The art of gift-giving is being lost with commercialism, while crocheters have the ability to make gifts that have meaning and thought. What comes to my mind the most are the people who have everything they want but something handmade is more thoughtful and unique.
For myself, I appreciate handmade a lot. I understand the work that went behind the item. I love it, even more, when it has something unique that is something that I can see fitting into my life. My friend, Tanya, made me a Nova Scotian Inspired Quilt for my guest room at my house. I love it. I know she put a lot of thought into it and my guest room about travels with Nova Scotia being the epicentre. If you see the Christmas Fir Tree, that's my guest room. You can see I collect things on my travel for that room.
Crocheters can be significantly crushed in pressure at Christmas time with ideas that were bigger than the time allotment they had to do it. So my goals below are projects where there is not a lot of time commitment.
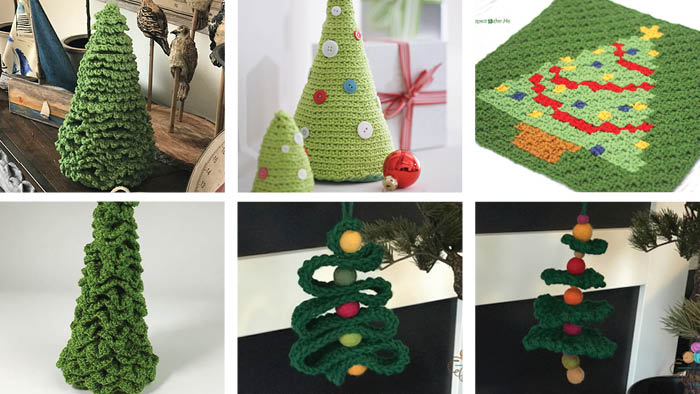
Pattern Suggestions
- Crochet Snow Wreath Pattern
- Crochet Christmas Tree Wall Hanging Pattern
- Crochet Ornament Hat for All Ages
- Crochet Blizzard Snowflake Afghan Pattern
- Crochet Kaleidoscope Blanket + Tutorial

Dangly Christmas Ball Ornament - 1 Hour
The Crochet Dangly Christmas Tree is just a crafty way to celebrate the Christmas Season ahead. For those with craft tables or into gift-giving, these are simple ideas to make whimsical festive ornaments. I used Caron One Pound for the tree. The layers are double-stranded for strength.
I settled on 1 large ball, 1 small ball between the layers. You can customize the number of felted balls to change the look.
I originally had green felted balls but felt it missed my appreciation for the idea. So I changed them to colourful balls. There is no tutorial available for this project.

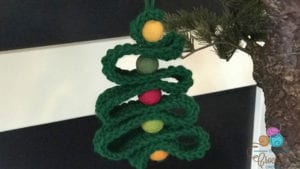
Christmas Tree Ribbon Ornament - 1 Hour
The Christmas Ribbon Tree is something that I saw in the store but it was using real ribbon and other types of balls. The one-piece band acts as a ribbon but with thickness.
Once the band is done, you will use 5 felted balls and fold the ribbon in the form of an evergreen tree. Using the balls, it separates the folded layers. For effect, I used assorted colours of felted balls.
The felted balls were 1" diameter. If using this as a kid project, be careful with the needle to feed it through the felted balls. There is no tutorial available for this project.

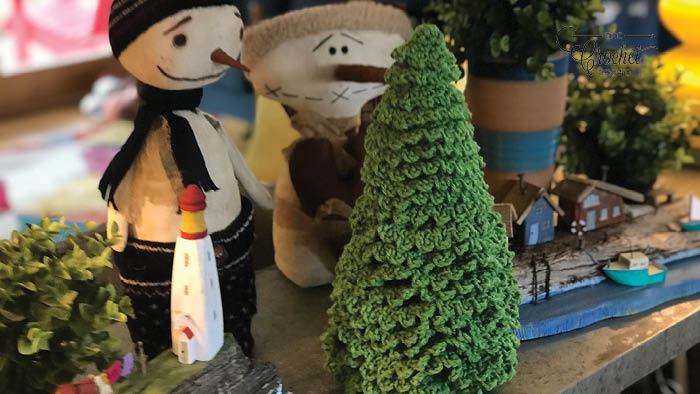
Crocodile Stitch Christmas Tree - 4 Hours
The Crochet Crocodile Christmas Tree is an idea I had back in 2012. It consists of making a cone foundation that will slide over a Styrofoam® Cone. Once the height is achieved to match the cone, you will stop. The project is worked up as a continuous spiral.
The scale stitch aka crocodile stitch is then surface overlayed onto the cone shape and spirals back to the top of the project.
- I also made one of these that was 5 feet tall. I stuffed it but polyfill. It was really heavy. I'm saying, the side is limitless with this concept.
- This exact sample in the project ended up being a hat for me during a major show with the World's Largest Stocking.
Tutorial
This is an old video before my weight gain! YIKES!
World's Largest Christmas Stocking - Presentation
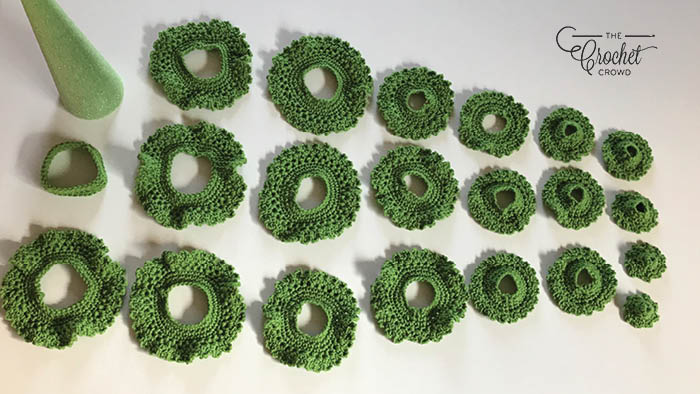
Fir Christmas Tree - 6 Hours
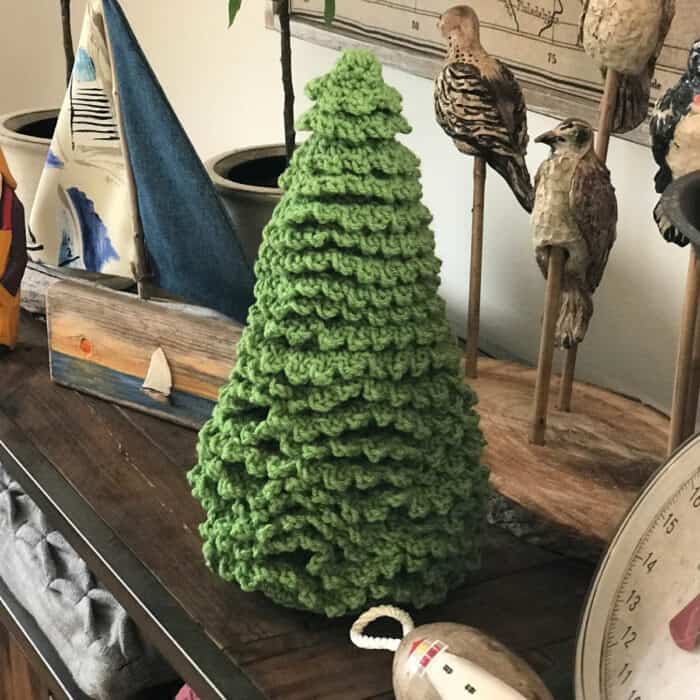
Learn to crochet a Fir Christmas Tree that is assembled together by motifs stacking up on top of each other. This project depends on your style, it can be an everyday evergreen tree as well. It can work with regular decor any time of the year.
There are 3 sizes in this pattern.
- Small size is written in full with all of the motifs. There are 10 motifs.
- Medium is written and the final 8 motifs are referencing sizes in the small to complete. There are 15 motifs.
- Large is written with its own unique sizing but references both medium and small sizes to ensure the growth is consistent. There are 21 motifs.
The pattern is very simple to follow and the are three sizes. You can do the 6.5" Tall Version all the way to the 13.5" version.
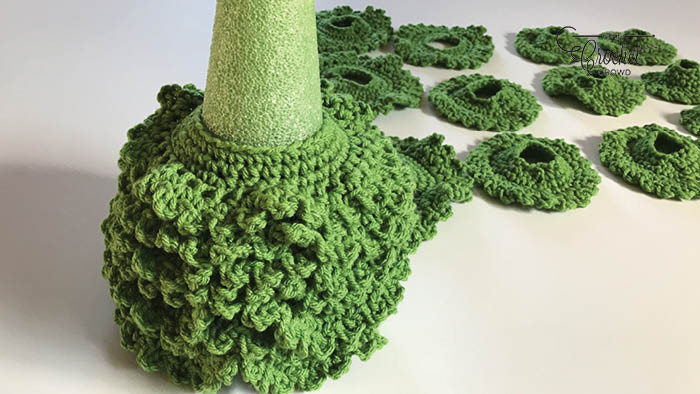
There is a Styrofoam cone in the middle to keep the motifs perfectly aligned on each other as they sit effortlessly on top of each other.
Tip: For the large size, the bands start off with 6 rounds, then eventually go to 5 rounds and then finally 4 rounds. As you start with the large bands first, the project gets faster to make as the next bands you do will be smaller in diameter and eventually, you will be reducing the number of rounds.
Assembly Look
Tutorial
There are 2 tutorials. 1 is just the tutorial itself without the extra help of understanding the pattern itself. The second is just the tips of what I would say to someone if they are sitting beside me learning.

Corner to Corner Christmas Tree Block - 3 Hours
Sarah of Repeat Crafter Me has just released a new stellar Christmas Tree Pixel Square that is using the Corner to Corner stitching concept.
Sarah has graphed out and provides a photographic example of how it is down. You can get the graph on her website.
Sarah has mentioned that our video tutorial is one of the best for following for the Corner to Corner Stitching Concept. We appreciate her saying so as she is an industry leader in the blogging world.
Since the creation of this Christmas Tree Square back many years ago, Sarah went onto really diving hard into graphghan work designing. You can tell she loves it. The concept is pretty straight forward but getting the items to look right in pixelated format can be a challenge.
Christmas Button Tree

Have an abundance of buttons lying around looking for a use? These cute little Christmas Trees pattern can be worked up and add some of your favourites to make this fun little tree decoration.
Made with Lily Sugar N' Cream these Christmas trees will make a great little gift especially for a loved one in a nursing home who loves Christmas can't have a full-size tree in their room.

Pam says
No blue button
Only one of the six patterns has a blue button.
Mikey says
Fixed. Thanks.
Linda says
There are only 5 projects, not 6, and the one I was interested in was missing.
Marina King says
So there was, thank you for noticing that, 6th one has been added, sorry about that.
Linda says
Thank you. Those are so cute, and perfect for my cubicle at work.
Marina King says
Not a problem, yes it's a cute little tree!