
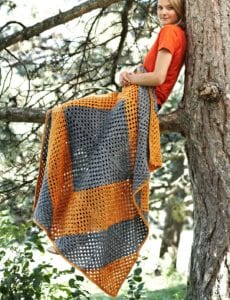
I found a fabulous crochet granny afghan on Yarnspirations. The free pattern is called Half'n Half Granny Afghan. I looked carefully and realized the squares are actually half colours. This makes the afghan have diagonal stripe opportunities.
So I crocheted a sample square to see if I could follow the instructions. I have done a two-tone granny in the past but this one is slightly different. I think this has been connectivity when the colours change over.
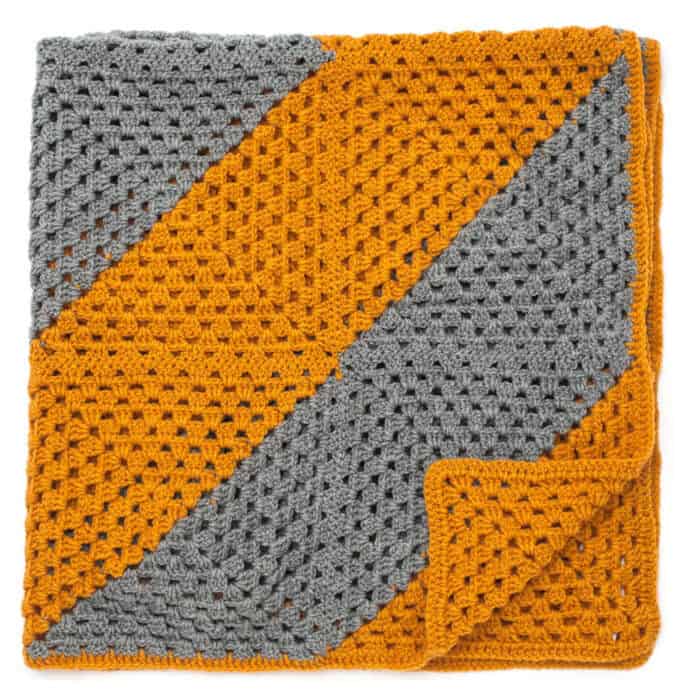
To make these types of squares, the squares are worked in around but at the end of the round, you have to turn and go back in the opposite direction. You cannot complete these in constant rotating motion like a typical granny square. I think this is to your benefit as you can manipulate the squares to flip them over if you have to. The right side and wrong side are equal mixes on both sides. So you will not end up with a flipped over the square that looks incorrect.

Here is a close up of my sample.
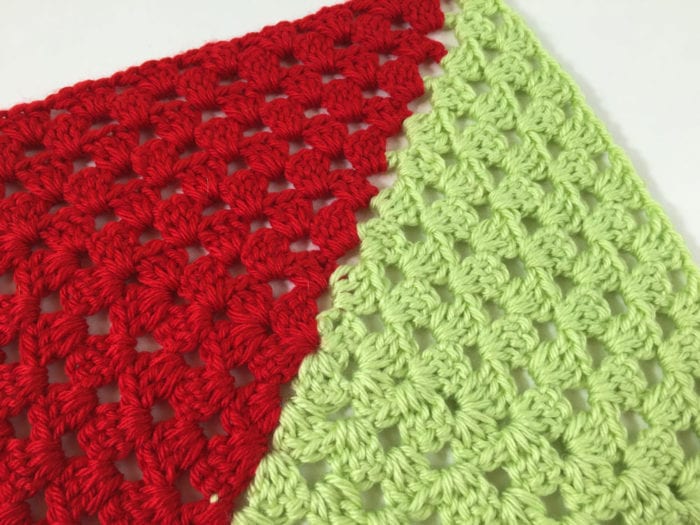
Notice the transition from colour to colour is clean and a solid consistent line on the diagonal. There is a ch 2 on each corner, on the corners where the colour changes, 1 chain is one colour, the 2nd chain is the next colour being added back to the project. The strand of the colour being left behind is dropped until you come back to the corner to pick it up back up again. See the pattern for more details.
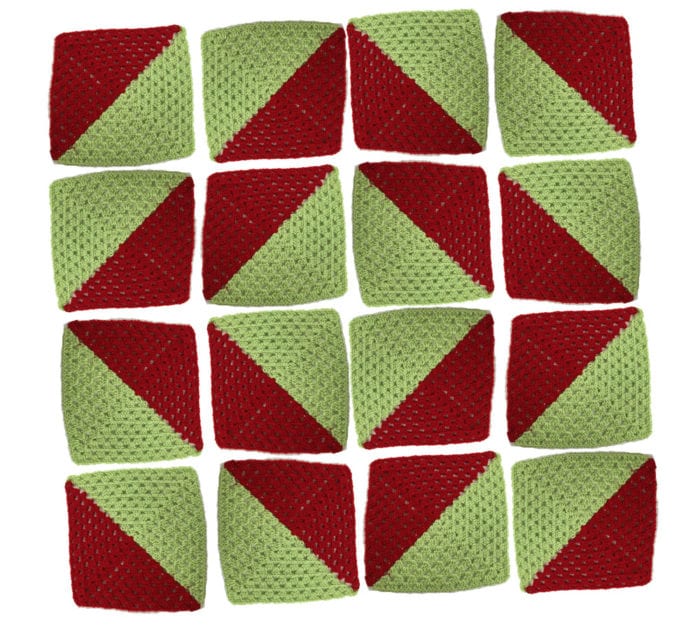
Puzzle Options
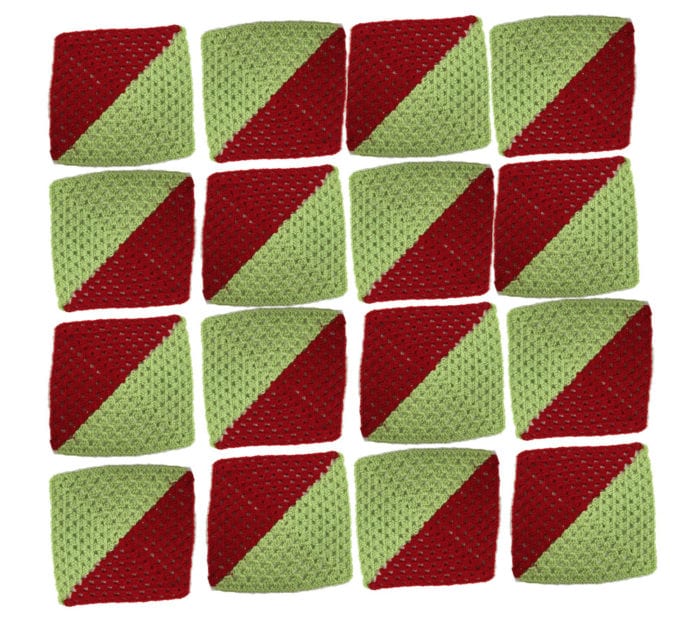
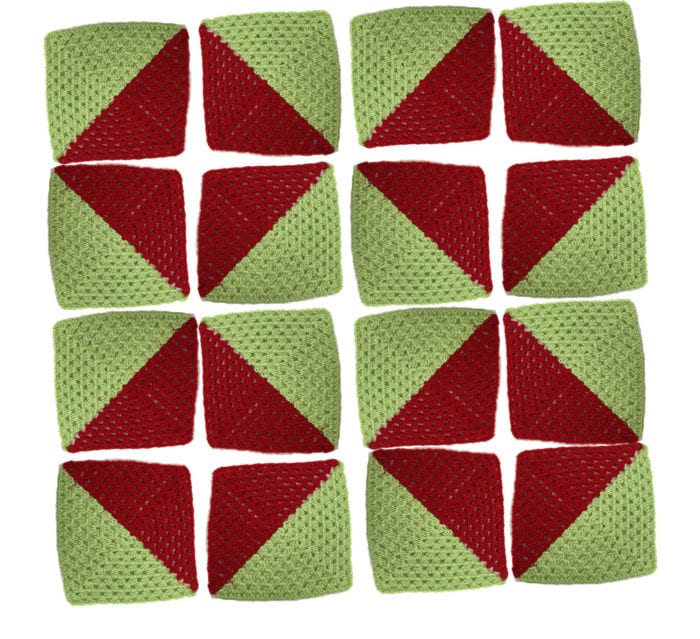
Here are 16 squares that are all identical. How you position them when sewing them together will determine how it looks. You will want to use the same colour when joining them. So if you are joining the red sides together, use a red yarn strand so it appears to be hidden. Do a whip stitch for a fabulous join.
The first example is how it appears in the pattern. I have left the gaps to clearly indicate they are separate motifs to prove to you how it works.
Bev says
Have you considered continuing the granny square into a larger square by switching the colors every four rounds ( or whatever number of rows you choose)? By continuing the pattern with the opposite color after your choice of number of rows you create another whole visual dimension! Love your step-by-step tutorials.
Mikey says
No I haven't but wow, what a fantastic idea.
maureen rumpf says
I love you Mikey !!!!
your patterns are clear and easy to understand.
thank you so very much !!!!!
Mikey says
You're welcome. Enjoy your day. 🙂 Michael
Meg Braye says
where did the calculator go?!
Mikey says
Stand by... It's one of the articles I pulled for review. It's nearly 11 pm. I can do it now for you.
Mikey says
It will be live again in 2 minutes.
Teri says
I'm wondering where the calculator went, too. I've checked and re-checked that page, thinking I may have missed the link for it, but there's nothing on this page that mentions a granny square calculator. I wish he would let us know where it is.
Mikey says
I took it down. The paid app we used was discontinued for it. I don't have a replacement for it.