
Crochet Market Bag
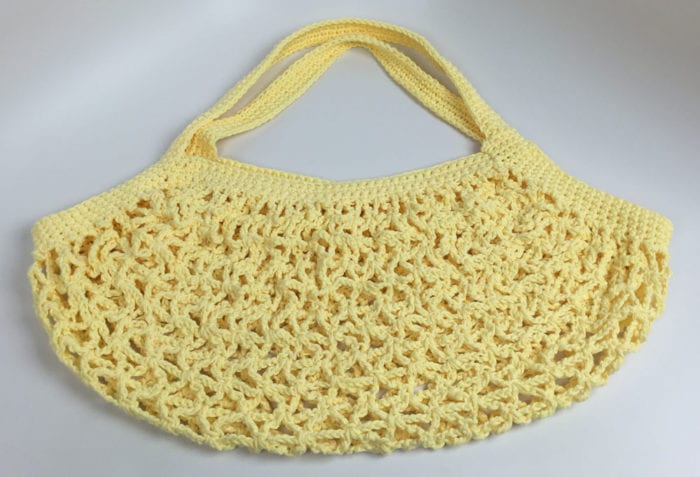
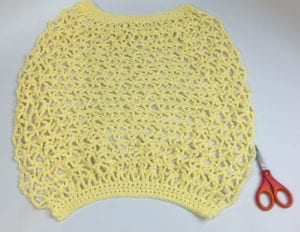
Introducing a crochet large market bag that has an interesting shape and lots of great advantages. Unlike many other crochet bags, when this bag sits flat, the bag is completely opened up to allow you to put in your fruits and veggies without having to squeeze them through a tight hole at the top of the bag. When you lift up the bag, the bag wraps around your contents to carry them away.
The best way to visualize this is think about people who use their aprons to carry something or a child using a shirt to carry something in front of them.
This pattern is originally from Yarnspirations. As a result of doing tutorial work with Yarnspirations, I have adapted this pattern with slight modifications to simplify construction and more reasons. In the rules of crochet and designing, this adaptation doesn't make this pattern my own and would like to be clear.
If you would like the original pattern, you can get it here. It's called the Market Bag.
My adaptations are at the following points in the original pattern:
- Row 1 after the body.
- Next Row after 20" is completed.
- Next Row after the 1st Row is completed after 20" is completed.
- Handles: My handles are one solid piece instead of two units that don't require to be sewed. My handles at slightly longer by a few stitches for patterns simplicity.
Tutorial
My tutorial follows my adaptation. You will see me constantly refer to my homemade diagrams and I really take my time in this tutorial. According to customer service, this particular pattern gets a lot of questions as the construction isn't obvious.
Before You Begin
Understanding where you are in this pattern when you begin isn't obvious in the original pattern. I wasn't sure if I am working front to back, side to side and exactly what is being defined as the starting point. It is the reason why I called Yarnspirations Help Desk to give me a clue to what sides I am seeing in this bag.
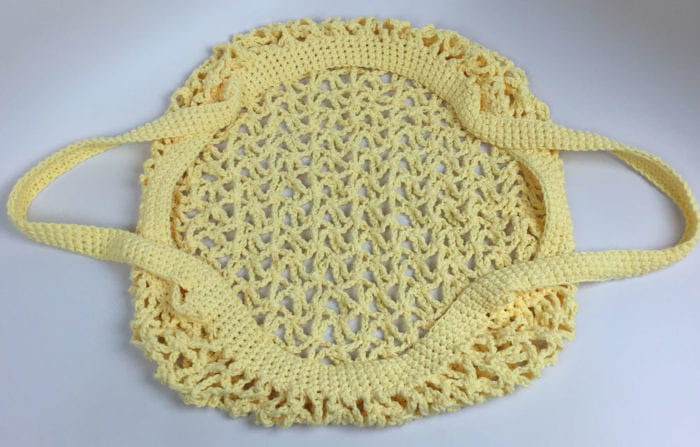
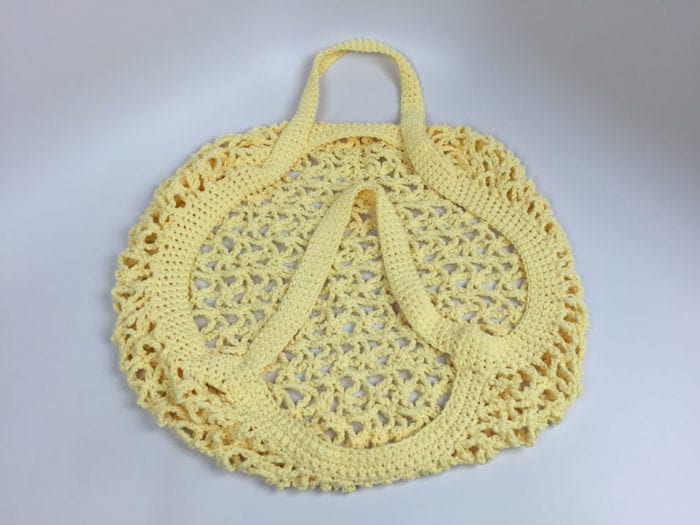
Front and Back
In this picture, you are actually looking at the back of the bag. The front or starting point of this bag is on the opposite side. The ending of the main body is what you are seeing in this picture.
When you start the first 4 rows, it will be narrow and once the lacy part begins, the rows will balloon outward. In the video tutorial, I will show you key tips that are in my crochet diagrams to show you how to keep your edges straight. I nearly finished the main body and realized my edges were all over the place. I make mention of the importance of keeping straight edges.
When you get past the 20" mark, we will begin to bring the lace back to the original format that you started with. This will cause the front and back to have the same single crochet edging. The side edging is next.
Side to Side
In my adaptation I have created the handle to be one solid unit as well as capturing the sides of the bag at the same time. The original pattern can you go across one side edge to make a handle. Once you were done, you had to sew the handle to the opposite side. Then repeat again for the other side.
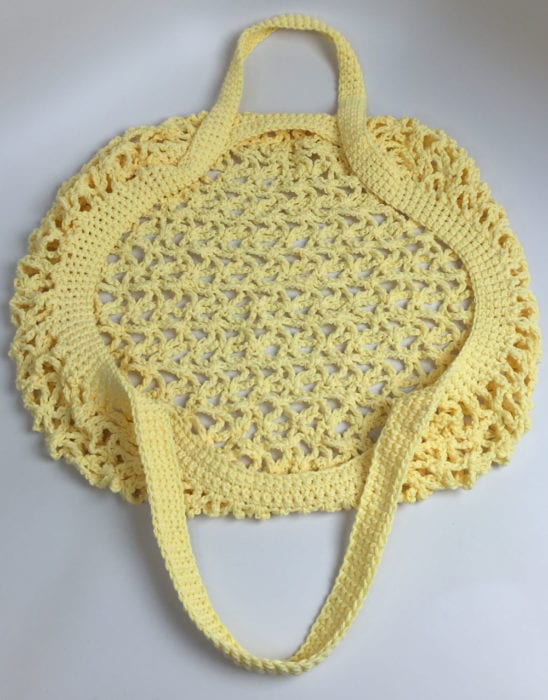
The front and back of the bag are still top and bottom of the photo. If you look at the handles and side edge, you will notice it's one complete unit as a large circle. You start on the one corner of the front edge and work your way across the side edge. Once the side edge is complete, you will chain 60 and then rejoin to the opposite side on the back side edge and crochet along that same edge. Once that edge is complete, you will chain about 60 and jump back to the front side where you started. It's one complete circle. Therefore, there is new sewing involved and the handle stays in tact without worry of falling apart.
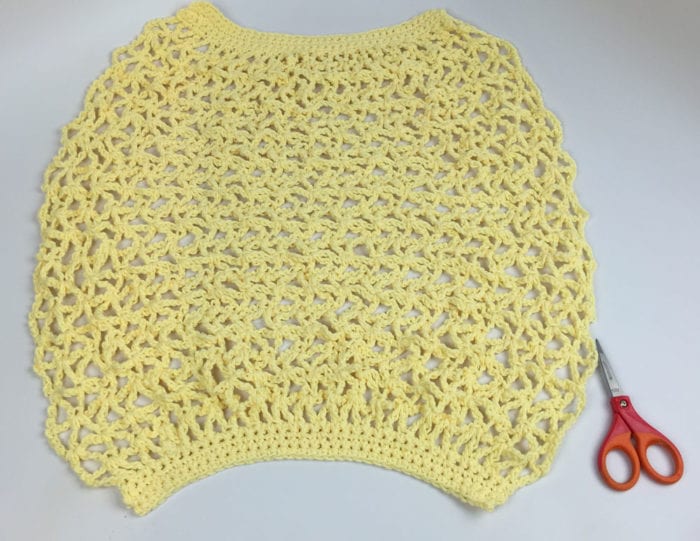
Front View
In the photo below, you are looking at the front view. The edging of front and back are between the handles. The sides are incorporated as part of the handles that are crocheted around and then chain 60 to jump over the front and back edging to the other side. As mentioned above, it's a large circle.
Crochet Diagrams
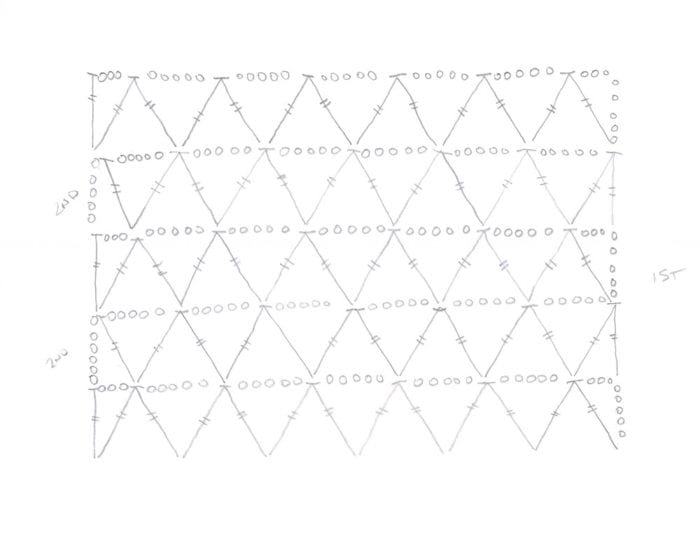
I used both of these two diagrams throughout the tutorial to help me keep my edges straight. You can save or print them out if you wish.
This is the lattice work starting from the edging that is made. It's detailing where the trebles are going and to show you to skip stitches.
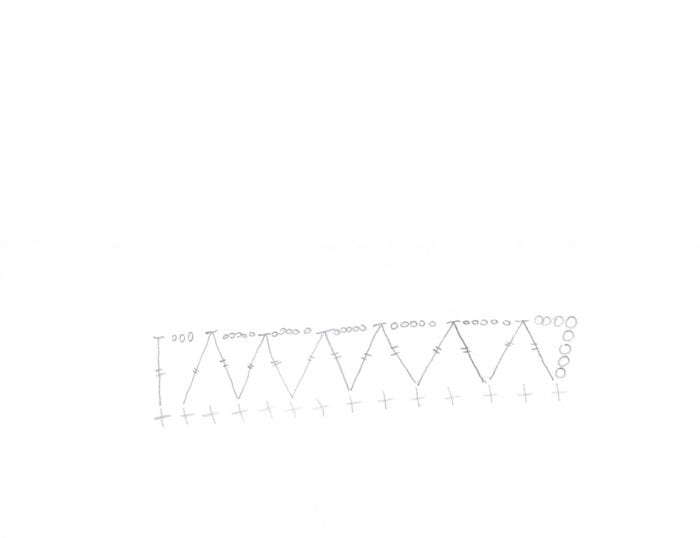
This is showing you the main lattice work in the body. Remember, in the tutorial I show you what to do with stitch markers so you never loose your edging. It's easy to miss the edge in lattice work crochet like this. Refer to the video tutorial to show you what I did. You too, can you make your own stitch markers and label the colours on each side of the edge so you can follow along with ease. It will speed you up tremendously and worth pulling out some scrap yarn to do this step.
Written Pattern
This pattern is written with my adaptations included. We will be starting at the front edge, working to the back edge. Then, we will be working on the sides to create the handles at the same time.

 Materials
- 3 Balls of Lily Sugarn Cream
- Size 5 mm or H Crochet Hook
- Tapestry Needle
Bag Dimensions
Bag is approximately 20" across without including length of handles.
Front Edge & Body
- 1st row: (RS). 1 sc in 2nd ch from hook. 1 sc in each ch to end of ch. 38 sc. Turn.
- 2nd to 4th rows: Ch 1. 1 sc in each sc to end of row. Turn.
Front band is now complete. Let's move to the Lattice Body. Refer to my video tutorial about the side edges of placing stitch markers so you can always find your edge. In lattice work, it's easy to misread which is your edge when it's laying on your lap as you crochet.
- 1st row: Ch 8 (counts as tr and ch 3). (Yoh) twice. Draw up a loop in same st where the chain starts. (Yoh and draw through 2 loops on hook) twice. Skip 1 st, yoh and draw up a loop. (Yoh and draw through 2 loops on hook) twice. Yoh and draw through all loops on hook – tr2tog made. *Ch 5. [(Yoh) twice. Draw up a loop in same stitch as last treble. (Yoh and draw through 2 loops on hook) twice], skip 1 st, yoh and draw up a loop in next st. (Yoh and draw through 2 loops on hook) twice. Yoh and draw through all loops on hook. Repeat from * to 2nd last sc. Ch 3, 1 tr in last sc. Turn.
- 2nd row: Ch 5 (counts as tr and ch 1). Miss next 3 ch. Tr in next st. *Ch 5. (Yoh) twice. Draw up a loop in same st asbefore. (Yoh and draw through 2 loops on hook) twice. Miss next 5-ch sp. (Yoh) twice. Draw up a loop in next st. (Yohand draw through 2 loops on hook) twice. Yoh and draw through all 3 loops on hook – tr2tog over 2 sts made. Repfrom * to last tr. Tr2tog over last st worked and next tr. Turn.
- 3rd row: Ch 8 (counts as tr and ch 3). Tr2tog over first st and next tr2tog. *Ch 5. Tr2tog over st just worked and next tr2tog. Rep from * to last tr. Ch 3. 1 tr in 4th ch of ch 5. Turn.
The next row is an adaptation of making the lattice work more compressed on the final time you do it. It is similar to row 2, but instead of chaining 5 between the trebles, you only ch 1.
- Ch 5 (counts as tr and ch 1). Miss next 3 ch. Tr in next st. *Ch 1. (Yoh) twice. Draw up a loop in same st as before. (Yoh and draw through 2 loops on hook) twice. Miss next 5-ch sp. (Yoh) twice. Draw up a loop in next st. (Yoh and draw through 2 loops on hook) twice. Yoh and draw through all 3 loops on hook – tr2tog over 2 sts made. Rep from * to last tr. Tr2tog over last st worked and next tr. Turn.
Back Edge
- Ch 1. 1 sc in each st and ch-1 space across. This will bring you back to 38 stitches across like you had on the front band.
- Row 2: Ch 1. 1 sc in each sc to end of row.
- Repeat Row 2 - Two More Times. Fasten off at end of last row.
Side Edge and Handles
Now that the front and back edging is done. The side will appear ballooned outwards. We have to strategically across along the side edges to compress the stitches inward.
- We will start on the corner of the single crochet on the front band. 1 SC in each of the 4 sc rows and then you will be at the lattice work.
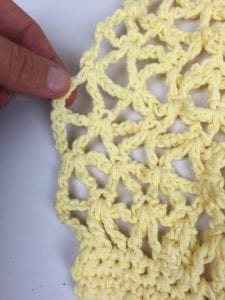
- You need place your single crochets in each of those gap spaces. You can see me holding a gap space to show you. Every row of the lattice has a gap space to work with. You will crochet *1 sc in the next gap space, 2 sc in the next one and keep alternating like that. 1 sc in gap space, 2 sc in next gap space until you get to the back edge.
- At the back edge, you will place 1 sc in each of the sides of the 4 rows of sc.
- Then you will chain 60 and jump to the other side edge along the back edge corner.
- Place 1 sc in each of the side 4 rows of sc and then continue to do the side edge of 1 sc in next gap space, 2 sc in the next one after that. Keep alternating. Once you get all the way across, place 1 sc in each of the sides of the row sc.
- Ch 60 and jump back to the corner you started with.
- Join with slip stitch. You will have one complete revolution of starting the sides and handle.
- Ch 1, 1 sc in each 1 sc all the way around.
- Repeat last instruction, 3 more times.
- Fasten off and weave in ends.
Barbara Miller says
This post is dated 2022 but the videos are from 2016. Is there a video from 2022 with the changes?
Mikey says
The article was moved forward in time. Are you saying there was pattern errors?
Barbara Miller says
No printable/downloadable of the 2022 version.
Nancy says
Hi Mikey,
I am returning to crocheting after about a 20 year hiatus but I needed something to fill my time during the COVID-19 pandemic and stay-at-home isolation. I never had advanced skills – maybe intermediate – and your tutorials are wonderful! I don’t think I would still be crocheting if not for your detailed instructions and sense of humor. I have been making market bags in different patterns for friends and family and like the challenge of this bag. I look forward to crocheting more with you – remotely ?
Thanks so much!