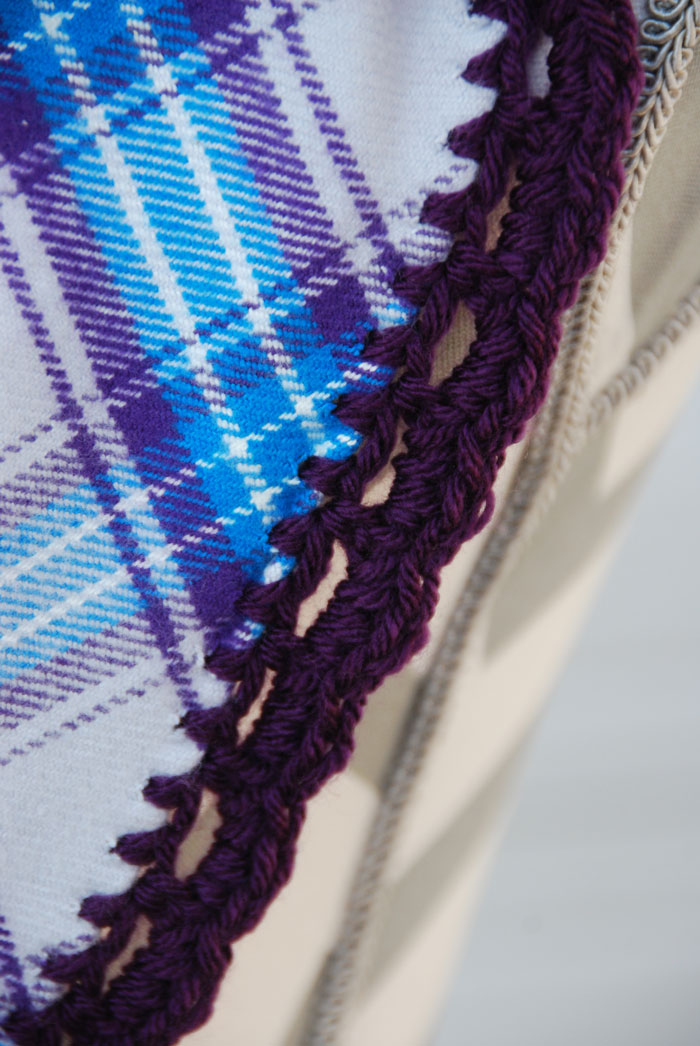
Crocheted Edge Flannel Scarf
Plaid flannel is really hot this fall and I've just added some crochet too! I have seen some pretty scarves in the stores, but I know that I could dress it up even better by adding an interesting crocheted edge! This is the Crochet Edge Flannel Scarf pattern.

Crocheted Edge Flannel Scarf
Pattern by Jeanne Steinhilber
- 2 yards of 45" wide plaid flannel
- rotary cutter with wide skip cutting blade
- self healing cutting mat and ruler
- worsted weight yarn
- crochet hook 5.0mm H
Step 1 - Measure and cut the fabric to 55" wide. This is the neck edge width. At the time I purchased the material, I wasn't sure how wide I was going to be making this, so feel free to buy 55" if you'd rather and skip this step.


Step 2 - Cut the fabric in half the long way so now you will have 2 pieces that are about 22.5" x 55". You will be able to make 2 full size scarves if you wish.

Step 3 - Fold the fabric in half on the short end noting which is the selvage end as you will want to make this the neck edge so that there is no sewing involved.

Step 4 - Measure diagonally from the corners, again making sure the neck edge is the long edge, and cut. The leftover triangles might be used to make matching child sized scarves.


Step 5 - Switch to the wide skip cutting blade. You will only be cutting the 2 sides of the triangle. Do not cut the neck edge.


Now the crocheting fun begins.
Row 1 - With the right side of the flannel facing you, start in the neck edge corner and work towards the point. Start by putting 2 sc's into the first hole. You might have to feel your way a bit to get started. Put one sc into each hole to the point, 3 sc's in the point, then 1 sc along the other side and finish with 2 sc's in the last hole at other neck edge. Turn.


*Count the number of stitches to the center point sc. If it's not an even number, be sure to add an extra sc at the beginning and end next to the neck edge.
Row 2 - Ch 1, sc into first stitch, *ch 3, skip 1 sc, sc in next sc, repeat from * to corner. In corner, sc, ch 3, sc, the repeat again from * along the 2nd side to end. Turn.
Row 3 - Ch 1, sc in first sc, *into ch 3 space, sc, hdc, sc, skip next sc; repeat from the * to the end; sc in the end. Finish off and weave in ends.

The extra pieces of flannel could easily make matching little girl sized scarves. Also, these whip up so quickly that you could use these for those last minute gift ideas.
Thanks to my good friend Yolanda for helping me figure out the dimensions and being my cutting model.
Click here to save to your Ravelry favorites.
Be creative! 🙂 – Jeanne – The Crochet Crowd
Lain says
I really enjoyed this tutorial. I am a seamstress with a bistitchual hobby... Love it! Thank you for sharing, im going to make a bunch!
georgiescreations says
I am confused a bit. when cutting from corner to corner is it just one cut across or is it cutting like an X?
Jeanne - The Crochet Crowd says
I folded the fabric in half so it's 27.5" x 22" and then it's only one cut from corner to corner. Jeanne
Tam Elizabeth says
Do we fold over the edges before we start crocheting?
Jeanne - The Crochet Crowd says
I just folded as I went along. Jeanne