5 Star Beanies for Kids
The 5 Star Stitch Beanie for adults has been super popular. We have been overwhelmed with requests to get this hat into being kids sizes. I have figured out the size changes to make this same hat into Toddler and Child Sizes.
Firstly, let me do a disclaimer first that I am not the designer of this pattern. It was designed by the Design Team at Yarnspirations. My reduction of sizes is merely courtesy for those who want it in kid sizes. I will show you what to adjust.
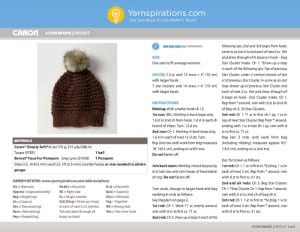
You can get the original pattern to compare to at 5 Star Beanie Hat Pattern by Yarnspirations.
The Changes Review
- We need to change the height and length of the brim.
- We need to change the stitch count that goes around the brim.
- We need to change the height of the main body.
- We need to start the top finishing at a different point.
- The difference between toddler and child sizes is the brim. The brim has a 15% shrinkage based on the elasticity of the brim. So I have taken that into account. So when you are crocheting this, it may look small but that's because it's suppose to have a nice fit to the head.

Follow Along with the Main Pattern and Adjust
Ribbing Section
Using the same size hook. Change the following:
- Ch 7 and then begin as instructed.
- For Toddler sizes, your brim unstretched should be 15"
- For Child sizes, your brim unstretched should be 16"
Continue Pattern
Main Body
Change the hook as instructed. Do not put in 71 sc evenly around.
- Ch 1, work 61 sc evenly around. Join with sl st to first sc. 61 sc.
You will continue instructions to round 3. Be sure that you ignore the 71 sc noted at the end of the row 3, you will only have 61 sc.
- For the end of round 3 where it tells you to work until it measures 6.5" which includes the brim, we need to make an adjustment here.
- You will continue the instructions but continue until it measures only 4.5" which includes the brim. It's 2" shorter than the adult before beginning the decrease.
Decreasing at the Crown
Due to having less stitches, we cannot start the decrease from the beginning. I have taken the math into account for the reduction.
- Start the decrease instructions at Round 3 and continue exactly as it says to Round 10.
That's it. A few changes here and there and voila you are done.
I have tutorials for the adult version. If you make the adjustments as noted above. The tutorial shows you all of the steps.
Just as a disclaimer. Doing this type of adjustment does take time and a physical example to cross compare to. I cannot do this on a whim and can only do it with patterns where permission for teaching purposes allows me to do. Please don't send me your patterns to have me adjust them. I don't physically have the time to handle those types of requests on an on-going basis. Thanks for your understanding.
Peggy Drake says
I don't know the actual dimensions of the persons receiving the hats I donate. I only know ranges, such as child, teen, adult men and women. I need dimensions for those ranges, as I cannot measure their actual heads.
Mikey says
We have an article about that. Finding the Hat Size and it's a guide for the different sizes. https://thecrochetcrowd.com/crochet-hat-sizes-reference-guide/
Michael
Margaret Wilson says
Hi, I have just started making this hat only yesterday by watching your YouTube video... so far so good ?
Sharmita Kar says
so here i start 5 star in my husband's cowl . i am just loving it. so soft n fluffy 🙂