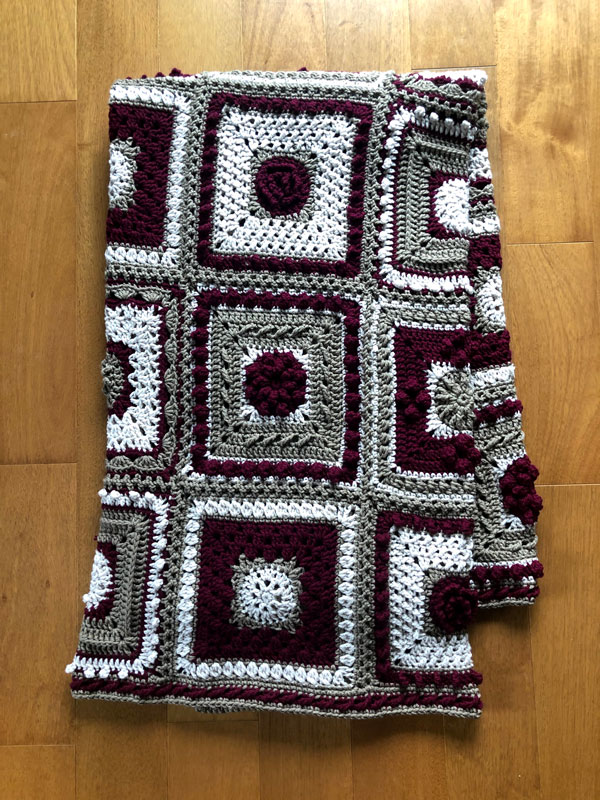
Crochet, a full blanket or baby-size blanket with this free pattern, is called the Crochet 7-Day Stitch Sampler Afghan by Jeanne Steinhilber. We used Red Heart With Love; each square is 10" x 10".
The goal was to provide texture for each of the motifs. If you don't like a motif, leave it out and substitute it with another one. You are the artist. Below is a baby size with a recommendation for the number of squares and the big blanket version.
The instructions have been combined into a 14-page Crochet Blanket Downloadable PDF. Each written pattern also has a supporting tutorial to follow to be able to follow along.
Remember, the colour recommendations are just that, recommendations. Use colours and yarn you love and complete a blanket in 7 days. Just keep in mind it's not a race. When you find time, grab a square and turn on the TV to hook away.
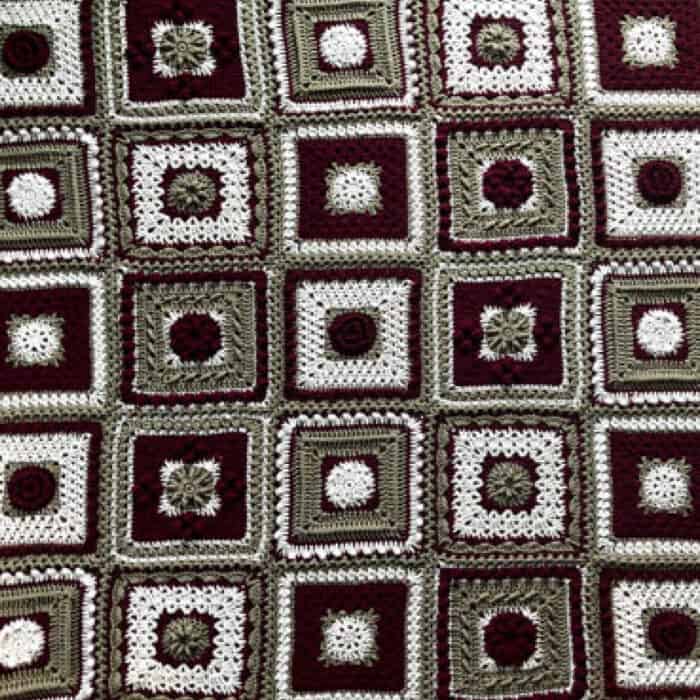
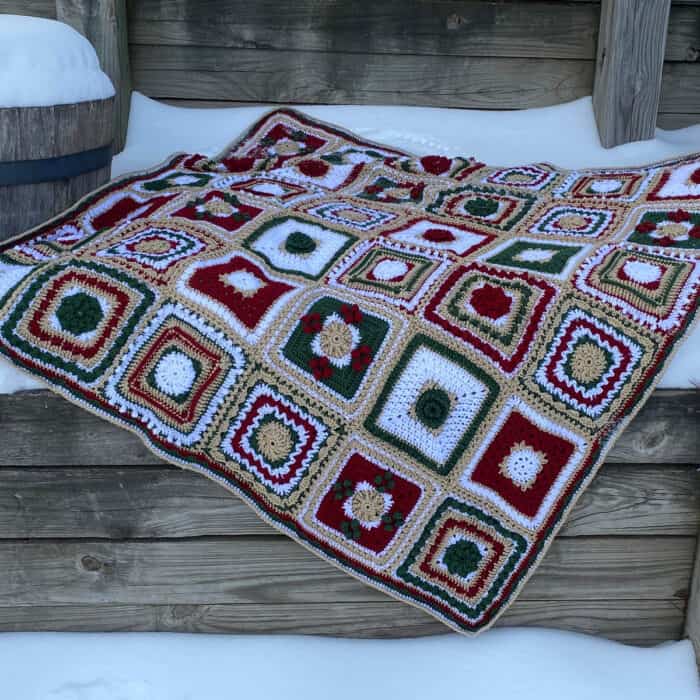
I have completed 2 sizes of the afghan. The full size is 55" X 66" and the baby size is 33" x 44". The full size uses 5 of each motif, while the baby size uses only 2 of each one. Don't be afraid, I have a fast and simple joining method you will just love. But if not, feel free to use you favorite join and border to create you own look.
7 Day Sampler Afghan
Full Size Afghan
Red Heart® With Love™ (198 g/7 oz, 338 meters/370 yards)
- Color A - Merlot - 3 balls
- Color B - Stone - 2 balls
- Color C - Taupe - 3 balls
Size U.S. J/10 (6.0 mm) crochet hook.
Measurements Approx 10” x 10” per square. Finished blanket 55” X 66” [140 x 168 cm].
Crochet 5 of each of the 6 squares.
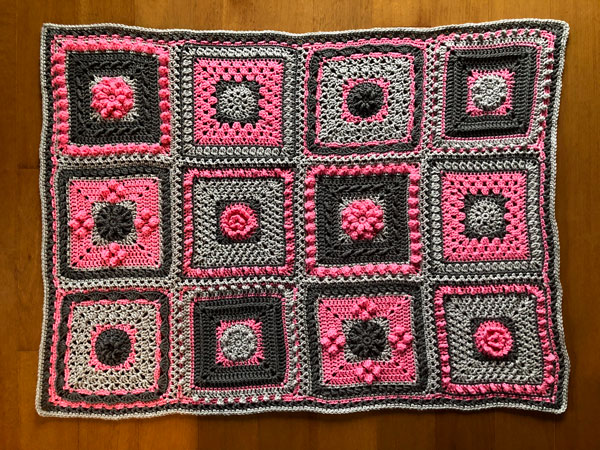
Baby Size Afghan
Red Heart® With Love™ (198 g/7 oz, 338 meters/370 yards)
- Color A - Bubblegum - 1 ball
- Color B - Light Grey - 1 ball
- Color C - Pewter - 1 ball
Size U.S. J/10 (6.0 mm) crochet hook.
Measurements Approx 10” x 10” per square. Finished blanket 33” X 44” [84 x 112 cm].
Crochet 2 of each of the 6 squares.
Abbreviations for All Squares
Beg = Begin(ning)
BLO = Back loop only
Ch = Chain
Cl = Cluster
Dc = Double crochet
Dc2tog = Double crochet 2 together
Dtr = Double treble crochet
FLO = Front loop only
Hdc = Half double crochet
Pc = Popcorn
Rem = Remain
Rep = Repeat
Rnd(s) = Round(s)
RS = Right side
Sc = Single crochet
Sk = Skip
Sl st = Slip stitch
Sp = Space
St(s) = Stitch(es)
Tr = Treble crochet
Trbp = Treble crochet back post
Trfp = Treble crochet front post
Yoh = Yarn over hook
Special stitches, if applicable will be listed with each square.
.
.
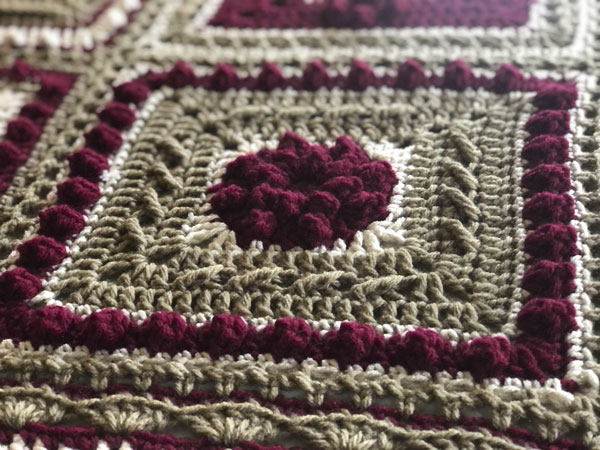
Saturday - Day 1 Square
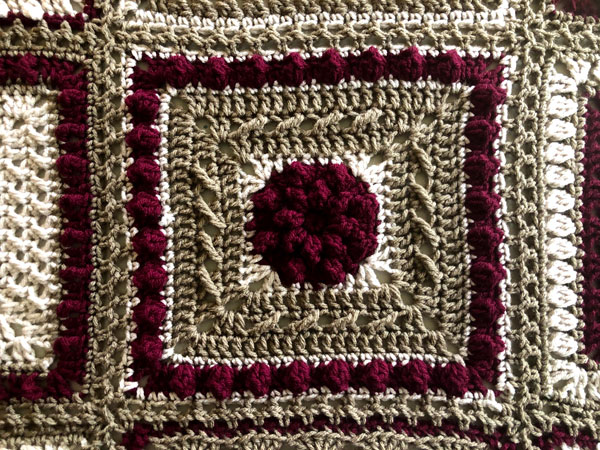
Special Stitches for this square.
Popcorn = Work 4 dc into same st or sp, drop loop from hook, insert hook from front to back into first dc of 4 dc group, pull dropped loop through st, ch 1 to secure popcorn.
Standing Sc = Form slip knot and insert onto the hook. Insert hook into st, yoh and pull loop through, yoh through 2 loops.
Tutorial for this Square
Instructions
Make 5 squares.
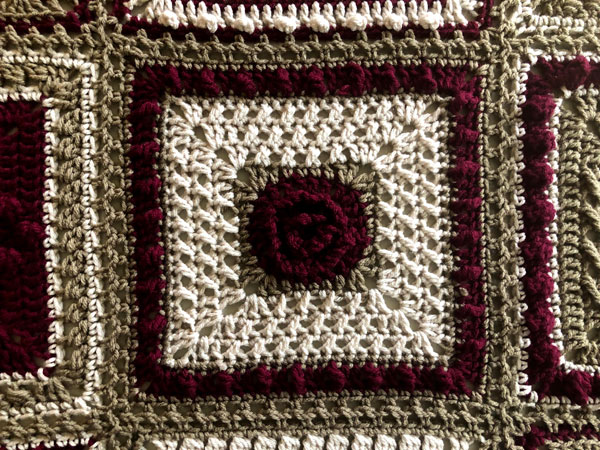
1st rnd: (RS) With color A, ch 2, 8 sc in 2nd ch from hook, join with sl st to first sc. 8 sc.
2nd rnd: Ch 3 (counts as dc here and throughout), 1 pc in same st, *(1 dc, 1 pc) in next st; rep from * around, join with sl st to top of ch-3. 8 dc, 8 pc.
3rd rnd: Ch 3, 1 pc in same st, 1 dc in next st, *[(1 dc, 1 pc) in next st, 1 dc in next st]; rep from * around, join with sl st to top of ch-3. Break A. 16 dc, 8 pc.
4th rnd: Attach B to any dc with a sl st, ch 3, 1 dc in same st, *1 hdc in next st, 1 sc in next 3 sts, 1 hdc in next st,** (2 dc, ch 2, 2 dc) in next st; rep from * twice, then from * to ** once, 2 dc in first st, join with hdc to top of ch-3 (hdc counts as a ch-2 sp). Break B. 4 dc, 2 hdc, 3 sc per side, 4 ch-2 corners.
5th rnd: Attach C to any ch-2 sp with a sl st, ch 3, 1 dc in same sp, *1 dc in each st to corner,** (2 dc, ch 2, 2 dc) in ch-2 sp; rep from * twice, then from * to ** once, 2 dc in beg sp, join with hdc to top of ch-3. 13 dc per side.
6th rnd: Ch 3, 1 dc in same sp, *1 dc in next st, [sk 2 sts, 1 tr in next st, working behind tr, 1 dc in 2 skipped sts] to corner,** (2 dc, ch 2, 2 dc) in ch-2 sp; rep from * twice, then from * to ** once, 2 dc in beg sp, join with hdc to ch-3. 17 sts per side.
7th rnd: Ch 3, 1 dc in same sp, *1 dc in each st to corner,** (2 dc, ch 2, 2 dc) in 2 sp; rep from * twice, then from * to ** once, 2 dc in beg sp, join with hdc to beg ch-3. Break C. 21 dc per side.
8th rnd: Attach B to any ch-2 sp with a standing sc, *1 sc in each st to corner,** (1 sc, ch 2, 1 sc) in ch-2 sp; rep from * twice, then from * to ** once, 1 sc in beg sp, join with hdc to beg sc. Break B. 23 sc per side.
9th rnd: Attach A to any ch-2 sp with a sl st, ch 3, 1 dc in same sp, *1 dc in next st, 1 pc in next st, [1 dc in next 2 sts, 1 pc in next st] to corner,** (2 dc, ch 2, 2 dc) in ch-2 sp; rep from * twice, then from * to ** once, 2 dc in beg sp, join with hdc to ch-3. Break A. 8 pc, 19 dc per side.
10th rnd: Attach B to any ch-2 sp with a standing sc, *1 sc in each st to corner,** (1 sc, ch 2, 1 sc) in ch-2 sp; rep from * twice, then from * to ** once, 1 sc in beg sp, join with hdc to beg sc. Fasten off. 29 sc per side.
Sunday - Day 2 Square
Special stitches for this square.
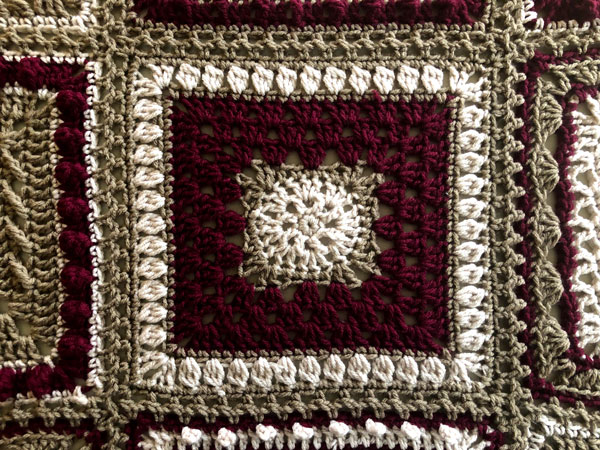
Cluster = Double crochet 3 together in same st or sp.
Standing Sc = Form slip knot and insert onto the hook. Insert hook into st, yoh and pull loop through, yoh through 2 loops.
Tutorial for this Square
Instructions
Make 5 squares.
1st rnd: (RS) With color B, ch 2, 8 sc in 2nd ch from hook, join with sl st to first sc. 8 sc.
2nd rnd: Ch 4 (counts as 1 dc and ch 1 sp), (1 dc, ch 1) in each st around, join with sl st to top of ch-3. 8 dc, 8 ch-1 sps.
3rd rnd: Sl st into ch-1 sp, ch 3, 2 dc in same sp, 3 dc in each ch-1 sp around, join with sl st to top of ch-3. Break B. 24 sts.
4th rnd: Attach C to any dc with a sl st, ch 3, 1 dc in same st, *1 hdc in next st, 1 sc in next 3 sts, 1 hdc in next st,** (2 dc, ch 2, 2 dc) in next st; rep from * twice, then from * to ** once, 2 dc in first st, join with hdc to top of ch-3. Break C. 4 dc, 2 hdc, 3 sc per side, 4 ch-2 corners.
5th rnd: Attach A to any ch-2 sp with a sl st, ch 3, 1 dc in same sp, *sk 1 dc, 3 dc in next dc, [sk 2 dc, 3 dc in next dc] twice, sk 1 dc,** (2 dc, ch 2, 2 dc) in ch-2 sp; rep from * twice, then from * to ** once, 2 dc in beg sp, join with hdc to top of ch-3. 13 dc per side.
6th rnd: Ch 3, 1 dc in same sp, *sk 2 dc, 3 dc before next dc, [sk 3 dc, 3 dc before next dc] 3 times, sk 2 dc,** (2 dc, ch 2, 2 dc) in ch-2 sp; rep from * twice, then from * to ** once, 2 dc in beg sp, join with hdc to ch-3. 16 dc per side.
7th rnd: Ch 3, 2 dc in same sp, *sk 2 dc, 3 dc before next dc, [sk 3 dc, 3 dc before next dc] 4 times, sk 2 dc,** (3 dc, ch 2, 3 dc) in 2 sp; rep from * twice, then from * to ** once, 3 dc in beg sp, join with hdc to beg ch-3. Break A. 21 dc per side.
8th rnd: Attach C to any ch-2 sp with a standing sc, *1 sc in each st to corner,** (1 sc, ch 2, 1 sc) in ch-2 sp; rep from * twice, then from * to ** once, 1 sc in beg sp, join with hdc to beg sc. Break C. 23 sc per side.
9th rnd: Attach B to any ch-2 sp with a sl st, ch 3, 1 dc in same sp, *ch 1, sk 1 st, [1 cl in next st, ch 1, sk 1] to corner,** (2 dc, ch 2, 2 dc) in ch-2 sp; rep from * twice, then from * to ** once, 2 dc in beg sp, join with hdc to ch-3. Break B. 11 cl, 4 dc per side.
10th rnd: Attach C to any ch-2 sp with a standing sc, *1 sc in each st and ch-1 sp to corner,** (1 sc, ch 2, 1 sc) in ch-2 sp; rep from * twice, then from * to ** once, 1 sc in beg sp, join with hdc to beg sc. Fasten off. 29 sc per side.
Monday - Day 3 Square
Special Stitches for this Square
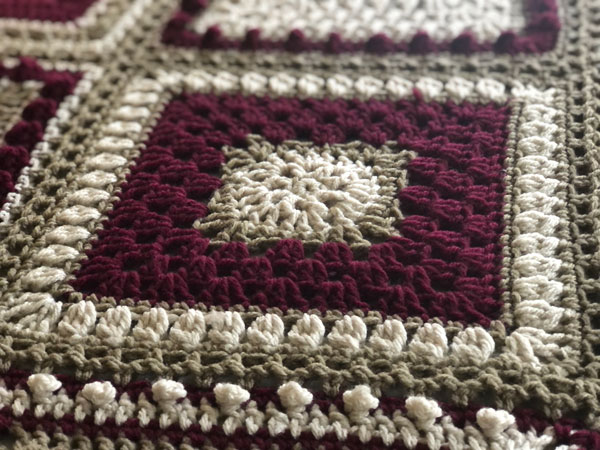
V-st = Work 1 dc, ch 1, 1 dc all in same st or sp.
Standing Sc = Form slip knot and insert onto the hook. Insert hook into st, yoh and pull loop through, yoh through 2 loops.
Tutorial for this Square
Instructions
Make 5 squares.
1st rnd: (RS) With color C, ch 2, 8 sc in 2nd ch from hook, join with sl st to first sc. 8 sc.
2nd rnd: Ch 3, 1 dtr in same st, [1 dc, 1 dtr] in each st around, join with sl st to top of ch-3. 8 dc, 8 dtr.
3rd rnd: Ch 3, 1 dc in same st, 1 dc in next st, [2 dc in next st, 1 dc in next st]; rep from * around, join with sl st to top of ch-3. Break C. 24 dc.
4th rnd: Attach A to any dc with a sl st, ch 3, 1 dc in same st, *1 hdc in next st, 1 sc in next 3 sts, 1 hdc in next st,** (2 dc, ch 2, 2 dc) in next st; rep from * twice, then from * to ** once, 2 dc in first st, join with hdc to top of ch-3. Break A. 4 dc, 2 hdc, 3 sc per side, 4 ch-2 corners.
5th rnd: Attach B to any ch-2 sp with a sl st, ch 3, 1 dc in same sp, *sk next st, [v-st in next st, sk 2 sts] twice, v-st in next st, sk last st,** (2 dc, ch 2, 2 dc) in ch-2 sp; rep from * twice, then from * to ** once, 2 dc in beg sp, join with hdc to top of ch-3. 3 v-st, 4 dc per side.
6th rnd: Ch 3, *3 dc in next st, [sk 2 sts, 3 dc in ch-1 sp] until 3 sts rem, sk 2 sts, 3 dc in last st,** (1 dc, ch 2, 1 dc) in ch-2 sp; rep from * twice, then from * to ** once, 1 dc in beg sp, join with hdc to ch-3. 17 dc per side.
7th rnd: Ch 3, 1 dc in same sp, *1 dc in next st, sk 1 st, v-st in next st, [sk 2 sts, v-st in next st] until 2 sts rem, sk 1 st, 1 dc in last st,** (2 dc, ch 2, 2 dc) in 2 sp; rep from * twice, then from * to ** once, 2 dc in beg sp, join with hdc to beg ch-3. Break B. 5 v-st, 6 dc per side.
8th rnd: Attach A to any ch-2 sp with a standing sc, *1 sc in each st and ch-1 sp to corner,** (1 sc, ch 2, 1 sc) in ch-2 sp; rep from * twice, then from * to ** once, 1 sc in beg sp, join with hdc to beg sc. Break A. 23 sc per side.
9th rnd: Attach C to any ch-2 sp with a sl st, ch 3, *sk 1 st, 5 dc in next st, [sk 4 sts, 5 dc in next st] 4 times, sk last st,** (1 dc, ch 2, 1 dc) in ch-2 sp; rep from * twice, then from * to ** once, 1 dc in beg sp, join with hdc to ch-3. Break C. 27 dc per side.
10th rnd: Attach A to any ch-2 sp with a standing sc, *working in BLO, 1 sc in each st to corner,** (1 sc, ch 2, 1 sc) in ch-2 sp; rep from * twice, then from * to ** once, 1 sc in beg sp, join with hdc to beg sc. Fasten off. 29 sc per side.
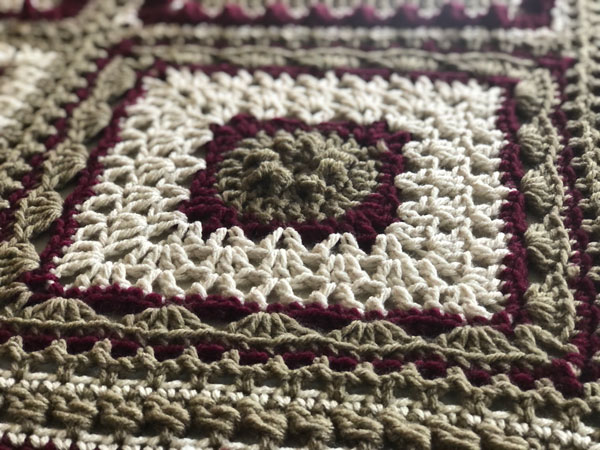
Tuesday - Day 4 Square
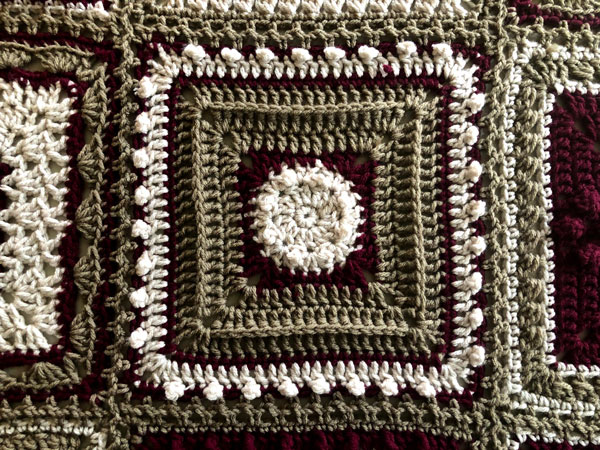
Special Stitches for this Square
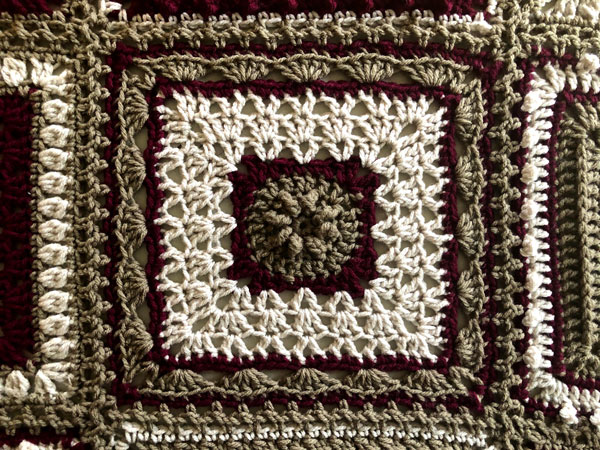
Picot = Ch 4, sl st back into the last st worked.
Standing Sc = Form slip knot and insert onto the hook. Insert hook into st, yoh and pull loop through, yoh through 2 loops.
Tutorial for this Square
Instructions
Make 5 squares.
1st rnd: (RS) With color B, ch 2, 8 sc in 2nd ch from hook, join with sl st to first sc. 8 sc.
2nd rnd: Ch 3, 1 dc in same st, picot, (2 dc, picot) in each st around, join with sl st to top of ch-3. 16 dc, 8 picot.
3rd rnd: Ch 3, 2 dc in same sp, sk next st, [3 dc in next st, sk next st] around, join with sl st to top of ch-3. Pushe picots from previous round to RS. Break B. 24 dc.
4th rnd: Attach A to any dc with a sl st, ch 3, 1 dc in same st, *1 hdc in next st, 1 sc in next 3 sts, 1 hdc in next st,** (2 dc, ch 2, 2 dc) in next st; rep from * twice, then from * to ** once, 2 dc in first st, join with hdc to top of ch-3. Break A. 4 dc, 2 hdc, 3 sc per side, 4 ch-2 corners.
5th rnd: Attach C to any ch-2 sp with a sl st, ch 3, 1 dc in same sp, *1 dc in each st to corner,** (2 dc, ch 2, 2 dc) in ch-2 sp; rep from * twice, then from * to ** once, 2 dc in beg sp, join with hdc to top of ch-3. 13 dc per side.
6th rnd: Ch 3, 1 dc in same sp, *1 dc in each st to corner,** (2 dc, ch 2, 2 dc) in ch-2 sp; rep from * twice, then from * to ** once, 2 dc in beg sp, join with hdc to top of ch-3. 17 dc per side.
7th rnd: Ch 3, 1 dc in same sp, *1 trbp in each st to corner,** (2 dc, ch 2, 2 dc) in 2 sp; rep from * twice, then from * to ** once, 2 dc in beg sp, join with hdc to beg ch-3. Break C. 21 dc per side.
8th rnd: Attach A to any ch-2 sp with a standing sc, *1 sc in each st to corner,** (1 sc, ch 2, 1 sc) in ch-2 sp; rep from * twice, then from * to ** once, 1 sc in beg sp, join with hdc to beg sc. Break A. 23 sc per side.
9th rnd: Attach B to any ch-2 sp with a sl st, ch 3, 1 dc in same sp, *1 dc in next st, picot, [1 dc in next 3 sts, picot] until 1 st rem, 1 dc in last st,** (2 dc, ch 2, 2 dc) in ch-2 sp; rep from * twice, then from * to ** once, 2 dc in beg sp, join with hdc to ch-3. Break B. 27 dc, 8 picots per side.
10th rnd: Attach A to any ch-2 sp with a standing sc, *1 sc in each st (pushing picots to RS) to corner,** (1 sc, ch 2, 1 sc) in ch-2 sp; rep from * twice, then from * to ** once, 1 sc in beg sp, join with hdc to beg sc. Fasten off. 29 sc per side.
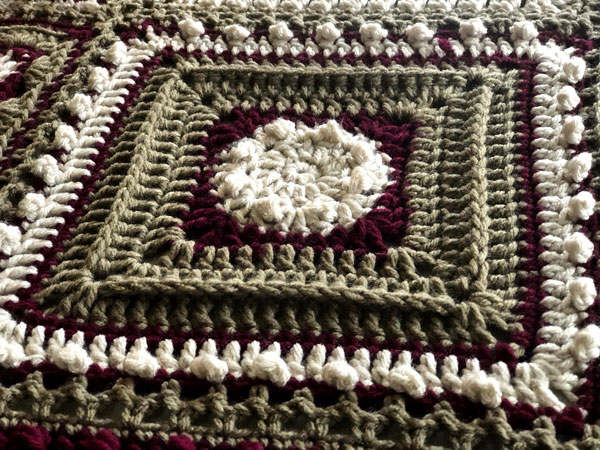
Wednesday - Day 5 Square
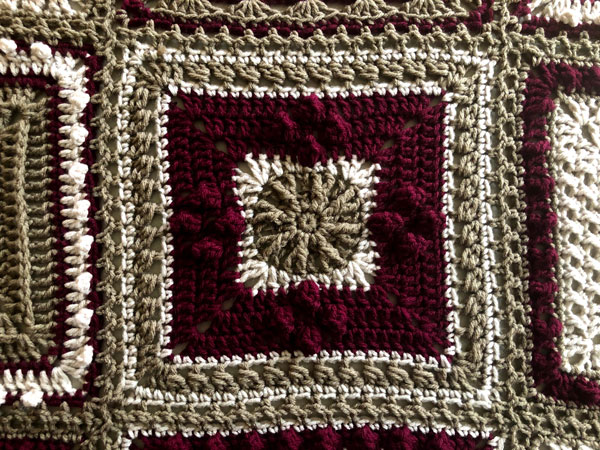
Special stitches used for this square.
Popcorn = Work 4 dc into same st or sp, drop loop from hook, insert hook from front to back into first dc of 4 dc group, pull dropped loop through st, ch 1 to secure popcorn.
Standing Sc = Form slip knot and insert onto the hook. Insert hook into st, yoh and pull loop through, yoh through 2 loops.
Tutorial for this Square
Instructions
Make 5 squares.
1st rnd: (RS) With color C, ch 2, 8 sc in 2nd ch from hook, join with sl st to first sc. 8 sc.
2nd rnd: Ch 3, 1 dc in same st, 2 dc in each st around, join with sl st to top of ch-3. 16 sts.
3rd rnd: Ch 3, 2 trfp in next st, *[1 dc in next st, 2 trfp in next st]; rep from * around, join with sl st to top of ch-3. Break C. 24 sts.
4th rnd: Attach B to any dc with a sl st, ch 3, 1 dc in same st, *1 hdc in next st, 1 sc in next 3 sts, 1 hdc in next st,** (2 dc, ch 2, 2 dc) in next st; rep from * twice, then from * to ** once, 2 dc in first st, join with hdc to top of ch-3. Break B. 4 dc, 2 hdc, 3 sc per side, 4 ch-2 corners.
5th rnd: Attach A to any ch-2 sp with a sl st, ch 3, 1 dc in same sp, *1 dc in next 4 sts, 1 pc in next st, 1 dc in next 4 sts,** (2 dc, ch 2, 2 dc) in ch-2 sp; rep from * twice, then from * to ** once, 2 dc in beg sp, join with hdc to top of ch-3. 12 dc, 1 pc per side.
6th rnd: Ch 3, 1 dc in same sp, *1 dc in next 4 sts, 1 pc in next st, 1 dc in next 3 sts, 1 pc in next st, 1 dc in next 4 sts,** (2 dc, ch 2, 2 dc) in ch-2 sp; rep from * twice, then from * to ** once, 2 dc in beg sp, join with hdc to ch-3. 15 dc, 2 pc per side.
7th rnd: Ch 3, 1 dc in same sp, *1 dc in next 8 sts, 1 pc in next st, 1 dc in next 8 sts,** (2 dc, ch 2, 2 dc) in 2 sp; rep from * twice, then from * to ** once, 2 dc in beg sp, join with hdc to beg ch-3. Break A. 20 dc, 1 pc per side.
8th rnd: Attach B to any ch-2 sp with a standing sc, *1 sc in each st to corner,** (1 sc, ch 2, 1 sc) in ch-2 sp; rep from * twice, then from * to ** once, 1 sc in beg sp, join with hdc to beg sc. Break B. 23 sc per side.
9th rnd: Attach C to any ch-2 sp with a sl st, ch 3, 1 dc in same sp, *[1 dc in next st, dc2tog around post of previous dc, sk next st] 11 times, 1 dc in last st,** (2 dc, ch 2, 2 dc) in ch-2 sp; rep from * twice, then from * to ** once, 2 dc in beg sp, join with hdc to ch-3. Break C. 27 sts per side.
10th rnd: Attach B to any ch-2 sp with standing sc, *1 sc in each st to corner,** (1 sc, ch 2, 1 sc) in ch-2 sp; rep from * twice, then from * to ** once, 1 sc in beg sp, join with hdc to beg sc. Fasten off. 29 sc per side.
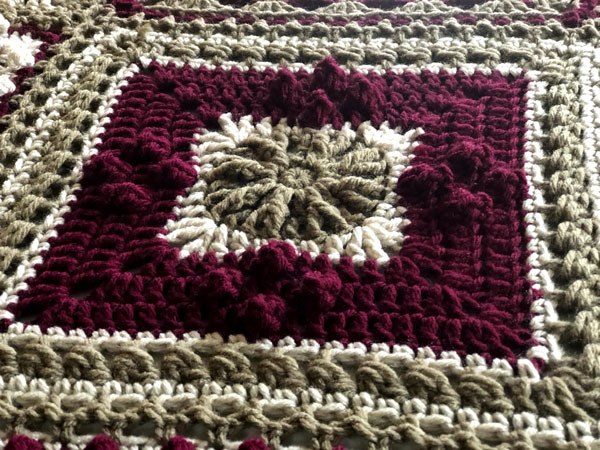
Thursday - Day 6 Square
Special stitches used for this square.
Standing Sc = Form slip knot and insert onto the hook. Insert hook into st, yoh and pull loop through, yoh through 2 loops.
Tutorial for this Square
Instructions
1st rnd: (RS) With color A, ch 2, 8 sc in 2nd ch from hook, join with sl st to FLO of first sc. 8 sc.
2nd & 3rd rounds will circle the project twice each, first working in the front loops, then working in the back loops.
TIP: Place a stitch marker on the first stitch, which includes both loops of a stitch of rnd 2 A and 3 A. You will only be using the Front Loops Only for the A and then Back Loops Only for B. This will help you locate when to start 2 B and 3 B.
2nd A rnd: Ch 3, *sl st in FLO on next st, ch 3, rep from * 7 times , now work in BLO, sl st in of beg sc.
2nd B rnd: Work in back loops only of rnd 1. Ch 3, 1 dc in same st, 2 dc in each st around, join with sl st to FLO at top of beg ch-3. 16 dc, 8 ch-3 loops.
3rd A rnd: Ch 3, *sl st in FLO on next st, ch 3, rep from * 15 times , now work in BLO, sl st in beg dc.
3rd B rnd: Work in back loops only of rnd 2 B. Ch 3, 1 dc in same st, 1 dc in next st, [2 dc in next st, 1 dc in next st] around, join with sl st to top of ch-3. Break A. 24 dc, 16 ch-3 loops.
4th rnd: Attach C to any dc with a sl st, ch 3, 1 dc in same st, *1 hdc in next st, 1 sc in next 3 sts, 1 hdc in next st,** (2 dc, ch 2, 2 dc) in next st; rep from * twice, then from * to ** once, 2 dc in first st, join with hdc to top of ch-3 (hdc counts as a ch-2 sp). Break C. 4 dc, 2 hdc, 3 sc per side, 4 ch-2 corners.
5th rnd: Attach B to any ch-2 sp with a sl st, ch 3, 1 dc in same sp, *1 dc in next st, [sk next st, 1 dc in next st, 1 dc in skipped st] to corner,** (2 dc, ch 2, 2 dc) in ch-2 sp; rep from * twice, then from * to ** once, 2 dc in beg sp, join with hdc to top of ch-3. 13 dc per side.
6th rnd: Ch 3, 1 dc in same sp, *[sk next st, 1 dc next in next st, 1 dc in skipped st] until 1 st remains before corner, 1 dc in next st,** (2 dc, ch 2, 2 dc) in ch-2 sp; rep from * twice, then from * to ** once, 2 dc in beg sp, join with hdc to ch-3. 17 dc per side.
7th rnd: Ch 3, 1 dc in same sp, *1 dc in next st, [sk next st, 1 dc next in next st, 1 dc in skipped st] to corner,** (2 dc, ch 2, 2 dc) in 2 sp; rep from * twice, then from * to ** once, 2 dc in beg sp, join with hdc to beg ch-3. Break B. 21 dc per side.
8th rnd: Attach C to any ch-2 sp with a standing sc, *1 sc in each st to corner,** (1 sc, ch 2, 1 sc) in ch-2 sp; rep from * twice, then from * to ** once, 1 sc in beg sp, join with hdc to beg sc. Break C. 23 sc per side.
9th rnd: Attach A to any ch-2 sp with a sl st, ch 3, 1 dc in same sp, *1 dc in next st, 1 dtr in next st, [1 dc in next 2 sts, 1 dtr in next st] to corner,** (2 dc, ch 2, 2 dc) in ch-2 sp; rep from * twice, then from * to ** once, 2 dc in beg sp, join with hdc to ch-3. Break A. 8 dtr, 19 dc per side.
10th rnd: Attach C to any ch-2 sp with a standing sc, *1 sc in each st to corner,** (1 sc, ch 2, 1 sc) in ch-2 sp; rep from * twice, then from * to ** once, 1 sc in beg sp, join with hdc to beg sc. Fasten off. 29 sc per side.
Day 7 - Joining and Final Border
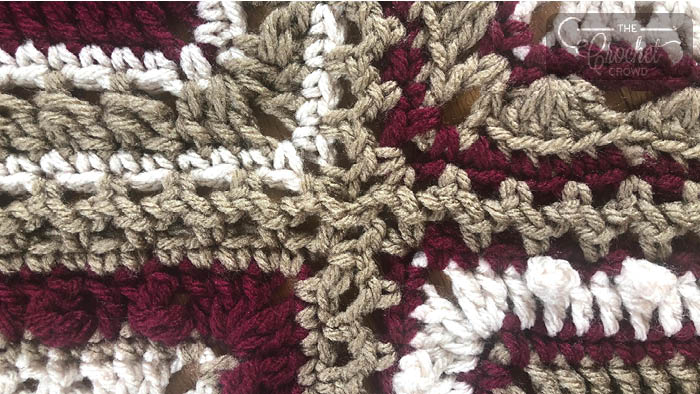
Zig Zag Horizontal and Vertical Joining
Be sure all motifs are right side up.
Join Motifs into 5 Strips, 6 Motifs long, as shown on diagram above as follows: Join C (for baby option, use B) in any corner ch-2 sp of first Motif. With WS tog, ch 1. 1 sc in corner ch-2 sp of second Motif. *Ch 1. Skip next st of first Motif. 1 sc in next st of first Motif. Ch 1. Skip next st of second Motif. 1 sc in next st of second Motif. Rep from * to end of row, always working into corner ch 2 sps.
Tutorial for Joining and Border
Final Border
1st rnd: Attach C (for baby option, use A) to any ch-2 sp with a standing sc, *1 sc in each st to corner, working evenly into the joins between the squares,** (1 sc, ch 2, 1 sc) in ch-2 sp; rep from * twice, then from * to ** once, 1 sc in beg sp, join with hdc to beg sc. Break yarn.
Full Size
2nd rnd: Attach A to any ch-2 sp with a sl st, ch 3, 1 dc in same sp, *[sk 2 sts, 1 tr in next st, working behind tr, 1 dc in 2 skipped sts] to corner (adjust with an extra dc if necessary),** (2 dc, ch 2, 2 dc) in ch-2 sp; rep from * twice, then from * to ** once, 2 dc in beg sp, join with hdc to ch-3.
Baby Size
2nd rnd: Attach C to any ch-2 sp with a sl st, ch 3, 1 dc in same sp, *sk next st, [v-st in next st, sk 2 sts] to corner (adjust with an extra dc if necessary),** (2 dc, ch 2, 2 dc) in ch-2 sp; rep from * twice, then from * to ** once, 2 dc in beg sp, join with hdc to top of ch-3.
3rd rnd: Attach C (for baby option, use B) to any ch-2 sp with a standing sc, *1 sc in each st and/or sp to corner,** (3 sc) in ch-2 sp; rep from * twice, then from * to ** once, 2 sc in beg sp, sl st to beg sc. Fasten off.
Enjoy your new blanket.
Community Submissions
See what other community members have done with this unique fun 7-Day Crochet Blanket Pattern.

Carolea says
I am so loving these squares simple but some new looks, new combos but having done a few , I have been working as well so somewhere I lost a day.
Thank you Jean for giving us a pattern that finally clicks for me to turn a circle to a square. It might be because it happens early in the pattern
I love how quickly each square works up.
Jeanne says
I'm glad you are enjoying it. My first time designing with a circle at all, so I just couldn't go too big. 🙂
Kathryn Krawczynski says
Is there a way to get a clear printable version of the pattern without all the pop-up ads
Jeanne says
Sure, when you click to each day's motif, near the top, there is a blue button to click that says, PATTERN, save, print & enjoy, The Crochet Crowd. On any of our pages, you can trust the blue button as the link to the printable pattern.
Ellen Teal says
Just finished up the Wednesday motif and I am so impressed! The patterns are beautiful and smartly designed. Jeanne, your talent for design is nothing short of magic! Mikey, I am SO thankful for your patient and helpful videos. You have made getting back into crochet easy and stress free!! I have loved each crochet along this year, and I’m looking forward to many more.
Jeanne says
Thank you so much! It's been a fun journey.