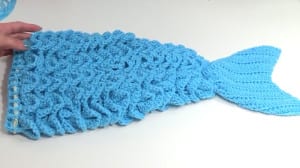
Mermaid Outfit
I've located a great little crochet pattern tutorial for a Mermaid Outfit which includes the tail, sea shell top and star fish head band.
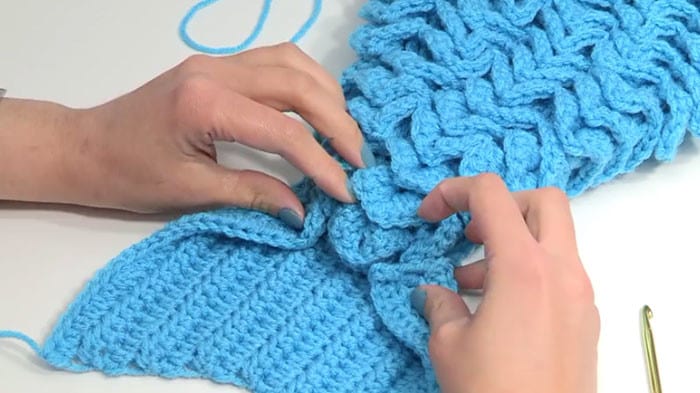
The tutorial is taught by Fuad Azmat on YouTube. She does a great job of showing you what to do to make your own. You can find many more great ideas and inspirational tutorials on her YouTube Channel.
She has clear instructions and is easy to follow along. Definitely a worthwhile visit to check it out. There are no written instructions. Just grab a hook and follow along. There are no written instructions for this.
Video Tutorial
Robin says
I have been asked to make one of these for a Christmas present for an adult without the shells, for me to make an adult size would i just have to keep increasing?
Robin says
sorry i meant to say is i was asked to make with the crocodile shells, so in order to make it bigger is to keep increasing for an Teen/adult size right?
Robyn Olszowy says
ExcellEnt. Thank you.
Nadia says
Thank you for sharing my video tutorial Mikey! I really appreciate it. I use my dad's account on YouTube to share my video tutorials. His name is Fuad Azmat. 🙂 I share all my videos and patterns on my website (YARNutopia.com) Some of my patterns are free, but this one is a paid pattern that can be found on my etsy shop. Again, thank you for sharing my pattern. Your website is the very best resource for me, so you can imagine, I'm totally fan-girling right now that you recognize my work!
Cathy Renfrew says
I would like to extend and increase the pattern to fit a 3 year old and a 4 year old how would I go about increasing row 41 for 60 double crochets around the mermaid and then what will be the next increase and how many rows do I keep the 60 dc rows and I assume the next increase would be 70 how would I do the increase as for the dc in next stitch and 2 dc in the next is this confusing I don't think ill have to increase it after 70 dc around if all possible can you enlighten me to follow through with this pattern I really love this pattern and had excellent teaching skills I was able to follow you throughout the pattern and then I just will have to follow the rest of the waist band as it goes thank you very much I sure would appreciate this I am making these for my granddaughters for when we go to ocean city Maryland in September and its their birthdays on September 7th and September 9th and we are going to have them wear them while we take pictures on the beach with their traditional heart made in the sand with their name and the year that we are there this one will be Alyssa 4 years old Alayna 3 years old on 2015 is written and formed inside of a big heart and each girl will sit by their name wearing these mermaid suit so if you can be of any help I would really appreciate it
Brittany Mitchell says
As far as the increases, it seems that every 2 rows, starting at row 23, you would increase by 10. So row 23 would be (2 dc in next st, 1 dc in next 4 st) repeated around to get to 60. Then a row of croc stitches, followed by a dc row of 60, and another croc stitch row. Increases would then be, every 4th row, up to 70 (2dc in stitch, 1 dc in next 5st), 80 (2dc in stitch, 1dc in next 6st), 90 (2dc in stitch, 1 dc in next 7 st) (<<you see the pattern here being the number of repeated dc equals the total number of stitches for that row divided by 10). Keep increasing every 4 rows until you get the width you want, then repeat the largest to rows until your project reaches the length you need.