Make a complete set for a baby shower or just because you want to dress up the little person in your life. Two different types of bibs include a Teddy Version and a Sweet Heart Version. The booties are the same in the set, just coloured differently. This is the Baby Sweet Heart, Teddy and Booties Crochet Set.
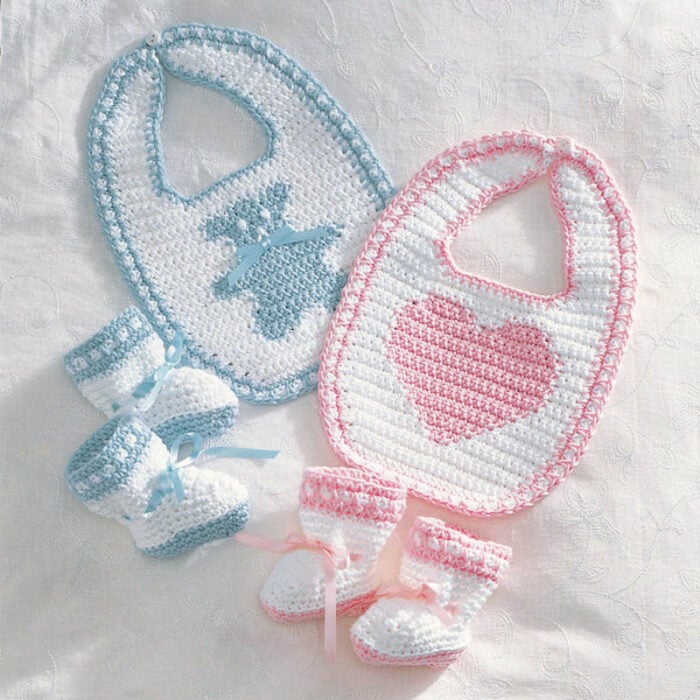
These are using Lily Sugar'n Cream yarn that is 100% cotton. If you are in Canada, substitute with Bernat Handicrafter Cotton.
This uses a 4 mm / G/6 crochet hook. If you don't want the buttons that are behind the baby's neck, just substitute them with snaps.
.
.
Leave me your thoughts...