Crochet Thursday Square

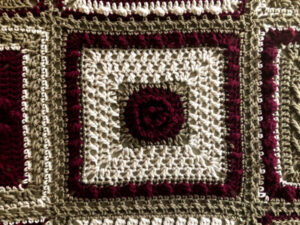
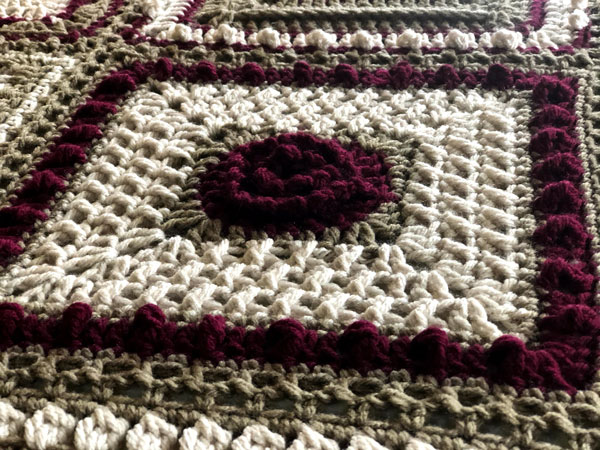
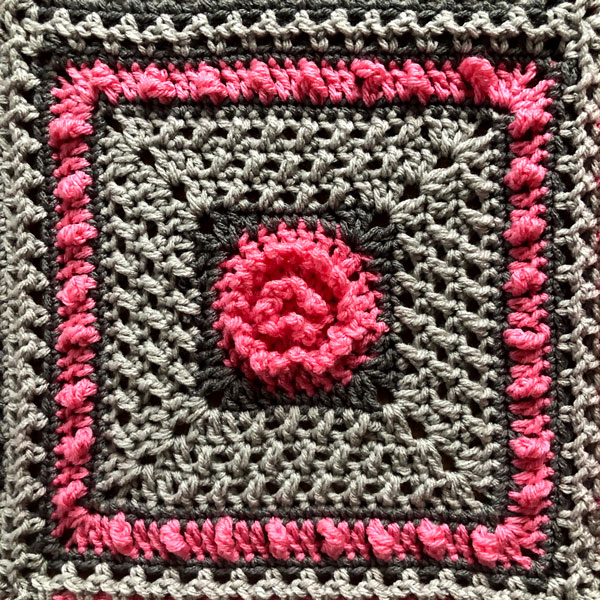
The Crochet Thursday Square is the sixth motif in the 7 Day Sampler Afghan Stitch Along. This crochet project can be easily completed in just one week.
The Thursday Square features 3-D flowery center by crocheting around twice, first using the front loops, then the back loops. This is the most challenging and textured of all the 7 Day Sampler motifs.
The first 3 rounds of this pattern is the most challenging of all of the squares. If you feel it's beyond your level, Michael has provided an alternate beginning in the tutorial of the video.
When you upload your project to The Crochet Crowd Stitch Social Group or Instagram, feel free to tag me so I can see what you have crocheted. Follow me on Instagram @ jeannestein or on Facebook. My designs can also be saved in your Ravelry favorites by following me HERE.

Tutorial
Thursday Square
Size U.S. J/10 (6.0 mm) crochet hook.
Measurements Approx 10” x 10” per square.
Abbreviations List
- Beg = Begin(ning)
- BLO = Back loop only
- Ch = Chain
- Cl = Cluster
- Dc = Double crochet
- Dc2tog = Double crochet 2 together
- Dtr = Double treble crochet
- FLO = Front loop only
- Hdc = Half double crochet
- Pc = Popcorn
- Rem = Remain
- Rep = Repeat
- Rnd(s) = Round(s)
- RS = Right side
- Sc = Single crochet
- Sk = Skip
- Sl st = Slip stitch
- Sp = Space
- St(s) = Stitch(es)
- Tr = Treble crochet
- Trbp = Treble crochet back post
- Trfp = Treble crochet front post
- Yoh = Yarn over hook
Standing Sc = Form slip knot and insert onto the hook. Insert hook into st, yoh and pull loop through, yoh through 2 loops.
INSTRUCTIONS
1st rnd: (RS) With color A, ch 2, 8 sc in 2nd ch from hook, join with sl st to FLO of first sc. 8 sc.
2nd & 3rd rounds will circle the project twice each, first working in the front loops, then working in the back loops.
TIP: Place a stitch marker on the first stitch, which includes both loops of a stitch of rnd 2 A and 3 A. You will only be using the Front Loops Only for the A and then Back Loops Only for B. This will help you locate when to start 2 B and 3 B.
2nd A rnd: Ch 3, *sl st in FLO on next st, ch 3, rep from * 7 times , now work in BLO, sl st in of beg sc.
2nd B rnd: Work in back loops only of rnd 1. Ch 3, 1 dc in same st, 2 dc in each st around, join with sl st to FLO at top of beg ch-3. 16 dc, 8 ch-3 loops.
3rd A rnd: Ch 3, *sl st in FLO on next st, ch 3, rep from * 15 times , now work in BLO, sl st in beg dc.
3rd B rnd: Work in back loops only of rnd 2 B. Ch 3, 1 dc in same st, 1 dc in next st, [2 dc in next st, 1 dc in next st] around, join with sl st to top of ch-3. Break A. 24 dc, 16 ch-3 loops.
4th rnd: Attach C to any dc with a sl st, ch 3, 1 dc in same st, *1 hdc in next st, 1 sc in next 3 sts, 1 hdc in next st,** (2 dc, ch 2, 2 dc) in next st; rep from * twice, then from * to ** once, 2 dc in first st, join with hdc to top of ch-3 (hdc counts as a ch-2 sp). Break C. 4 dc, 2 hdc, 3 sc per side, 4 ch-2 corners.
5th rnd: Attach B to any ch-2 sp with a sl st, ch 3, 1 dc in same sp, *1 dc in next st, [sk next st, 1 dc in next st, 1 dc in skipped st] to corner,** (2 dc, ch 2, 2 dc) in ch-2 sp; rep from * twice, then from * to ** once, 2 dc in beg sp, join with hdc to top of ch-3. 13 dc per side.
6th rnd: Ch 3, 1 dc in same sp, *[sk next st, 1 dc next in next st, 1 dc in skipped st] until 1 st remains before corner, 1 dc in next st,** (2 dc, ch 2, 2 dc) in ch-2 sp; rep from * twice, then from * to ** once, 2 dc in beg sp, join with hdc to ch-3. 17 dc per side.
7th rnd: Ch 3, 1 dc in same sp, *1 dc in next st, [sk next st, 1 dc next in next st, 1 dc in skipped st] to corner,** (2 dc, ch 2, 2 dc) in 2 sp; rep from * twice, then from * to ** once, 2 dc in beg sp, join with hdc to beg ch-3. Break B. 21 dc per side.
8th rnd: Attach C to any ch-2 sp with a standing sc, *1 sc in each st to corner,** (1 sc, ch 2, 1 sc) in ch-2 sp; rep from * twice, then from * to ** once, 1 sc in beg sp, join with hdc to beg sc. Break C. 23 sc per side.
9th rnd: Attach A to any ch-2 sp with a sl st, ch 3, 1 dc in same sp, *1 dc in next st, 1 dtr in next st, [1 dc in next 2 sts, 1 dtr in next st] to corner,** (2 dc, ch 2, 2 dc) in ch-2 sp; rep from * twice, then from * to ** once, 2 dc in beg sp, join with hdc to ch-3. Break A. 8 dtr, 19 dc per side.
10th rnd: Attach C to any ch-2 sp with a standing sc, *1 sc in each st to corner,** (1 sc, ch 2, 1 sc) in ch-2 sp; rep from * twice, then from * to ** once, 1 sc in beg sp, join with hdc to beg sc. Fasten off. 29 sc per side.


heather says
grid
Mikey says
Thanks
Cheryl says
I'm working on day 6 square. And I just wanted to say I LOVE EVERYTHING about this blanket!!! Yes even the very challenging Thursday square! I love it so much I'm already planning color scheme for another one. THANK YOU SO MUCH for sharing.
Jeanne says
I'm so happy you are enjoying this Stitch Along. 🙂
Gaylyn says
Hi. Really love the squares. Is there by a chance a diagram on how to do them. I have seen the video
Mikey says
The diagrams take about 6 - 8 hours each. I am lacking the time right now to do that. I'm sorry. I'm not quick at making them.