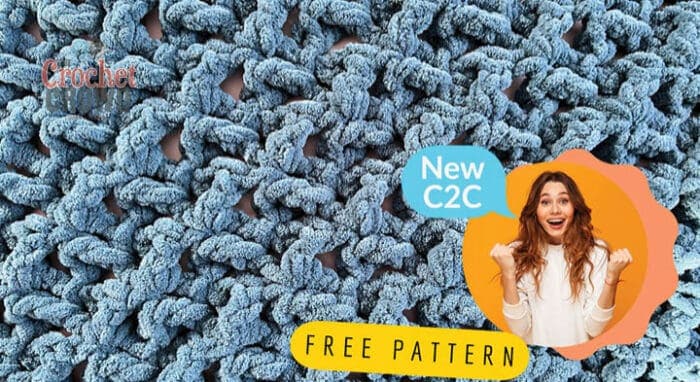
Introducing a new stitch, I created for crochet corner to corner. The stitch has less stitchwork involved by creating a chain in the stitchwork to make it airier. The stitch is really fast due to the technique I used. This is the Pattern Please Crochet Corner to Corner Blanket and Stitch Concept.
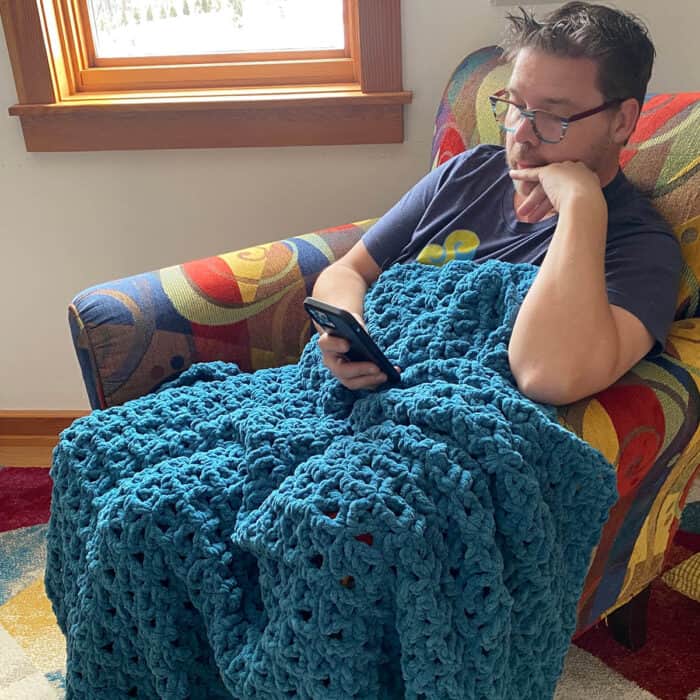
In the tutorial, I will show you how to anchor the stitches. Notice how the outside boxes are regular to have a nice flat edge. There is just one round of a border to finish it off. It uses 5 balls of Bernat Blanket in Dark Teal.
Pattern
Bernat Blanket, 201 m / 220 yds, 300 g / 10.5 oz
Dark Teal - 5 balls
Project Size: 50” x 60” long
8 mm / L/11 Crochet Hook or size needed to obtain gauge.
Abbreviations
Beg = Begin(ning)
Ch(s) = Chain(s)
Sc = Single crochet
Sk = Skip
Sl st = Slip stitch
Sp(s) = Space(es)
St(s) = Stitch(es)
This blanket is double-sided. It won’t matter how many rows you do, the blanket will look great on both sides.
The blanket is 33 blocks by 43 blocks. If you change the number of blocks per side, it will alter the yarn quantities. This will yield as much of the five Bernat Blanket yarn balls without a lot of waste.
You can opt to have a square blanket if you decrease on both sides at the same time without doing a rectangle shape. See video tutorial.
Special Stitches
Special Corner to Corner Stitches
Dec block start = Sl st in each of first 3 dc and next ch. (Ch 3, 3 dc) in beg ch sp.
Inc block = Beginning Block - Ch 6. 1 dc in 4th ch from hook. 1 dc in each of next 2 ch.
Cr block = Cross Block - Sl st in next sp. Ch 3. 1 dc in next ch-3 sp, ch 1, 1 dc on same ch-3 sp before the last dc crossing back behind the first dc.
Reg block = Regular Block = Sl st in next sp. Ch 3, 3 dc in same sp.
Instructions
With A, ch 6.
1st row: 1 dc in 4th ch from hook. 1 dc in each of next 2 ch. Turn. 1 block made.
2nd row: Inc block. Reg block. Turn. 2 blocks.
TIP: Cross blocks start here, with the first and last block on the edges being regular blocks, and everything in between is a cross block.
3rd row: Inc block. Cr block. Reg block. Turn. 3 blocks.
4th row: Inc block. (Cr block) twice. Reg block. Turn. 4 blocks.
5th row: Inc block. (Cr block) three times. Reg block. Turn. 5 blocks.
6th row: Inc block. (Cr block) four times. Reg block. Turn. 6 blocks.
Continue in the same increase until you can count 33 blocks across. We will start to decrease one side and increase on the other to form the rectangle shape.
11th row: WS. Dec block. (Cr block across). Reg block for last block. Turn. 33 blocks.
12th row: RS. Inc block. (Cr block across to 2nd last block). Reg block. Turn. 33 blocks.
Continue with 11th and 12th rows until you can count 43 blocks in length.
We will start to decrease on both edges and start eliminating one block per row.
Next row: WS. Dec block. (Cr block across to 2nd last block). Reg block. Turn. 32 blocks.
Next row: WS. Dec block. (Cr block across to 2nd last block). Reg block. Turn. 31 blocks.
Keep repeating the last row until 2 blocks remain.
Next row: Dec block. Reg block. Turn. 2 blocks.
Next row: Dec block. Fasten off. 1 block.
Frame Round
1st rnd: With B, attach to any corner st. Ch 1, 1 sc in same st. *Ch 3. [1 sc in next sp between 2 blocks. Ch 3.] Rep [ ] to next corner. ** (1 sc. Ch 3. 1 sc) in corner stitch. Rep from * twice, then * to ** once. 1 sc in same beg corner st. Ch 3. Sl st to beg sc. Fasten off.
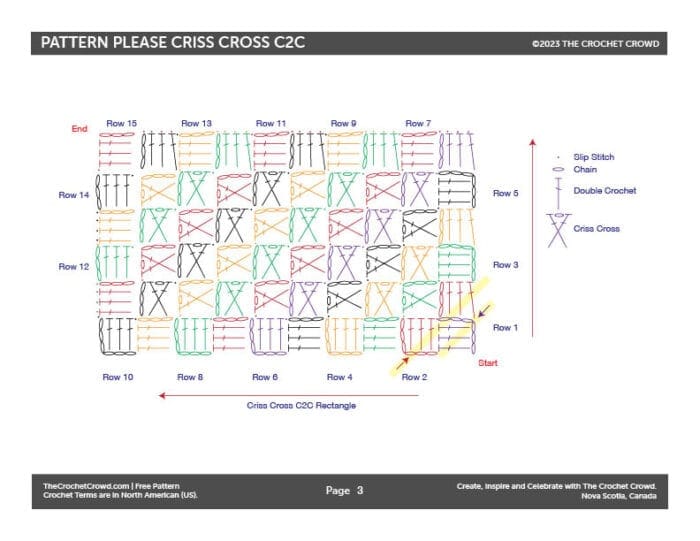
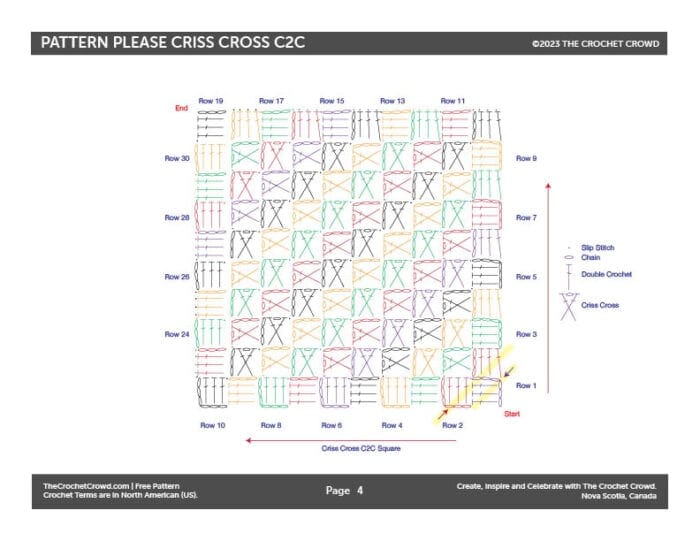
Crochet Diagrams
Both of the crochet diagrams are available in the free download of this pattern. I am showing you the rectangle and square versions to cover my basis.
Try Another Corner to Corner Stitch
I created another textured Corner to Corner stitch using 6 double crochet cluster stitches. It's used in the Inspired by Friendship Blanket.
[the_grid name="C2C"]
Janine Kline says
Good afternoon.
I have a favor to ask. Is there already a stitch/stitch pattern name for this:
2 hdc in same stitch, skip 1, *2 hdc in same stitch, skip 1*, Repeat * *across the row, end with 1 hdc in last stitch
Meaning:
Foundation Row: ch multiples of 2 + 1
Row 1: in 5th stitch do 2 hdc, skip 1, *2 hdc, skip 1*, Repeat * * across the row, end with 1 hdc in last stitch, turn & ch 3 (counts as 1hdc)
Repeat Row 1 to desired length
I have searched the internet and placed inquiries. No one seems to know. I call it the "Hyacinth Stitch" because the 'circles' line up like the individual blooms on a hyacinth.
I hope you can help me. Thanks.
Mikey says
Reading this pattern, it's incomplete. If you repeat row 1. it's assuming you are working with the foundation chain. What would row 2 look like pattern wise. It resembles a star stitch combination but until I know Row 2. I won't know for sure.
Lena Cybulskie says
Loving this pattern! Why does it say 11th row to end the increase? It is far beyond the 11th row that you get to 33 blocks, correct? For some reason, that is throwing me off.
Mikey says
It's intended that you keep repeating the step until you can get to 33 blocks wide. I'm sorry for that. I've stopped writing patterns lately as I think I am confusing more people these days and just relying on video recordings instead. Again, I'm sorry about that.
Betty says
As a left handed crocheter I truly appreciate the video for both left and right hand. I noticed in the video for left hand that when you turn the work the working yarn is in front I found this odd because for me the working yarn is in back. Not criticizing just stating something I noticed . I have also done the cross cross going from back to front as the video shows as a lefty I found it much easier to go front to back as that was stated in the video it could be done. I love the Pattern Please Criss Cross C2C and currently making it with 2 strands of Big Twist worsted weight yarn . I did have to go down to a J/6mm as the larger hook left it too loose for my liking. I am still working the blanket so I don’t know how many yards of yarn it will take. Thank you for all the free videos and patterns!