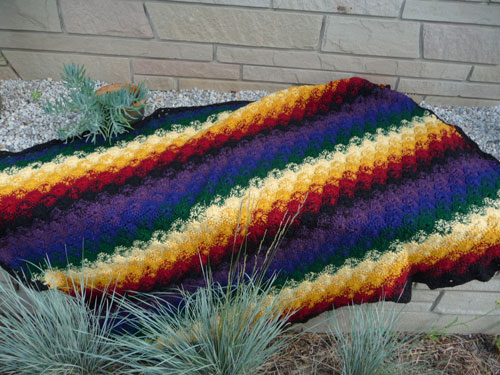
Vibrant Catherine Wheel Afghan
This afghan was completed in 2001 and for me is an afghan that I will never forget. Like many people turning to crochet to deal with emotional turmoil in our souls, this afghan has a lot of emotion worked into this afghan.
Some of the colour shades seen here may be faded off the original colours due to countless washes and the age of this heavy-duty afghan. This is the Catherine Wheel Stitch Afghan.

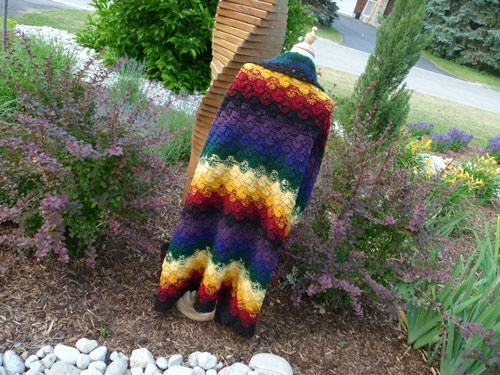
This afghan has been all over North America when I used to drive a transport truck. It is the perfect size for a single bed. It is heavy due to the double strands used within.
There is a combination of 7 colours being used in this afghan. You can try using Red Heart With Love for a softer version or use Red Heart Super Saver to gain the same look and feel as this original afghan.
Pattern Suggestions
- Crochet Baby Tiles for Miles Blanket Pattern
- Crochet Family Blanket Pattern
- Crochet Big Plaid Blanket Pattern
- Crochet Yarn Thermometer Applique
- Crochet Christmas Trimmings Afghan
- Original Colours 2001, = Black, Red, Orange, Yellow, Green, Blue & Purple
- Today's Colours for Super Saver Colours = Black, Cherry Red, Carrot, Cornmeal, Tea Leaf, Blue & Amethyst
- Today's Colours for With Love = Black, Holly Berry, Mango, Daffodil, Lettuce, Blue Hawaii & Aubergine
 Understanding the Colour Transition Within
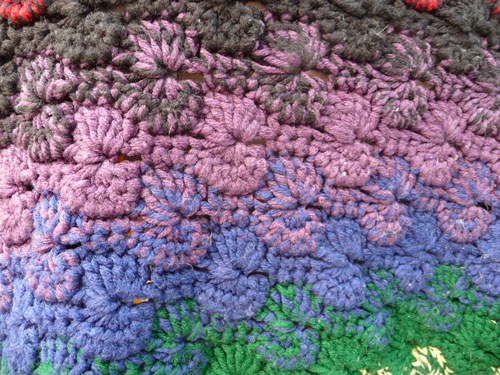
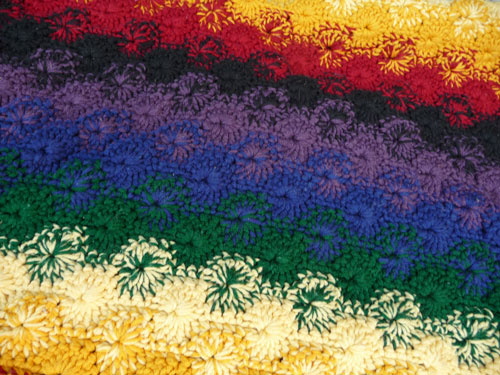
The repeat of the pattern is every other line. Each circle you see is a combination of 2 lines together. One line is the underside of the circle and the next line is the overside. I say this because if you want to have solid colour circles, then you may be interested to know where to change colours to achieve this look.
There are two strands being used at one time. This is creating a double thickness. Where you see a solid colour circle, there is actually two strands of the same colour being used at the same time. One colour is overlapping over three circles as it transitions in, full colour and then transitions out. This is creating the vibrant colour bleeding that is looking like the colours are melting together.
Here are the circle combinations to help you understand this further.

| Circle | Colour 1 | Colour 2 |
| 1 | Black | Black |
| 2 | Black | Red |
| 3 | Red | Red |
| 4 | Red | Orange |
| 5 | Orange | Orange |
| 6 | Orange | Yellow |
| 7 | Yellow | Yellow |
| 8 | Yellow | Green |
| 9 | Green | Green |
| 10 | Green | Blue |
| 11 | Blue | Blue |
| 12 | Blue | Purple |
| 13 | Purple | Purple |
| 14 | Purple | Black |
| Start at 1 again |
Dimensions
- 54" Wide x 44" Long
- When counting circles, there is a total of 41 circles seen from top to bottom. The final circle is the same as the starting row to bring consistency to the look.
- The repeat of the colouring of circles appears 4 times.
- This afghan when on a bed is actually sideways as it's wider than it is tall.
Help
- You can substitute colours and yarn to match your own colouring ideas. You can use more colours or less. The choice is up to you.
Materials Used
Size K Crochet Hook, 6.5 MM
This afghan is a bit of a yarn pig.
You will need between 3 - 4 balls of each of the 7 colours. Red Heart With Love or Super Saver 7 oz or 198 g.
The colours suggested above.
Free Pattern:
Abbreviations: CH = Chain, ST ST = SL ST, BEG = Beginning, DC = Double Crochet,
HELP Below for the circles (bottom of circles as seen in this pattern)
CL - Cluster (Begin double crochet as normal and stopping one step before finalizing the stitch. This will keep the loops adding onto the crochet hook. For this pattern, you will end up with a total of 8 loops before pulling the yarn through all loops to form the underside of the circle.) This has multiple sets of 10. There are 8 sets of 10 stitches in this pattern. If you want a larger or smaller mat, reduce the stitch sets or add more stitch sets. At the end of the desired length of the chain, add 3 extra chains.
Vibrant Catherine Wheel Afghan
The pattern below is for the identical version for what is seen in this picture. You can use this pattern for a throw, afghan or any other creative idea you may have. Change colours as you want to.
- CH 253
- CH 1, SC in stitch 2nd from hook, SC in next. *, SKIP 2 stitches, 7 DC into the next stitch. SKIP 2 Stitches, 1 SC into the next three stitches, repeat from *. Very End of the line will finish with only 2 SC's in a row and not three. Turn.
- If desired, this is where you would change your colour to ensure the circles stay the same colours if desired. If pulling off the same effect you see in my pictures, don't worry about it and carry on.
- Ch 3, Form CL with only 3 DC's. This creates a partial circle on the edging that is required. CH 2, 1 SC into the next three stitches. *CH 3, CL using the next 7 stitches together, (you will have 8 loops on your hook before forming the cluster.) SC the next three stitches which are over the circle in the line below, Repeat from * all the way across until the final partial circle. The end of the line will finish off with a partial cluster by CH 3, CL using the next 3 Stitches.
 Turn
Turn - CH 3, 3 DC into the same stitch under the CH 3. *SC in each of the next three stitches (where SC's are in the line under it). 7 DC's into the centre of the circle in the line below. Repeat from * all the way across. Finish the final partial circle with 4 DC's into the centre of the partial circle on the end. Turn.
- If desired, this is where you change the colour again if wanting solid colour circles.
- CH 1, 1 SC into the first two stitches. *CH 3, CL the next 7 Stitches Together, CH 2, 1 SC into each of the next three Stitches. Repeat from *. Final will end with only 2 single crochets in a row to match the starting side.
- Repeat lines 2 - 7. There will be a total of 43 circles shown after finishing the borders.
- I repeated the final circle of the afghan to be the same colour as the starting row to bring consistency. The choice is yours.
Finish Starting Row
- The starting row is flat where the final row you finished with will be a full circle.
- Go back over the first row using the same colour as the row and creating the top half of the circle so both sides will have a nice circling effect on the top and bottom borders.
- I didn't do this for the side borders due to the many colours running down the sides. The circles would look mismatched.
 Turn
Turn
Nancy I Sanchez says
no blue button