As a new crocheter, you may not realize there are several ways to cheat the crochet patterns. One way is to avoid things you may strongly dislike about crochet, such as joining at the end of the rounds.
Have you ever been behind someone in line at the coffee shop and noticed the slip stitching line in their hats? I have, and I can't take my eyes off it.
The key to any recommendations below is not to change the final stitch counts in the rounds.
Tutorials will be made for each coming in the future.
Crochet naturally leans in one direction. When you go back and forth in a row, the lean changes direction, and it's not as noticeable. However, when you do circles such as hats, cowls, and similar items, you can see the obvious lean that creates the slip stitch to travel up on an angle.
Technique #1
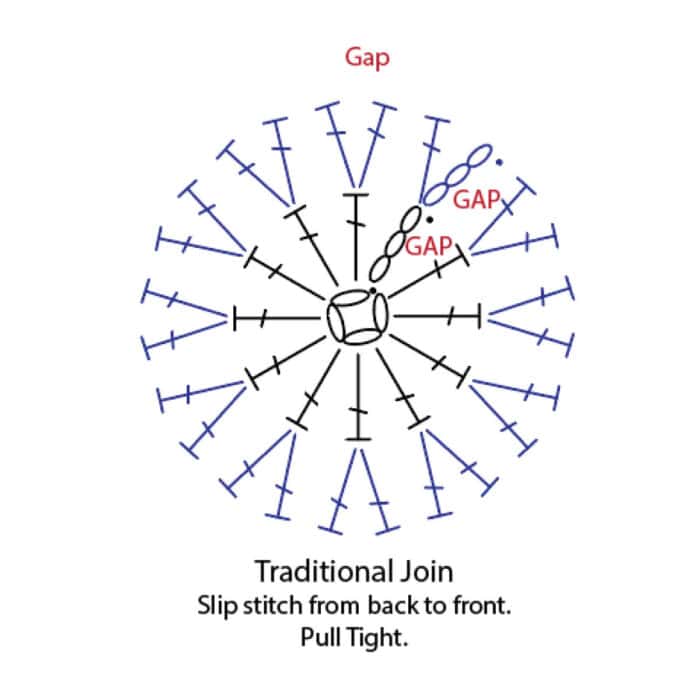
Traditional slip stitching involves joining the first stitch or top of a beginning chain by inserting a hook into that position and pulling yarn from back to front. In many designs, the problem is not in the slip stitch but in the way the circle is started.
The beginning chain 3 is not as thick as regular double crochet and doesn't fill the space. It creates a noticeable gap that's unavoidable as it is. You can change the crochet rules to suit your needs if you know this.
Technique #2
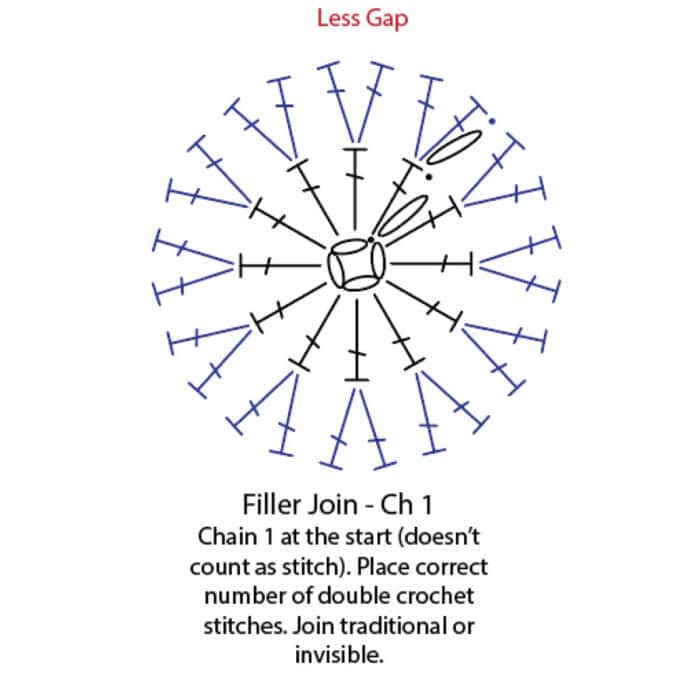
It becomes a builder in the round by starting with a chain before you do the stitch work and not allowing the chain to count as a stitch. I refer to this in many tutorials: You are creating a builder.
The chain shown below is going to partially fill the gap that is created by the slip stitch. It eliminates that one stitch is made up of a chain. Ensure that chain 1 is not counted as a stitch in the future.
Technique #3 - Mikey's Favourite
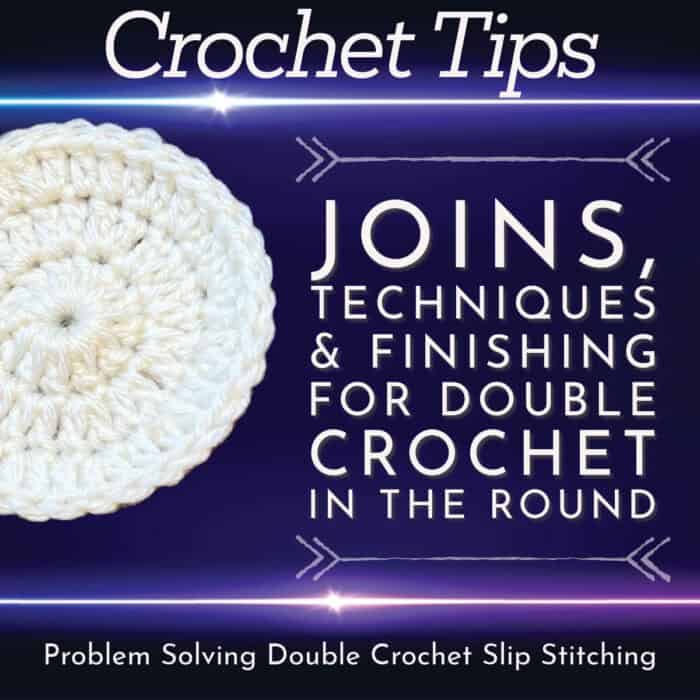
My favourite is using chain 2 before you start a round that won't count as a stitch. This chain 2 fills in the space entirely and blends the best. This example is the cover photo for this article. You cannot see the join; if you can, it's tough to locate.
My inability to resist the unsightly gap in my work causes me to want to fill it in my latest designs. Sometimes, I also use technique 2. It might depend on my mood.
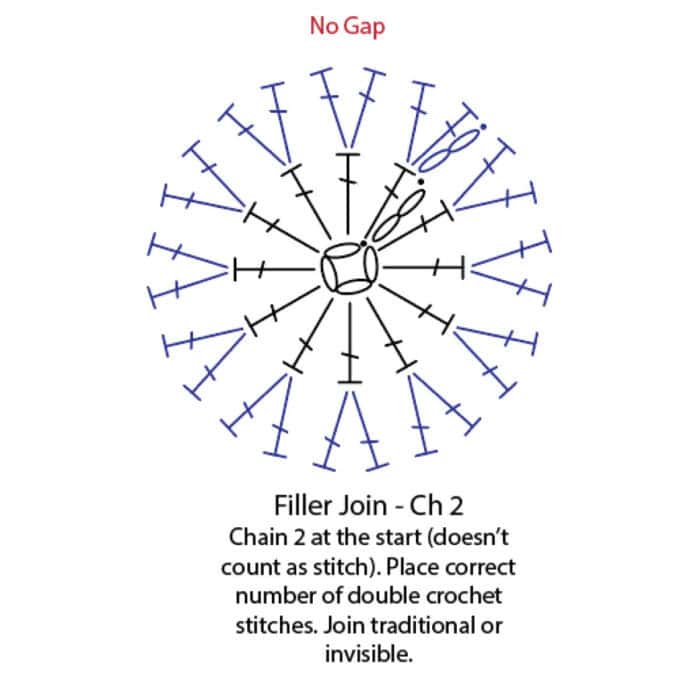
If I have another design for someone else I am working on; I will automatically change chain 3 at the beginning of the instruction to chain 2 and not count it as a stitch to avoid the gap. Play by the rules that work for you.
Technique #4
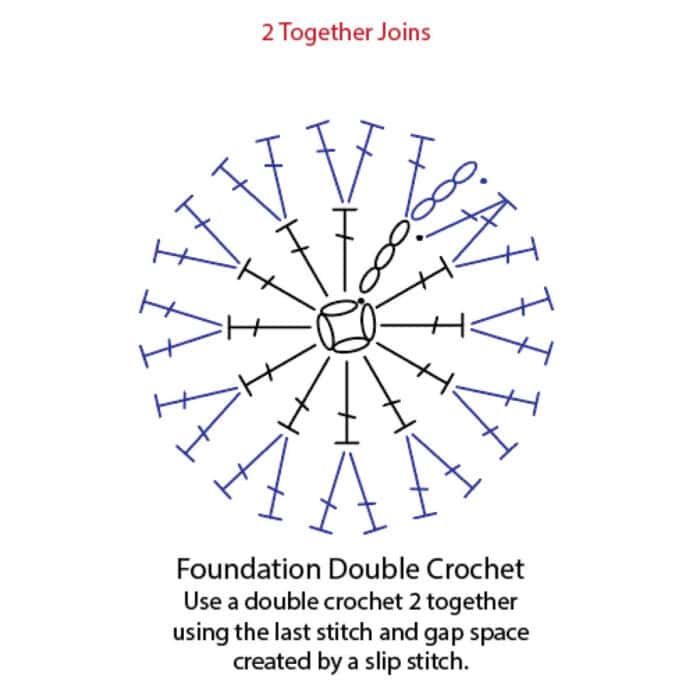
Earlier in my career in crochet, I would use this technique without telling people so it would close the gap. I convert the last stitch to a two-together double crochet, bridge the last stitch, and use the gap space created with the slip stitch. You may see this in projects I have posted online.
Today, I try not to do a chain 3 to start a crochet round to avoid the irregular look.
Techniques #5, 6 and 7
The crochet always leans; for the circles, whether growing or maintaining, the slip stitch will always lean and rotate in the direction of your crochet hook-holding hand.
Number 5: For circles in the growth, you will use the last stitch to put in an extra stitch that you intentionally skip in the beginning. The crochet diagram below shows that we should have put 2 double crochets in round 2 in the first stitch, but there is only one. The last stitch has 3 double crochets instead. This counterbalances the lean and keeps the slip stitch going into a straight line down the project.
Number 6: If you are no longer growing the circle, such as the growth of a hat is completed and you are doing the body of the hat, you need to slip stitch to the next stitch and begin as usual. This will keep them in a straight line.
Number 7: If you turn the work entirely at the end of the round and go back in the opposite direction, this will keep the slip stitch line at the same point, whether growing it out or maintaining the round.
Techniques #8, 9 and 10
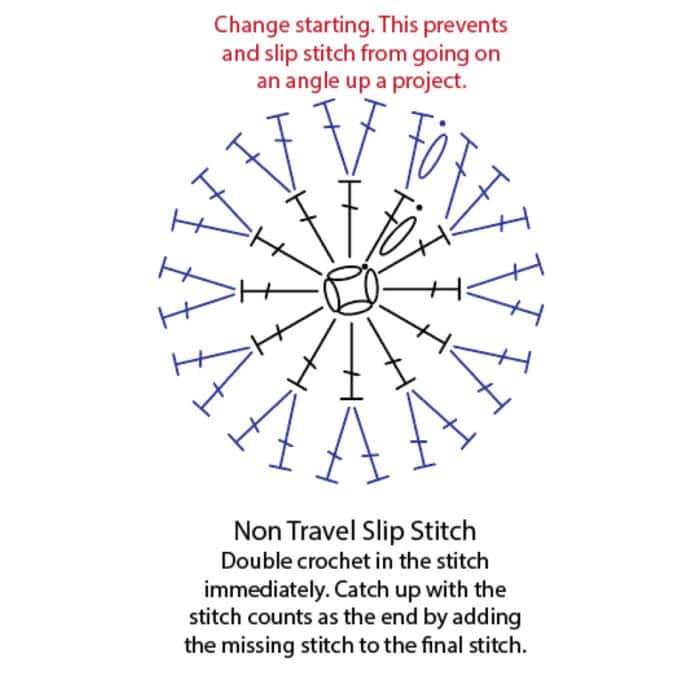
There are probably more than three ways to start chainless double crochet. It creates the first stitch to appear as a double crochet.
Number 8: It's a bit cumbersome, but it works. I would do technique #3 instead of this version. This one takes a bit of practice for tension. Slip stitch from front to back. Pull up a loop the height of the double crochet. Insert a hook into the stitch. Yarn over and pull through the stitch. Rotate loops around the hook and yarn over to pull through the final two loops. I find this is a pain in the ass but works.
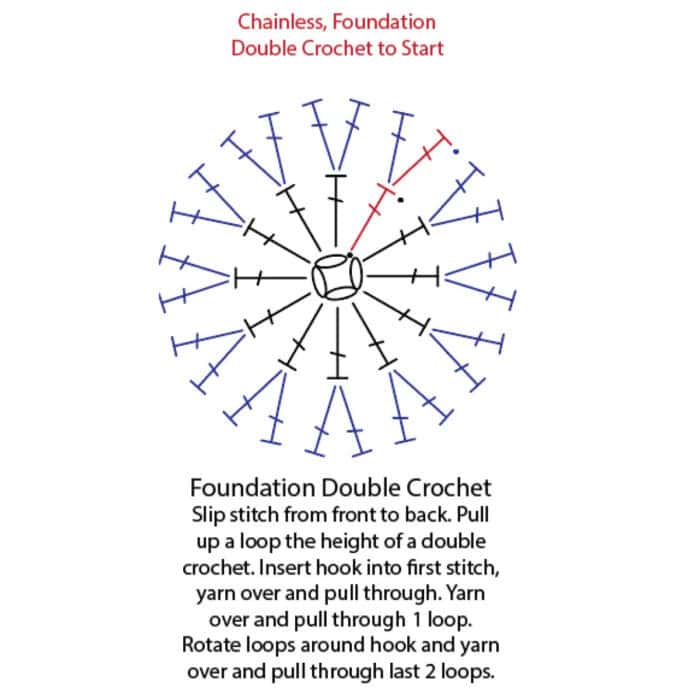
Number 9: This technique definitely needs a tutorial to show you the way. If technique #3 didn't exist, I would choose this method.
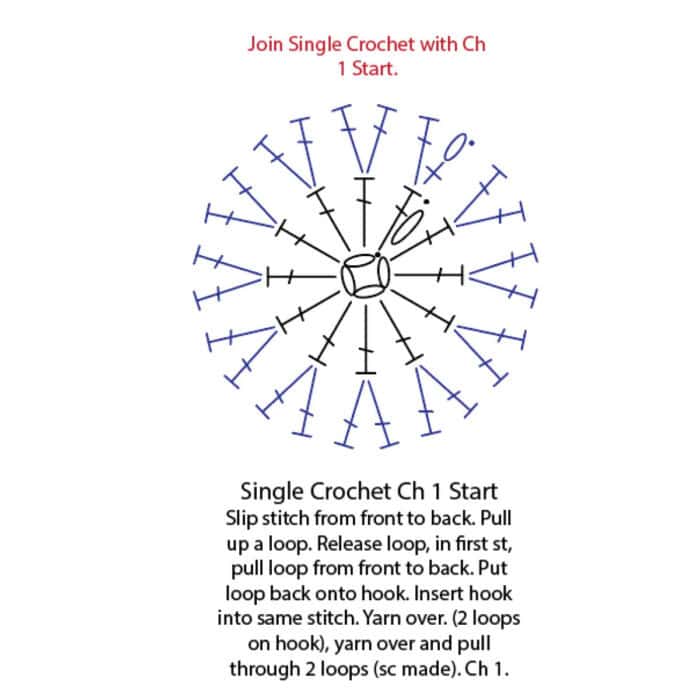
Number 10: Pull up a higher double crochet than a regular one. Use your pointer finger to prevent unravelling. Wrap the hook once. Insert the hook into the stitch. Yarn over to pull through. Then, complete the double crochet as you know it to be.
Technique #11
Front-to-back slip stitching can be done for all of these, instead of doing the traditional method of slip stitching by pulling the yarn from the back and through the first stitch to join.
Release the loop from the last stitch made in the round. Insert your hook from the back to the front, put the loop back onto the hook, and pull the loop through to the back. It seems to do a better job.

Finishing Technique
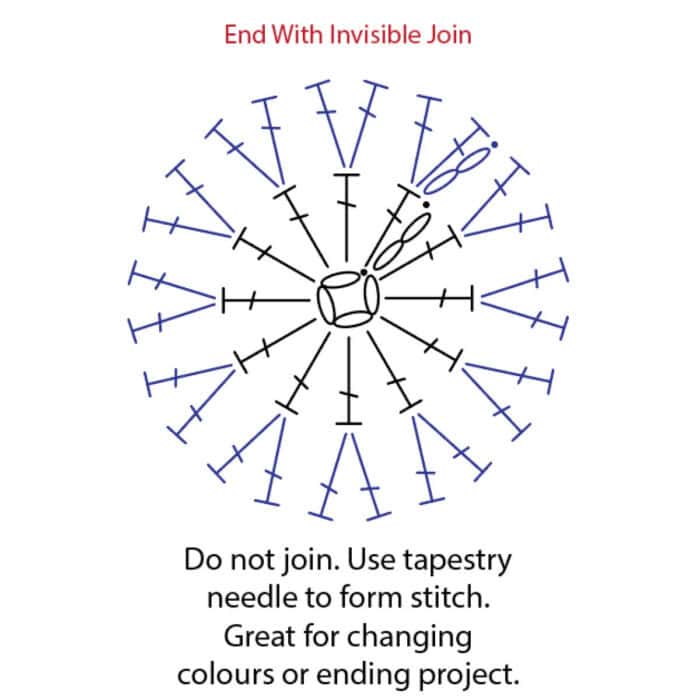
The stitch you use for this invisible join doesn't matter. You will not finish the round with a slip stitch if this is your final round with the colour or the end of the project.
You will use a tapestry needle to emulate the final stitch, and it will be nearly impossible to see where you finished it.
Pull it tight if you are moving to a new colour after the round. If you finish the project, make it look like the size of a regular stitch.
The tutorial below will show you.
You'll be able to use some of these techniques in our up-and-coming stitch-along for Summer 2024.

Leave me your thoughts...