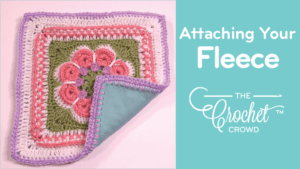
How to Attach An Existing Crochet Project to Fleece
If you had intentions of matching a crochet project to the fleece for a backing. In previous articles, I have shown you how to measure and cut the fleece already.
I have also shown you how to do the first round of the fleece to prepare it to be attached. See the articles listed below if you haven't got this far yet.
Now, we are going to attach the fleece to the crochet project.
- Lay the fleece down so the wrong side is facing up. The good side should be facing down as that's the side you want friends and family to see after the attaching is complete.
- Lay down your project on top of the fleece with the good side facing up. This is the side your crochet project that you want your friends and family to see when complete.
- Using the same size hook as the original crochet project. Start in a corner and slip stitch through the corner of the project and ch-2 corner of the fleece. Ch 1, sc in same space. Sc across the project in each of the crochet stitches and equally spacing the stitches into the fleece side. You will notice the stitch counts don't match the fleece but if you equally space the stitches into the fleece, you can get away with a lot as it's barely noticeable on the fleece side.
- In corners, sc, ch 2, sc in each. Continue around in the same manner to attach.
- Once around fully, you can continue your project as normal for additional border work or stop if you feel like it. You are the artist, you know what is best for you.
Square Project Shown
The Project Shown is the Flower in the Square. It's a free design created by me.
Tutorial
More Fleece Articles
[the_grid name="Fleece"]
Leave me your thoughts...