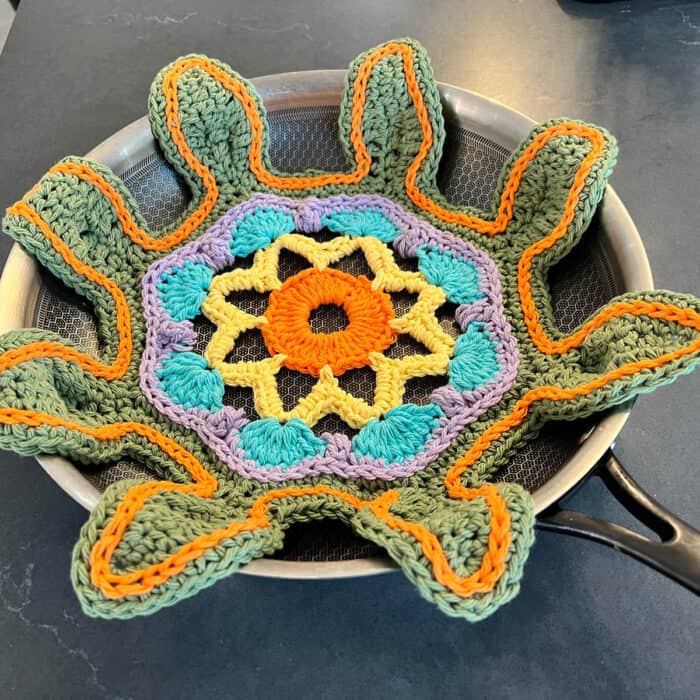
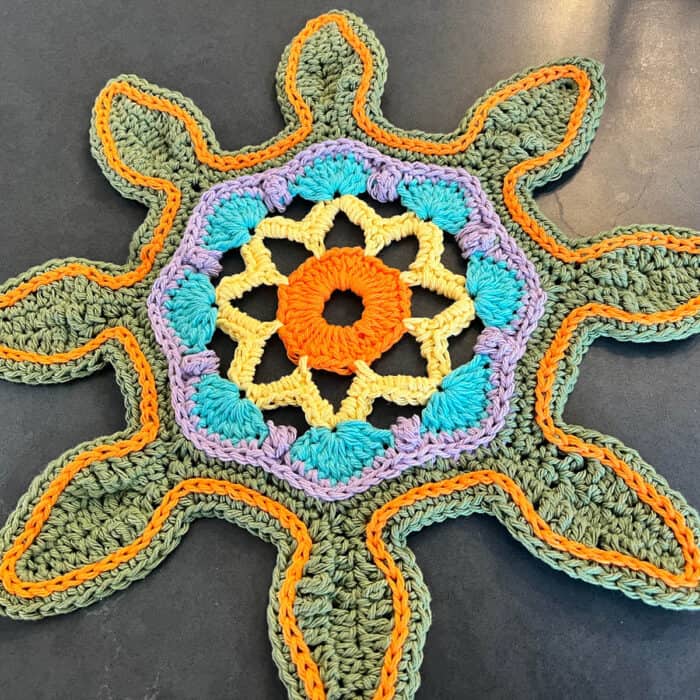
For those who want something fancier for their cookware protection, I designed one resembling an opening flower. Maybe you have glassware and want to see the protector through the glass, or perhaps you just want a table topper. Unlike the basic cookware protector we have, this is done as a one-piece unit with two rounds of added surface overlay. This is the Fancy Crochet Cookware Protector.
Please remove this before heating your pots or pants.

Materials and Hook
Lily Sugar’n Cream, 71g / 2.5 oz, 109 meters / 120 yards
- A - Hot Orange - 1 Ball
- B - Sunshine - 1 Ball
- C - Robbin’s Egg - 1 Ball
- D - Orchid - 1 Ball
- E - Jade Mist - 1 Ball
You will use less than one ball per item but the colour Jade Mist uses the most yarn of them all.
Use 5 mm / H/8 Crochet Hook
Gauge 13 sc and 14 rows with a 5 mm (U.S. H/8) crochet hook or size needed to obtain gauge.
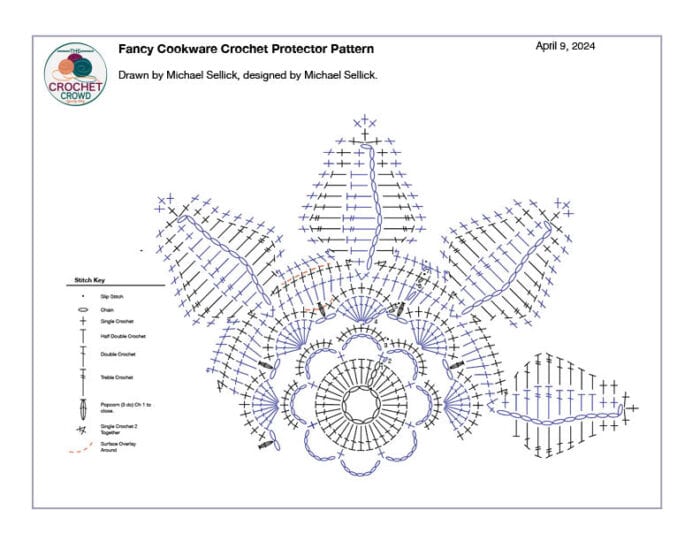
This pattern uses Surface Overlay techniques in two places. You can do it at the end of the project. I have provided a video below. It’s applied at the orange dotted line in the crochet diagram shown.

Abbreviations
- Ch(s) = Chain(s)
- Dc = Double crochet
- Hdc = Half double crochet
- Join = Slip stitch to the first stitch in the round.
- Popcorn = 3 dc in same st, remove hook. Insert hook from front in the top of the first dc in the group of 5. Put loop on hook and pull through first dc st. Ch 1 to finish.
- Rem = Remain(ing)
- Rep = Repeat
- RS = Right side
- Sc = Single crochet
- Sk = Skip
- Sl st = Slip stitch
- Sp(s) = Space(s)
- St(s) = Stitch(es)
- Tr = Treble

With A, ch 10. Sl st to beg ch to form ring.
1st rnd: RS. Ch 3. 31 dc in ring. Join. Break A. 32 dc.
2nd rnd: With B, join with sl st to top of beg ch-3 from rnd below. Ch 1. 1 sc in same st as join. Ch 7, sk next 3 dc. *1 sc in next dc, ch 7, sk next 3 dc. Rep from * around. Join. 8 ch-7 loops and 8 sc.
3rd rnd: 9 sc in each ch-7 loop around. Join. Break B.
4th rnd: With C, join with sl st to 5th dc of a group of 9. Ch 3, 8 dc into same st as join. Ch 2. *9 dc in 5th dc in next group of 9 dc. Ch 2. Rep from * around. Join. Break C.
5th rnd: With D, join to the top of beg ch-3 in rnd below. Ch 1. 1 sc same st as join. 1 sc in next 8 dc. Popcorn in next ch-2 sp. *1 sc in next 9 dc, popcorn in next ch-2 sp. Rep from * around. Join. Break D.
6th rnd: With E, join with sl st to top of any popcorn. Ch 1, 1 sc in same st as join. *1 sc in next 5 sc. Ch 12. (1 sc in 2nd ch from hook, 1 sc in next ch, 1 hdc in next 2 ch, 1 dc in next 2 ch, 1 tr in next 2 ch, 1 dc in next ch, 1 hdc in next ch, 1 sc in next ch) - petal created. 1 sc in same sc where ch-12 started. 1 sc in next 4 sc. *1 sc in next 6 sc. Ch 12. (1 sc in 2nd ch from hook, 1 sc in next ch, 1 hdc in next 2 ch, 1 dc in next 2 ch, 1 tr in next 2 ch, 1 dc in next ch, 1 hdc in next ch, 1 sc in next ch) - petal created. 1 sc in same sc where ch-12 started. 1 sc in next 4 sc. Rep from * around. Join.
7th rnd: Ch 1, 1 sc in next st as join. 1 sc in next 3 sc. Sc2tog over next 2 sts that include 1 sc in rnd and first ch of ch-12. 1 hdc in next ch, 1 dc in next ch, 1 tr in next 2 chs, 1 dc in next 2 chs, 1 hdc in next 2 chs, 1 sc in next 2 sc. 3 sc in end of petal ch sp. 1 sc in next 2 sc. 1 hdc in next 2 hdc, 1 dc in next 2 dc, 1 tr in next 2 tr, 1 dc in next dc, 1 hdc in next hdc. Sc2tog over next 2 sts that include sc on petal and next empty st on rnd. 1 sc in next 2 sc. *1 sc in next 4 sc. Sc2tog over next 2 sts that include 1 sc in rnd and first ch of ch-12. 1 hdc in next ch, 1 dc in next ch, 1 tr in next 2 chs, 1 dc in next 2 chs, 1 hdc in next 2 chs, 1 sc in next 2 sc. 3 sc in end of petal ch sp. 1 sc in next 2 sc. 1 hdc in next 2 hdc, 1 dc in next 2 dc, 1 tr in next 2 tr, 1 dc in next dc, 1 hdc in next hdc. Sc2tog over next 2 sts that include sc on petal and next empty st on rnd. 1 sc in next 2 sc. Rep from * around. Join.
8th rnd: Ch 1, 1 sc in same st as join. 1 sc in next 2 sc. Sc2tog over next 3 sts, sk sc2tog st between the sc. 1 sc in next 10 sts. 3 sc in next st (point), 1 sc sc in next 10 sts. Sc2tog over next 3 sts, sk sc2tog st between the sc. 1 sc in next 2 sc. *1 sc in next 3 sc. Sc2tog over next 3 sts, sk sc2tog st between the sc. 1 sc in next 10 sts. 3 sc in next st (point), 1 sc sc in next 10 sts. Sc2tog over next 3 sts, sk sc2tog st between the sc. 1 sc in next 2 sc. Rep from * around. Join. Fasten off.
Surface Overlay Rounds
The surface overlay is not functional and just adds a bit more flare, visually, to the design.
With D, apply surface overlay around same colour posts of round 5. Use the video for the best results on finishing surface over.
With A, apply surfacing overlay around rnd 7.
You can download this pattern to print or save it for another time.
.
.
How to Do Surface Overlay
The red dotted lines show the two rounds to follow for this concept.
Leave me your thoughts...