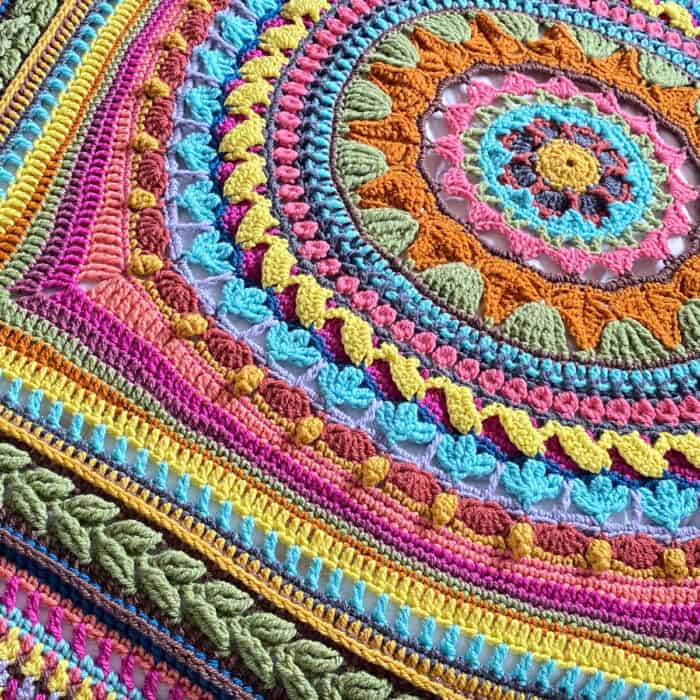
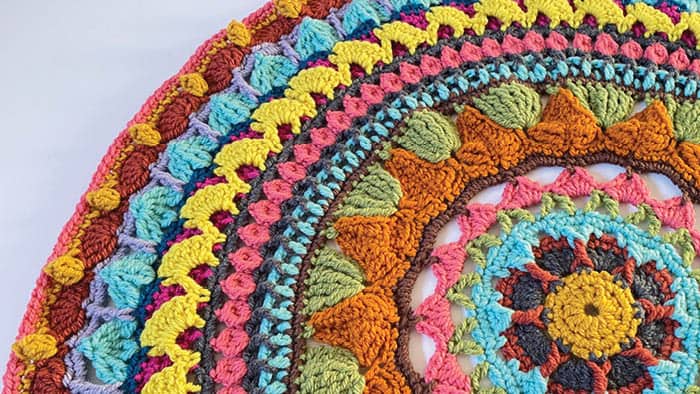
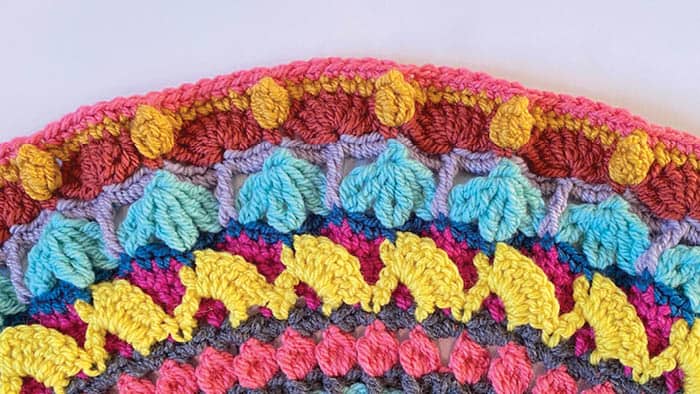
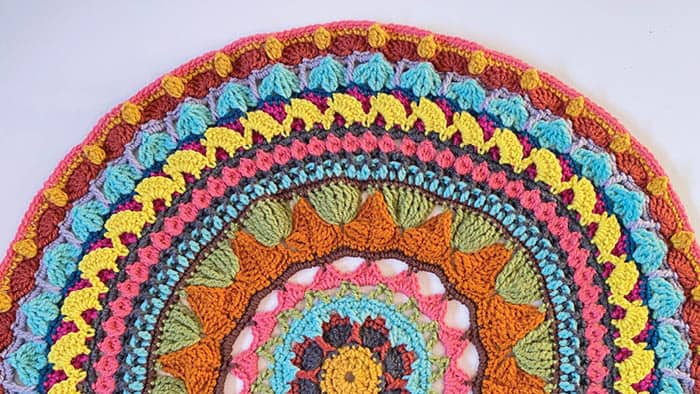
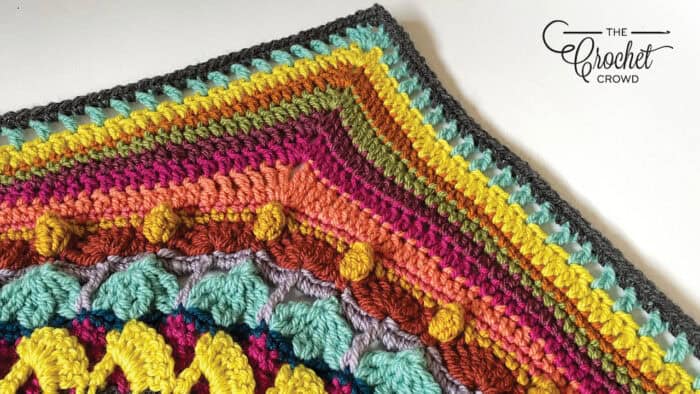
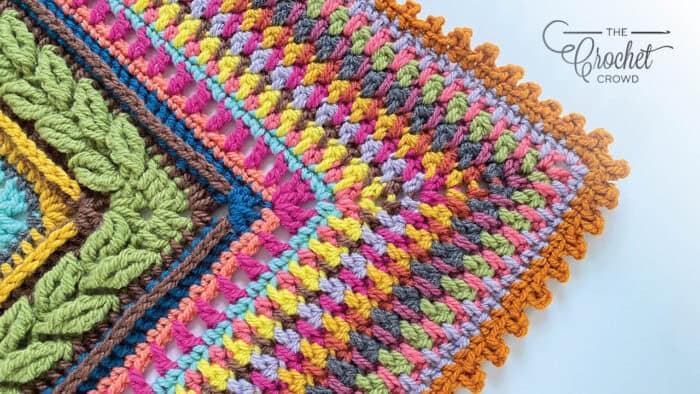
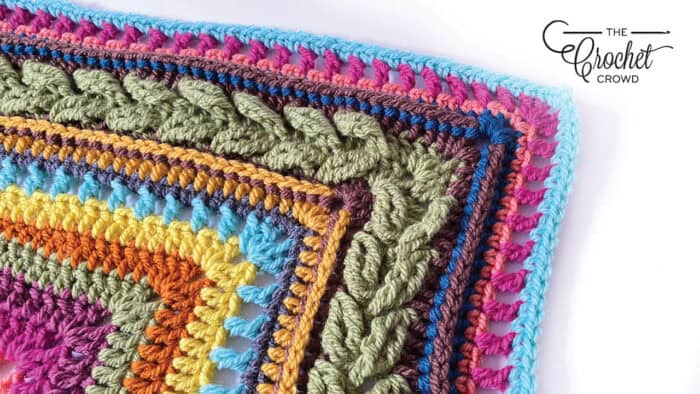
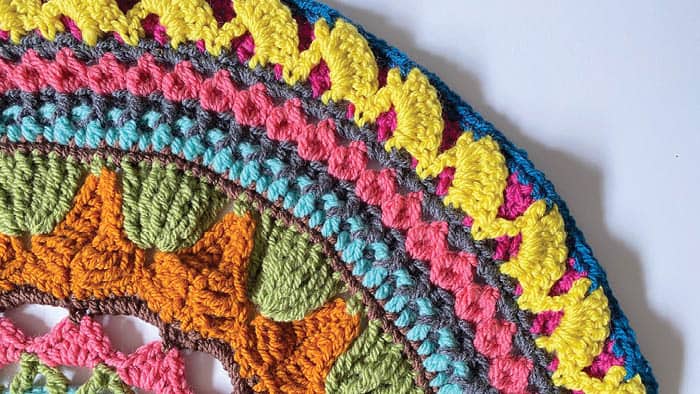
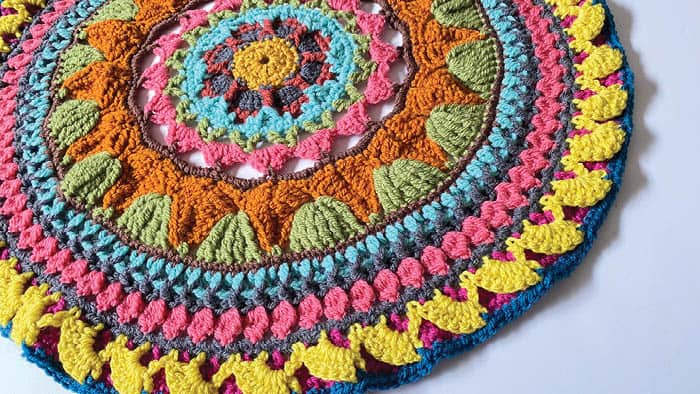
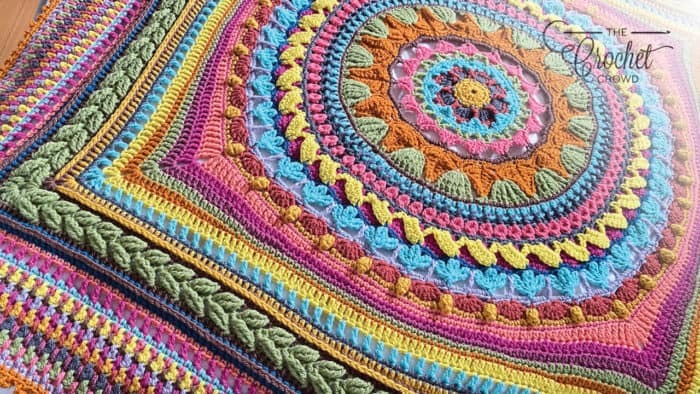
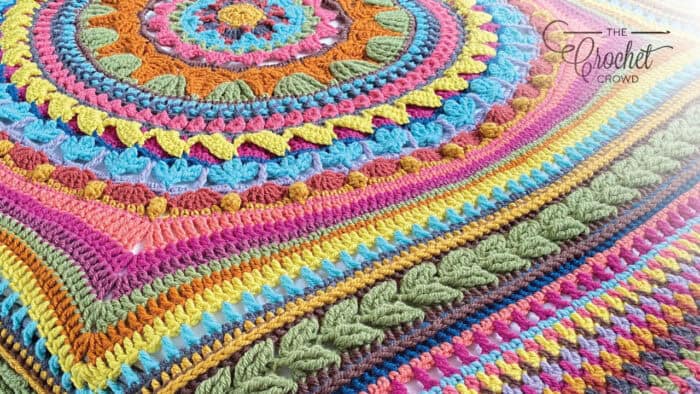
Crochet Stitch Along with a signature Mikey free patterns called the Study of the Journey Crochet Blanket. Completed with Patons Inspired yarn. This stitch along happened in 2021 and the complete pattern and tutorials are ready for you at any time.
This blanket was a tough design to create and took about 2 months from really pushing through it to ensure it stayed sitting flat with so much texture going on.
Free Pattern + Optional Purchase
The written pattern and crochet tutorials will remain free. The free download instructions will not include crochet diagrams.
The blanket is a journey of stitches I have learned since 2008. It's a heavy mix of textures that will make you feel an incredible sense of pride. A tremendous amount of thought went into the execution of the ordering and colours. It was designed with only 3 colours.
The purchased pattern includes the entire written instructions and crochet diagrams together in one download. The diagrams took about 78 hours to make, and the funds raised will go towards therapy for Mikey's hands.
.
.
.
Errors Located In the Book - SEE ALL ERRORS
Errors for this pattern are corrected in our free download below.
This pattern is in our first ever book that launched in September 2021. Simply called The Crochet Crowd, Inspire, Create and Celebrate.
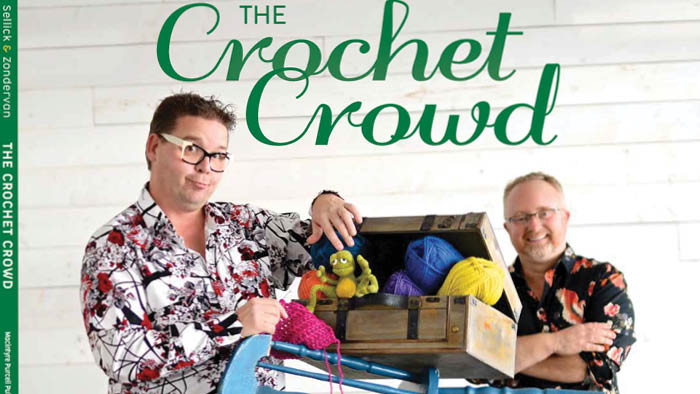
The yarn inside the trunk is Patons Inspired.
So, I am directly asking you not to hand over the pattern freely and allow people to purchase the book as literally there are 1000's hours invested into the book. I took a stand with my publisher to trust in us and he agreed it was okay. I told my publisher that I cannot put out a book with no pattern support for at least one project.
The finished sample was done with the following:
Patons® Inspired™ (150 g/5.3 oz, 203 m/222 yds)
- Contrast A - Silver Gray Heather 4 Balls
- Contrast B - Pacific Blue 4 Balls
- Contrast C - Sapphire Teal 3 Balls
Use size 6.5 mm, U.S. K/10.5 hook or hook size to obtain gauge. The project total is 1547 m/1692 yds. You will have some yarn leftover on the last ball of each colour assigned. Measurements approx 60” x 60” [152.5 x 152.5 cm]. Gauge 12 sc and 13 rows = 4” [10 cm].
I did this afghan in chunky format, which is unusual for me, but it grows faster and gets you to the finish line faster.
The design really taxed me in conceptual and thought processes. Our testers did multiple different yarn options that are in the book such as Caron Simply Soft, Caron Cotton Cakes and Scheepjes Colour Crafter. I did the original prototype in Caron Cotton Cakes but I wanted something heavier.
Cotton Cakes Gauge: 13 sc and 14 rows = 4” [10 cm]. Colours I used in prototype shown above as as follows:
Caron® Cotton Cakes™ (250 g/8.8 oz, 485 meters/530 yards)
- Contrast A Silver Cloud, 2 Balls
- Contrast B Cream, 2 Balls
- Contrast C Lilac, 2 Balls
My nemesis was getting this monster to sit down flat after going from the huge circle to the square, but I kept trying. I vowed I wasn't going to leave the table until I had the right mathematics and trials. I sat at the dining room table from the morning to sunset during July 2020 to figure it out, testing, frogging, testing, frogging, and so on.
The Crochet Crowd Book

Our book is available for ordering (pre-orders depending on stock levels), available for order at your local bookstores and online sources.
Book officially launches in September 2021, though pre-orders are now being processed and shipped.
ISBN: 978-1-77276-160-3
This was one of the hardest things I have ever done to create. Your purchase means a lot to me personally. We do almost everything pattern and video support for free. Investing in me keeps the tutorials and free patterns pumping out.
Please consider a purchase, and if you want to play along with the free tutorials for this stitch-along, the book will be our guide, and the pattern won't be shown on camera but just following the book instructions step by step.
Instructions
Patons® Inspired™ (150 g/5.3 oz, 203 m/222 yds)
Contrast A Silver Gray Heather 4 Balls
Contrast B Pacific Blue 4 Balls
Contrast C Sapphire Teal 3 Balls
Use size 6.5 mm, U.S. K/10.5 hook or hook size to obtain gauge. The project total is 1547 m/1692 yds. You will have some yarn left over on the last ball of each colour assigned.
Measurements approx 60” x 60” [152.5 x 152.5 cm].
Gauge 12 sc and 13 rows = 4” [10 cm].
Abbreviations
Some abbreviations are not used in this pattern but here as a reference, in alphabetical order.
- Approx Approximately
- Beg Begin(ing)
- Beg Sunset Reflection St Ch 3, 1 tr in same st (counts as 1), skip 2 sts, place tr4tog by placing 2 of the tog stitches in the next st, skip next 2 stitches, place next 2 tog stitches in the next st. Yoh and pull through 6 loops on hook.
- Bet Between
- Big V-st(s) Big V-stitch(es). 1 dc, ch 3, 1 dc using same st.
- Blo Back loop only
- Bpdc Back post double crochet
- Break At the end of each round where the colour is going to be changed. Break means to end the colour, fasten off and weave in ends. It’s assumed you are breaking the same colour being used in the round.
- Bs Bean stitch
- Ch Chain
- Cluster (Yoh and insert into stitch, yoh and pull through stitch, yoh pull through 2 loops.) 4 times. 5 loops on hook, yoh and pull through all 5 loops.
- Cr dcfp Cross Double Crochet Front Post. Miss next dc. Dcfp around post of next dc, then dcfp around post of missed dc.
- Dbl Double
- Dtr Double treble
- Dtrcl Double Treble Cluster, Yoh twice and draw up a loop in next stitch. (Yoh and draw through 2 loops on hook) 3 times. Yoh twice and draw up a loop in same stitch. (Yoh and draw through 2 loops on hook) 3 times. Yoh and draw through all 3 loops on hook.
- Dc Double crochet
- Dc2tog Double crochet 2 stitches back post (Yoh and draw up a loop in next stitch. Yoh and draw through 2 loops on hook) twice. Yoh and draw through all loops on hook.
- Dcbp Double crochet back post. Yoh and draw up a loop around post of stitch at back of work, inserting hook from right to left. (Yoh and draw through 2 loops on hook) twice.
- Dcfp Double crochet front post Yoh and draw up a loop around post of stitch at front of work, inserting hook from right to left. (Yoh and draw through 2 loops on hook) twice.
- Dec Decrease
- Ea Each
- Ex sc Extended single crochet
- Ex ex sc Extended extended single crochet. Insert hook into st, yoh, pull through, yoh, pull through 1 loop, yoh, pull through next loop, yoh, pull through final 2 loops.
- Fig Figure 1 (picture of stitch)
- Flat Petal St (1 tr, 5 dc, 1 tr) in same st. This stitch spans over 8 stitches.
- FLO Front loop only
- FP Front post
- FPdc Front post double crochet
- Gr Group
- Hdc Half double crochet
- Hdc Join Half double crochet join to the top of the beg ch or st.
- Inc Increase
- Join At the end of a round, join to the beginning stitch or top of a beginning chain with a slip stitch.
- Ldc Long double crochet
- Lp(s) Loop(s)
- Lsc Long single crochet
- MC Main color
- Pat Pattern
- Pc st Popcorn stitch, see pattern for definitions as not a standard stitch or count.
- Picot Ch 3. Sl st back into last sc worked.
- Prev Previous
- Puff St Puff stitch, (Yoh and Insert hook into assigned stitch or space. Yoh, draw through stitch or sp, yoh and through 2 loops on hook.) 3 times. Yoh and draw through 3 loops only, leaving the last 2 loops on hook. Yoh and draw through the last 2 loops.
- Rem Remaining
- Rep Repeat
- Rnd(s) Round(s)
- RS right side
- Rsc Reverse single crochet
- Sc Single crochet
- Scbp Single crochet back post
- Scfp Single crochet front post
- Shark Fin St 1 sc, ch 2, sk next 2 sts, 1 tr in next. Ch 3, 6 dc along the tr post. Sk next 2 sts.
- Sk Skip
- Sl cl Slanted cluster, sk 3 sts, (3 dc, ch 3, 1 sc) in next
- st.
- Sl st Slip stitch
- Sp(s) Space(s)
- Spec Tog St 1 dc + 1 hdc together as a st. The dc will use the next empty or assigned stitch 2 rnds below by going over top of the ch 1 completely so the ch 1 is encased inside the dc. Then use the next hdc st in rnd below to bring them together.
- Splhdc Split half double crochet, work hdc between ‘legs’ at front and back of stitch (splitting stitch) instead of through top loops.
- St(s) Stitch(es)
- Standing Sc Form slip knot and insert onto the hook. Insert hook into st, yoh and pull loop through, yoh through 2 loops.
- Sunset Reflection St Tr6tog spanning over the next 7 stitches. Place 2 tr stitches in first st, skip 2 sts, place 2 stitches in next st, skip 2 stitches, place last 2 stitches in next st. Yoh and pull through all 7 loops.
- Tog Together
- Tr Treble
- Tr2tog Treble crochet 2 together, *Yoh twice and draw up a loop in next stitch. (Yoh and draw through 2 loops on hook) twice. Repeat from * once. Yoh and draw through all 3 loops on hook.
- Tr4tog Treble crochet 4 together, *Yoh twice and draw up a loop in next stitch. (Yoh and draw through 2 loops on hook) twice. Repeat from * 3 times. Yoh and draw through all 5 loops on hook.
- Trbp4tog Treble crochet back post 4 together, *Yoh twice and draw up a loop around post of stitch at back of work, inserting hook from right to left. (Yoh and draw through 2 loops on hook) twice. Repeat from * 3 more times. Yoh and draw through all 5 loops on hook.
- Trbp8tog Treble crochet back post 8 together, *Yoh twice and draw up a loop around post of stitch at back of work, inserting hook from right to left. (Yoh and draw through 2 loops on hook) twice. Repeat from * 7 more times. Yoh and draw through all 9 loops on hook.
- Trbp Treble back post, Yoh twice and draw up a loop around post of stitch at back of work, inserting hook from right to left. (Yoh and draw through 2 loops on hook) three times.
- Trfp2tog Treble crochet front post 2 together, *Yoh twice and draw up a loop around post of stitch at front of work, inserting hook from right to left. (Yoh and draw through 2 loops on hook) twice. Repeat from * once. Yoh and draw through all 3 loops on hook.
- Trfp Treble front post, Yoh twice and draw up a loop around post of stitch at front of work, inserting hook from right to left. (Yoh and draw through 2 loops on hook) three times.
- WS wrong side
- X-st Skip next st or sp, dc in next st or sp, dc in skipped st or sp.
- Xsc Skip the 1st st, 1 sc in next st. 1 sc in the skipped st and directly over the first st to bury it.
- Yo(h) Yarn over or yarn over hook
Special Stitches: The popcorn and shell stitches can be defined many ways. For this pattern it is as follows:
- Popcorn = 4 dc in same st, remove hook. Insert hook from front in the top of the first dc in the group
- Shell = 7 dc in same st.
NOTES
● Join stated at the end of the rounds is assumed to slip stitch to the beginning stitch or top of the beginning chain. Unless otherwise stated.
● For the instructions in rounds, each instruction is followed by a breakdown of stitches and total round. An example at the end of:
◊ Round 14: Join. Break. 16 groups of 7 dtr, 16 sc and 32 ch 1 sps. 160 sts. It has the number of grouped stitches such as 16 in this case. With the count of 16 single crochet and 32 ch 1 spaces. Followed at the end for a total stitch count for the entire round.
● Here are the instructions for the blanket transitioning from the circle to a square. It will give the total stitch count per side and then a total stitch count for the entire round. An example is the end of:
◊ Round 44: Join with hdc. 125 sts. 500 sts. There are 125 stitches per side and 500
stitches around.
Where It All Began
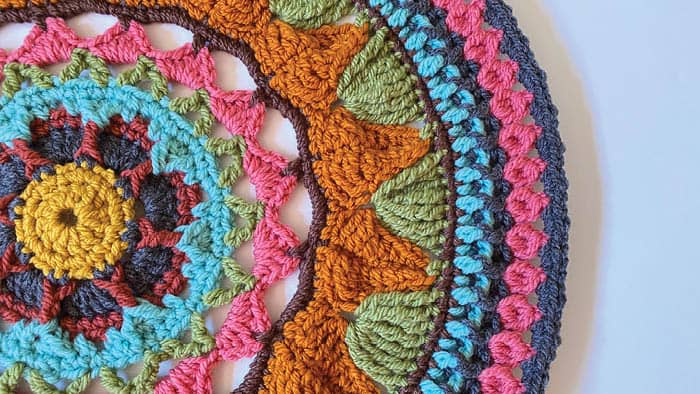
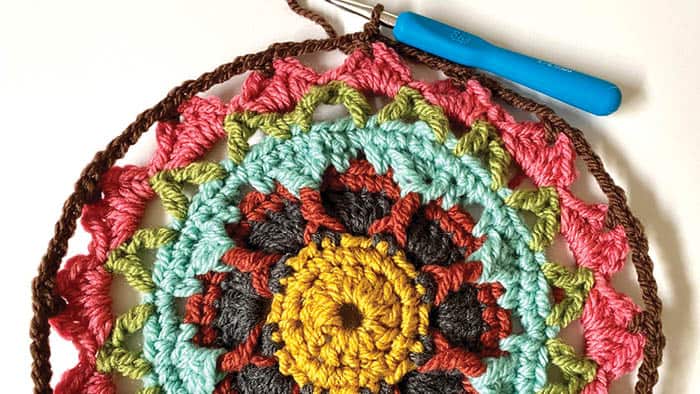
1st rnd: (RS) With A, ch 3 (ch 3 doesn’t count as st in this rnd). 12 dc in 3rd ch from hook. Join with sl st to top of first dc. 12 dc.
2nd rnd: Ch 1, 2 sc in same sp as sl st. 2 sc in each st around. Join. 24 sc.
3rd rnd: Ch 1, 1 sc in same sp as sl st. 1 sc next st, ch 2, sk next st. *1 sc in next 2 sts, ch 2, sk next st. Rep from * around. Join. Break. 16 sc and 8 ch 2 sps.
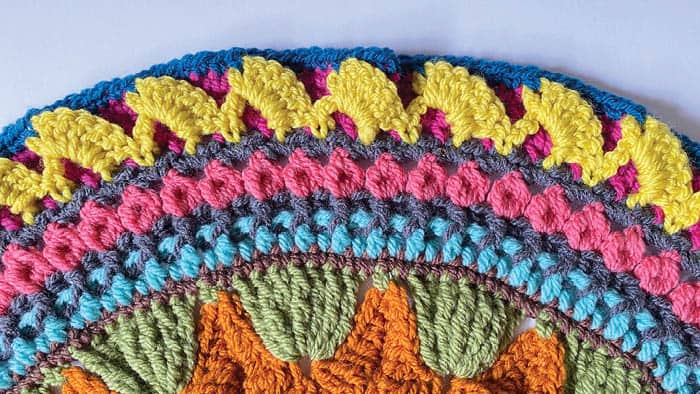
4th rnd: With C, join with sl st to next ch 2 sp. Ch 3 (counts as dc in this round and throughout). 4 dc in same ch 2 sp. *5 dc in next ch 2 sp. Rep from * around. Join. Break. 40 dc.
TIP: In the next round, our testers thought it would be easier for you to put a stitch marker at the top of trfp. It’s easier to find where the 2 sc goes into the top of the trfp in rnd 6.
5th rnd: With B, join with standing sc in the same sl st. 1 sc in next 4 st. 1 trfp around both sc sts in 3rd rnd. The trfp is an extra st that is in front to help the circle grow bigger. Start next st in the next group of 5 sts. *1 sc in next 5 sts, 1 trfp around both sc sts in 3rd rnd. Rep from * around. Join. 40 sc and 8 trfp.
6th rnd: Ch 1, *1 dcfp around the last trfp st that we just passed in rnd 5. 1 sc in next st, ch 2, sk next st, 1 sc in next st, 1 dcfp around next trfp in rnd 5, 2 sc in top of trfp st. Rep from * around. Join to beg dcfp. Break. 8 ch 2 sps, 32 sc and 16 dcfp.
7th rnd: With A, standing sc in same sp as sl st. 1 sc in next st. 2 sc in ch 2 sp. *1 sc in next 6 sts, 2 sc in next ch 2 sp. Rep from * around to last 4 sts. 1 sc in last 4 sts. Join. 64 sc.
8th rnd: Ch 6 (counts as dc and ch 3 sp). 1 dc in next st. *Sk 2 sts, 1 dc in next st, ch 3, 1 dc in next st. - big v-stitch made. Rep from * around. Join to 3rd ch of beg ch 6. Break. 16 big v-sts.
9th rnd: With C, join with sl st to next ch 3 sp. Ch 1, (1 sc, 1 hdc, 1 dc, ch 1, 1 dc, 1 hdc, 1 sc, ch 1) in same ch 3 sp. *(1 sc, 1 hdc, 1 dc, ch 1, 1 dc, 1 hdc, 1 sc, ch 1) in next ch 3 sp. Rep from * around. Join. Break. 32 sc, 32 hdc, 32 dc and 16 ch 1 sps.
10th rnd: With A with standing sc in ch 1 sp of the next petal point. Ch 5, *1 sc in next ch 1 on the next petal. Ch 5. Rep from * around. Join. 16 ch 5 sps and 16 sc.
Sunshine Rays Section
11th rnd: Continue with A, ch 1, 1 sc in same join sp. 6 sc in next ch 5 sp, *1 sc in next sc st. 6 sc in next ch 5 sp. Rep from * around. Join. 112 sc.
TIP: The next rnd is the foundation of building the sunshine rays.
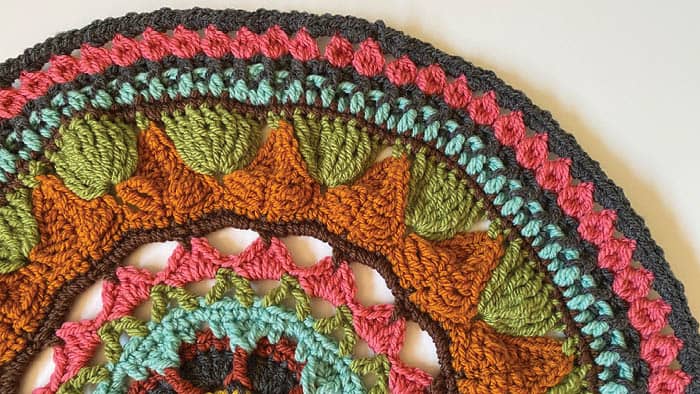
12th rnd: Ch 1, 1 sc in same join sp. Ch 8. 1 sc in 3rd ch from hook, 1 sc in next 5 chs. 1 sc in next 6 sts, *1 sc in next st, ch 8, 1 sc 3rd ch from hook, 1 sc in next 5 chs, 1 sc in next 6 sts. Rep from * around. Join. Break. 112 sc and 16 ch petals.
13th rnd: With B, join with sl st to middle sc between two ch petals. Ch 1, 1 sc in same join sp. *Sk to the 4th st to begin using only the ch petals, tr2tog using next 2 sts, 1 dc in next st, 1 hdc in next 2 sts, 1 sc in next st, 3 sc in ch sp at the tip of petal. 1 sc in next st, 1 hdc in next 2 sts, 1 dc in next st, tr2tog using next 2 sts. **1 sc in 4th st between the ch petals. Rep from * around to the start of last petal. Rep * to ** once. Join. Break. 16 petals around. 13 sts per petal, 1 sc between each petal. 224 sts.
TIP: The project will appear to buckle, but keep on going.
14th rnd: With A, join with sl st to same join sp. Ch 5 (counts as dtr), 6 dtr in same join sp. Ch 1, 1 sc in the middle sc of the next petal point. Ch 1. *7 dtr in next sc between petals, ch 1, 1 sc in the middle sc of the next petal point, ch 1. Rep from * around. Join. Break. 16 groups of 7 dtr, 16 sc and 32 ch 1 sps. 160 sts.
15th rnd: With C, using standing sc on one of the first dtr sts. 1 sc in each st and ch 1 sp around. Join. 160 sts.
16th rnd: Ch 3 (counts as dc), 1 dc in each st around. Join. Break. 160 sts.
17th rnd: With A, join with sl st to same join sp. Ch 1, 1 dcfp around same post as join, 1 dcbp around next st. *1 dcfp around next st, 1 dcbp around next st. Rep from * around. Join. Break. 160 sts.
18th rnd: With B, join with sl st to same join sp. Ch 2, cluster in the same sp as join. Ch 2. *Sk next st, cluster in next st, ch 2. Rep from * around. Join. Break. 80 clusters and 80 ch 2 sps.
19th rnd: With A, join with sl st to next ch 2 sp. Ch 1, *3 sc in each ch 2 sp around. Join. Break. Turn. 240 sc.
Around the Mulberry Bush Section
The next round, we need to work on the WS (Wrong Side). We are going to create shark fins, but we want them to lean back into the project; so it must be completed on the wrong side. There are multiple steps to make one fin.
20th rnd: WS With C, join with standing sc to same join sp. Starting in the same stitch as join. Shark fin st around. Join. Break. Turn. 40 shark fins.
21st rnd: RS Lean fins forward toward you and work behind fins. With B, join with standing sc in next st in rnd 19. Ch 2, sk 2 sts on 19th rnd which includes the st that the shark fin uses, 1 sc in next st. Sk next 2 sts, ch 2. *1 sc in next st on 19th rnd, ch 2, sk 2 sts on 19th rnd. Rep from * around. Join. 80 ch 2 sp and 80 sc.
TIP: Read carefully the next rnd.
22nd rnd: Sl st to next ch 2 sp. Ch 3 (counts as dc), 2 dc in same sp. 3 dc in next ch 2 sp, 1 dc in next sc st. *3 dc in next 2 ch 2 sps, 1 dc in next sc. Rep from * around. Join. 280 dc.
23rd rnd: Ch 1, 1 sc in each st around. Join. Break. 280 sc.
24th rnd: With A, join with standing sc 1 st before the join, 1 sc in next 4 sts, 1 sc in next st going through the space between the ch 3 and next post of the first shark fin to pin it back. *1 sc in next 6 sts, 1 sc going through shark fin post first and next st together. Rep from * around. 1 sc in last st. Join. 280 sc.
Sunsets Section
The Sunset Reflection Stitch uses 7 stitches for each sunset. It consists of Tr6tog with intentional spacing between the groups. 2 of each of the rays of the sunset share the same stitch.
25th rnd: Beg sunset reflection st, ch 8. *Sunset reflection st, ch 8. Start with using next st. Rep from * around. Join. Break. 40 reflection sunset groups.
26th rnd: With C, join with sl st in any ch 8 sp. Ch 1, in each ch 8 space around [4 sc in ch 8 sp, 1 tr in front of ch 8 sp last st used by the last sunset reflection just passed, 4 sc]. Join. Break. 40 groups of 9. 360 sts.
27th rnd: With B, join with standing sc in same join sp. Sk 3 sts, 1 flat petal st in next tr st, sk 4 sts, *1 sc in next st, sk 3 sts, 1 flat petal st in next st (this is the tr st for reference), sk 4 sts. Rep from * around. Join. Break. 40 flat petals, 40 sc. 320 sts.
28th rnd: With A, join with standing sc on the 2nd st of a flat petal. 1 sc in next 4 sts, ch 1, sk next tr, 1 popcorn in next st, ch 1, sk next st. *1 sc in next 5 sts, sk next st, ch 1, 1 popcorn in next st, ch 1, sk next st. Rep from * around. Join. 40 popcorn, 80 ch 1 sps and 200 sc.
29th rnd: Ch 1, 1 sc in same join sp, 1 sc in next 4 st. 1 sc in each sp before and after next popcorn. *1 sc in next 5 sc sts, 1 sc in each sp before and after next popcorn. Rep from * around. Join. Break. 280 sts.
Transition To A New Life
Prepare the next round with stitch markers to locate the corners. Use the first st as the first corner and place a stitch marker. (Starting in next st, count to the 70th st and mark with a stitch marker.) 3 times. The 70th stitch is after the 10th popcorn in first sc by itself after a stitch that has 2 sc in the top of the popcorn. When counting the stitches per side, don’t include the chain spaces that make up the turn of a corner.
30th rnd: With C, join with sl st to same join sp. Ch 4 (counts as tr), 1 tr in same join sp. *1 tr in next 4 sts, 1 dc in next 7 sts, 1 hdc in next 7 sts, 1 sc in next 33 sts, 1 hdc in next 7 sts, 1 dc in next 7 sts, 1 tr in next 4 sts. ** (2 tr. Ch 2. 2 tr) in next stitch. Rep from * twice more, then * to ** once. 2 tr in same join sp at the beginning. Join with hdc. 73 sts. 292 sts.
31st rnd: Ch 3 (counts as dc), 1 dc in same join sp. *1 dc in next 14 sts, 1 hdc in next 14 sts, 1 sc in next 17 sts, 1 hdc in next 14 sts, 1 dc in next 14 sts. ** (2 dc. Ch 2. 2 dc) in next corner sp. Rep from * twice more, then * to ** once. 2 dc in same join sp at the beginning. Ch 2, join. Break. 77 sts. 308 sts.
32nd rnd: With B, join with sl st to ch 2 sp corner. Ch 3 (counts as dc), 1 dc in same join sp. *1 dc in next 10 sts, 1 hdc in next 10 sts, 1 sc in next 37 sts, 1 hdc in next 10 sts, 1 dc in next 10 sts. ** (2 dc. Ch 2. 2 dc) in next corner sp. Rep from * twice more, then * to ** once. 2 dc in same join sp at the beginning. Join with hdc. 81 sts. 324 sts.
33rd rnd: Ch 3 (counts as dc), 1 dc in same join sp. *1 dc in next 8 sts, 1 hdc in next 8 sts, 1 sc in next 49 sts, 1 hdc in next 8 sts, 1 dc in next 8 sts. ** (2 dc. Ch 2. 2 dc) in next corner sp. Rep from * twice more, then * to ** once. 2 dc in same join sp at the beginning. Join with hdc. 85 sts. 340 sts.
34th rnd: Ch 3 (counts as dc), 1 dc in same join sp. *1 dc in next 8 sts, 1 hdc in next 8 sts, 1 sc in next 53 sts, 1 hdc in next 8 sts, 1 dc in next 8 sts. ** (2 dc. Ch 2. 2 dc) in next corner sp. Rep from * twice more, then * to ** once. 2 dc in same join sp at the beginning. Ch 2, join. Break. 89 sts. 356 sts.
35th rnd: With A, join with sl st to ch 2 sp corner. Ch 3 (counts as dc), 1 dc in same join sp. *1 dc in each st to corner. ** (2 dc. Ch 2. 2 dc) in next corner sp. Rep from * twice more, then * to ** once. 2 dc in same join sp at the beginning. Join with hdc. 93 sts. 372 sts.
36th rnd: Ch 3, 1 dc in same corner sp. Ch 1, *sk next st. (1 dc in next st, ch 1, sk next st) 46 times. (2 dc. Ch 2. 2 dc) in next corner sp. Rep from * 2 more times, then rep * to ** once. 2 dc in beg corner sp. Join with hdc. 97 sts (47 ch 1 sps included). 388 sts
37th rnd: Ch 1, 1 sc in same corner sp. *1 sc in each st and ch 1 sp across. (1 sc. Ch 2. 1 sc) in corner sp. Rep from * 2 more times, then * to ** once. 1 sc in beg corner sp. Ch 2. Join. Break. 99 sts. 396 sts.
Raised Leaves Section
38th rnd: With B, join with sl st to corner sp. Ch 3 (counts as dc), 1 dc in same join sp. *1 dc in each st to corner. ** (2 dc. Ch 2. 2 dc) in next corner sp. Rep from * twice more, then * to ** once. 2 dc in same join sp at the beginning. Join with hdc. 103 sts. 412 sts.
39th rnd: Ch 1 (doesn’t count as st), 2 hdc in same sp. 1 dcbp in each st to next corner. ** (2 hdc. Ch 2. 2 hdc) in next corner sp. Rep from * twice more, then * to ** once. 2 hdc in same join sp at the beginning. Ch 2, join. Break. 107 sts. 428 sts.
40th rnd: With C, join with sl st to corner sp. Ch 3, 1 dc in same corner sp. *[Sk next 3 sts. 1 dtrcl in next st. Working behind last dtr, 1 dc in each of 3 skipped sts.] 26 times. Sk next 3 sts, 1 dtrcl in next corner sp, 1 dc in each of the 3 skipped sts.** (1 dc. Ch 2. 2 dc) in next corner sp. Rep from *twice more, then * to ** once. 1 dc in beg corner sp. Join with hdc. 27 arrow sts. 111 sts per side. 444 sts.
41st rnd: Ch 3, 1 dc in same corner sp. *1 dc in next 2 sts. [Sk next st. 1 dc in next 3 sts. Working in front, 1 dtrcl in skipped st.] 27 times. 1 dc in next st.** (2 dc. Ch 2. 2 dc) in corner sp. Rep from * twice more, then * to ** one. 2 dc in beg corner sp. Ch 2, join. Break. 27 arrow sts. 115 sts per side. 460 sts.
42nd rnd: With A, join with sl st to corner sp. Ch 1, 1 sc in same corner sp. *1 sc in each st across. ** (1 sc. Ch 2. 1 sc) in corner sp. Rep from * 2 more times, then from * to ** once. 1 sc in beg corner sp. Join with hdc. 125 sts. 500 sts.
43rd rnd: Ch 1 (doesn’t count as st), 2 hdc in same st. 1 dcbp in each st to next corner. ** (2 hdc. Ch 2. 2 hdc) in next corner sp. Rep from * twice more, then * to ** once. 2 hdc in same join sp at the beginning. Ch 2, join. Break. 123 sts. 492 sts.
44th rnd: With A, join with sl st to corner sp. Ch 1, 1 sc in same corner sp. *1 sc in each st across. (1 sc. Ch 2. 1 sc) in corner sp. Rep from * 2 more times, then * once. 1 sc in beg corner sp. Join with hdc. 125 sts. 500 sts.
45th rnd: Ch 3, 1 dc in same corner sp. *Ch 1, sk next st. (1 dc in next st, ch 1, sk next st) 62 times. ** (2 dc. Ch 2. 2 dc) in next corner sp. Rep from * 2 more times, then from * to ** once. 2 dc in beg corner sp. Join with hdc. 63 ch 1 sps per side. 129 sts. 516 sts.
46th rnd: Ch 1, 1 sc in same corner sp. *1 sc in each st and ch 1 sp across. ** (1 sc. Ch 2. 1 sc) in corner sp. Rep from * 2 more times, then from * to ** once. 1 sc in beg corner sp. Ch 2. Join. Break. 131 sts. 524 sts.
The Road Less Travelled
As we begin the next round we need to set ourselves up so that the afghan will not buckle in the future. I placed stitch markers after each group of 9 so it’s easier to count.
47th rnd: With B, join with sl st to corner sp. Ch 1, 1 hdc in same corner sp. *Ch 1, sk next st. (1 hdc in next st, ch 1, sk next st) 65 times. ** (1 hdc. Ch 2. 1 hdc) in
next corner sp. Rep from * 2 more times, then from * to ** once. 1 hdc in beg corner sp. Ch 2, join. Break. 67 hdc and 66 ch 1 sps per side. 133 sts. 532 sts.
48th rnd: With C, join with sl st to corner sp. Ch 1, 1 hdc in same sp. *[Ch 1, 1 spec tog st]. Rep [ ] to next corner. ** (1 hdc. Ch 2. 1 hdc) in next corner sp. Rep from * 2 more times, then from * to ** once. 1 hdc in beg corner sp. Ch 2, join. Break. 66 spec tog sts with 66 ch 1 sps per side and 2 hdc in corner. 134 sts. 536 sts.
TIP: The next rnd for this section has a special added stitch that keeps this section in balance but also helps it to grow outward to stay flat. It’s the last stitch before each corner.
49th rnd: With B, join with sl st to corner sp. Ch 1, 1 hdc in same corner sp, *ch 1, sk next st. (1 hdc in next ch 1 sp, ch 1, sk next st) 66 times. 1 hdc between the posts of the spec tog st and last hdc before corner. Ch 1. (1 hdc. Ch 2. 1 hdc) in next corner sp. Rep from * 2 more times, then from * to ** once. 1 hdc in beg corner sp. Ch 2, join. Break. 69 hdc sts and 68 ch 1 sps per side. 135 sts. 540 sts.
50th rnd: With A, join with sl st to corner sp. Ch 1, 1 hdc in same sp. *[Ch 1, 1 spec tog st]. Rep to the next corner. ** (1 hdc. Ch 2. 1 hdc) in next corner sp. Rep from * 2 more times, then from * to ** once. 1 hdc in beg corner sp. Ch 2, join. Break. 68 spec tog sts, 68 ch 1 sps, 2 hdc per side. 138 sts. 552 sts.
51st rnd and alt rnds: As rnd 49. Alternate rounds are 53, 55 and 57.
52nd rnd: With C, as rnd 50.
54th rnd: With A, as rnd 50.
56th rnd: With C, as rnd 50.
It’s A Wrap - Final Border
58th rnd: With A, join with sl st to corner sp. Ch 1, 1 sc in same corner sp. *1 sc in next hdc, [1 dc in next st 2 rows below, encasing the ch 1 sp in the row below inside st, 1 sc in next st.] Rep [ ] to next corner. ** (1 sc. Ch 2. 1 sc) in corner sp. Rep from * 2 more times, then from * to ** once. 1 sc in beg corner sp. Join with hdc. 76 dc sts and 79 sc sts per side. 155 sts. 620 sts.
59th rnd: Ch 1, 1 sc in same corner sp. Picot, 1 sc in same corner sp. *1 sc in next st, picot, (1 sc in next 2 sts, picot) to next corner. 1 sc in corner sp. ** [1 sc in same corner sp, picot, 1 sc in same corner sp.] twice.” Rep from * 2 more times, then * to ** once. 1 sc in last corner sp, picot, 1 sc in same sp. Join. Fasten off.
Stitch Along
This stitch-along is complete, and the videos are attached below and ready to go.
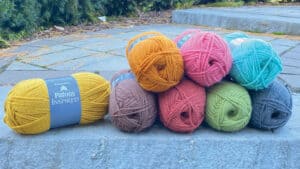
I have one ball of every colour on hand and a few with several balls. My goal is to randomize the blanket to use up what I have. Tutorial Version will be randomized in colouring with Patons Inspired that include the following colours:
I will record if I use more than 1 ball of colour in the tutorial as I go.
- Gray Heather
- Raspberry
- Honey Spice
- Olive - I USED 2 BALLS
- Burgundy
- Cocao
- Ginger
- Rich Teal
- Celery (not shown in the group shot)
- Violet (not shown in the group shot)
- Fucshia (not shown in group shot)
- Purple Gray (not shown in group shot)
- Rich Teal (not shown in group shot)
- Clay (not shown in group shot)
See the bottom of the article for ordering the colours done in the tutorial.
Gauge Check
Tutorials
The tutorials use different colour palettes; before each tutorial, the colour and round number are shown below.
All yarn is Patons Inspired.
- Rnds 1 & 2 = Honey Spice
- Rnd 3 & 4 = Silver Gray Heather
- Rnd 5 = Burgundy
- Rnd 6 & 7 = Mineral Teal
- Rnd 8 = Olive
- Rnd 9 = Raspberry
- Rnd 10 = Cocoa
All yarn is Patons Inspired.
- Rnd 11 = Cocoa
- Rnds 12 & 13 = Ginger
- Rnd 14 = Olive
- Rnd 15 = Cocoa
- Rnd 16 = Mineral Teal
- Rnd 17 = Silver Gray Heather
- Rnd 18 = Raspberry
- Rnd 19 = Silver Gray Heather
All yarn is Patons Inspired.
- Rnd 20 = Celery
- Rnd 21 to 23 = Fucshia
- Rnd 24 = Rich Teal
All yarn is Patons Inspired.
- Rnd 25 = Mineral Teal
- Rnd 26 = Purple Gray
- Rnd 27 = Burgundy
- Rnd 28 = Honey Spice
- Rnd 29 = Clay
All yarn is Patons Inspired.
- Rnd 30 = Clay
- Rnd 31 = Fuschia
- Rnd 32 = Violet
- Rnd 33 = Olive
- Rnd 34 = Ginger
- Rnd 35 = Celery
- Rnd 36 = Mineral Teal
- Rnd 37 = Silver Gray Heather
All yarn is Patons Inspired.
- Rnd 38 = Honey Spice
- Rnd 39 = Cocoa
- Rnd 40 & 41 = Olive
- Rnd 42 = Cocoa
- Rnd 43 = Rich Teal
- Rnd 44 = Clay
- Rnd 45 = Fucshia
- Rnd 46 = Mineral Teal
All yarn is Patons Inspired.
- Rnd 47 = Raspberry
- Rnd 48 = Celery
- Rnd 49 = Cocoa
- Rnd 50 = Purple Gray
- Rnd 51 = Fucshia
- Rnd 52 = Honey Spice
- Rnd 53 = Burgundy
- Rnd 54 = Silver Gray Heather
- Rnd 55 = Purple Gray
- Rnd 56 = Olive
- Rnd 57 = Raspberry
- Rnd 58 = Orchid
- Rnd 59 = Ginger
Christiane says
I love crochet and knitting and I´m always looking for new inspirations....You´re doing GREAT Job <§
Elizabeth Montes says
Crocheting makes me feel stress free. I have had a lot of health issues since 2005 that have taken away my ability to work. I went into a deep depression in this time until my son told me that I was going to become a grandma and that he wanted me to crochet something for the baby. I taught myself to crochet when I was 10 years old and I hadnt done anything since I started working in 1994.
But my son had seen my work aroung the house. So I boght some yarn and looked for my needles and started crocheting and I havent stopped since. My depression is under control, a day cannot go by without me crocheting for a while. When I crochet I feel like I can leave my worries behind because I need to count LOL. Its like going to a secluded Island where only my work and me exist.
Terry Downey says
Crocheting makes me feel loved. My mother crocheted beautiful things for me when I was a child, and fabulous afghans for all her beloved grandchildren. She taught me to crochet as a child with all the love and patience a child could ever need. When I crochet for my family, and when I taught my daughter to crochet and now my grandchildren, it's as if I am looking through my mother's eyes, working with my mother's hands, feeling with my mother's heart, and though she is gone from this earth, she is still there, in me, pouring out her love on every new generation.