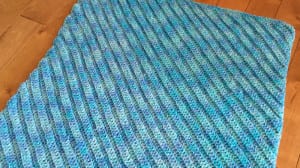
Corner to Corner for Squares & Rectangles
Do you love corner to corner and want to change it up a bit to add texture and different sets of stitches? I have a solution for you. Try the double crochet corner to corner.
Corner to corner doesn't mean it has to be square. It can be a rectangle, in this pattern, I will show you how to do both and customize it to match whatever you need.
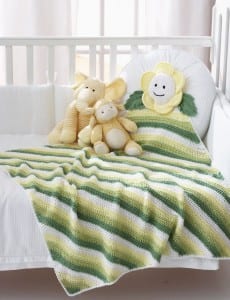
This pattern is inspired by an existing pattern from Yarnspirations called the Daisy Blanket. The pattern also includes that really cute flower on the top to crochet with it.
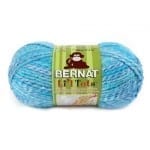
For me, I get lazy and don't always want to change colours. So what I decided to do was to use the Bernat L'il Tots Yarn that has colour variegation and I added ridges to the blanket to give it the obvious appears as a corner to corner.
Below, I will give you the pattern written for just double crochet and then give you the pattern as my ridges really provide texture. I leave it to you to decide what you prefer.
If you want the flower, visit the original flower, just visit the original pattern called Daisy Blanket on Yarnspirations.

Pattern Tips
- You can use any yarn you wish as long as the hook compliments the yarn. Refer to the ball band if you need help with that recommendation.
- Sizing is up to you. I will have yarn ball recommendations for different sizes.
Afghan Sizes
- Baby Blanket 36" x 36" square
- Throw Size 60" x 60" square
- Twin 39" x 75"
- Double 54" x 75"
- Queen 60" x 80"
- King 76" x 80"
Yarn Ball Counts per Size
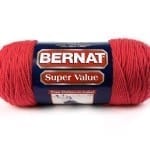
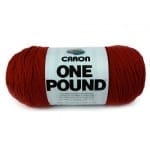
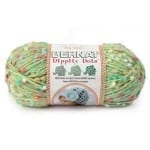
Here are the yarns I am comparing to get yarn ball counts. If using different yarns or mixing colours, you will have to figure that out on your own. Yarn class is Medium #4. The hook is 5.5 mm Size I. Each ball has different yardage; therefore, will be different ball counts per size.

Baby Afghan
- Bernat L'il Tots = 9 Balls
- Caron One Pound = 2 Balls
- Caron Simply Soft = 3 Balls
- Bernat Super Value = 3 Balls
- Bernat Dippity Dots = 7 Balls
Throw
- Bernat L'il Tots = 15 Balls
- Caron One Pound = 4 Balls
- Caron Simply Soft = 9 Balls
- Bernat Super Value = 7 Balls
- Bernat Dippity Dots = 18 Balls
Twin Size
- Bernat L'il Tots = 12 Balls
- Caron One Pound = 3 Balls
- Caron Simply Soft = 8 Balls
- Bernat Super Value = 6 Balls
- Bernat Dippity Dots = 15 Balls
Double Size
- Bernat L'il Tots = 17 Balls
- Caron One Pound = 4 Balls
- Caron Simply Soft = 11 Balls
- Bernat Super Value = 8 Balls
- Bernat Dippity Dots = 20 Balls
Queen Size
- Bernat L'il Tots = 20 Balls
- Caron One Pound = 5 Balls
- Caron Simply Soft = 12 Balls
- Bernat Super Value = 9 Balls
- Bernat Dippity Dots = 24 Balls
King Size
- Bernat L'il Tots = 25 Balls
- Caron One Pound = 6 Balls
- Caron Simply Soft = 16 Balls
- Bernat Super Value = 12 Balls
- Bernat Dippity Dots = 30 Balls
Pattern without Ridges - Regular DC
The pattern starts in one corner and progressively gets wider until you are ready to start decreasing.
Hook, 5.5 mm Size I
- Ch 5.
- (RS). 2 dc in 4th ch from hook (counts as 3 dc). 2 dc in next ch. 5 dc. Turn.
- Ch 3. 2 dc in first st (2 inc made). 1 dc in each of next 3 sts. 3 dc in last st (2 inc made). 9 dc. Turn.
- Ch 3. 2 dc in first st (2 inc made). 1 dc in each dc to last dc. 3 dc in last st (2 inc made). Turn. 13 dc.
- Continue as Step 3 until you get to the width you want before starting to decrease.
Decreasing as a Square Size
- Ch 3. (Yoh and draw up a loop in next dc. Yoh and draw through 2 loops on hook) twice. Yoh and draw through all loops on hook - dc2tog made. 1 dc in each st to last 3 sts. (Yoh and draw up a loop in next dc. Yoh and draw through 2 loops on hook) 3 times. Yoh and draw through all loops on hook - dc3tog made. Turn.
- Continue as Step 1 until you are at the final point of the corner.
- Final Corner, Ch 3. Dc3tog. Fasten off.
Decreasing as A Rectangle Size
When decreasing as a rectangle, one side stops growing and the other side continues to grow to create the rectangular shape. Once the growing side gets to the length you need, you then finish it off like a typical square version where both sides are decreasing.
- Ch 3. 2 dc in first st (2 inc made). 1 dc in each dc to last 3 stitches. (Yoh and draw up a loop in next dc. Yoh and draw through 2 loops on hook) 3 times. Yoh and draw through all loops on hook - dc3tog made. Turn.
- Ch 3. (Yoh and draw up a loop in next dc. Yoh and draw through 2 loops on hook) twice. Yoh and draw through all loops on hook - dc2tog made. 1 dc in each to the last stitch. The last stitch gets 3 dc. Turn.
- Repeat Step 1 and 2 until the growing side gets to the length you want.
- Once you have the length. Begin Decreasing as a Square Size to finish off.
Mikey's Pattern with Ridges
Mikey's pattern has obvious ridges through the use of Back Loops when crocheting along. You can follow the same instructions as above for both Square and Rectangle but substitute the stitches to be using the Back Loop Double Crochet.
If you need further help on what the back loops are. Here's a quick lesson.
Video Tutorials
https://www.youtube.com/watch?v=Bi51fpCZWWA
Nikki Dampf says
the starting is folding up like I am getting it too tight so I switched to a bigger hook and that isn't working either.
any help on how to make it not curl?
Barbara Wiegand says
I have made this blanket turned out uneven at the end of the blanket - the blanket looks warped, the end is wider than the beginning. Feel as though I followed the tutorial correctly. Do you have any insight as to why this happened?
Meredith K. says
I am having the same problem (four and a half years later).
SANDRA FREEMAN says
Thank you for this web sight. It has been very helpful for this beginner.