The Jewelled Elf Bell Hat was designed for Christmas Markets on the Rhine River Crochet Adventure for 2023. Using Caron One Pound.
This free pattern will be in crochet diagram format as it's easier to follow with all of the colour changes that will happen. I have provided a free tutorial on how to read crochet diagrams below.
The colours shown are white, deep pink, gray, gold and kelly green.
There are 32 (18 mm) bells that are tied to the centre of each one of the open sections in green. There are 4 bells high for each repeating section. Colour-wise, they are randomly placed.
Pattern is included in this article and Daniel is revealing it in the video here.
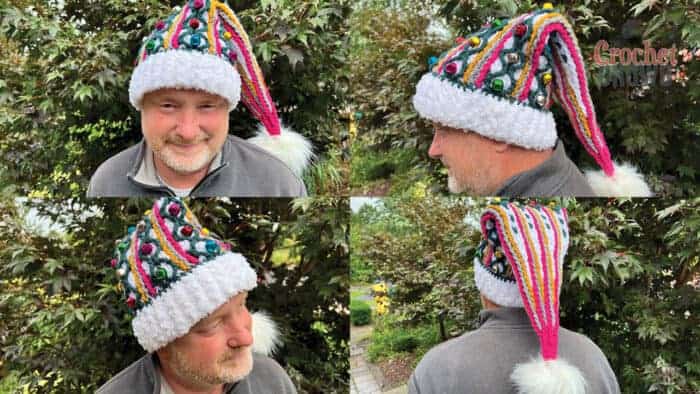
The hat is for the average adult with a tighter brim than usual. The hat measures 22" long. If a hat brim is too loose, the weight of the extra that hangs over tends to make the hat slip off the hat due to the weight.
The Brim
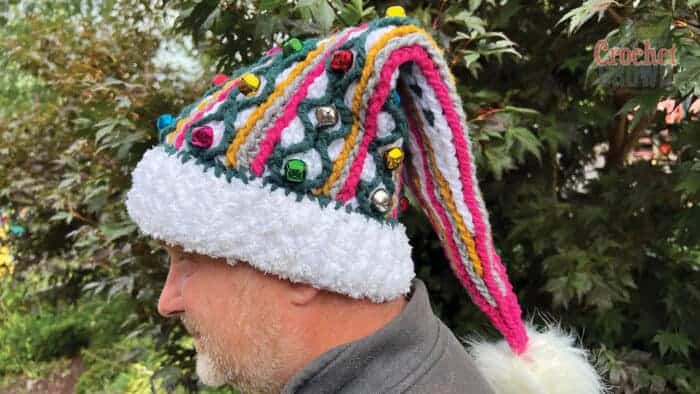
Use a 4.5 mm / G/6 crochet hook with two strands of yarn at the same time. Use Bernat Pipsqueak in white plus Caron One Pound in white together.
Chain 64. Join to the beginning chain to form the ring. Careful not to twist the chain.
1st rnd: Ch 1, 1 dc in each st around. Join with sl st to beg dc. 64 dc.
2nd rnd: Ch 1, 1 dcbp around first post, 1 dcfp around next post. *1 dcbp around first post, 1 dcfp around next post. Rep from * around. Join with sl st to beg dcbp. 64 sts.
3rd and 4th rnds: Rep 2nd round. Finish yarn at the end of the 4th round.
Body of Hat
Using kelly green to begin. Switch to 5 mm / I/9 hook from this point to the end.
1st rnd: Attach with sl st to side of brim. Ch 1. Equally space 72 hdc around the edge of the brim. Join to the beginning hdc. 72 hdc.
Going forward, you will introduce the rest of the colours and do the stitchwork as per the colours. When a colour is not in use, carry it behind, not under the stitches. This will allow for crisp colour changes.
The hat of 72 hdc can be equally divided by 9. There are 8 sections. The diagram shows just one as it's repeated around. At the end end of the round, finish the last stitch with the first colour that will be used in the next round and also use that same colour to slip stitch.
The darker green is to show you to keep those always in the front of the work. The diagram is colour-coded to show you how the colours flow.
All diagrams are available for download so you can print them off and check it off on your list.
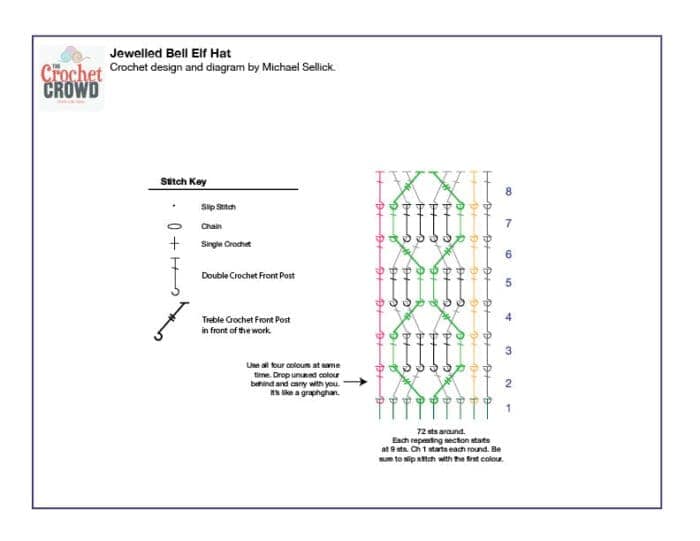
Once you are completed up to rnd 8. Jump to the next page and work through the diagram. As you begin to eliminate stitches, the hat gets faster to make as there's less stitches per round. I have indicated how many stitches there are in the repeat.
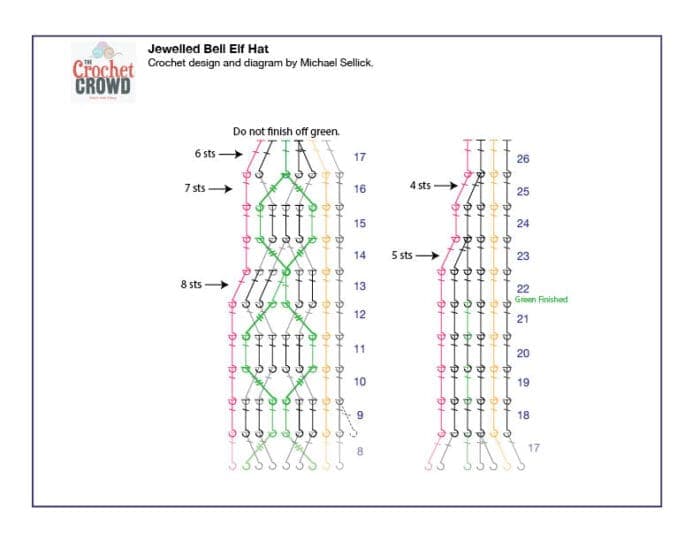
Once completed, to rnd 26. Jump to the next page and continue.
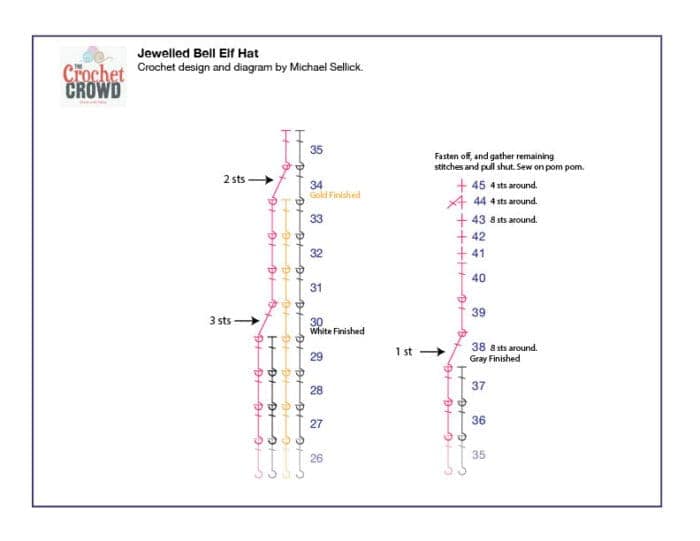
Sew on a 6" pom pom to the end of the hat.
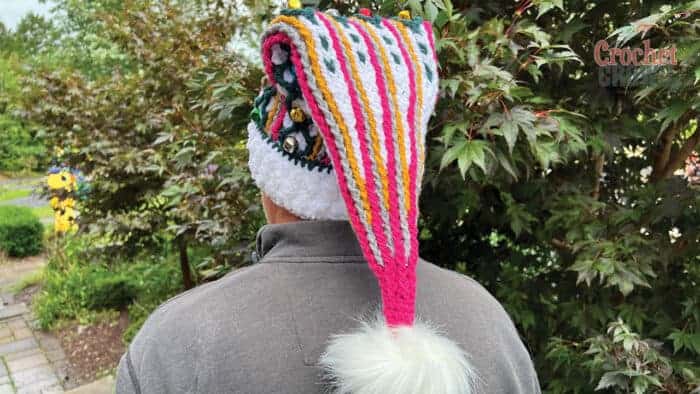
Another Elf Hat
You can try Mikey's Spiral Elf Hat with the free pattern with diagrams provided.

Leave me your thoughts...