The Stitch is Right Blanket Game 2.0 is the latest version of our first Stitch is Right Game back a few years ago. The game includes six stitches, and you can decide which yarn and the size of your project. Will it be a scarf or blanket?
The printable instructions include the rules and patterns for each stitch provided.
.
.
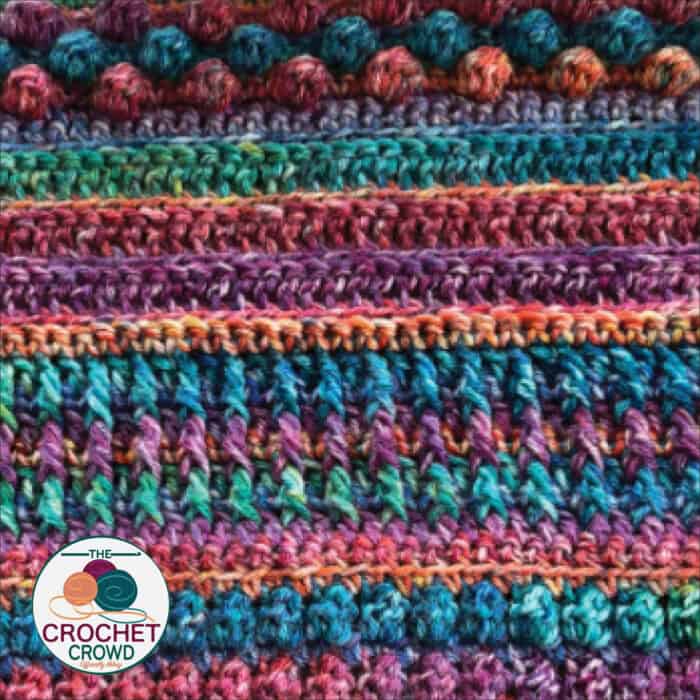
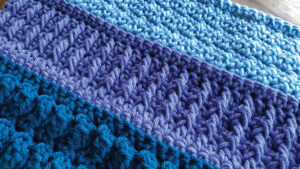
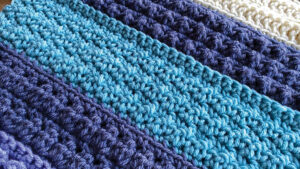
Some popular stitch combinations have come viral through our previous Stitch is Right Game. The game was a team effort to make here, but Jeanne and I did the original stitches. Jeanne realized that 3 of the stitches used in the game were beautiful together. However, it wasn't until it randomly appeared during the spins that it was noticed.
The original Crochet Hugs and Kisses Baby Blanket has been downloaded over 200,000 times. This combination may never have been noticed if it wasn't for the game.
The game was revised in February 2025 with the help of our friend, Lauren. She went through the pattern to provide feedback. Lauren helped me to get each stitch combination to end on the wrong side so every section starts on the right side. It would allow people who don't want to change the yarn just to keep on going.
Rolling the Dice
- The first number of the dice will tell you which colour to use.
- The second roll of the dice will tell you the stitch assignment.
Stitch is Right Blanket Game 2.0
I used Caron One Pound in my example:
- 1 - Lilac
- 2 - Sky Blue
- 3 - Cream
- 4 - Denim
- 5 - Soft Sage
- 6 - Ocean
Hook - 5.5 mm / I/9
Gauge - 12 sc and 15 rows = 4” [10 cm]
1956 Choices

By using 6 colours and 6 stitches, there are possibilities of 1956 different choices that could be made. The chances of a blanket matching another crocheter are 1 in 1956. It’s impossible to tell you how much yarn is needed.
The game's primary purpose is to try new stitches, but it also takes a game of risk of how the stitches will combine. You can keep spinning the same stitch combination and colours in a row.
Personally speaking, it is hard to see what it could potentially look like. Maybe I don’t want to go to the same section twice in a row or even a colour. Ultimately, you have to decide what works for you.
I intentionally chose stitches that work with each other. The main objective is to get the starting chain correct.
Major Tip
Record the stitch count once the 1st row is completed, and write that down so you have it for reference.
I suggest counting stitches on the first row when creating a new section. This will ensure you didn’t miss any stitches, as it’s not evident on some of the stitches, like the loop tracks.
You’re the Artist
There’s no crochet police, if you don't like the results of what. the dice is telling you, roll again or pick your next stitch or colour.
Right Side VS Wrong Side
In my experience, I have found some stitch samplers where the stitches are crocheted on the wrong side of the blanket. The stitch feature can be on the underside of the blanket and not on the top surface. While some designers tell you to force the stitch to make it pop out the good side of the blanket, it’s not a great solution.
It is a strong suggestion to mark the RS once the first row is completed. It will become evident after 1 or 2 sections, which are the RS of the project.
DO NOT FASTEN OFF QUICKLY
I would roll the dice to tell you the next colour before fastening off the last section, as the dice roll may have you use the same colour again. Why fasten it off if the device tells you to use it again? Right!?
Stitches Used In this Game
- Stitch 1 - Houndstooth Stitch (tooth)
- Stitch 2 - Clusters (cabbage)
- Stitch 3 - Faux Popcorn (kernel)
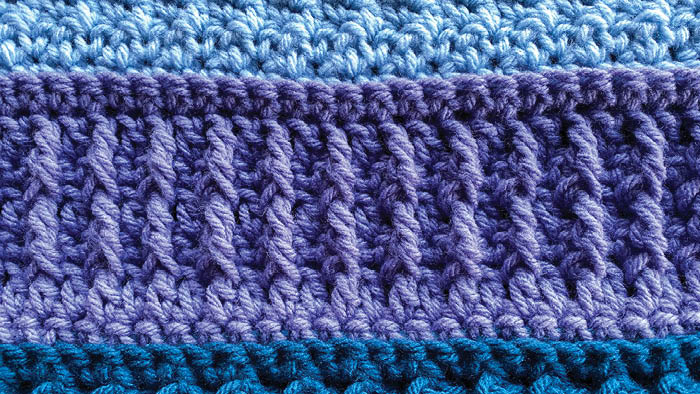
- Stitch 4 - Treble Ribs (similar to Alpine Stitch, mountains)
- Stitch 5 - Popcorn (popped corn)
- Stitch 6 - Loop Tracks (train tracks)
Design Considerations
I have seen patterns with a ridge between sections of stitch combinations. Each new section will have you do a back loop stitch to make the ridge appear.
Each section is about 2.5" to 3.5” each with Caron One Pound yarn.
This is designed to be fun to see what community members have for combinations.
Blanket Sizes

Using the recommended hook, 5.5 mm / I/9, the following are the chain counts if you want to aim for a specific size. However, if you want to customize to something not listed below, chain so the count is an even number, such as 100, 102, 130 etc.
Most crocheters don’t factor in the hangover of a bedspread called the ‘drape’. I have given you the information in chain counts so you can drape and know the average for achieving this.
I have also left you the average length of a blanket for sizing. Of course, you can customize.
The chain counts given are for the 5.5 mm / I/9 hook. I don't know if the chain counts if you use a different size hook.
Scarves may be suitable with 20 or 30 chains to start if you prefer a scarf size.
- Baby sized blankets, chain 110. (36” long)
- Toddler sized blankets, chain 110. (36 - 40” long)
- Lapghan blankets, chain 144. (48” long)
- Throw size blankets, chain 182. (60” long)
- Full/Double Blanket (without drape), chain 170. (75” long)
- Full/Double Blanket (with drape), chain 252. (90” long)
- Queen (without drape), chain 228. (80” long)
- Queen (with drape), chain 276. (90” long)
- King (without drape), chain 228 (80” long)
- King (with drape), chain 324. (95” long)
Assign Your Colours
Assign the dice number to a colour.
Choose 6 colours. You could even experiment with textured yarns with this as well. Assign each colour a number between 1 and 6. Write that on the ball band.
Colour 1 = ________________________________
Colour 2 = ________________________________
Colour 3 = ________________________________
Colour 4 = ________________________________
Colour 5 = ________________________________
Colour 6 = ________________________________
Abbreviations
- Ch = Chain
- Dc = Double Crochet
- Rep = Repeat
- RS = Right Side
- Sc = Single Crochet
- Sk = Skip
- Sp(s) = Space(s)
- Standing sc = Create slip knot and insert onto hook. Insert hook into st. Yoh and pull through st. 2 loops on hook. Yoh and pull through 2 remaining loops.
- St(s) = Stitch(es)
- Tr = Treble
- Trfp = Treble Front Post
- WS = Wrong Side
How to Begin Game
Choose the project size you wish to make.
- Roll the dice to determine the first colour.
- Start your blanket with the beginning row and then proceed into the stitch assignment to complete. Fasten off.
Tutorial - How to Play
Starting Chain & Row Needed to Begin
Beginning Chain: Chain in the count you wish. If you are customizing, chain an even number.
1st row: (RS) 1 sc 2nd ch from hook. 1 sc in each ch to the end. Turn. Mark this row as your right side for future reference.
2nd row: Ch 1. 1 sc in each st across. Fasten off if your next colour differs from the dice roll.
- Roll the dice to determine your next colour.
- Roll the dice again to get your stitch assignment.
It is very possible that you can spin the same section again and colour again. If you don’t like the option, spin again, and no one will be watching you.
The last 2 rows of the project are just single crochet back and forth to finish it off.
About These Stitch Combos
If you prefer not to play the game or you prefer to start one of the stitch combinations on your own, the Chain Multiple is 2.
None of these combinations will compress in tension, so the edging should stay relatively flat.
If you want a border, circle around with sc evenly spaced up the sides and across the tops and bottoms. Place 3 sc in the corners to keep it laying flat. I’ve not designed a border so you can have creative control over that.
1st Row Stitch Count = _________________
Tutorial

Stitch 1 - Houndstooth
Start on the RS for this section.
1st row: (RS) With colour, using back loops only for this row, attach use standing sc to the first stitch. 1 sc in each across. Turn.
2nd row: (WS) Ch 1. 1 sc in first st, *1 dc in next st, 1 sc in next st. Rep from * across. Turn.
3rd row: (RS) Ch 3 (counts as dc). *1 sc in next st, 1 dc in next st. Rep from * across. Turn.
4th - 7th rows: Rep 2nd and 3rd row.
8th row: (WS) Ch 1. 1 sc in each st across. Fasten off. This ends on a WS.
Tutorial

Stitch 2 - Clusters
Start on the RS for this section.
Cluster = 3 dc together in assigned stitch.
1st row: (RS) With colour, using back loops only for this row, attach use standing sc to the first stitch. 1 sc in each st across. Turn.
2nd row: (WS) Ch 3 (counts as 1 dc and ch 1). Sk next st, *cluster in next st, ch 1, sk next st. Rep from * across, 1 dc in last stitch. Turn.
3rd row: (RS) Ch 3 (counts as 1 dc and ch 1). Sk next ch sp, *cluster in next cluster, ch 1, sk next ch sp. Rep from * across, 1 dc in 2nd ch of beg ch 3. Turn.
4th row: (WS) Ch 1. 1 sc in each st and ch sp across. Fasten off. This ends on a WS.
Tutorial

Stitch 3 - Faux Popcorn
Start on the RS for this section.
The faux popcorn naturally pops out towards the back, so it’s best to crochet these on the WS. The treble used creates the pop-out at the front of the project.
1st row: (RS) With colour, using back loops only for this row, attach use standing sc to the first stitch. 1 sc in each st across. Turn.
2nd row: (WS) Ch 1. 1 sc in first st. *1 tr in next st, 1 sc in next st. Rep from * across. Turn.
3rd row: (RS) Ch 1. 1 sc in each st across. Turn.
4th - 7th rows: Rep 2nd and 3rd row.
8th row: Ch 1. 1 sc in each st across. Fasten off. This ends on a WS.
Tutorial
Stitch 4 - Treble Ribs (Similar to Alpine)
Start on the RS for this section.
1st row: (RS) With colour, using back loops only for this row, attach use sl st to the first stitch. Ch 3. 1 dc in each st across.
2nd row: (WS) Ch 1. 1 sc in each st across. Turn.
3rd row: (RS) Ch 3 (counts as 1 dc). *1 trfp around next dc post 2 rows below. Sk st on row as trfp counts as that same st. 1 dc in next st. Rep from * across. Turn.
4th row: (WS) Ch 1. 1 sc in each st across. Turn.
5th row: (RS) Ch 3 (counts as 1 dc). *1 trfp around next tr post 2 rows below. Sk st on row as trfp counts as that same st. 1 dc in next st. Rep from * across. Turn.
6th row: (WS) Ch 1. 1 sc in each st across. Fasten off. This section ends on WS.
Tutorial

Stitch 5 - Popcorn
Start on the RS for this section.
Popcorn = Work 4 dc into the next st, drop the loop from the hook, insert your hook from front to back under the top 2 loops of the first double crochet of the group, grab the dropped loop and pull through; 1 pc made.
1st row: (RS) With colour, using back loops only for this row, attach use sl st to the first stitch. Ch 3 (counts as 1 dc and ch 1 sp). *sk next st, 1 popcorn in next st. Ch 2. Rep from * across to last 2 sts. Sk 2nd last st, 1 dc in final st. Turn.
2nd row: (WS) Ch 1. 1 sc in each st and ch sps across. Re-member, the last turning chain as 1 dc and ch 1. Fill in space for the ch 1 and the last sc is in the 2nd chain. Turn.
3rd row: (RS) Ch 3 (counts as 1 dc and ch 1). *Sk next st, 1 popcorn in next st. Ch 2. Rep from * across to last 2 sts. Sk 2nd last st, 1 dc in final st. Turn.
4th row: (WS) Ch 1. 1 sc in each st and ch sps across. Re-member, the last turning chain as 1 dc and ch 1. Fill in space for the ch 1 and the last sc is the 2nd chain. Fasten off. This section ends on WS.
Tutorial

Stitch 6 - Loop Tracks
Start on the RS for this section.
1st row: (RS) With colour, using back loops only for this row, attach use standing sc to the first stitch. 1 sc in each st across. Turn.
2nd row: (WS) Ch 3 (counts as 1 dc). 1 dc in each front loop across. Turn.
3rd row: (RS) Ch 1. 1 sc in each back loop st across. Turn.
4th - 7th rows: Rep 2nd and 3rd row.
8th row: (WS) Ch 3. 1 dc in each front loop st across. Fasten off. This combination finishes off at the WS.
Tutorial
Last 2 Rows
1st row: RS. With colour, attach use standing sc to the first stitch. 1 sc in each st across. Turn.
2nd row: Ch 1. 1 sc in each st across. Fasten off.
Tutorial

Dot says
Exactly the kind of pattern I was looking forward - having it in my favorite colors is a plus.
Kristine S says
You 'GUYS'... L❤VE your creativity, your sense of adventure, SOH‼️ CLE-VER‼️ Thank you very much for your free pattern & inspo. You've gone to a LOT of work & I'm sure others, apart from moi, appreciate it. ‼️
Laurel says
Loved this project. Made a prayer shawl. Thanks so much