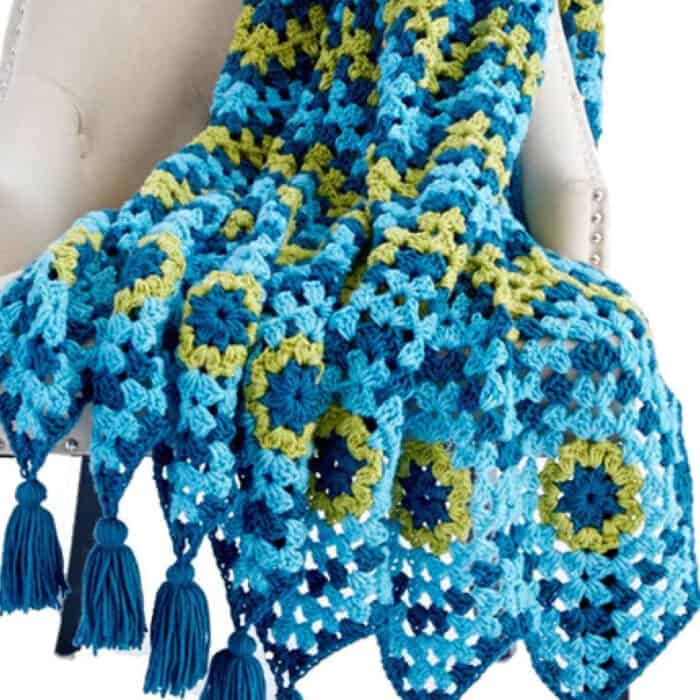
For those who have struggled with the concept of Wave Afghans, an easy way to start is by using Granny Squares as your base to create the formation of the wave. This Crochet Waving to Granny Afghan is a great way to get started.

The concept is to create the granny squares and link them together on the final round for the width of the granny you want. Once you get the number of squares you want for the width, you begin the wave.
The wave concept allows you to go in either direction. So this allows you to put in the granny squares at any point in your afghan. You have to start with the first but you can crochet in both directions in using it as a base.
Follow the tutorial below if you need more help.

Anne says
Thank you for a great tutorial!
I would like to add another set of squares to the other end and possibly in the middle of the afghan. How would you suggest attaching additional rows of squares to the wave pattern already established?
Mikey says
Can you not just add more squares and keep on doing the ripple across to make it wider?
Anne says
Thanks for your reply. I'm afraid I didn't make myself clear. I would like to be able to create the afghan with 7 squares across. I would like to have squares at the top as well as at the bottom of the afghan, with the ripple in between. So, if you were looking at it top to bottom, the afghan would have rows of ripple, granny squares, more rows of ripples, granny squares and then final rows of ripples. Does that make sense? Thanks for your help!
Mikey says
Great question... hmmmm how could that be done... I am thinking... I have to put thought and research and development during free time to figure those mathematics out. Interesting thought though. I don't have an immediate answer.
Alicia Carl says
Hi, I have been looking for the written pattern for Crochet Waving to Granny Afghan. everything I click on link on the video tutorial it goes back to the video tutorial. Is there a written pattern? If so, can you direct me to the link so that I can print it out. I love this pattern and got all the materials to get started. I appreciate the creativity that went into making this beautiful pattern. Thank you for sharing your pattern and for having a tutorial to go along.
Most Grateful,
Alicia
Mikey says
Thanks so much. I updated the article with fresh link. I appreciate the heads up.
Sandra Leach says
Wow!! Your tutorial makes it look so easy and it really is; you just have to know where to begin and end the connecting rows. Great news--I can do this easily now that I've seen your tutorial.
Something I noticed, of course, is how fast you crochet, but another thing is how loose you make all of your stitches and how even they are. When I crochet, I tend to make my stitches only as large as it takes to get the hook into the next space. I always thought that was necessary when I first began to crochet. I still do that although I'm trying very hard to loosen my stitches. Any advice on how you make them all exactly the same with the looser stitch, and how I can begin to go from the tight stitch I make to the looser stitch you make? I tend to start out making the looser stitch, and then before I know it, I'm making the tighter stitch. Does this just take practice or is there a tip you can give me without it requiring me to take an entire row out and start over? I know this may sound silly to some crocheters, but it's a real problem for me. Thank you so much for your advice and for your awesome tutorial. Sandi