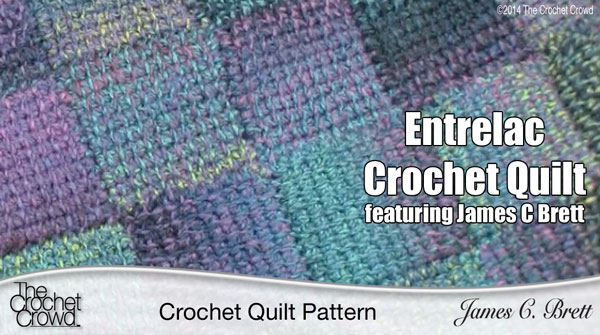
Entrelac That Appears Like A Quilt
Create an amazing quilt look-a-like using large entrelac crochet squares. The squares are much larger measuring 3" x 3". It gives the illusion of quilt patches. Using James C Brett Yarn Chunky Marble, you can achieve a wicked amazing look where each square has its own personality.
More Pattern Ideas
- Complete Entrelac Gallery
- Crochet Market Bag + Tutorial
- Side to Side Stitch
- Crazy Eight Shawl + Tutorial
- Tunisian Basket Weave Cowl
You can also use this size of square to do the traditional looks of entrelac crochet as seen in the Trip Around The World Pattern.

1 Ball of James C Brett Chunky Marble will create 18" x 18" = Square. 2.25 Square Feet
Due to the nature of this yarn, this type of afghan would be an heirloom and something to treasure. The yarn is chunky in weight providing a bulky weight yarn that will drape beautifully.
- Baby Afghan - 3 Feet (36") x 3 Feet (36") Yarn Amount to be Determined
- Throw Size - 5 Feet (60") x 5 Feet (60") Yarn Amount to be Determined
- Full Double Bed Spread Size - 8 Feet x 9 Feet - Yarn Amount to be Determined
Instructions
Please note that this pattern has been originally written by Brenda Bourg for Red Heart Yarns. Due to my relationship with Red Heart Yarns, the pattern below is slightly altering Brenda's stitch counts and used a different yarn to achieve larger squares and unique appearance. This is not considered a brand new pattern by Mikey. This version has been written for those who would like to achieve her afghan in a different look and square size. In the rules of pattern creation, this change I have made isn't enough to justify this pattern to be unique, nor am I accepting credit for creating this design. You can thank Brenda Bourg for this design.
Materials Required
- Size 6.5 mm or Size K Tunisian Crochet Hook.
- For the Quilt Look, James C Brett, Colour used in Jewel Tones.
- Darn Needle to hide ends.
Pattern written below is as seen on Trip Around The World Afghan with slight changes to the stitch count to achieve the 3" x 3" Square.
Pattern Notes
- The throw is worked from the center outwards. A center square is worked first. A round of squares is worked around the center square. Then another round of squares is worked around the previous round, and so on.
- Each square is worked in Tunisian Crochet. In Tunisian Crochet, each row is worked in two steps. In the first step (forward pass), loops are picked up and placed on the hook. In the second step (return pass), the loops are worked off the hook. The work is never turned. The right side is always facing you.
- The video tutorial below easily explains the concept if you are confused.
Centre Square
- Ch 12.
- Row 1 (right side): Forward pass: Insert hook in 2nd ch from hook and draw up a loop, *keeping loops on hook, insert hook in next ch and draw up a loop; repeat from * across (12 loops on hook). Return pass: Yarn over and draw through 1 loop on hook, **yarn over and draw through 2 loops on hook; repeat from * until only 1 loop remains on hook.
- Rows 2–10: Forward pass: Skip first vertical bar (at the beginning edge of the previous row, [insert hook under next vertical bar, yarn over and draw up a loop] 11 times (12 loops on hook). Return pass: Work the same as Row 1 return pass.
- Row 11 - Slip st in each of the next vertical bars. Fasten off.
First Round of Squares
Corner Square
- Row 1 (right side): Ch 11.
- Forward pass: insert hook in 2nd ch from hook and draw up a loop, *keeping loops on hook, insert hook in next ch and draw up a loop; repeat from * across ch (12 loops on hook), insert hook in the same corner as joining and draw up a loop. Return pass: *Yarn over and draw through 2 loops on hook; repeat from * until only 1 loop remains on hook.
- Rows 2–10: Skip first vertical bar (at the beginning edge of the previous row, [insert hook under next vertical bar, yarn over and draw up a loop] 10 times (12 loops on hook); insert hook in the edge of the previous square and draw up a loop. Return pass: Work the same as Row 1 return pass.
- Row 11: Slip st in each of next 11 vertical bars, slip st in next corner of previous square—1 loop remains on hook.
Second Round of Squares
- With the right side facing, draw up a loop of A in the lower outer corner of any square of the previous round.
First Square (Corner Squares)
- Row 1 (right side): Ch 11. Forward pass: Insert hook in 2nd ch from hook and draw up a loop, [keeping loops on hook, insert hook in next ch and draw up a loop] 10 times (11 loops on hook), insert hook in the same corner as joining and draw up a loop. Return pass: *Yarn over and draw through 2 loops on hook; repeat from * until only 1 loop remains on hook.
- Rows 2–10: Forward pass: Skip first vertical bar (at the beginning edge of the previous row, [insert hook under next vertical bar, yarn over and draw up a loop] 10 times (11 loops on hook); insert hook in the edge of the previous square and draw up a loop. Return pass: Work the same as Row 1 return pass.
- Row 11: Slip st in each of next 11 vertical bars, slip st in next corner of previous square—1 loop remains on hook.
Second Square (Side Square)
- Row 1 (right side): Forward pass: [Keeping loops on hook, insert hook under next vertical bar of the square in the previous round, and draw up a loop] 10 times (11 loops on hook), insert hook in corner of square in the previous round and draw up a loop: Return pass: *Yarn over and draw through 2 loops on hook; repeat from * until only 1 loop remains on hook.
- Rows 2–10: Skip first vertical bar (at the beginning edge of the previous row, [insert hook under next vertical bar, yarn over and draw up a loop] 10 times (11 loops on hook); insert hook in the edge of the previous square and draw up a loop. Return pass: Work the same as Row 1 return pass.
- Row 11: Slip st in each of next 5 vertical bars, slip st in next corner of previous square—1 loop remains on hook. Repeat first and second squares three more times to make a total of 8 squares all the way around the outer edge of the previous round of squares. Fasten off.
You now know how to handle the corner squares and the side squares. You continue to go around the centre adding squares.
3" Squares Video Tutorial To Follow Along
This size to be filmed
norma ochoa says
Can't wait for the 3" squares =) I went from not knowing a thing about crochet to making a blanket Thank you for the video
Marcia Kiefer says
Can't thank you enough for this video Mikey! I was afraid to try Entrelac too and after watching your video, tried it and was easy! Addicted to it now! I did the 3" with Bernat Mosaic and LOVE it - gonna try the smaller squares in Boutique Unforgetttable next time. Love you Mikey and so appreciate all you do for us! Big hugs! {{{{{<3}}}}}
Patsey says
I cannot find the entrelac quilt tutorial using the James Brett Marble yarn. I purchased this yarn to make this beautiful project per your photo but need the specific video to guide me because this yarn is difficult to see the stitches. I know the tutorial is out there somewhere, please help, thanks, Patsey