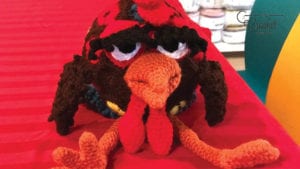
Crochet The Boss Bird Rooster
The Round Rascals Rooster is part of a three-some. Designed by Michelle Moore, locally to me here, from Nova Scotia. Her little business is called AMooreEh! She is Canadian, just like me. She has a ton of paid patterns that are just delish!
We had the goal to use a soccer ball as the original shape.
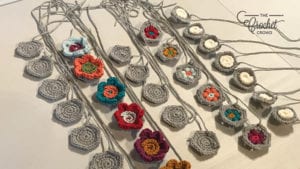
From this shape, do extension add ons. This was originally designed for the Crochet Cruisers as a mystery project. They were given the Pentagon and Hexagon Shapes to do in advance before coming to the cruise.
Here are the other two animals that go with this but are not yet posted.
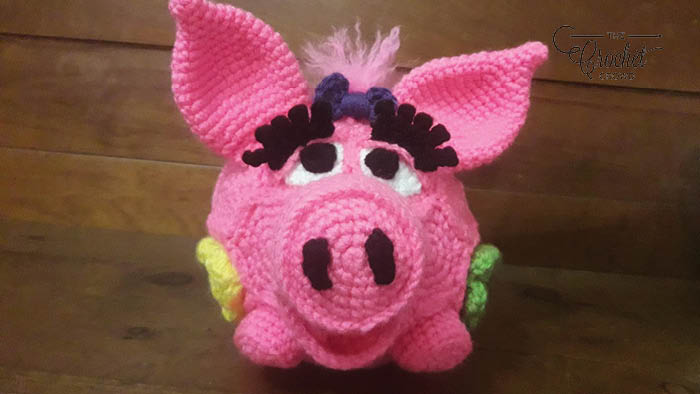
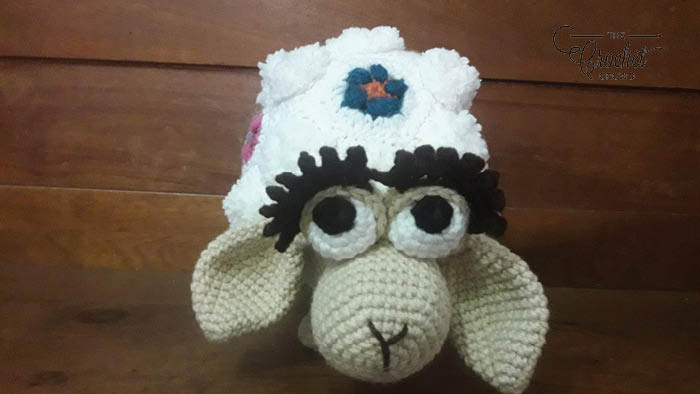
We Had An Obstacle
This was a crochet cruise mystery. This means that cruisers could change their mind mid-way through after they knew what was going on. Michelle rejigged the pattern for the mystery to include all of the different types of shapes and put them together as one.
Originally, the Rooster has only the sunken hexagon shape.

This meant for the cruisers, they had the flowers from the pig, puffs from the sheep and sunken hexagons from the rooster all on one project. Michelle figured out the positioning so the flowers stay on the top of the character.
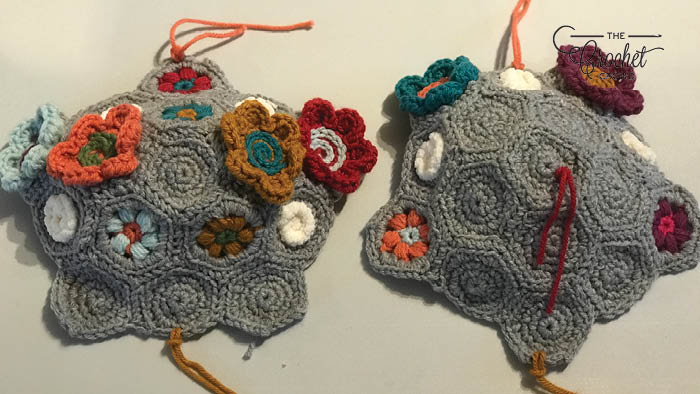
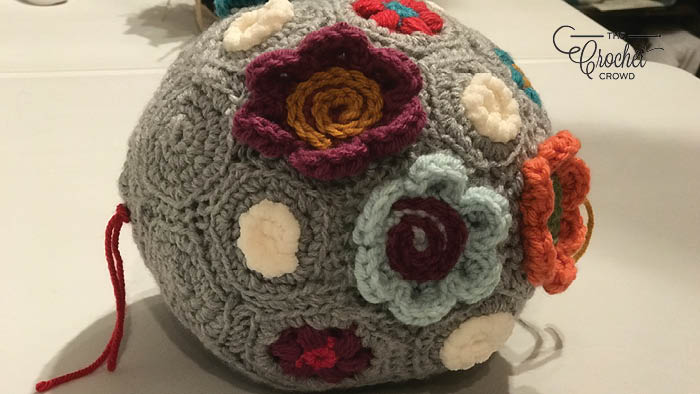

The cruisers went onto being inspired by Michelle's creations and went onto using the shape and creating their own characters like a spider, goat, pufferfish, elephant, bear, dog, flamingo and of course, the sheep, pig and rooster.
I love doing add ons to existing ideas. So Mikey's version ended up changing a few things such as the following:
- I made the 2 tail feathers to be the same length and made a longer tail feather for variation.
- I made the eyelashes a bit shorter and crocheted them in a way so they curl back and instead of in front of the eyes.
- I applied spiral surface overlays so the flowers.
- I gave my rooster rose cheeks by crocheting two circles.
- I crocheted a mini ice cream cone to hold in one hand. I free-formed.
- I crocheted a small pumpkin for the other hand. I free-formed.
- I crocheted a small tongue that is sewn to the bottom inside the beak.
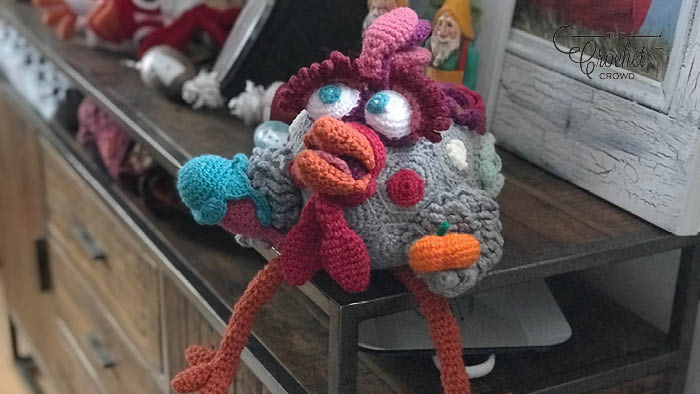
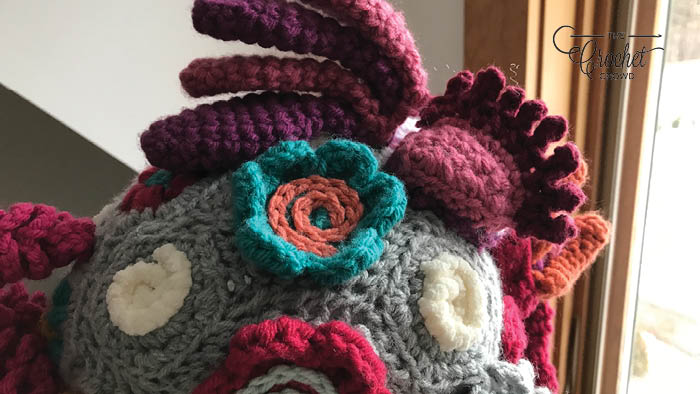
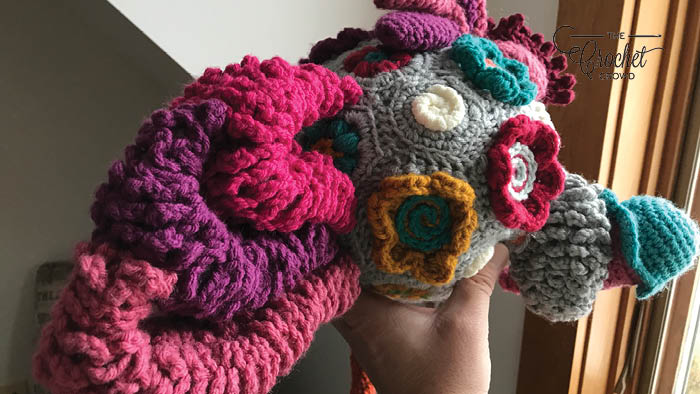
Creativity Unleashed
Below is the free pattern for this. The download will have the photographs attached. Michelle's base model is fabulous but you can really add on extra things to personalize it more.

More Pattern Ideas
- Crochet Modern Granny Shrug Pattern
- Crochet St. Patrick’s Day Ideas
- Cute As A Button Flower Pattern
- Crochet Dragonfly Bag Pattern
- Crochet Twisting Fringe + Tutorial
Round Rascals Rooster Pattern
Designed by Michelle Moore, © 2019 The Crochet Crowd. Photographs of assembly and parts inside downloadable pdf.
Materials
4mm/G Hook
Red Heart Super Saver, 7 oz / 198g, 364 yds / 333 m
- Contrast A - Brown
- Contrast B - Red
- Contrast C - Orange
- Contrast D - Teal
Small Amounts - 10 Yds or Less
- Contrast E - Black
- Contrast F - White
- Contrast G - Yellow
Tapestry Needle, Scissors, Stitch Markers, Pins, Polyfil Stuffing
Abbreviations
- BLO = Back loop only
- Ch = Chain
- 2sc = Increase – 2 Stitches in the Same Stitch
- Dc = Double crochet
- FLO = Front loop only
- FO = Fasten off
- Hdc = Half double crochet
- MC = Magic circle
- Rep = Repeat
- Rnd = Round
- RS = Right side
- Sc =Single crochet
- Sc2tog = Decrease - 2 single crochet together
- Sk = Skip stitch
- Sl st = Slip stitch
- St = Stitch
- WS = Wrong side
- YOH = Yarn over hook
Tips for this Pattern
- Secure your magic circle by pulling the starting tail tight and tying a knot. If you can’t do a magic circle, simply chain 2 and work the starting stitches in the 2nd chain from the hook.
- Amigurumi is worked in the round, which means instead of closing your circles with a slip stitch and a chain, you simply continue around in a spiral, with a stitch marker indicating the start of the next round.
- Carry your tails where possible, unless otherwise indicated.
- When the number is before the st, such as 2sc, that means you put that many sts in the same st (increase sts). When the number is after the st, such as sc2, that means you sc in the next 2 sts.
- Secure your sewing tails with knots before weaving them inside the amigurumi.
- Use pins when available, this will help visualize the placement of the pieces before you sew them on.
- Try to find a happy medium of stuffing fullness. Under stuffing can leave your amigurumi looking floppy, but overstuffing can stretch the stitches and show the stuffing.
- Use an invisible decrease on amigurumi as it makes smaller holes.
- Starting tails need to be long enough to be hidden when necessary. It’s always better to have extra length than not enough.
- Perfection is a myth. Happy accidents can happen and give amigurumi their own character.
- Did you know that if you use yarn under instead of yarn over, it will give you tighter and neat stitches on your amigurumi?
Instructions
Eyeballs - Make 2
1st rnd: With F, 6 sc in MC. Place st marker. 6 sts.
2nd rnd: 2 sc in each st around. 12 sts.
3rd rnd: (Sc, 2sc) repeat around. 18 sts.
Next 2 rnds: Sc in each st around. 18 sts. Sl st in next st and FO.
6th rnd: With Red (B), join yarn in BLO. (sc in next 2 sts, 2sc) repeat around. Sl st in next st to FO, leaving long tail for sewing. 24 sts.
Pupils - Make 2
1st rnd: With E, 6 sc in MC. Sl st in next st to FO, leave long tail for sewing. 6 sts.
Eyelids - Make 2
Eyelids start at the bottom of the eyelids and decrease to make the arch that appears on the top of the eyelids.
With B, Ch 9.
1st row: RS - Sc in 2nd ch from hook. Sc in next 7 chs. Ch1, turn. 8 sts.
2nd row: Sc2tog, sc in next 4 sts, sc2tog. Ch 1, turn. 6 sts.
3rd row: Sc2tog, sc in next 2 sts, sc2tog. Ch 1, turn. 4 sts.
4th row: Sc2tog - twice. FO.
5th row: With RS facing, join yarn in the right corner, sc 10 sts evenly across top arch of eyelids. FO, leave long tail for sewing.
Eyelashes - Make 2
With E, ch 9.
1st Row: Sl st in 2nd ch from hook, *ch 6, sl st in 2nd ch from hook and next 4 chs, sl st into next st on original chain*. Repeat from * to * until the end of the ch. Sl st in the last ch to FO, leave long tail for sewing.
Beak - Make 2
1st rnd: With C, 6 sc in MC. Place st marker. 6 sts.
2nd rnd: Sc in each st around. 6 sts.
3rd rnd: (Sc2, sc in next 2 sts) twice. 8 sts.
4th rnd: Rep 2nd rnd. 8 sts.
5th rnd: (Sc, 2sc) repeat around. 12 sts.
6th rnd: Rep 2nd rnd. 12 sts.
7th rnd: (Sc, 2sc) around. 18 sts.
8th rnd: (Sc in next 2 sts, 2sc) around. 24 sts.
9th rnd: (Sc in next 3 sts, 2sc) around. Lightly stuff. 30 sts.
Close beak: Pinch the top of the beak, with 15 sts on each side lining up. Ch 1 and sc through each set of sts across to close. FO, leave long tail for sewing.
Beak Plate - Make 1
1st rnd: With C. 6 sc in MC. Place st marker. 6 sts.
2nd rnd: 2 sc in each st around. 12 sts.
3rd rnd: (sc, 2sc) repeat around. 18 sts.
4th rnd: (Sc in next 2 sts. 2sc) around. 24 sts.
5th rnd: (Sc in next 3 sts, 2sc) around. Sl st in next st to FO, leave long tail for sewing. 30 sts.
Comb Tips & Wattles - Make 6
1st rnd: With B, 6 sc in MC. Place st marker. 6 sts.
2nd rnd: (Sc2, 2sc) twice. 8 sts.
3rd rnd: Sc in each st around. 8 sts.
4th rnd: (Sc, 2sc) repeat around. 12 sts.
5th - 8th rnds: Rep rnd 3. 12 sts.
9th rnd: (Sc2tog) around. 6 sts.
10th - 13th rnds: Rep rnd 3. 6 sts.
Close: Pinch the top of the comb tip, with 3 sts on each side lining up. Ch 1 and sc through each set of sts across to close. FO, leave long tail for sewing.
Use 4 for the Comb Tips and 2 for the Wattles.
Legs - Make 2
1st rnd: With C, 6 sc in MC. Place st marker. 6 sts.
2nd rnd: (Sc, 2sc) repeat around. 9 sts.
3rd rnd: Sc around. 9 sts.
4th rnd: Rep rnd 3. 9 sts.
5th rnd: (Sc, Sc2tog) around. (6)
6th - 13th rnds: Rep rnd 3. Lightly stuff as you progress.
Tip: Use the back of a 6mm/J hook to insert the stuffing down into the leg.) 6 sts.
14th rnd: (sc, 2sc) around. 9 sts.
15th - 16th rnds: Rep rnd 3. 9 sts.
17th rnd: (Sc, Sc2tog) around. 6 sts.
18th - 25th rnds: Sc in each st around. Sl st in next st to FO, leave long tail for sewing. Finish stuffing.
Toes - Make 6
1st rnd: With C, 6 sc in MC. Place st marker. 6 sts.
2nd - 6th rnds: Sc in each st around. 6 sts.
Sl st in next st to FO, leaving a long tail for sewing. STUFF LIGHTLY.
Wings - Make 2
1st rnd: With A, 6 sc in MC. Place st marker. 6 sts.
2nd rnd: Sc in each st around. 6 sts.
3rd - 4th rnds: Rep rnd 2. 6 sts.
5th rnd: (Sc, 2sc) repeat around. 9 sts.
6th rnd: In BLO, sc in each st around. 9 sts.
7th rnd: (Sc in next 2 sts, 2sc) around. 12 sts.
8th rnd: Rep rnd 6. 12 sts.
9th rnd: Rep rnd 5. 18 sts.
10th rnd: Rep rnd 6. 18 sts.
11th rnd: Rep rnd 7. 24 sts.
12th rnd: Rep rnd 6. 24 sts.
13th rnd: Rep rnd 2. 24 sts.
14th rnd: Rep rnd 6. 24 sts.
15th rnd: (Sc in next 2 sts, Sc2tog) around. 18 sts.
16th rnd: Rep rnd 6. 18 sts.
17th rnd: (Sc, Sc2tog) around. 12 sts.
18th rnd: In BLO, Sc2tog around. Sl st in next st to FO, leave long tail for sewing the hole closed and for sewing on the wing later. 6 sts.
Tip of wing: At the bottom tip of the wing, join yarn in 1st FLO, Ch 5, sk st, sl st in next. *Ch 5, sk st, sl st in next. Rep * to * until you reach the top of the wing. FO. Weave in ends.
Tail Feathers - Make 3
Use D for 2 feathers and A for 1 feather.
1st rnd: 6 sc in MC. Place st marker. 6 sts.
2nd - 4th rnds: Sc around. 6 sts.
5th rnd: (Sc, 2sc) repeat around. 9 sts.
6th rnd: In BLO, SC around. 9 sts.
7th rnd: Rep rnd 5. 12 sts.
8th rnd: Sc around. 12 sts.
9th rnd: Rep rnd 5. 18 sts.
10th rnd: Rep rnd 6. 18 sts.
11th rnd: Rep rnd 8. 18 sts.
Next rnds: Repeat rnds 10 - 11 - 5 times. 18 sts.
22nd rnd: Rep rnd 6. 18 sts.
23rd rnd: (Sc, Sc2tog) around. 12 sts.
24th rnd: Rep rnd 6. 12 sts.
25th rnd: Rep rnd 23. Sl st in next st to FO, leave long tail for sewing the hole closed and for sewing on the wing later. 6 sts.
Tip of feathers: At the bottom tip of the tail feathers, join yarn in 1st FLO, Ch 5, sk st, sl st in next. * Ch 5, sk st, sl st in next.* Rep from * to * until you reach the top of the tail feathers. FO. Weave in ends.
Flower Hexagons - Make 10
Tip: Avoid a lot of yarn strands by hiding in the starting and ending strands by crocheting directly over the tails. Snip when done and avoid using a tapestry needle to hide.
1st rnd: With A, 5 sc in MC. Sl st in next st to FO. 5 sts.
**Pretend there are 6 sts when you work the next row. You will work a st before the knot, and a st after the knot. By doing this, your starting circle is tighter and looks much neater after the next row is complete.
For round 2, complete 5 motifs using B and 5 motifs using D.
2nd rnd: With new colour join with a sl st in any st. *YOH, insert hook into same st as join and draw up an extended loop, but keep things as loose and relaxed as you can. Repeat * 3 more times, for a total of 4 loops. YOH and pull the hook through all 4 loops. Ch 2. (In next st, rep *.) 5 more times. Sl st into st at the top of the 1st petal. FO. 6 petals.
3rd rnd: With A, join with standing sc in the 1st ch 2 space. Sc, ch 1, 2 sc in same ch2 space. Sc in the next st at the top of the flower petal. *[(2 sc. Ch 1. 2 sc) in ch 2 space), sc in top of petal]*. Rep from * to * 4 more times. Sl st loosely in the next 2 sts. Sl st in next ch 1 space to FO, leave 24” long tail for sewing later.
Trim off any tails at the back of the hexagon. If you forgot to carry some of the tails, be sure to tie them off before trimming. This will make sewing the pieces together easier.
Flower Pentagons - Make 5
1st rnd: With A, 4 sc in MC. Sl st in next st to FO. 4 sts.
**Pretend there are 5 sts when you work the next row. You will work a st before the knot, and a st after the knot. By doing this, your starting circle is tighter and looks much neater after the next row is complete.
2nd rnd: With G, join new yarn with a sl st in any st. *YOH, insert hook into same st as join and draw up an extended loop, but keep things as loose and relaxed as you can. Repeat * 3 more times, for a total of 4 loops. YOH and pull the hook through all 4 loops. Ch 2. (In next st, rep *.) 4 more times. Sl st into st at the top of the 1st petal. FO. 5 petals.
3rd rnd: With A, join with standing sc in the 1st ch 2 space. Sc, ch 1, 2 sc in same ch2 space. Sc in the next st at the top of the flower petal. *[(2 sc. Ch 1. 2 sc) in ch 2 space), sc in top of petal]*. Rep from * to * 3 more times. Sl st loosely in the next 2 sts. Sl st in next ch 1 space to FO, leave 24” long tail for sewing later.
If you mark each pentagon with a stitch marker, you can easily identify it in the future for the assembly process.
Plain Pentagons - Make 7
Plain pentagons are solid colours using A.
1st rnd: With A, 5 sc in MC. Place st marker. 5 sts.
2nd rnd: 2 sc in each st around. 10 sts.
3rd rnd: (sc, 2sc) repeat around. 15 sts.
4th rnd: [(Sc, hdc, sc in same st), sc2] around. Sc in next st, sl st in next st to FO, leaving a long tail approx. 24“ for sewing later. This should bring the tail to a point on the pentagon. 25 sts.
Plain Hexagons - Make 10
1st rnd: With A, 6 sc in MC. Place st marker. 6 sts.
2nd rnd: 2 sc in each st around. 12 sts.
3rd rnd: (sc, 2sc) repeat around. 18 sts.
4th rnd: [(Sc, hdc, sc in same st), sc2] around. Sc in next st, sl st in next st to FO, leave long tail approx. 24“ for sewing later. 30 sts.
Assembly Layouts
This is the layout for the sphere. The 5 plain hexagons and 1 plain pentagon at the FRONT center are where you will eventually attach the face. Use the long tails for sewing. You will be joining with either the Slip Stitch Method or the Hook Whipstitch Method. You can use a whip stitch to join if you prefer.
The layout diagram is available in the download.
FRONT
1 Plain Pentagon - Middle Only
10 Plain Hexagons
5 Yellow Flower Hexagons
BACK
6 Plain Pentagons
5 Red Flower Hexagons
5 Blue Flower Hexagons
JOINING METHODS
Slip Stitch Method - Ridged Seam
With WS facing each other, line up the corners on each piece you are joining. 5 sts across each side. When you count from right to left, the 5th st will always be the corner. (either the hdc or the st before the Ch 1 space). If you aren’t sure you are lined up, find the corner st to the left and including that st, count back 5, from left to right, and st 1 will be where you insert your hook. Using the long tail to your right, insert your hook through both sts, grab the tail, draw it through with the hook, YOH, and pull through the loop (counts as sl st). Now sl st 4 across to the next corner. You may want to use stitch markers to join the corners as you go.
Hook Whipstitch Method - Flat Seam
(This is the method I use for the Rooster)
With WS facing each other, line the corners and the sts up on each piece you are joining. Using the long tail to your right, insert your hook through both sts, grab the tail, and draw it all the way through with the hook. Insert your hook through the next 2 sts, YOH, and pull it all the way through. Do this 3 more times until you reach the corner. When you count, 1, 2, 3, 4, 5, the 5th st will always be the CORNER (either the
HDC or the st before the Ch1 space). You may want to use stitch markers to join the corners as you go.
Joining Front Side Together
**Important: ALL pieces should be placed with the tail at the right-hand corner, next to the joining round, so you can join pieces from right to left.**
**It may be easier to join the pieces individually, one at a time, rather than pinning them all together at once. Just keep in mind the layout. That is why it was suggested that you print the diagram page.**
ROUND 1: Lay the first 6 pieces together with the tails to the right-hand side.
There should be a plain pentagon, in the middle and 5 plain hexagons on each side of the pentagon. Using the tail on the plain pentagon, join each plain hexagon to the plain pentagon. FO.
ROUND 2: Take 5 yellow flower pentagons, and place them between each plain hexagons, with the tails pointing inward at the center. Using the long tail of each plain hexagons. Join the plain hexagons together up the middle, and then join the yellow flower pentagon across to the left (with the same tail). FO. Then use the tail of each yellow flower pentagon, and join across to the right. FO.
ROUND 3: You will notice in this round that the ball will start to curve as you join. Take 5 plain hexagons, and place each between the yellow flower pentagons, with the plain hexagon tails to the bottom right, when looking out from the center. Using the long tail of each plain hexagon, join the plain hexagon across the top of the plain hexagon, and then join the yellow flower pentagon across to the left (with the same tail). FO. Then use the tail of each PLAIN HEXAGON, and join across to the right. FO. If any of the pieces are “bunched” at the seam, you may have made a mistake joining. It should look EXACTLY as shown. Secure all tails and weave them into the back of the FRONT piece of the ball. If necessary, use tails to close up any holes at the joins. Then weave them in and trim them off.
JOINING THE BACK PIECES TOGETHER
**Important: ALL pieces should be placed with the tail at the right-hand corner, next to the joining round, so you can join pieces from right to left.**
**It may be easier to join the pieces individually, one at a time, rather than pinning them all together at once. Just keep in mind the layout. That is why it was suggested that you print the diagram page.**
ROUND 1: There should be a PLAIN PENTAGON in the middle and 5 BLUE FLOWER HEXAGONS on each side of the pentagon. Using the tail on the PLAIN PENTAGON, join each BLUE FLOWER HEXAGON to the PLAIN PENTAGON and then FO.
ROUND 2: Now take 5 PLAIN PENTAGONS, and place them between each BLUE FLOWER HEXAGON, with the tails at the center point. Using the long tail of each BLUE FLOWER HEXAGON, join the BLUE FLOWER HEXAGONS together up the middle, and then join the PLAIN PENTAGON across to the left (with the same tail). FO. Then use the tail of each PLAIN PENTAGON, and join across to the right. FO.
ROUND 3: You will notice in this round that the ball will start to curve as you join. Take the next 5 RED FLOWER HEXAGONS, and place each between the PLAIN PENTAGONS, with the RED FLOWER HEXAGON tails to the bottom right (when looking out from the center). Using the long tail of each RED FLOWER HEXAGON, join the RED FLOWER HEXAGON across the top of the PLAIN HEXAGON, and then join the PLAIN PENTAGON across to the left (with the same tail). FO. Then use the tail of each RED FLOWER HEXAGON, and join across to the right. FO. If any of the pieces are “bunched” at the seam, you may have made a mistake joining. It should look EXACTLY as shown. Secure and weave all tails into the back of the FRONT piece of the ball. If necessary, use tails to close up any holes at the joins. Then weave them in and trim them off.
JOINING THE FRONT & BACK PIECES TOGETHER
Lightly stuff each half of the ball. Attach a long piece of yarn, approx. 10 ft for joining the pieces together. (If you are using the Hook Whipstitch Method, you may want to use 2 – 5ft pieces, as it won’t be quite so long to pull through the sts.) Line each half up and begin joining together. Go ahead and use stitch markers or pins to secure the pieces if necessary, at the corners. When you join about ⅔ of the way around, begin to stuff more firmly. When you only have 2 seams left to close the ball, finish stuffing firmly. Secure your tails and weave them inside of the ball.
Assembly Instructions
TURN YOUR BALL INTO A ROOSTER
BEAK: Take the beak plate and one of the beak pieces and line the sts up on the bottom half of the beak plate. Using the long tail on the beak piece, whipstitch through the FL of the beak plate and the whole st of the beak piece, across 15 sts. Line the top beak piece up with the remaining sts on the beak plate and using the long tail, whipstitch around as previously indicated. Use both beak tails to sew the sides of the beak pieces together. Secure and weave in the ends. The long tail on the beak plate will be used to sew the beak to the ball, through the remaining BLs. Turn the ball as shown, with the yellow flower at the top. Line the beak up with the center pentagon, pin if necessary, and sew it in place. Secure the tail and weave it into the beak.
EYES & EYELIDS: With the front of the eyeballs facing you, line up the pupils so that they are centred over the middle rnd (or center it just below the middle rnd). Using the long tails, whipstitch the pupils to the eyeballs, secure your tails and weave them in. Line the eyelids up on the eyeballs and using the long tails on the eyelids, whipstitch the eyelids to the eyeballs as follows: With the eyeballs facing away from you, whipstitch through the FLs of the eyeballs and the whole sts of the eyelids. Secure tail with a knot, then weave into the back of the eyelids. Do not sew across the bottom of the eyelid. You should be able to pull the eyelid down over the pupil. Line the eyeballs up on the two hexagons above the beak. Pin if necessary, and sew the eyeballs to the ball. Secure and weave in your ends.
EYELASHES: Line the eyelashes up at the top of the eyelids, with the WS facing out toward you (so that the eyelashes curve down around the eyeballs. Pin in place, if necessary. Using the long tail, whipstitch through the chs on the bottoms of the eyelids and the chs along the bottoms of the eyelashes. Secure the tails and weave in the tails. You should be able to pose the eyelashes to make the rooster sleep or awaken.
WATTLES: With the RS facing toward you, stack the 2 wattles on top of each other. Line each of 3sts up together and using BOTH tails, sl st across to join. Secure the ends, and using the tails, sew the wattles at the bottom/middle of the beak. Weave in the ends
COMB: Take the 4 comb pieces, and with RS facing towards you, stack them atop each other, with 3sts on each lining up. Take ONE tail, insert your hook through all 4 pieces, and sl st across to join. Weave the 3 remaining tails into the comb pieces. Line the comb up just above the yellow flower between the eyes. Using the remaining tail, sew the comb to the ball across the front, then across the side, across the back and then across the other side. Sewing it on all sides will help hold the comb together and give it some lift. Secure your tail and weave it in.
WINGS: Take the wings with the long tail end facing toward the front of the rooster, and line them up at the sides, just below and between the flower hexagons. Sew the wings to the ball across the front tip of the wing and then across the back. Secure the tail and weave it in.
TAIL FEATHERS: With the Rooster upright and the back facing you, take the brown tail feather and line it up with the center pentagon. The bottom of the tail feather (where the long tail is) should be at the bottom. Use the long tail to sew the tail feather to the ball. Sew across both the top and the bottom edge of the tail feather. Then join the blue tail feathers in the same way, slightly angled and overlapping the brown tail feather. Once the tail feathers are attached, push them up slightly towards the ball, and using the tails, tack the tail feathers up, so that they look like the last image shown below. Secure and weave in the ends when you are happy with the position of the tail feathers.
LEGS: Take the long leg piece and line up the 1st middle toe as shown. Sew in place. Then take the other 2 toe pieces and slightly angle them on each side of the center toe. Sew in place, secure and weave in the ends. Repeat for the other leg. Take the legs and line them up at the bottom center of the rooster. Using the long tails on the legs, sew the legs to the ball. Secure the tails and weave them in.

Wendy says
[the_grid name="Amigurumi"]
Mikey says
Got it Thanks.