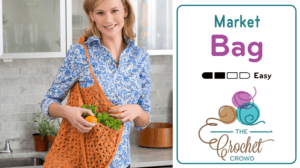
This Little Bag Went to Market
We had fun with this crochet little market bag a few years back. It has an interesting stitch which I hadn't seen before that allows the bag to expand in a geometric mesh formation. It's pretty spectacular.

More Ideas
- Shine Like Diamonds Shawl + Tutorial
- Free Crochet Workshop for Beginners + Tutorial
- 22 Portable Knit and Crochet Projects
- Crochet Textured Wheels Bag + Tutorial
- 15 Crocheted Summer Tops
If you are in the 'market' for a new market bag, you should try this pattern. The tutorial is below to help you with the special stitch that is required.
We have actually done a Challenge with this bag a few years ago. You can see all the different bag colour combinations that were submitted for this same pattern. View The Submissions Gallery
Video Tutorial - Follow Along
Right handed video version is only available for this bag.
Crys Hall says
Your diagram was a life saver! Been pulling my hair out from going off the RH pattern for two days now but your diagram clicked it for me. Thanks so much for all the help you give us in your videos, challenges, etc!
Lisa says
OMG!!! What am I doing wrong?? I completed row 9 and 10 with no problems however, as I'm working my way up, I am some how increasing...this bag is going to be huge!! What the heck am I doing wrong???
Chrystalkay says
It will start going up. It is just that you have gone from 3 stitches at the base, to 6 stitches on the rim. So don't expect it to be the size of the base. I didn't realize that myself until I had a 2' size ang growing! I used 4 weight worsted and an H hook and WOW! So... nothing done wrong, it will just be larger by half at least than the bottom. I think the original base was supposed to be 8 or 9 inches and the width if the bag was supposed to be 16".
Lisa says
Thanks for your help! What was happening, and only because I didn't pay close enough attention to Mikey's video, is that I was 'increasing' each round between the last star and the 1st join (don't even ask me how I was doing it). So I went from 32 stars up and up and up! Now it's 1/2 done and going great!
Chris Sexstella says
I need help. I need to know how to add more yarn? I just started row 9 and before I get to far into the pattern I want to make sure I can finish it. My yarn balls are only 30g so I am sure I am going to need to add more a few times and am confused as how to do this and where is the best spot.
Chrystalkay says
Because of the openness of the pattern, I would start at the bottom of any base stitch like this... You wrap, wrap, wrap the yarn and go into the proper base stitch, and pull up a loop, then I would bring in the new yarn at that point and draw it through the first 2 loops and go on with that, to finish the DT. Both the last yarn and the first yarn will be close to a place where it can be woven in, and it will give maximum strength to the add-on.
I hope this helps!
Chris Sexstella says
Yes this helps. I could not wrap my head around where to combine. Thank you so much!
Chris Sexstella says
This Helped so much Thank You!