DOWNLOAD FREE PATTERN
Try my Christmas Tree Skirt
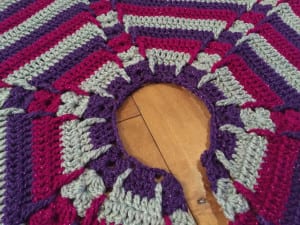
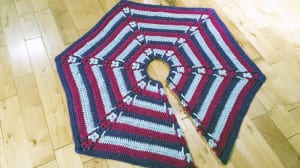
I have designed a Christmas Tree Skirt that is a hexagon with opportunities to grow to infinity.
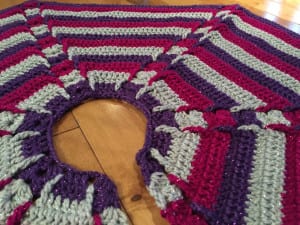
In my design, I get you started with a generous size hole space for the middle of the tree. You can use this for real or artificial trees. I have incorporated a slit so you can easily wrap it around the base after the tree is installed.
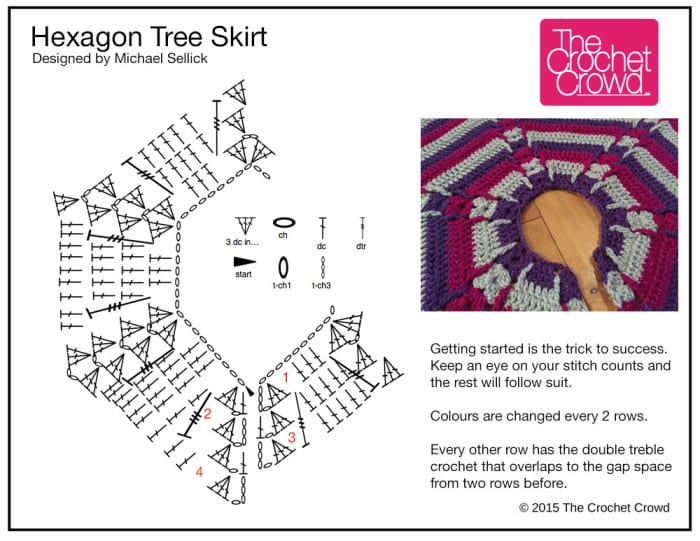
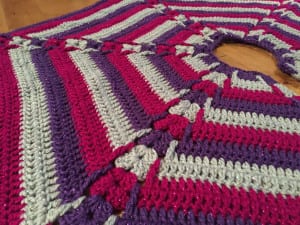
The trick to this pattern is getting started to establish the first 2 rows. Based on my instructions, you can grow your skirt as large as you need. You can essentially use any colour mixing but you should know that the corner spots have a detail that is only visible on one side of the skirt. This means, every other row, once the beginning is established can have this overlay of the double treble that is happening to make it really interesting.
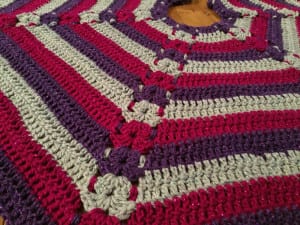
The tree skirt is a one side pattern it looks different on the back. Here's what it looks like.
To keep the skirt continually growing, you must be able to identify the gap spaces in the pattern at the corner spots. You will be playing those spaces for the double tree and regular double crochet to ensure the right amount of stitches is applied to make the corners turn properly so it can sit down flat.
I have included a crude crochet diagram that you are welcome to view, download and/or print. View or Print the PDF Here.
Sizing, Yarn and Hook Size
- My is only 3 feet diameter. You can make yours as big or as small as you need.
- Using 5 mm or H Size Crochet Hook
- I used Caron Simply Soft Party. 2 Balls of each of the Fuscia, Silver and Purple.
Written Instructions
- Ch 53. 3 dc in 5th chain from hook. *Skip next 2, 1 dc into next 3 ch, skip next 2. 3 DC into next ch, ch 2, 3 dc all in the same chain. Repeat * around. Final chain has 3 dc, ch 1, 1 dc into the same chain. Turn.
- Ch 4 (counts as 1 dc, ch 1), 3 dc into ch-1 space in row below. *1 dc into space the 3-dc and first 1-dc that stands alone. 1 dc into each of the next dc stitches. 1 dc into the space between 1-dc and 3-dc space. Corners are the same throughout as 3 dc, ch 2, 3 dc. Repeat * around. Final stitch is 3 dc into ch-1 space, ch 1 and 1 dc into the same space. Fasten off colour and change to something new. Turn.
- Ch 4 (counts as 1 dc, ch 1), 3 dc into ch-1 space in row below. *1 Double Treble into space the 3-dc and first 1-dc that stands alone from two rows below. 1 dc into each of the next dc stitches. 1 Double Treble into the space between 1-dc and 3-dc space from two rows below. Corners are the same throughout as 3 dc, ch 2, 3 dc. Repeat * around. Final stitch is 3 dc into ch-1 space, ch 1 and 1 dc into the same space. Turn.
- Ch 4 (counts as 1 dc, ch 1), 3 dc into ch-1 space in row below. *1 dc into space the 3-dc and first 1-dc that stands alone. 1 dc into each of the next dc stitches. 1 dc into the space between 1-dc and 3-dc space. Corners are the same throughout as 3 dc, ch 2, 3 dc. Repeat * around. Final stitch is 3 dc into ch-1 space, ch 1 and 1 dc into the same space. Fasten off colour and change to something new. Turn.
- Repeat Rows 3 and 4 until you get to your desired size.
Tutorial

Rebecca Christopher Mattison says
needs a Rav link!
Morgan says
I can't find the difficulty level on this....
But other than that I love the idea!
Paula Landry says
Yaaaaaa! I've been looking for a design like this for ages! (with the slit) Will be doing this for sure! Thanks Mikey!! <3
However, do you have any words of wisdom if I needed that centre hole bigger? Is there a repeating stitch count that I can experiment with? <3 <3 <3 this 🙂
Tory Cook says
Paula Landry I think if you increase it like this it would work well.
when you chain on in the beginning add an extra 6, then when you are going back around where the pattern is 3 double crochet in one spot skip two then do 1 double crochet for three spots.....do 4 not 3 spots, then it would be bigger and not mess up the rows. Does it make sense? Im not the greatest when wording things.