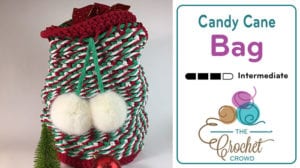
Crochet Candy Cane Santa Bag
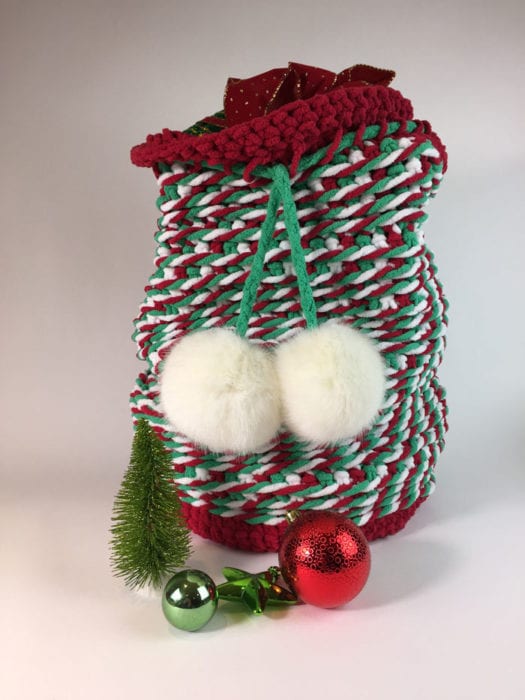
This super cute Candy Cane Santa Bag was designed by our very own Diva Dan aka Daniel Zondervan. The bag is 12" Dia x 18" Tall. It is using Bernat Blanket Yarn.
It's a great bag that mixes in the Braided Single Crochet appearance that you see. It's not hard but we have classified this as intermediate. The bag starts in the middle of the bottom base and when it works up to the top brim of the bag.

Pattern Suggestions
- Crochet Hugs & Kisses Baby Blanket Pattern
- Crochet C2C Puffin Square
- Crochet Twisting Fringe + Tutorial
- Crochet Dusting Mitt Pattern
- Crochet Felted Purse Pattern
Instructions
Materials
- Size 10 mm or N Hook.
- 300 g (1 ball) of Bernat Blanket Brights Race Car Red. Colour A
- 150 g (1 ball) of Bernat Blanket Bright Go Go Green. Colour B
- 150 g (1 ball) of Bernat Blanket Vintage White. Colour C
- 2 Bernat Pom Poms for the Tie String.
- Tapestry Needle.
Base
The entire project from base to the where the Candy Cane Single Braiding Stops is a continuous round. Use a stitch marker for the base section while in the growing stitches to record the revolutions so that the growth is even.
With colour A, ch 6 and st st in beg chain to form a ring.
- 12 sc in ring, mark with a stitch marker in last sc. Continue to use a stitch marker in last sc in each round until the end of row 14. The stitch marker helps you identify each time you have gone completely around.
- *1 sc in 1st sc, 2 sc in next sc. Repeat * around.
- *1 sc in next 2 sc, 2 sc in next sc. Repeat * around.
- *1 sc in next 3 sc, 2 sc in next sc. Repeat * around.
- *1 sc in next 4 sc, 2 sc in next sc. Repeat * around.
- *1 sc in next 5 sc, 2 sc in next sc. Repeat * around.
- *1 sc in next 6 sc, 2 sc in next sc. Repeat * around.
- *1 sc in next 7 sc, 2 sc in next sc. Repeat * around.
- *1 sc in next 8 sc, 2 sc in next sc. Repeat * around.
- *1 sc in next 9 sc, 2 sc in next sc. Repeat * around.
- *1 sc in next 10 sc, 2 sc in next sc. Repeat * around.
Rounds 12 - 14. 1 sc in each around. Do not fasten off the red.
Sides of Bag from Base
Row 15 and onward: Sc with colour A is 1st sc. Attach Colour B by doing sc in the next stitch. Attach Colour C by doing sc in the next stitch. All three colours are now ready to play.
The Single Crochet Braiding technique relies on 3 colours. The act of carrying the yarn creates the braided look that you can see. This happens on the opposite side of the project. So when looking at the project, you will see it from the inside point of view and the braid is happening on the other side. Remember to keep the yarn tot when doing this technique for consistency.
*Grab Colour A yarn over the other two yarns and sc in next stitch and then drop that colour. Grab colour B yarn over the next two yarns and sc in next stitch, drop that colour. Grab colour C yarn over the next two yarns and sc in the next stitch and drop that colour. Continue repeating from the first colour and keep repeating. Single crochet in the revolutions in this manner until you have a tennis ball size ball of yarn and fasten off Colour B and C. Keep only the red attached.
Yarn will get twisted once in a while, you must twirl your project to untwist the yarn leading to the yarn ball.
Top
You will no longer work in continuous rounds.
- With Colour A, ch 1, 1 sc in each stitch around. Join with a sl st to beginning sc.
- Ch 2, *hdc in next stitch, sl st in next. Repeat * around. Join with a sl st to beg ch-2.
- Repeat Step 1
- Repeat step 1, Fasten off and weave in ends.
Rope
- Chain with colour B or C approx 36" long. Fasten off and weave in ends.
- Thread through loops of the hdc around.
- Attach pompoms to the end of the rope.
Close Up
Diane says
Do you have a printable version of the pattern? When I try to print it from what you have shown, the adds print over the top of the pattern!
Mikey says
I just made you a free downloadable PDF, should be ready to link in about 10 minutes. Just refresh the page if you don't see it. It's a blue download button now. Thanks for the heads up and an opportunity to update this article.