The Crochet Crowd

  • PATTERNS
  • STITCH ALONGS
  • TUTORIALS
  • COMMUNITY & EVENTS
  • ABOUT US
menu icon
go to homepage
  • PATTERNS
  • STITCH ALONGS
  • TUTORIALS
  • COMMUNITY & EVENTS
  • ABOUT US
search icon
Homepage link
  • PATTERNS
  • STITCH ALONGS
  • TUTORIALS
  • COMMUNITY & EVENTS
  • ABOUT US
×
Home » Michael Sellick

Adding Fleece to Crochet + Video and Photographic Tutorial

Sharing is caring!

  • Facebook
  • Email

I was heavily inspired by the Troublemakers, they call themselves that, from Arizona, who are part of Project Linus and have been for many, many years.
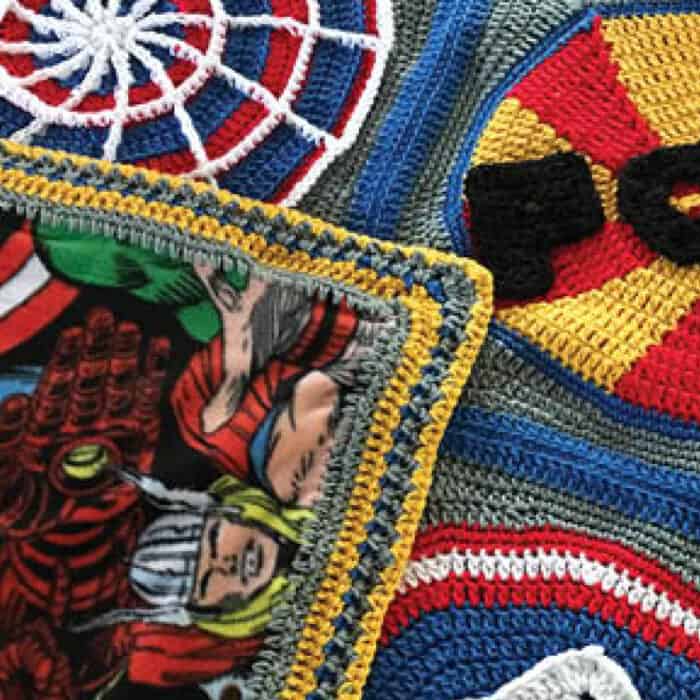
How to Add Fleece to Your Crochet Projects

They told me that much of their work comes from using Fleece to crochet borders around fleece to hand out to children in need. When we think of children in need, we think hospitals but Project Linus is much more than that. Blankets could be in the back of a police cruiser with a child being pulled out of a home due to domestic violence. We have been supporting Project Linus initiatives for years but these 3 ladies inspired me so much to try to do crochet around fleece.

Other Cruise Charity Projects We've Done

They save their chapter money and go into Joann Fabrics and Crafts to stock up on Fleece. These ladies, along with many others around North America cut up the fleece and crochet around the borders to stockpile them for Project Linus.

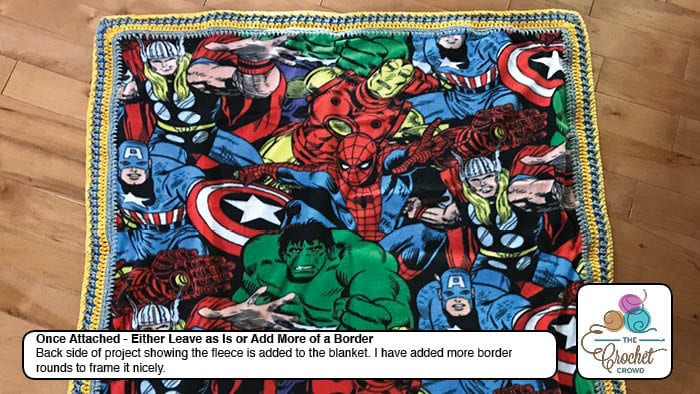
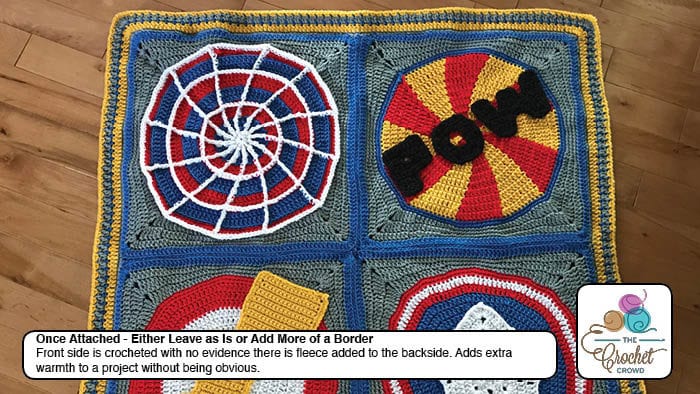
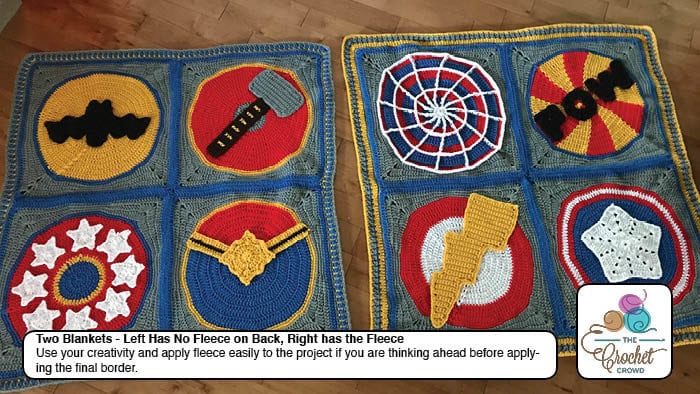
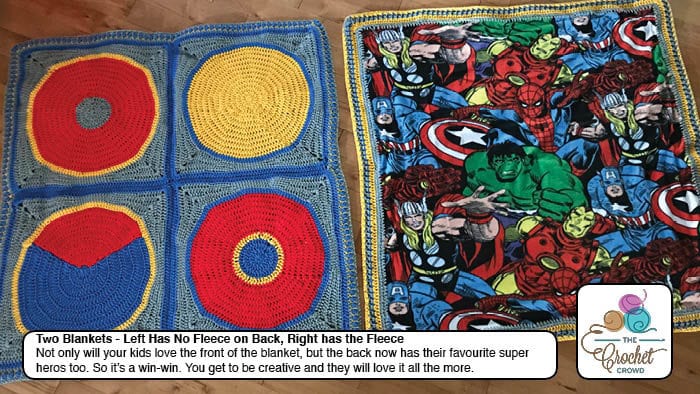
The tutorial shown below is demonstrating how to apply fleece to the back of an existing blanket. In the steps I demonstrate how to prepare the fleece to apply a border. The tutorial goes on to show you how to attach it to an existing blanket.

Inspiration

https://www.youtube.com/watch?v=Gi6CCL6Cy30

Easy Steps

The tutorial below shows all of these steps.

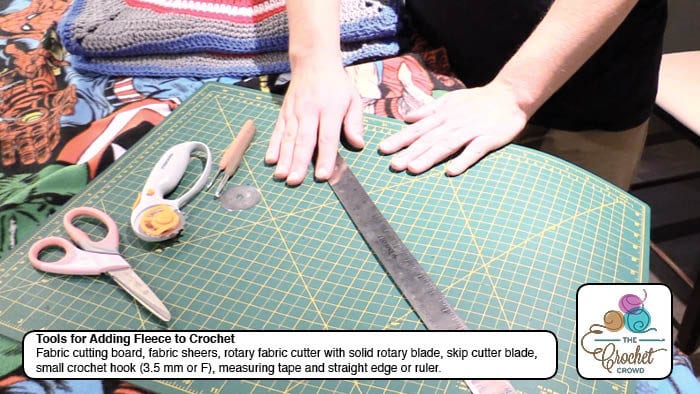
Tools Needed

  • Rotary Cutter, Fabric Cutting Board, Straight Edge/Ruler, Measuring Tape, Scissors, Skip Cutter and Small Crochet Hook.

Preparing Your Fleece

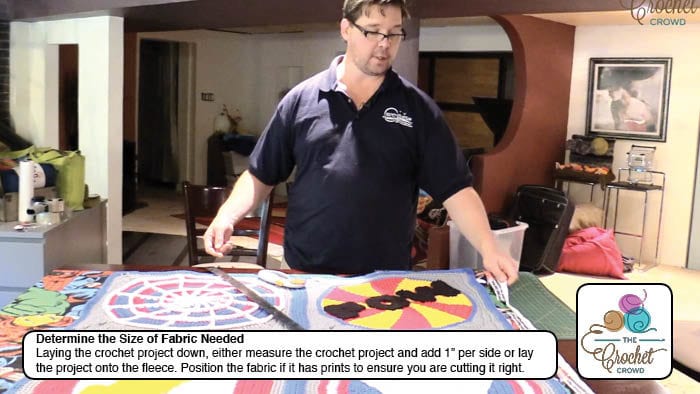
  1. Choose your Fleece for either to match it to an existing blanket or big enough to do a dedicated fleece blanket with a crochet border.
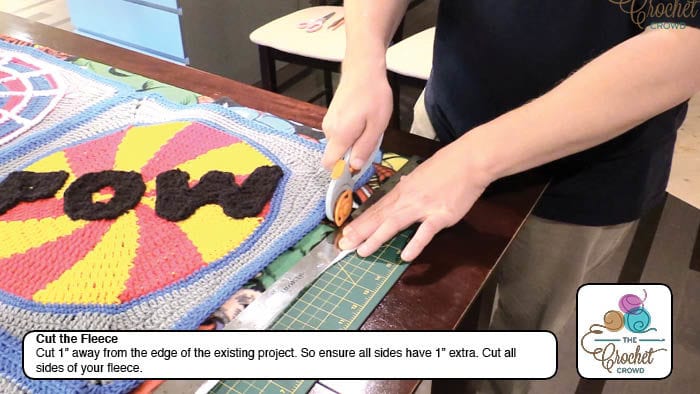
  2. If matching to an existing project. Using the rotary cutter, cut the fleece 1" extra per side.
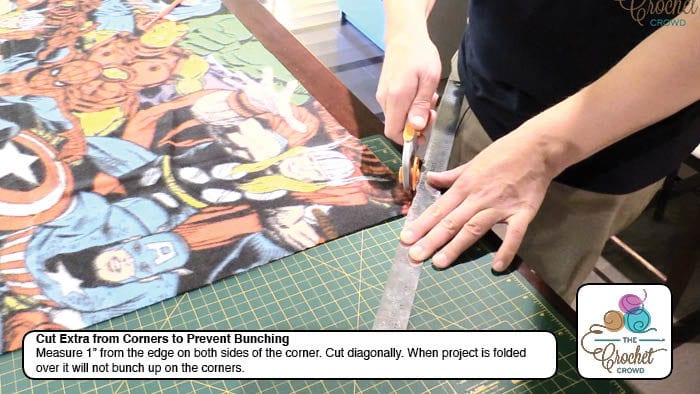
  3. In the corners, cut a diagonal out that is approximately 1" x 1" from the corner. When you are folded over the edge, the removal of fabric here will prevent bunching up in the corner.
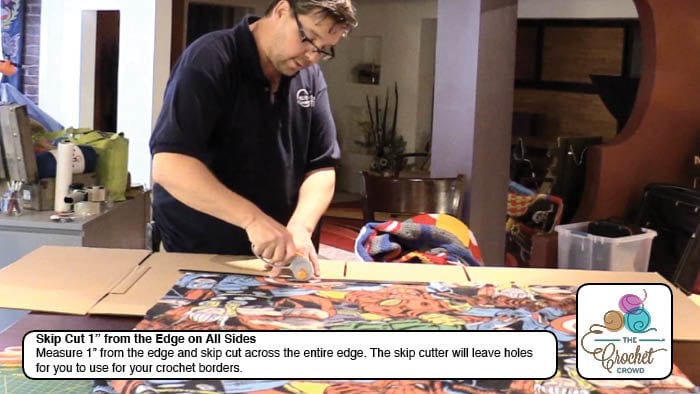
  4. Measuring 1" from each edge, use the Skip Cutter firmly to go across. DO NOT GO OVER MORE THAN ONCE or you will ruin your fleece. Be firm and exact.

Crocheting into Fleece

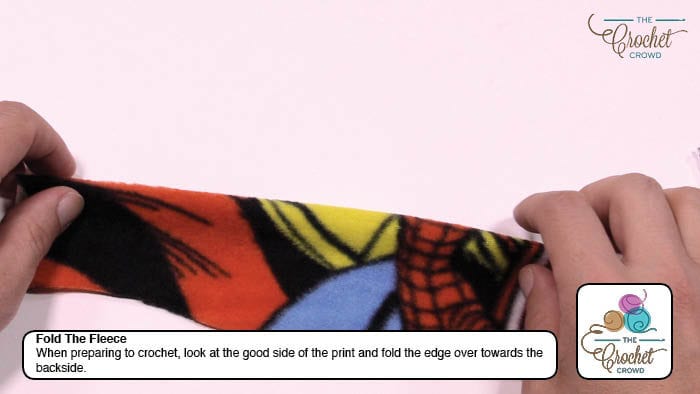
  1. Looking at the good side of the fleece. Fold the edge away from you to the back side.
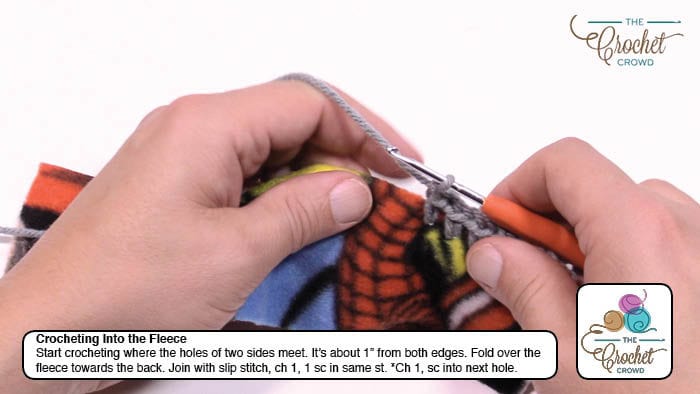
  2. Using a smaller crochet hook, 3.5 mm or F Hook and the same yarn you are using with your project and/or other Medium (4) Weight Yarn, insert hook into the first hole at the meeting points of where the skip cutter holes intersect. It's about 1" from top edge and side edge.
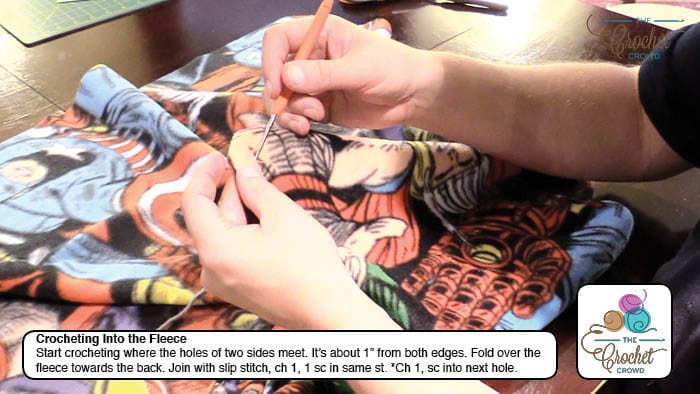
  3. Join yarn with a slip stitch, ch 1, 1 sc in same hole. *Ch 1, sc in next hole. Continue to * Around. In corners, ch 2. Be sure to stop where the next skip cutter holes are on the next side. Rotating your project and folding over the next edge as you crochet. Continue all the way around. Fasten off, weave in ends.
How to Add Fleece to Crochet Projects

Continuing On Without Attaching to Existing Project

  • You can continue to add more to your border by switching back to a regular size hook.
  • Consider the border as a multiple of 1 unless you want to count them out to be sure. You can add as many rounds as you wish.

Attaching to Existing Blanket

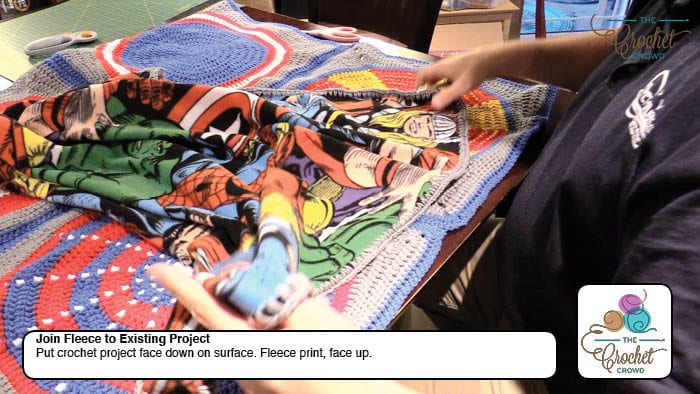
  1. Lay the crochet project you want to join the fleece to face down.
  2. Lay the fleece project on top of the crochet project face up.
  3. Lift up the two panels together as if they are one and the crochet project should be facing towards you.
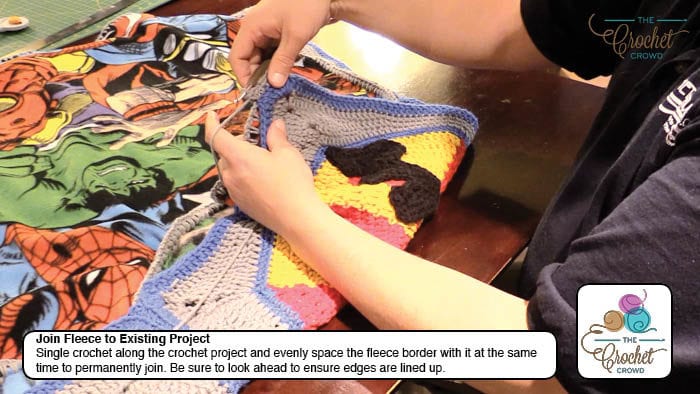
  4. Insert hook using the same size hook you were crocheting your project. Insert through both pieces at the same time and join with a single crochet. For the fleece side, only crochet into the single crochet stitches.
  5. Ensure to look ahead to ensure the fleece is matching up all the way to the other edge. In the case you are slightly too big or too small, just stretch the project out and align wth your stitches as you crochet if you are too small. If you are too big for the fleece, don't be afraid to advance a stitch on the crochet side but go into the same stitch on the fleece side. This will change the distance. Be random about it to prevent buckling.
  6. Once you join, you can continue to add more to the border if you wish. Be creative and have fun.

Tutorial

Pictorial Tutorial in order of Procedures
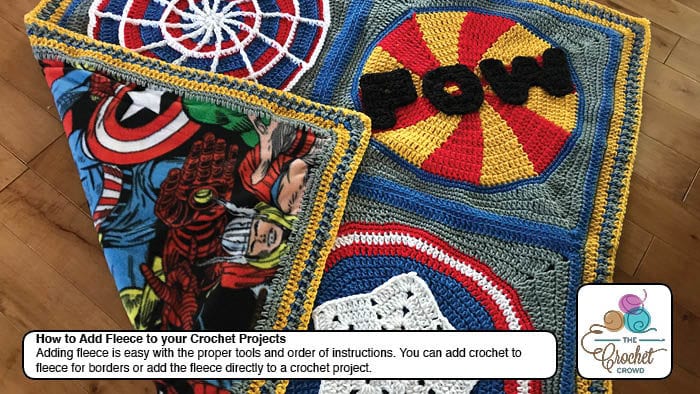
How to Add Fleece to Crochet Projects

More Michael Sellick

  • How To Crochet Square From the Middle Afghan Pattern + Tutorial
  • Michael Sellick aka Mikey of The Crochet Crowd
  • How to Crochet Two Tone Granny
  • The Secret to Finding the Multiples

Filed Under: Baby Blanket Tutorials, Baby Blankets, Beginners' Blankets, Blankets, Blankets Tutorials, Christmas Blankets, Crochet Granny Ripple Blanket Patterns, Crochet Halloween Blanket Patterns, Crochet Hugs and Kisses, Crochet Patterns by Michael Sellick, Crochet Pet Blanket Patterns, Crochet Shells and Circles Blanket Patterns, Crochet Study of Blanket Series, Exclusive Crochet Crowd Knit and Crochet Patterns, Granny Blankets, Granny Blankets, Hexagon Blankets, Interlocking Blankets, Log Cabin Blankets, Michael Sellick, Octagon Blankets, Popular Blankets, Rectangle Blankets, Round Blankets, Sampler Blankets, Star Blankets, Star Blankets, Study of Series Blankets, Wave Blankets, Wave Blankets

Comments

    Have you completed this project. Show me! Cancel reply

    Your email address will not be published. Required fields are marked *

    The maximum upload file size: 360 MB. You can upload: image, document. Links to YouTube, Facebook, Twitter and other services inserted in the comment text will be automatically embedded. Drop file here

  1. Pam says

    July 31, 2020 at 10:43 pm

    Hello, I cut my flannel one inch bigger on each side as my project. I then used the skip cutter along the one inch mark. As I turned under and crochet around, the ending flannel piece was a half inch bigger around than the crochet piece. Should I have cut my flannel a half inch then measure one inch from the edge to use the skip cutter? Thanks

    Reply
    • Mikey says

      August 03, 2020 at 7:34 am

      Usually I just do 1 inch bigger than the project per side. I run the skip cutter at the 1 inch. I found the rolling of the project worked for me. But it sounds like to me you have a valid thought. Seems like that makes sense too.

      Reply
      • Pam says

        August 03, 2020 at 2:44 pm

        Thank you for your prompt reply. I did roll the edge under as I crocheted the fleece. The fleece side was bigger all the way around than the crochet project. I possibly crocheted too loosely. I added additional crochet border to the crochet piece to get them to match.

  2. Sue McVicker says

    April 25, 2020 at 10:06 am

    No Blue Button

    Reply
    • Marina King says

      May 12, 2020 at 11:06 am

      no button for this one

      Reply
  3. Roxanne says

    May 03, 2019 at 2:43 am

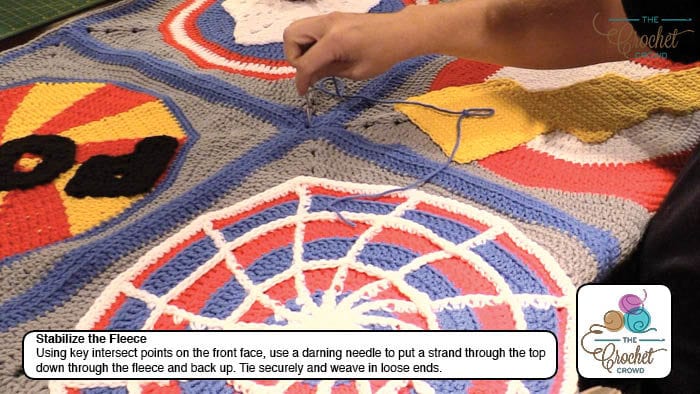
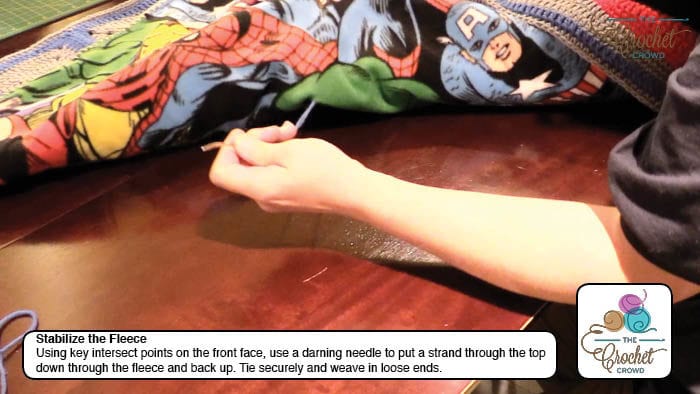
    I’ve made a blanket using cotton and I’m worried the blanket itself will stretch but not the fleece. Will the stabilising stitches stop this from happening, and should I put more in?
    Thanks

    Reply
  4. Loralee Wagstaff says

    October 03, 2017 at 11:53 am

    Thank you for this tutorial. I made an afghan for my autistic grandson, but he didn't like the feel of the yarn. I sewed flannel to the back, but didn't really like the way it ended up. This way looks easier and much nicer. I will use this method next time.

    Reply
Michael Sellick May 2026

Welcome!

I'm Mikey. Join me in learning crochet as I am always learning, too!

More about me
Mikey Stitch Studio Browse Patterns
The Crochet Crowd Design

AI Design

Learn about our designs. Why don't we use AI to design?

Designing
  • The Yarnkeepers Quest Crochet Retreat - Late Spring 2027
  • The Crochet Kaleidoscope Blanket Pattern
  • Crochet Graduate Gift Jar Pattern + Tutorial
  • Flowered Wedding Favour Box Pattern
  • Crochet Parade Pennants Pattern + Tutorial
  • Crochet Rainbow Dreams Patterns
  • Crochet Baby Bobble Hat Pattern
  • Crochet Heart Coasters Pattern + Tutorial
  • Crochet Minnie Mouse Ears Pattern
  • Crochet Halloween Puppets Pattern
  • Crochet Tuck-It Tote Bag Pattern + Stitch Along
  • Aran Toggle Crochet Wrap Stitch Along + Tutorial
  • The Crochet Crowd Book
  • Crochet Snowflake Throw + Diagrams + Tutorials
See more Crochet Stitch Alongs →

Footer

↑ back to top

Explore

  • About
  • Before 2023
  • 2023 Patterns
  • 2024 Patterns
  • 2025 Patterns
  • 2026 Patterns

More

  • FAQ
  • Contact
  • Privacy Policy

The website has been active since 2010. Articles and patterns are reviewed from time to time. Some patterns get updated with newly written instructions, photography and keeping the patterns current.

Copyright © 2026 The Crochet Crowd • Some links may contain affiliate connections.