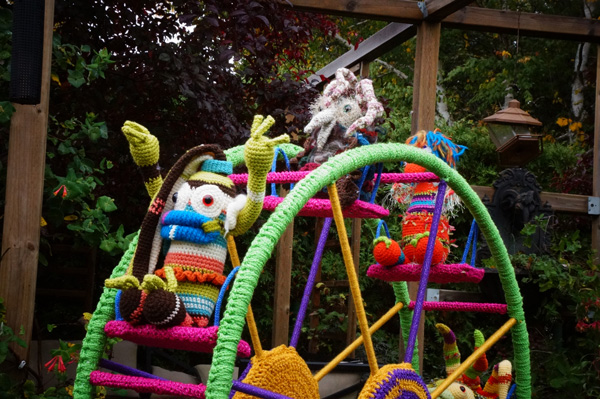
The Crochet Crowd Ferris Wheel
Trying a Crochet Ferris Wheel. Daniel came up with this concept and the very next morning at the end of September 2012, he put his vision to reality. I had come up with a crochet carousel, so he wanted to do a complimentary Ferris wheel to go with the carnival theme we have for Creativ Festival.
We also created a Crochet Yarn Bike for this exhibit.
Here's the truth though, this is actually version two. The first version had problems with the exterior wheel as he had an octagon shape using wood but the wood wasn't holding and the wood was splitting. With this, the outside rim of the wheel was removed and replaced with water pvc piping.
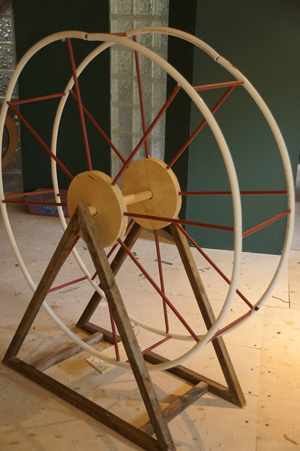
The challenges with this was to ensure the piping doesn't flex in a sideways direction. The cross beams on the outer rim were difficult to make even across. The ferris wheel can turn and if we motorized it, it could be really cool.
We had initial thoughts to add lighting but with cords being so thick, we didn't want to frame to turn into an electrical wire look. To compensate we decided to use yarn to help give the wheel some kick.
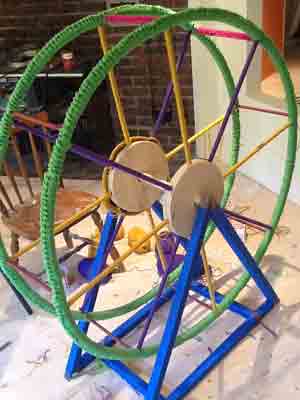
Some of the yarn bombing we did with this was completed while watching Netflix in the evenings and then crocheted using slip stitch techniques or hand sewn. We opted to use Celebration Yarn by Red Heart for the entire project due to the stunning colours of this line. The yarn has metallic mixed glitter to it giving the entire project a hint of glimmer.
The outside rim is actually two layers of crochet. The first layer, I had crocheted 9 stitches across for 2 strips that are 12 feet long. Though I thought I got the right width, when it was stretched over the round hose, it caused the strips to stretch too much that the white hose was being seen too much through it. It was causing the green to be dull due to the over stretching. I had to do a second layer of using 4 yarn strings at one time and did a slip stitch all the way around the rim. The second layer really thickened up the rim and really did a great job of really bringing the vibrant green forward.
The inside secret is that the outside rim is also version 2. The first time I did the slip stitching with the 4 yarn strings, I choose a mix of glitter, value and variegated yarn. It made the wheel exterior loose it's vibrants and carnival look. I also used the same yarn to the do the inner wheel. Again, doing it with the yarn made it loose it's fun look. The wheels were stripped for this yarn and inner wheel and redone with solid colours of Red Heart Celebration Yarn. With this lesson, we learned to not mix any other yarns with the Celebration Yarn so we don't loose the look.
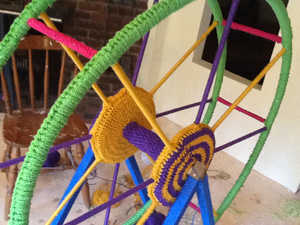
With the inner wheel, we opted to stripe up the interior to match the spokes of the ferris wheel. The entire inner wheels and cross beam was crocheting right onto the ferris wheel. I was on the outside putting my hands through the spoke areas to crochet in this areas. I was very concerned about the circles having a slit like a Christmas tree skirt. So I crocheted them right onto the frame. The two circles were then slip stitched together to form a tight seal in the spokes area of each side.
The pink cross beam yarn was completed in bed while watching Netflix. I hand sewed those crochet peices directly onto frame and also sewingt hem to the green yarn on the outside rim to ensure they stayed in place.
We have 8 characters to sit on this wheel. The seats are going to be like a swing set instead of a bucket seat you would find on a ferris wheel. Though we tried to maintain a sense of realism to this project, some aspects have a creative twist to work with our concept.
The blue frame and spokes were done with simple yarn wrapping around. Wrapping 16 spokes and this frame was nearly 7 hours of work. It was very time consuming but the look is great. We still need to finish off the corners, mount the seats and have each character positioned using dowels sticking up from the seat and into each character so they don't fall off.
Sharon Hunt says
I never knew you did a Ferris Wheel. It is soooooo awesome. :):)
Ginger says
You’re talents are unreal! This is awesome!!!!! Love seeing all your creations!!! Thank you for all you do for all of us!! ?