Updated in September 2024 from the original 2017 version, it is a way to square off the chevron Hugs & Kisses Baby Blanket. Another version of Hugs & Kisses Candy Hearts Blanket has a different beginning point, but with tens of thousands of these original blankets, we have given you additions to the pattern to square this off, too. Also updated are different chain counts for different sizes. From using a 4.5 mm / US 7 Hook, 5 mm / H/8 hook or even 10 mm / N/P for big chunky blankets such as Bernat Blanket.
TIP: If you want to square off the pattern, just have a fourth Caron Baby Cakes yarn ball on hand.
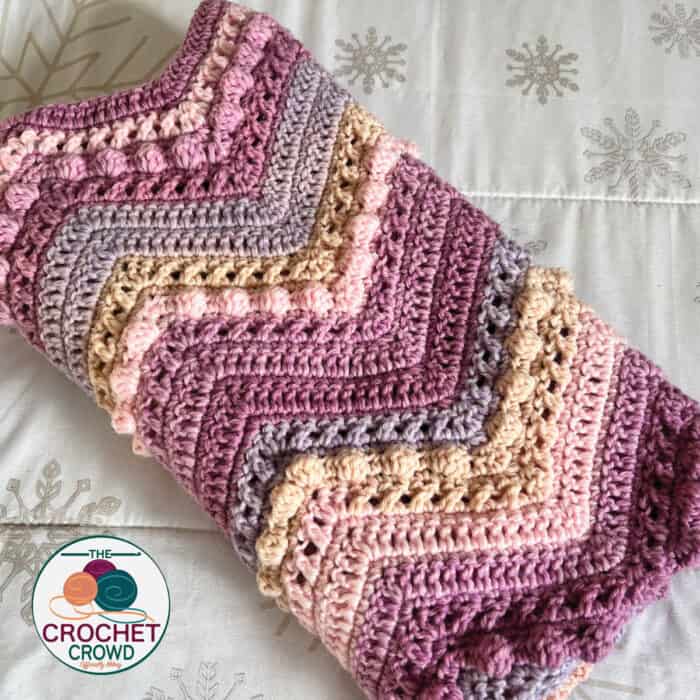
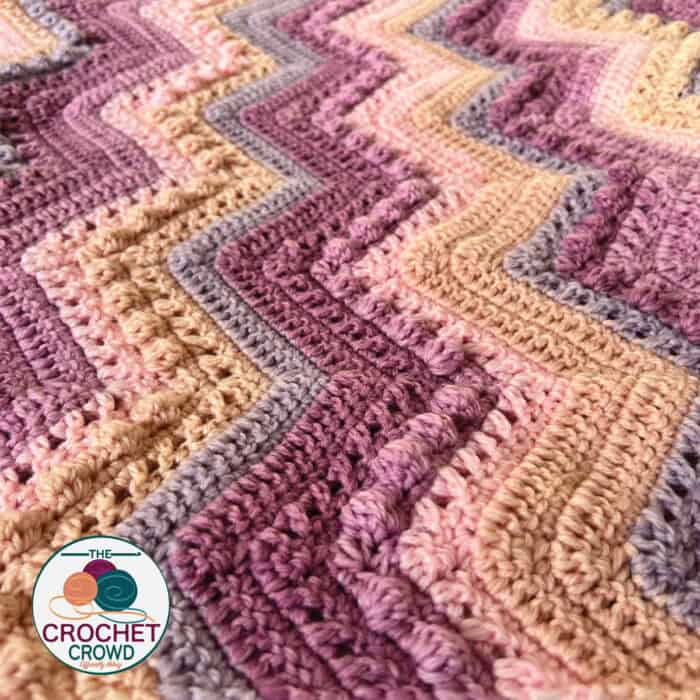
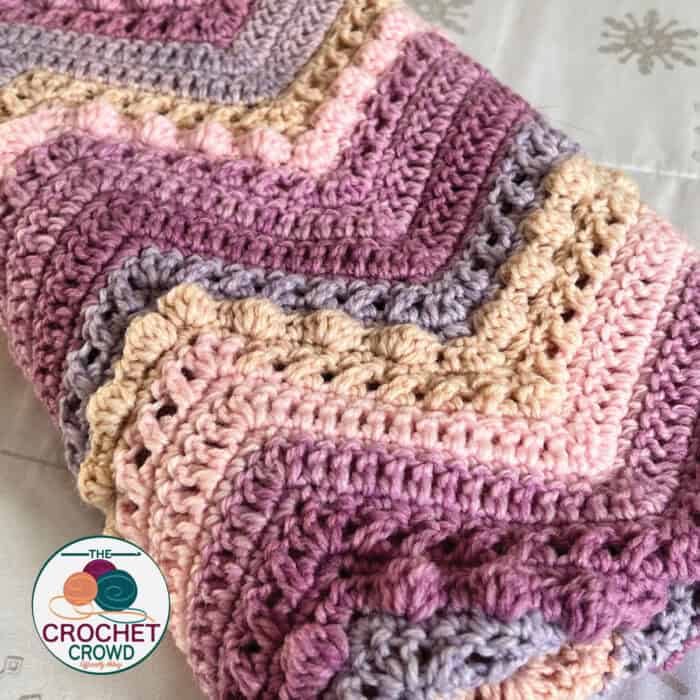
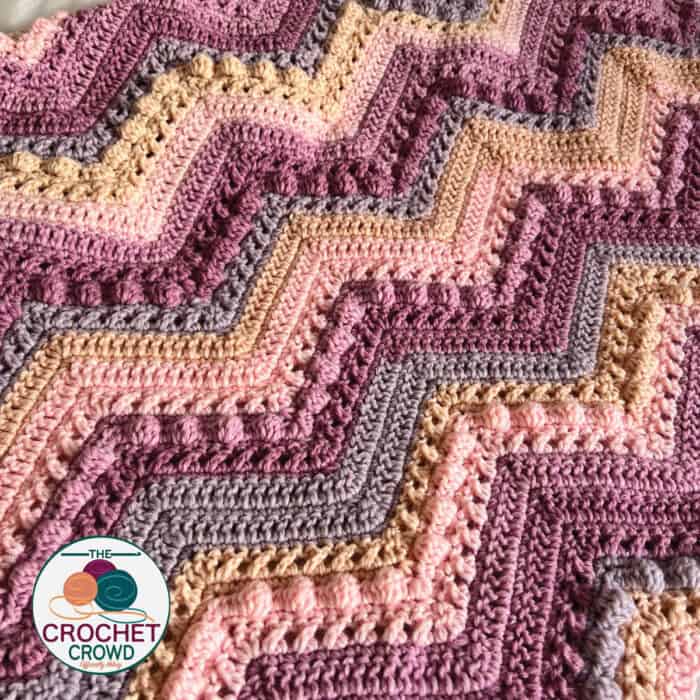
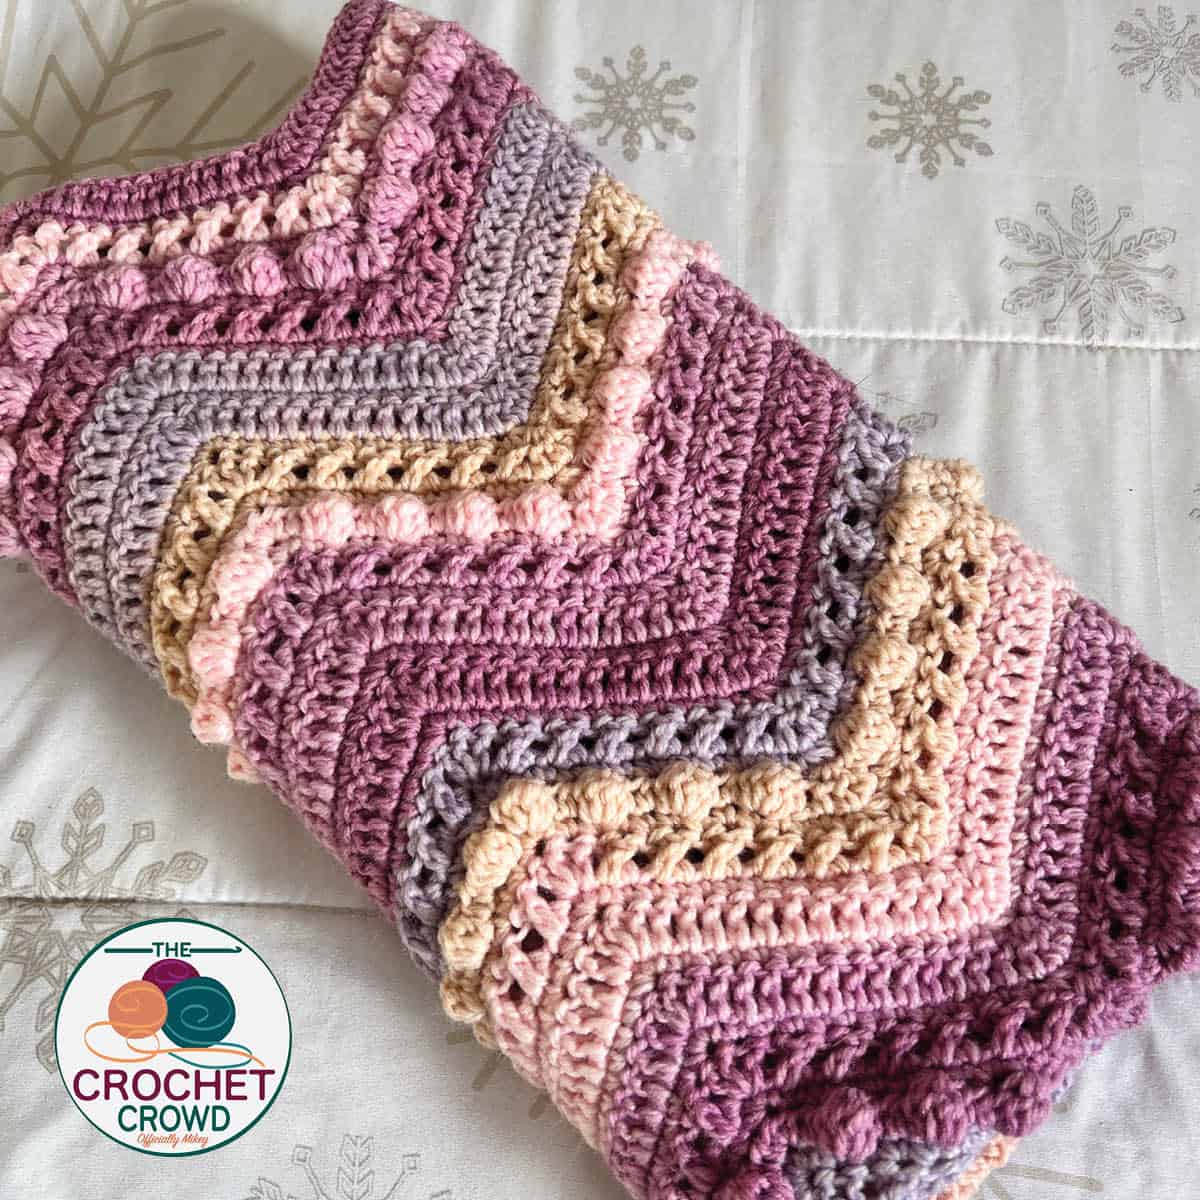
A brand new granddaughter is arriving soon, which means a new baby blanket in her honour. This crochet project features a series of cross stitches and bobbles, or X's and O's, which is how it became the Hugs & Kisses Baby Blanket.
Below is the original Hugs and Kisses.
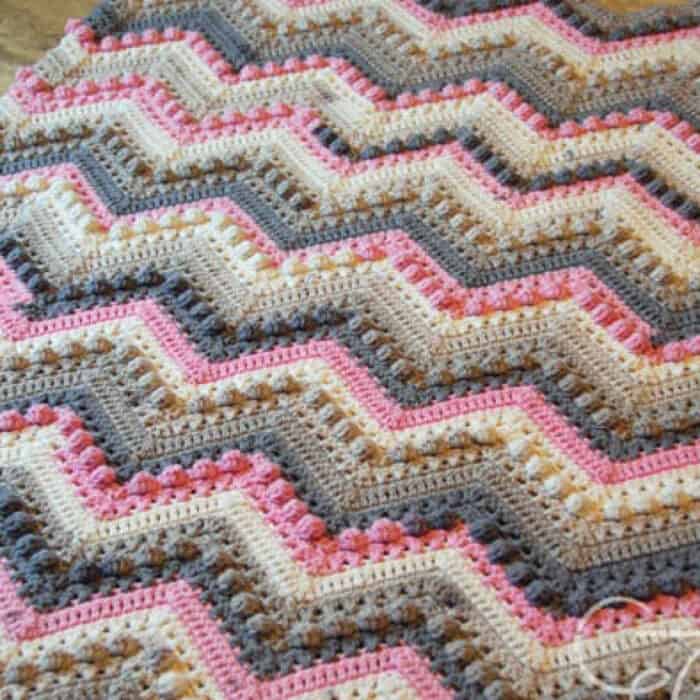
To change the size of this blanket, the stitch multiple is 28 chains + 18.
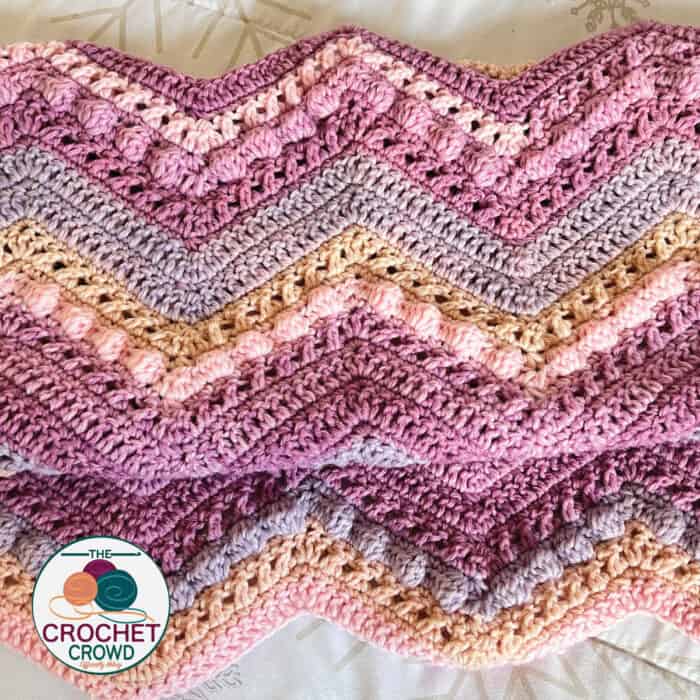
I used the new Caron Baby Cakes in Dreamy Rose for this, but feel free to substitute regular Caron Cakes or any worsted-weight yarn of your choice.
Do you love wave blankets? We have an extensive collection of crochet wave blankets to try. Many include tutorials.

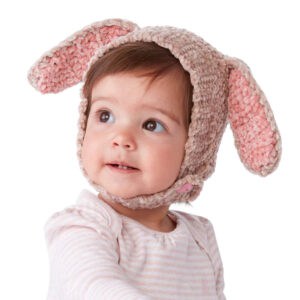
Hugs and Kisses Baby Beanie Hats
The Crochet Hugs and Kisses Baby Beanies are designed to pair with the Hugs and Kisses Stitching concepts by Jeanne Steinhilber.
The Hugs and Kisses Band really lends itself to unique colour play. The pattern is written for the Pink Version in changing the colours. You could do the band a solid colour or even do the entire hat in one colour and let the light make the texture pop off. The aqua version changes colour on the single round before and after the popcorn.
Back to Blanket Information
Question about Row 5
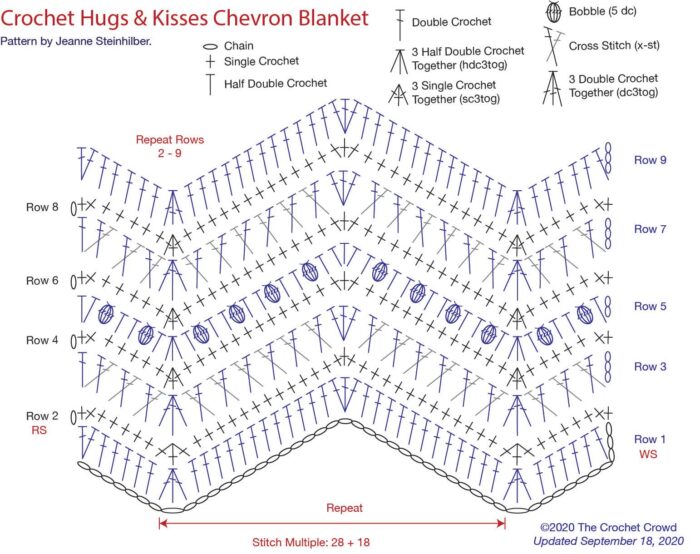
The crochet diagram below is a splice of Row 5.
5th row: Ch 2 (counts as hdc here and throughout), 1 hdc in same st, 1 bobble in next st, 1 hdc in next 2 sts, 1 bobble in next st, 1 hdc in next st, *hdc3tog over next 3 sts, [1 hdc in next st, 1 bobble in next st, 1 hdc in next st] four times, 3 hdc in next st, [1 hdc in next st, 1 bobble in next st, 1 hdc in next st] four times; rep from * until 9 sts remain, hdc3tog over next 3 sts, [1 hdc in next st, 1 bobble in next st, 1 hdc in next st] twice, 1 more hdc in last st. Turn.
If you look at the bobble just before the valley of the chevron, how many hdc are there before the hdc3tog? It's just one. So you cannot generalize that there are 2 HDC after each bobble.
If you look at the chart where I have circled the shapes. The repeat is 1 HDC, BOBBLE, 1 HDC. Not BOBBLE, 2 HDC. Jeanne's repeat makes it easier to comprehend if you think about the sets as working in three stitches. It's less wordy the way she wrote it.
Crochet Diagram
Click the Diagram to print or save.
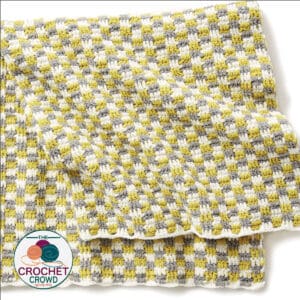
Little Boy Blue is the same blanket in straight across rows with a fun border added to it.
Tutorial
The new version of a different approach for the edgings is here:
.
.
Sizing Changes
Stitch Multiples = 28 + 18
Each chain size will get you close to the size shown. The yarn quantity will be up to you to figure out. It's better to over-estimate than not to have enough.
4.5 mm / US 7 - 4 Ply Worsted Yarn Version - Chain Counts
Gauge: 14 sc and 15 rows = 4”
- 158 (baby size 32.5” wide - 5 chevrons)
- 186 (baby size 39” wide - 6 chevrons)
- 242 (sofa throw size 52” wide - 8 chevrons)
- 354 (double size 78” wide - 12 chevrons)
- 410 (queen 91” wide - 14 chevrons)
- 466 (king 104” wide - 16 chevrons)
5 mm / H/8 - 4 Ply Worsted Yarn Version - Chain Counts
- 158 (baby size 35” wide - 5 chevrons)
- 186 (baby size 42” wide - 6 chevrons)
- 242 (sofa throw size 56” wide - 8 chevrons)
- 354 (double size 84” wide - 12 chevrons)
- 410 (queen or king 98” wide - 14 chevrons)
10 mm / N/P - Bernat Blanket Version - Chain Counts:
- 102 (baby size 39” wide - 3 chevrons)
- 130 (throw size 52” wide - 4 chevrons)
- 158 (sofa throw size 65” wide - 5 chevrons)
- 186 (double size 78” wide - 6 chevrons)
- 214 (queen size 91” wide - 7 chevrons)
- 242 (queen size 104” wide - 8 chevrons)
Designed by Jeanne Steinhilber
Original Yarn - Caron® Baby Cakes™ Yarn 3.5 oz./ 100 g, 231 yds. / 211 m - This yarn was revised by Yarnspirations is in bigger in size.
Dreamy Rose 6 balls or the equivalent of any worsted weight #4 yarn. Please note that this yarn came out in larger sizes and would be just three balls of Caron Baby Cakes 8.5 oz. / 240 g, 560 yds / 512 m. You will need an extra ball or the border but recommend a solid colour yarn for that.
Revised Colour December 2024 is Caron Baby Cakes in the colour called Petals. Just three balls neeed of the 8.5 oz. / 240 g, 560 yds / 512 m size ball.
Size 5 mm / H/8 crochet hook.
Measurements Approx 36” X 40” [91 x 101 cm].
Abbreviations List
- Ch(s) = Chain(s)
- Dc = Double crochet
- Dc3tog = Double crochet 3 together
- Hdc = Half double crochet
- Hdc3tog = Half double crochet 3 together
- Rep = Repeat
- Sc = Single crochet
- Sc3tog = Single crochet 3 together
- Sk = Skip
- St(s) = Stitch(es)
- WS = Wrong side
- Yoh = Yarn over hook
Special Stitches
X-st = Sk next st, dc in next st, dc in skipped st.
Bobble = Dc5tog in the same st. In next st, *yoh, pull up a loop, yoh, pull through 2 loops; rep from * 4 times, until you have 6 loops on hook, yoh and pull through all to complete 5 dc together. These are worked on the wrong side.
I’ve seen several blankets made into a throw size of 54” X 66” with a starting chain of 214 with about 4000 yards of worsted weight yarn.
Helpful Tip = If you have trouble recognizing the “peaks” and “valleys” of the chevron, use stitch markers until you are comfortable. This is especially helpful on the half double crochet and bobble row. The hdc3tog tends to lean off to the side and can be hard to spot.
Instructions
Ch 158 or pick a size from the sizing above.
1st row: (WS) Dc in 4th ch from hook (ch and dc counts as 2 dc in same st), 1 dc in next 5 chs, *dc3tog over next 3 chs (valley or bottom of chevron), 1 dc in next 12 chs, 3 dc in next ch (peak or top of chevron), 1 dc in next 12 chs; rep from * until 9 chs remain, dc3tog over next 3 chs, 1 dc in next 5 chs, 2 dc in last ch. Turn.
2nd row: Ch 1, 2 sc in same st, 1 sc in next 5 sts, *sc3tog over next 3 sts, 1 sc in next 12 sts, 3 sc in next st, 1 sc in next 12 sts; rep from * until 9 sts remain, sc3tog over next 3 sts, 1 sc in next 5 sts, 2 sc in last st. Turn.
3rd row: Ch 3 (counts as dc here and throughout), 1 dc in next st, cross back and place 1 dc in base of ch 3 (X-st made), X-st 2 more times, *dc3tog over next 3 sts, X-st 6 times, 3 dc in next st, X-st 6 times; rep from * until 9 sts remain, dc3tog over next 3 sts, X-st 3 times, 1 more dc in last st. Turn.
4th row: Ch 1, 2 sc in same st, 1 sc in next 5 sts, *sc3tog over next 3 sts, 1 sc in next 12 sts, 3 sc in next st, 1 sc in next 12 sts; rep from * until 9 sts remain, sc3tog over next 3 sts, 1 sc in next 5 sts, 2 sc in last st. Turn.
Pair with Other Baby Projects
5th row: Ch 2 (counts as hdc here and throughout), 1 hdc in same st, 1 bobble in next st, 1 hdc in next 2 sts, 1 bobble in next st, 1 hdc in next st, *hdc3tog over next 3 sts, [1 hdc in next st, 1 bobble in next st, 1 hdc in next st] four times, 3 hdc in next st, [1 hdc in next st, 1 bobble in next st, 1 hdc in next st] four times; rep from * until 9 sts remain, hdc3tog over next 3 sts, [1 hdc in next st, 1 bobble in next st, 1 hdc in next st] twice, 1 more hdc in last st. Turn.
6th row: Ch 1, 2 sc in same st, 1 sc in next 5 sts, *sc3tog over next 3 sts, 1 sc in next 12 sts, 3 sc in next st, 1 sc in next 12 sts; rep from * until 9 sts remain, sc3tog over next 3 sts, 1 sc in next 5 sts, 2 sc in last st. Turn.
7th row: Ch 3 (counts as dc here and throughout), 1 dc in next st, cross back and place 1 dc in base of ch 3 (X-st made), X-st 2 more times, *dc3tog over next 3 sts, X-st 6 times, 3 dc in next st, X-st 6 times; rep from * until 9 sts remain, dc3tog over next 3 sts, X-st 3 times, 1 more dc in last st. Turn.
8th row: Ch 1, 2 sc in same st, 1 sc in next 5 sts, *sc3tog over next 3 sts, 1 sc in next 12 sts, 3 sc in next st, 1 sc in next 12 sts; rep from * until 9 sts remain, sc3tog over next 3 sts, 1 sc in next 5 sts, 2 sc in last st. Turn.
9th row: Ch 3, 1 dc in same st, 1 dc in next 5 sts, *dc3tog over next 3 sts, 1 dc in next 12 sts, 3 dc in next st, 1 dc in next 12 sts; rep from * until 9 sts remain, dc3tog over next 3 sts, 1 dc in next 5 sts, 2 dc in last st. Turn.
Rep rows 2 thru 9, until blanket measures 40”. 11 pattern repeats total. Finish off.
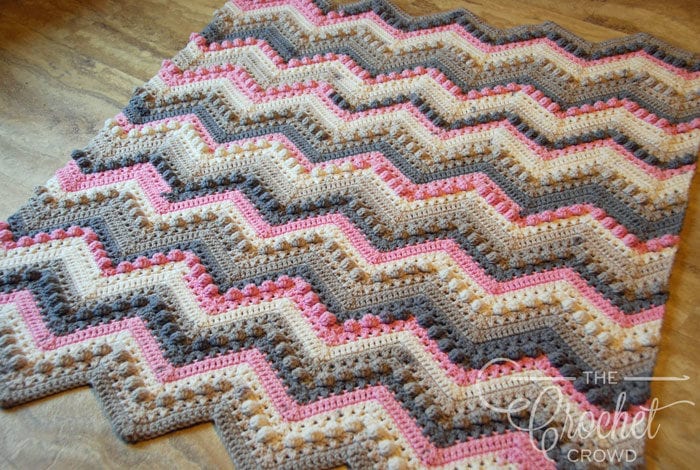
Hugs and Kisses, Squared Off
If you prefer a square or rectangle version, we have the same stitch work in rows without going up and down.
Square Off the Chevron
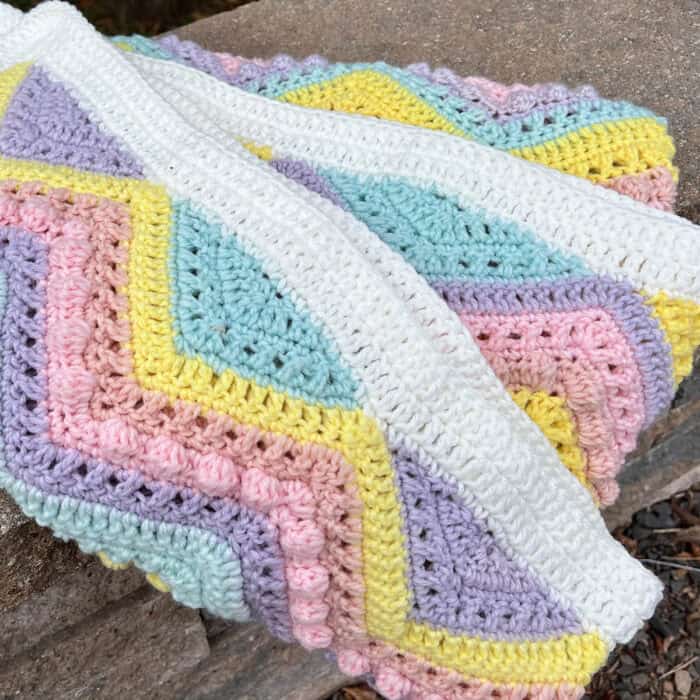
To flatten out the edges, five additional motifs or five sets of instructions need to be designed and written. The edging, not being a full wave, complicates the concept by requiring five additional designs. Blocks one and three cannot just be flipped over, as the blanket has to honour the right side of the work. The same goes for blocks four and five. Block 2 can be used for all full wave slot areas.
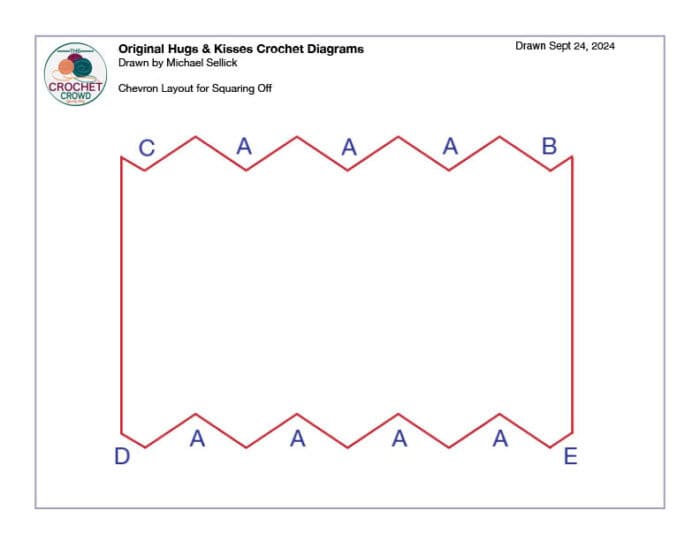
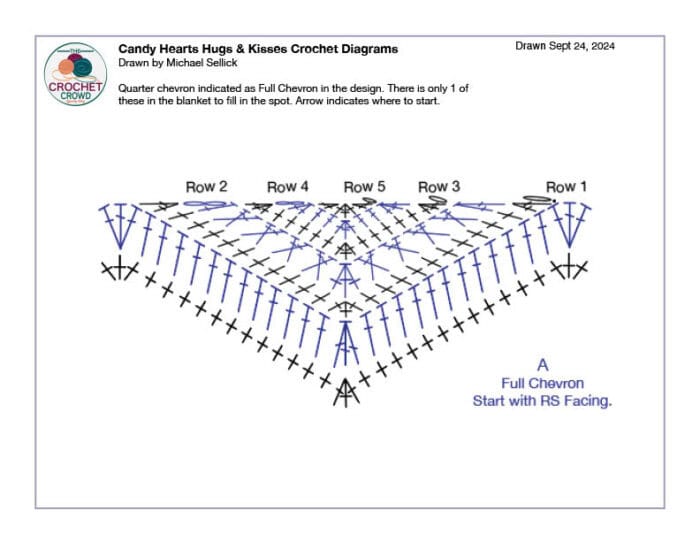
Chevron A
The candy hearts chevron and the original full chevron are the same design.
This chevron will fill in all the chevron spots. Be sure the right side is facing.
With RS Facing - 1st row: Join with sl st to 1st dc over from the middle dc of a point. Ch 1. Sctog. 1 sc in next 10 dc. Sc3tog over next 3 dc. 1 sc in next 10 dc. Sc2tog over next 2 dc. Turn.
2nd row: Ch 2. 1 dc in next sc (counts as dc2tog st). [X-st] 4 times. Dc3tog over next 3 sc. [X-st] 4 times. Dc2tog over last 2 sc. Turn.
3rd row: Ch 1. Sc3tog over first 3 dc. 1 sc in next 5 dc. Sc3tog over next 3 dc. 1 sc in next 5 dc. Sc3tog over last 3 dc. Turn.
4th row: Ch 2. Dc2tog over next 2 sc (counts as dc3tog). 1 dc in next 2 sc. Dc3tog over next 3 sc. 1 dc in next 2 sc. Dc3tog over last 3 sc. Turn.
5th row: Ch 1. Sc2tog over first 2 dc. Sc3tog over next 3 dc. Sc2tog over last 2 dc. Fasten off.
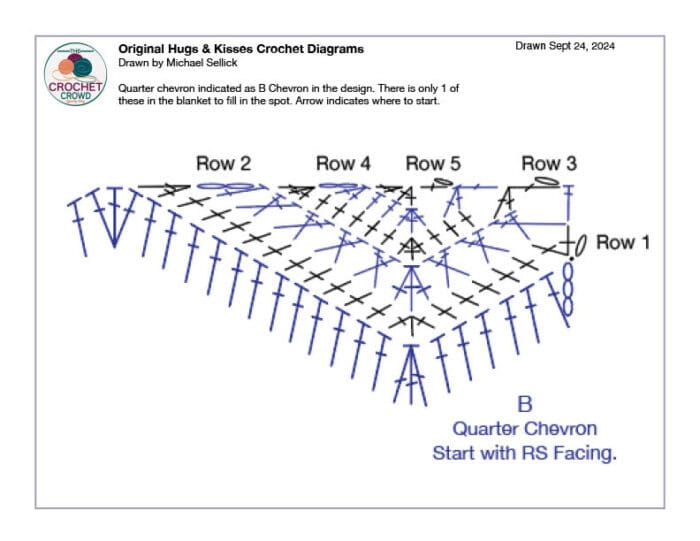
Chevron B
This will be completed only once and shown the location on the illustration.
With RS Facing - 1st row: Join with sl st to 1st dc on the edge of the blanket. Ch 1. 2 dc in same join st. 1 sc in next 5 dc. Dc3tog over next 3 dc. 1 sc in next 10 dc. Sc2tog over next 2 dc. Turn.
2nd row: Ch 2. 1 dc in next sc (counts as dc2tog st). [X-st] 4 times. Dc3tog over next 3 sc. [X-st] 3 times. 1 dc in last st that is already using 1 leg of the x-st. Turn.
3rd row: Ch 1. Sc3tog over first 3 dc. 1 sc in next 3 dc. Sc3tog over next 3 dc. 1 sc in next 5 dc. Sc3tog over last 3 dc. Turn.
4th row: Ch 2. Dc3tog over next 2 sc (counts as dc3tog). 1 dc in next 2 sc. Dc3tog over next 3 sc. Dc2tog over last 2 sc. Turn.
5th row: Ch 1. 1 sc in first dc. [Sc2tog over next 2 dc] twice. Fasten off.
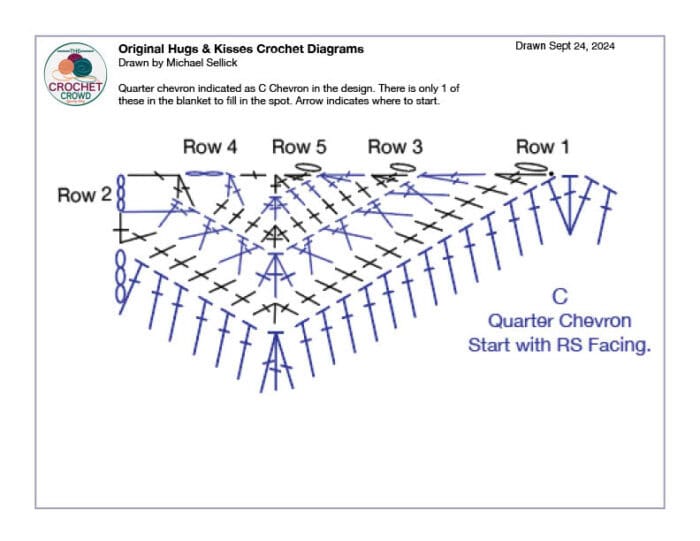
Chevron C
This will be completed only once and shown the location on the illustration.
With RS Facing - 1st row: Join with sl st to 1st dc over from the middle dc of a point. Ch 1. Sctog. 1 sc in next 10 dc. Sc3tog over next 3 dc. 1 sc in next 5 dc. 2 dc in next dc. Turn.
2nd row: Ch 3. Use next st as the first leg and then the same beginning stitch as the 2nd leg of the x-st. [X-st] 2 times. Dc3tog over next 3 sc. [X-st] 4 times. Dc2tog over last 2 sc. Turn.
3rd row: Ch 1. Sc3tog over first 3 dc. 1 sc in next 5 dc. Sc3tog over next 3 dc. 1 sc in next 3 dc. Sc3tog over last 3 dc. Turn.
4th row: Ch 2. Dc2tog over next 2 sc (counts as dc3tog). 1 dc in next 2 sc. Dc3tog over next 3 sc. Dc3tog over last 3 sc. Turn.
5th row: Ch 1. Sc2tog over first 2 dc. Sc2tog over next 2 dc. 1 sc in last dc. Fasten off.
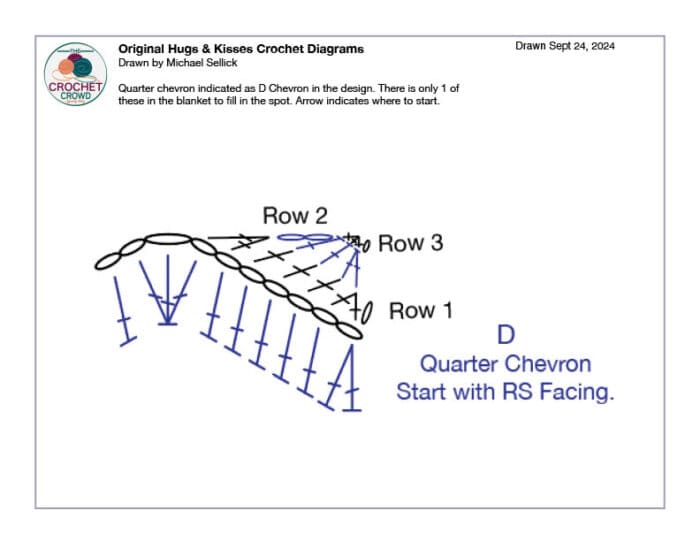
Chevron D
This chevron will fill in all the chevron spots. Be sure the right side is facing.
With RS Facing - 1st row: Join with sl st to 1st ch of beginning ch. Ch 1. Sc2tog over first 2 ch. 1 sc in next 3 ch. Sc2tog over next 2 ch. Turn.
2nd row: Ch 2. 1 dc in next 2 sc. Dc2tog over last 2 sc. Turn.
3rd row: Ch 1. Sc3tog over first 3 dc. Fasten off.
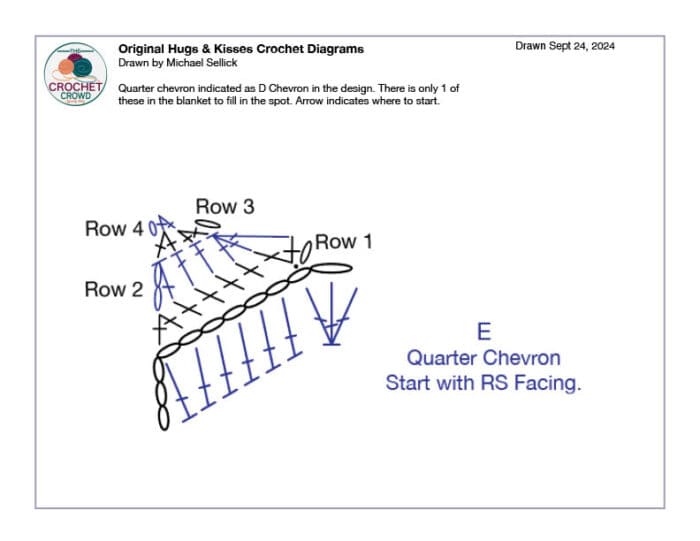
Chevron E
This chevron will fill in all the chevron spots. Be sure the right side is facing.
With RS Facing - 1st row: Join with sl st to 2nd ch from the 3 used for a dc3tog below. See the diagram for the position. Ch 1. 2 sc in same ch as join. 1 sc in next 4 ch. Sc2tog over last 2 ch. Turn.
2nd row: Ch 2. 1 dc in next sc (counts as dc2tog). 1 dc in next 2 sc. Dc3tog over last 3 sc. Turn.
3rd row: Ch 1. Sc2tog over first 2 dc. Sc2tog over last 2 sc. Turn.
4th row: Ch 1. Sc2tog. Fasten off.
*Update*
This proud Gigi was able to wrap the precious bundle in Hug & Kisses just a few hours after she was born.
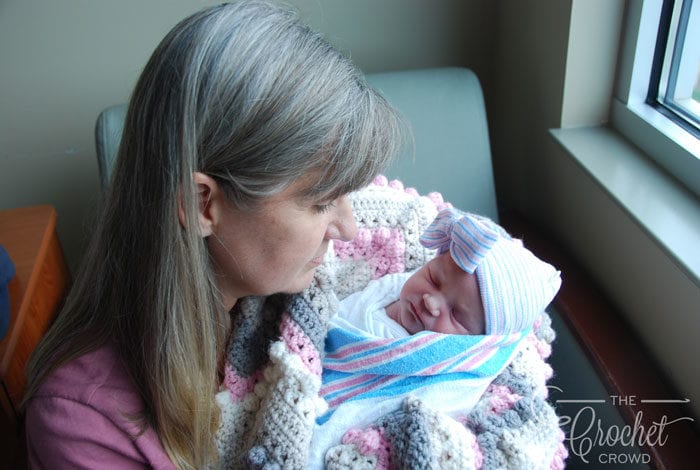
New revised colour in December 2024.





TP GiGi says
"My first question is how many stitches do you have after row one is completed? is it 156? And as I progress with the pattern and get to the Bobble row somehow I have Lost a stitch so when I turn to do the sc row it says sc 2 in same stitch and sc next 5, but I only have 4 stitches before the sc 3 together. I have started this pattern several times and it always end up the same at the Bobble row. What am I doing wrong?"
...I have seen this question asked a few times but have yet to found the answer. I too am having this save issue. HELP!! I would really love to make this baby blanket. Thanks!
Jeanne says
The stitch count is 155 for each row. I would suggest putting stitch markers in the top of the peak and in with 3tog valleys to hold your place until you nail the pattern down. If you still need help, please feel free to join the Hugs and Kisses Facebook group and post photos of where you are having trouble and there are tons of people ready to help! 🙂
KATHERINE says
Hi All I was having same problem until I ripped everything out and started again. To begin, you must chain 158 stitches. Dc in Fourth chain from hook. You will now be working in 154 stitches across your work.
DO A ROW AND COUNT THEM. Now, between the Peak (top) and the valley (3 dc decrease) , there should be 12 stitches. Tells you in row 2
Hope this is clear. I am having trouble on the row AFTER the popcorn row. It would be Row 2, SC all the way across. Cant figure it out. HELP!!!!!!!!!!!!!!!!!!!!!!!
Vicki says
So far I’ve crocheted this pattern twice. It is a little confusing because single crochet always messes me up at the beginning of a row. I’ve had to pull out some rows here and there, but I managed to make two blankets and they both came out beautifully. Just pay careful attention and COUNT YOUR STITCHES.
Lorraine Willis says
Me too. Also where in the pattern are the other double crochet rows I see in the photo. My bobbles wind up on the wrong side also. Is there a revised pattern and video?
Lauriesw says
Same problem with bobbles and next sc row. Have you been able to correct problems ? And how do you reach Mikey? Thank you.
Mikey says
We have reviewed this already, we cannot duplicate what others are doing wrong to be missing a stitch. Sorry, I have been away on an event for 2.5 weeks.
Deborah Oakes says
The issue is there is an error in the bobble row directions that I noticed by watching the tutorial. The * section should read hdc, bobble, hdc, hdc, repeat from * to peak, 3 hdc...
So after the peak or valley the is one hdc but work 2 hdc between each bobble.
Ruth Stimmel says
This is what happened to me I kept trying to fix the problem and after 30 row it was getting worse so I tore the whole thing out and starting over.In the video he says to put two stitches in the first st and crochet in the next 5 and and then do the valley.when I watched the video he goes back into the 5 the stitch to start the valley of 4 stitches .Just can't figure it out???
Danou says
Ruth Stimmel I have the exact same problem but when I go back into the 5th stitch, the 3sc in one stitch does not start in the middle of the 3sc in one stitch but start at the first sc of the 3sc in one stitch.
KATHERINE MABB says
Hi, been there done that!!!!!!!! Ch 158, Double crochet in 4th chain from hook.
The Chain 3 and the DC count as the 2DC in the stitch at the beginning. Next, carry on down the chain and do 1 double crochet in next 5 chains. DC3 tog. using the next 3 chains (valley) or bottom of chevron.Next, DC in each of next 12 stitches. This next stitch you will be making the PEAK, so put 3 DC in next stitch. Carry on with DC in next 12 stitches and DC 3 together for valley. Repeat until you are making your last VALLEY with the 3 DC alotted for. Now, 1 dc in next 5 DC and put 2DC in last stitch or final chain. TURN work to start row 2 which is the sc row. Hope this helps. Read the pattern over 3x to get in brain. make notes. It is worth the frustration. Good Luck
Jacqueline bennett says
Could you send me a pattern on how to make ends straight. Am a beginner and have know idea as to counts and height and I have spend so much time making this blanket I don’t want to ruin it as it’s for my granddaughter. Any information would be helpful thanks in advance
Diva says
*YouTube!!!*
Deb Oakes says
I don't see the pattern to download. I came to your site through AllFreeCrochet.com. I love the tutorial, so pattern really isn't needed, but how many cakes did you use to make the blanket?
Cheri Anderson says
Just finished this pattern, it's lovely but the sides curl in. I am going to make it again with a different set of colors, any suggestions on how to keep the sides from curling?
Joanne. says
Crochet the ends looser then the inside
Laurie Sweet says
Same problem here on the sc row after the bobble row. I got so discouraged that i wripped 1/2 of the rows out, restarted again. My questions are does each row have the same amount of stitches and what is that. My peaks are ok but the valleys are off a little. Does tjat soumd correct? Thanks