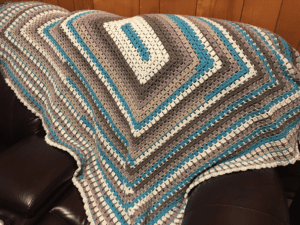
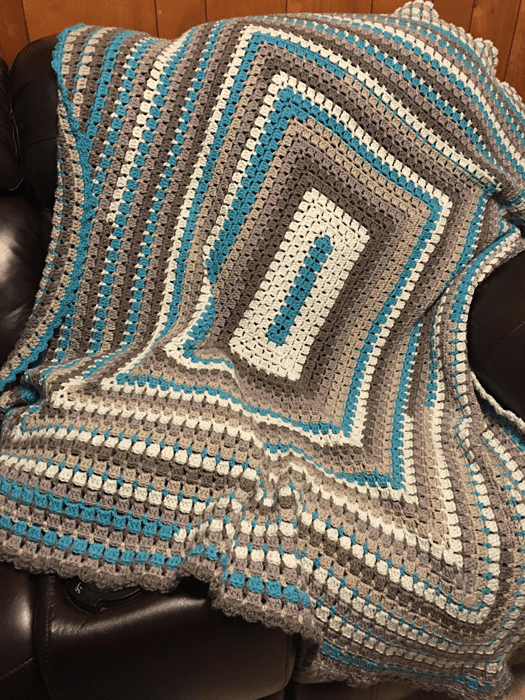
It's the simplicity of a granny square, but I decided to try something a bit different for this one. I'm using the crochet Brick Stitch to create the Crochet Modern Granny Afghan.
The original crochet modern granny has different corners than the updated ones.
In March 2025, we updated the modern granny pattern with crochet diagrams and a new approach for the corners.
I used Caron Cakes in the Cake Pop colorway for this project, but feel free to use any worsted-weight yarn in your favourite colours to create many fun looks. This would be an excellent pattern for your favourite sports team colours at those chilly games.
The original finished size is 52" x 64" using 6 Caron Cakes. If you want a baby version of 35" x 42", only 3 Cakes are needed. The updated pattern will not change the yarn quantity.
.
.
.
Original Pattern as Shown in the 2017 Tutorial
This is a throw size for your sofa or lounging.
Ch 31.

Updated Pattern December 24, 2025
The pattern was updated to 2024 standards of writing patterns. The pattern remains unchanged but has been re-written to bring it into current pattern writing compliance.
Yarn
Caron Cakes, 7.1 oz./ 200g , 383 yd. / 350 m
- 52” x 64” = 6 Balls. Colour shown is Cake Pop.
- 35” x 42” = 3 Balls. Baby Size. (not shown)
Hook: 5 mm / H/8
Gauge: 13 sc and 14 rows = 4” [10 cm]
Abbreviations
- Beg = Begin(ning)
- Bet = Between
- Ch(s) = Chain(s)
- Dc = Double crochet
- Hdc = Half double crochet
- Rep = Repeat
- Rnd(s) = Round(s)
- RS = Right side
- Sc = Single crochet
- Sk = Skip
- Sl st = Slip stitch
- Sp = Space
- St(s) = Stitch(es)
- WS = Wrong side
Instructions
Ch 31.
1st rnd: RS. (2 dc. Ch 1. 3 dc. Ch 1. 3 dc) all in 4th ch from hook - beginning corners made. Sk next 2 ch. *3 dc, sk next 2 ch. Rep from * to last ch. (3 dc. Ch 1. 3 dc. Ch 1. 3 dc) all in last ch - new corners made. Working on opposite side of ch. Sk 2 ch. *3 dc, sk next 2 ch. Rep from * to beg. Sl st to the top of ch-3.
Tip: The double crochet from last round form groups of 3. Every other round, we are using the space between the groups.
2nd rnd: Sl st in next 2 dc. (1 sc. Ch 3. 1 sc) all in ch-1 corner sp. Ch 3, sk next 3 dc, (1 sc. Ch 3. 1 sc) all into next corner ch-1 sp. *Ch 3, sk next 3 dc, 1 sc in sp bet next 3 dc group. Rep from * to next corner sp. (1 sc. Ch 3. 1 sc) all into ch-1 corner sp. Ch 3, sk next 3 dc. (1 sc. Ch 3. 1 sc) all into next ch-1 corner sp. *Ch 3, sk next 3 dc, 1 sc in in sp bet next 3 dc group. Rep from * to beginning sc. Sl st to 1st sc.
3rd rnd: Sl st to next corner ch-3 space. (Ch 3 - counts as dc here and throughout. 2 dc. Ch 1. 3 dc) all into same corner sp. 3 dc into next ch-3 sp. (3 dc. ch 1. 3 dc) all into next corner sp. *3 dc into next ch-3. Rep from * to next corner sp. (3 dc. Ch 1. 3 dc) all into corner sp. 3 dc into next ch-3 sp. (3 dc. Ch 1. 3 dc) all into corner sp. *3 dc into next ch-3. Rep from * to beginning dc. Sl st to the top of ch-3.
4th rnd: Sl st to next corner sp. (1 sc. Ch 3. 1 sc) all into corner sp. Ch 3. [Sk next 3 dc, 1 sc into sp bet 3 dc group, ch 3]. Rep [ ] to next corner sp. *(1 sc. Ch 3. 1 sc) all into corner sp. Ch 3. [Sk next 3 dc, 1 sc into sp bet 3 dc group, ch 3]. Rep [ ] to next corner sp. Rep from * around. Sl st to beg sc.
5th rnd: Sl st into corner corner sp. (Ch 3. 2 dc. Ch 1. 3 dc) all intp corner sp, 3 dc into each ch-3 sp to next corner. *(3 dc. Ch 1. 3 dc) all in next corner sp, 3 dc into each ch-3 sp to next corner. Rep from * around. Join with sl st to top of beg ch-3.
Rep 4th and 5th rnds until you get to the desired size. Complete 4th round once more.
Border: Sl st to next corner sp. Turn around the blanket to the WS to beg. Ch 1, 1 sc in corner sp. [(1 sc. 1 hdc. 1 dc. 1 hdc. 1 sc) all in next ch-3 sp.] Rep [ ] to next corner sp. *1 sc in corner sp. [(1 sc. 1 hdc. 1 dc. 1 hdc. 1 sc) all in next ch-3 sp.] Rep [ ] to next corner sp. Rep from * around. Join with sl st to beg sc. Fasten off.
2024 Updated Version - Square Size
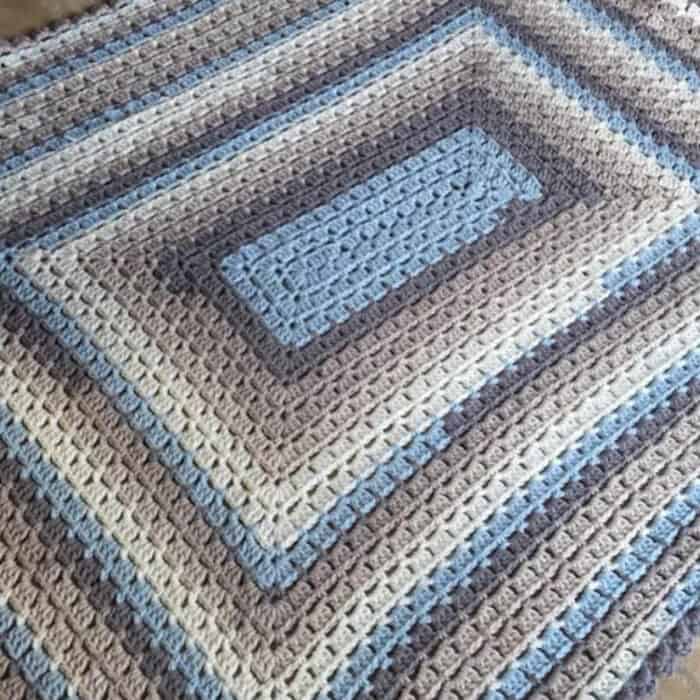
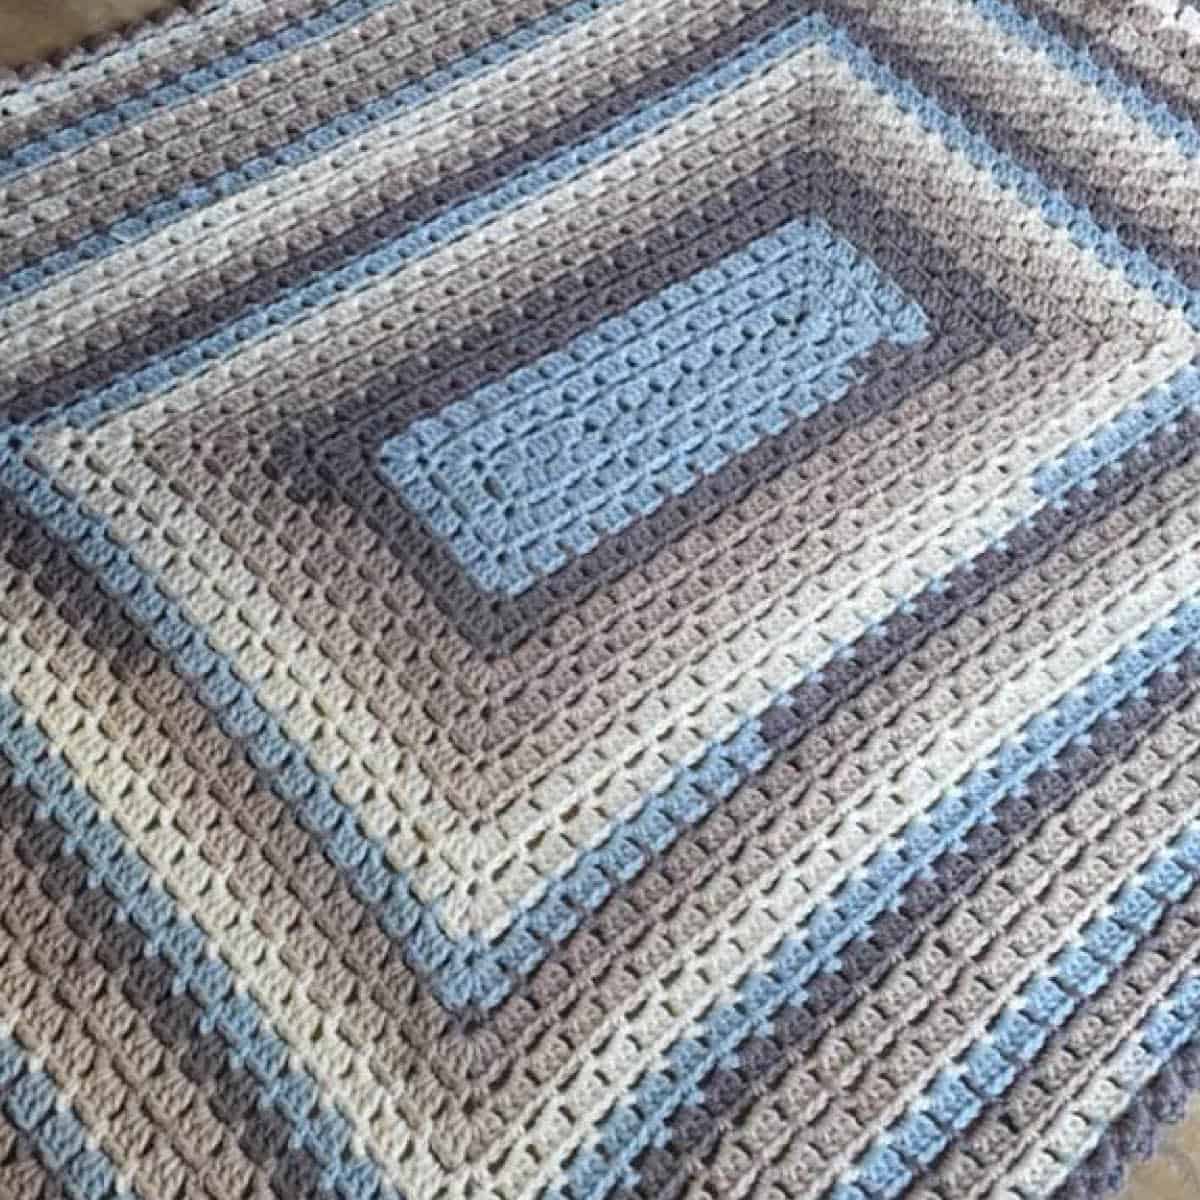
A square can be grown to any size. The photograph shows Bernat Baby Blanket; however, you can use any yarn and hook as long as they work together. The video and instructions below match. You can download the free instructions for the square here.
MATERIALS
Bernat® Baby Blanket (100 g/3.5 oz; 78 m/86 yds)
- A: 03230 (Baby Blue) 2 balls
- B: 03005 (White) 3 balls
- C: 03615 (Baby Yellow) 2 balls
Use 10 mm / US N Hook. Finished sizing is 36" square.
With A, ch 4. Join with sl st to form ring.
1st rnd: Ch 1. (1 sc. Ch 3) 4 times in ring. Join with sl st to first sc.
2nd rnd: Sl st in next ch-3 sp. Ch 3. (2 dc. Ch 3. 3 dc) in same sp as last sl st. *(3 dc. Ch 3. 3 dc) in next ch-3 sp. Rep from * twice more. Join with sl st to top of ch 3. Fasten off.
3rd rnd: Join B with sl st to any corner ch-3 sp. Ch 1. (1 sc. Ch 3. 1 sc) in same sp. Ch 3. Miss next 2 dc. 1 sc between next 2 dc. Ch 3.* (1 sc. Ch 3. 1 sc) in next corner ch-3 sp. Rep from * twice more, then from * to ** once more. Join with sl st to first sc.
4th rnd: Sl st to next ch-3 sp. Ch 3. (2 dc. Ch 3. 3 dc) in same sp. (3 dc in next ch-3 sp) twice.* (3 dc. Ch 3. 3 dc) in next corner ch-3 sp. Rep from * twice more, then from * to ** once more. Join with sl st to top of ch 3. Fasten off.
5th rnd: Join C with sl st to any corner ch-3 sp. Ch 1. (1 sc. Ch 3. 1 sc) in same sp. (Ch 3. Miss next 2 dc. 1 sc between next 2 dc) 3 times.* Ch 3. (1 sc. Ch 3. 1 sc) in next corner ch3 sp. Rep from * twice more, then from * to ** once more. Ch 3. Join with sl st to first sc.
6th rnd: Sl st in next corner ch-3 sp. Ch 3. (2 dc. Ch 3. 3 dc) in same sp. *3 dc in each ch-3 sp to next corner ch-3 sp. (3 dc. Ch 3. 3 dc) in next corner ch-3 sp. Rep from * around, ending with 3 dc in last ch-3 sp. Join with sl st to top of ch 3. Fasten off.
7th rnd: Join B with sl st to any corner ch-3 sp. Ch 1. (1 sc. Ch 3. 1 sc) in same sp. (Ch 3. Miss next 2 dc. 1 sc between next 2 dc) 5 times.* Ch 3. (1 sc. Ch 3. 1 sc) in next corner ch3 sp. Rep from * twice more, then from * to ** once more. Ch 3. Join with sl st to first sc.
8th rnd: Sl st in next corner ch-3 sp. Ch 3. (2 dc. Ch 3. 3 dc) in same sp. *3 dc in each ch-3 sp to next corner ch-3 sp. (3 dc. Ch 3. 3 dc) in next corner ch-3 sp. Rep from * around, ending with 3 dc in last ch-3 sp. Join with sl st to top of ch 3. Fasten off.
Cont as established, working 2 rnds each in the following color sequence: A, B, C, B until Blanket from middle measures approx 18 ins [45.5 cm], ending with 2 rnds of any color.
Fasten off.
2024 Updated Version - Throw Size
I have multiple sizes going out so you can match the starting chain to be different sizes such as queen size, twin size and more sizes. Coming soon. I wrote this on Jan 5, 2024.
The 2017 version will get you a similar result, but I prefer not to slip stitch to a corner to start a new round. I would instead finish in a corner to start fresh in the next rnd. I use a single crochet to join to the top of the first st when double crochet is used.
NOT TESTED BY SOMEONE ELSE YET.
Ch 28. Cradle Size (18" x 33")
Ch 79. Crib Size (28 x 52")
Ch 31. Throw Size (60" x 50")
Ch 58. Twin Size (39" x 75")
Ch 37. Full / Double Size (54" x 75"
Ch 31. Queen Size (60" x 80")
Ch 14. King Size (76" x 84")

1st rnd: In 4th ch from hook, 2 dc, ch 1, 3 dc, ch 1, (partial beginning corner made); sk 2 ch, *3 dc, sk 2 ch. Repeat * to last ch, 3 dc, ch 1, 3 dc, ch 1, 3 dc all in last ch (corner). Working on opposite side of ch, sk 2 ch, *3 dc, sk 2 ch. Repeat * to where the beginning corner base stitches are. Join using sc (the sc join is considered a ch-1 sp) to the top of beg ch-3.

2nd rnd: Ch 1, (1 sc. Ch 3. 1 sc) in beg corner sp. Ch 3. (1 sc. Ch 3. 1 sc) in next ch-1 corner sp. *Ch 3, sk 3 dc, sc in gap between next dc group. Repeat * to next ch-1 sp corner, (1 sc. Ch 3. 1 sc) into corner ch-1 sp, ch 3, (1 sc. Ch 3. 1 sc) in next ch-1 corner sp. *Ch 3, sk 3 dc, sc in between next dc group. Repeat * to last gap between dc group before corner. Ch 3. Sl st to 1st sc.
3rd rnd: Sl st into corner ch-3 space, ch 3, 2 dc in first corner sp, 3 dc into ch-3 sp, (3 dc. Ch 1. 3 dc) into corner ch-3 sp, *3 dc into ch-3. Repeat to next corner ch-3 sp, (3 dc. Ch 1. 3 dc) into corner ch-3 sp, 3 dc into ch-3 sp, (3 dc. Ch 1. 3 dc) into corner ch-3 sp, *3 dc into ch-3. Repeat * to final ch-3 sp before corner. 3 dc in last corner sp. Join with sc to the top of beg ch-3.
4th rnd: Ch 1, (1 sc, Ch 3. 1 sc) into corner ch-1 sp, ch 3, *sk 3 dc, sc in gap, ch 3. Repeat * to ch-1 sp. (1 sc. Ch 3. 1 sc) into next corner ch-1 sp, then repeat from * again. Continue around to beginning, sl st to beginning sc.
Each side gets bigger with more repeats of the same stitch work between the corners.
5th rnd: Sl st into corner ch-3 space, ch 3, 2 dc in first corner sp, [3 dc into ch-3 sp. Rep [ ] to next corner. *(3 dc. Ch 1. 3 dc) into corner ch-3 sp. Rep [ ] to next corner. Rep from * around. 3 dc in last corner sp. Join with sc to top of beg ch-3.
Continue to repeat rnds 4 and 5 until you get to your desired size.
Border: TURN to wrong side. Into *ch-3, sc, hdc, dc, hdc, sc. Repeat * to corner, sc, hdc, dc, dc, hdc, sc in corner sp. Repeat * again around to beginning. Sl st to beginning sc and finish off.
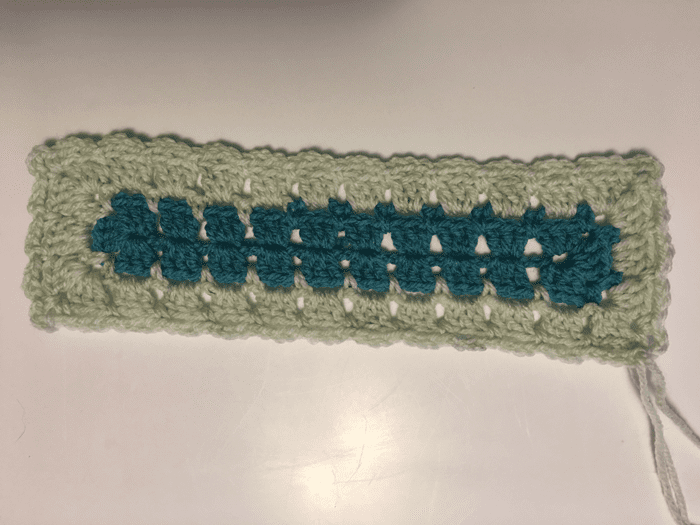
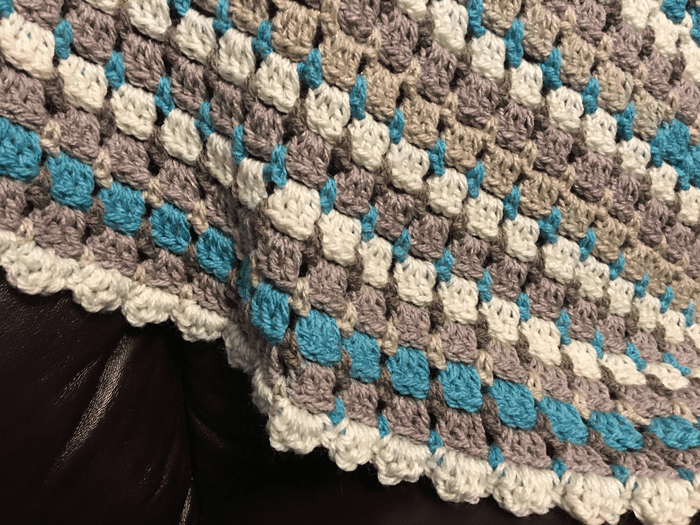
Original Modern Rectangle Granny Blanket Photographic Tutorial
The pattern has been replaced with a downloadable PDF. Pictures below aren't in the pdf in the case you need to refer to them.
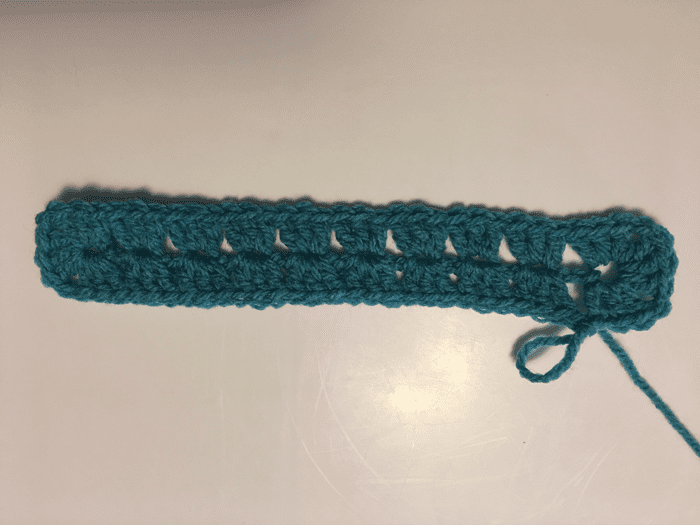
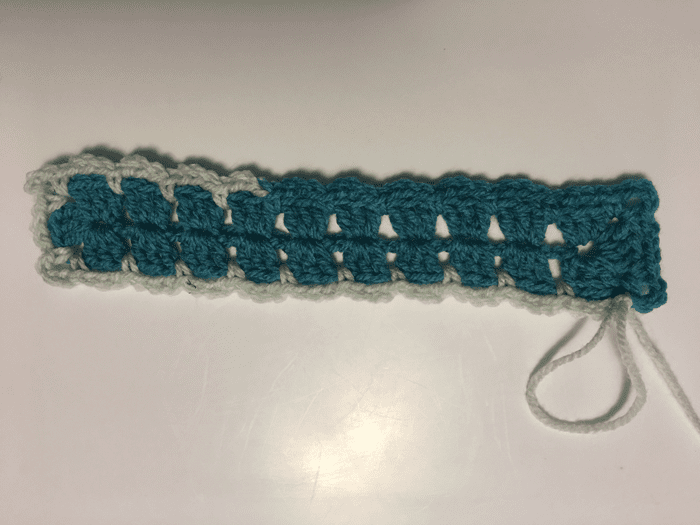
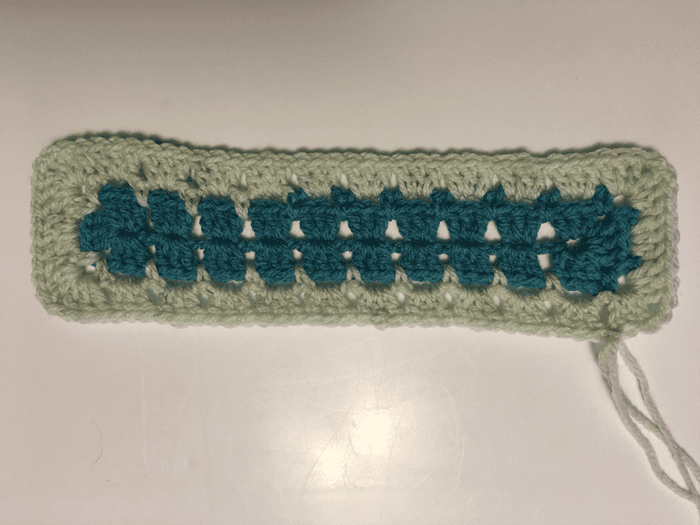
UPDATED VERSION Crochet Diagrams
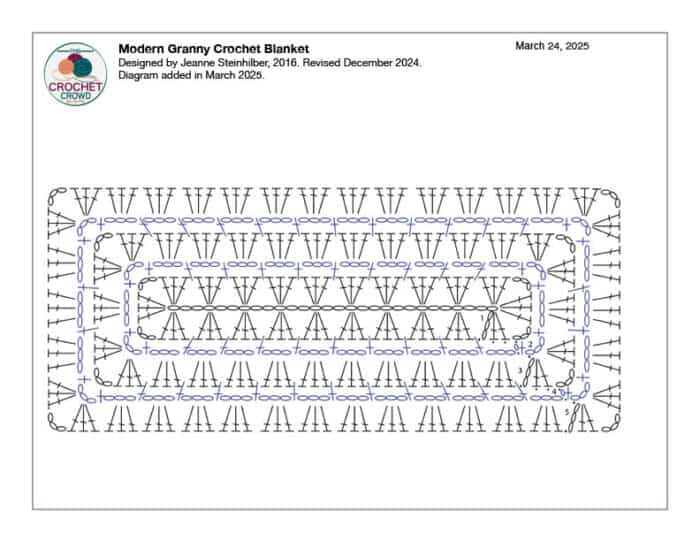
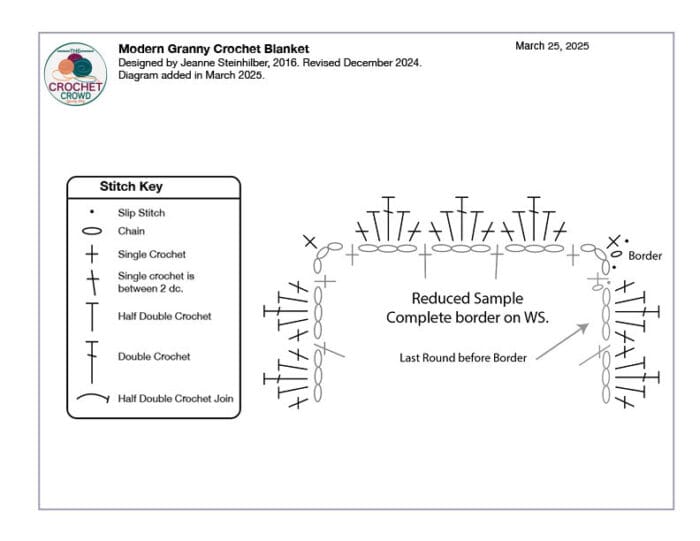
The crochet diagram shows the chain 31 version, the most popular size. You can click on the picture to enlarge it and/or save or print it.
Original Tutorial

Ray says
Could you send me a written pattern for the larksfoot granny afghan please? Thanks
Mikey says
You can find the download here: https://thecrochetcrowd.com/crochet-larksfoot-granny-afghan/
Melissa Ann Brigner says
What am I doing wrong, it's all wonky. 😢😢😢
Mikey says
I saw this same photograph posted on social media with people offering suggestions. Have you tried just restretching the rectangle. We crochet in a round and tension causes this. What size hook did you use? It just may need to be stretched to realign.