Half Double Crochet Corner to Corner known as C2C can be done. Written instructions and crochet diagrams are available. Border included.
Sarah from Repeat Crafter Me is an expert at the corner to corner stitching concept with an armful of free patterns. Tease yourself by snooping over on her website with her free patterns.
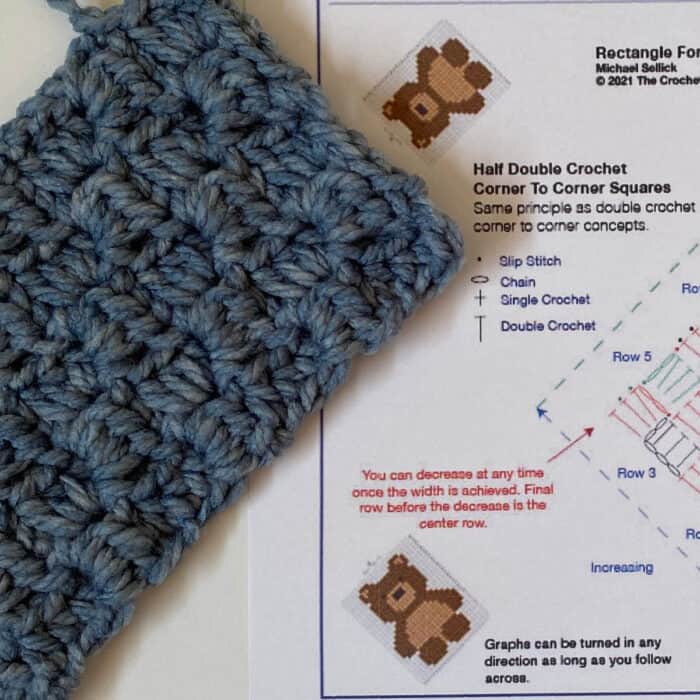
As an educator of crochet, one of the hangups I have is trying to get people to understand the decrease and I think it's our presentation that is not making it clear enough. Crochet Corner to Corner is actually done from one corner to the other. However, the diagrams usually presented are squared to the paper.
In the attempt to re-introduce this concept, I have intentionally turned the diagram on at 45-degree angle to be more realistic to what is in your hands. It's why I turned Sarah's pattern on the angle so you can see the similarities.
Learn the Basics of Doing Grapghan Work with Corner to Corner
Please note, most of the designs in Corner to Corner are using double crochet but you may find the half double crochet stitch in corner to corner more to your liking.
More Ideas
- Crochet 2 Colour Granny Pattern
- Crochet 4 Colour Granny Square Afghan Pattern
- Crochet Here and There Blanket Pattern
- Crochet HDC Wave Afghan Pattern

Crochet C2C Corner to Corner Diagram
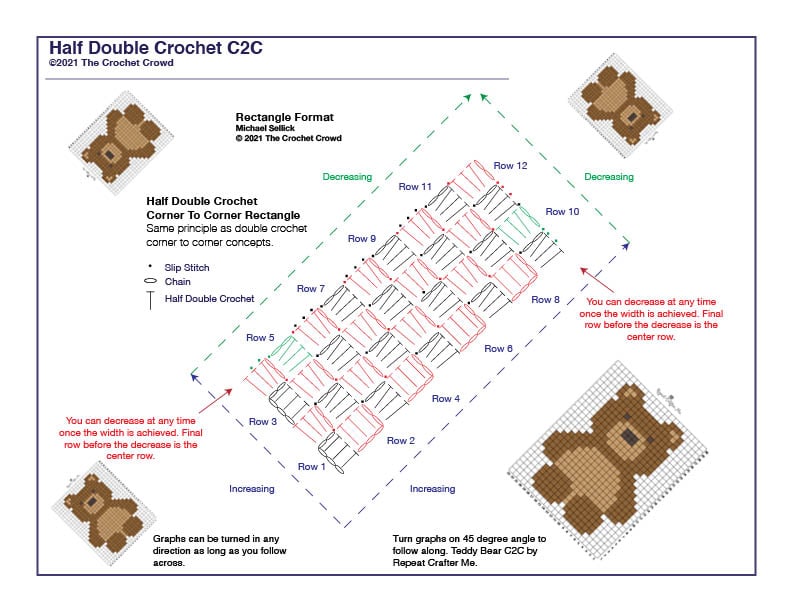
I created a Half Double Crochet Square Corner to Corner C2C Diagram for your visualization. As educators, we keep presenting you diagrams in this format that are squared to the page, when in fact, you are crocheting in rows that resemble this below.
Half Double Crochet Corner To Corner Rectangle 1 I recommend when you are following a diagram in this format to turn it 45 degrees so the beginning box is the absolute bottom.
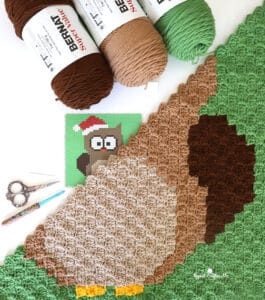
- For following Graphghans Corner to Corner like the C2C Crochet Christmas Owl Blanket by Repeat Crafter Me.
- You can start at any corner but Sarah prefers to start on the bottom right for consistency for her work.
- You can use the Tutorial for C2C Graphghans Work and just substitute with Half Double Crochet as shown below.
- For right or left-handed crocheters, follow the diagram as shown. There is no difference between a right and left-handed crochet graph in this format.
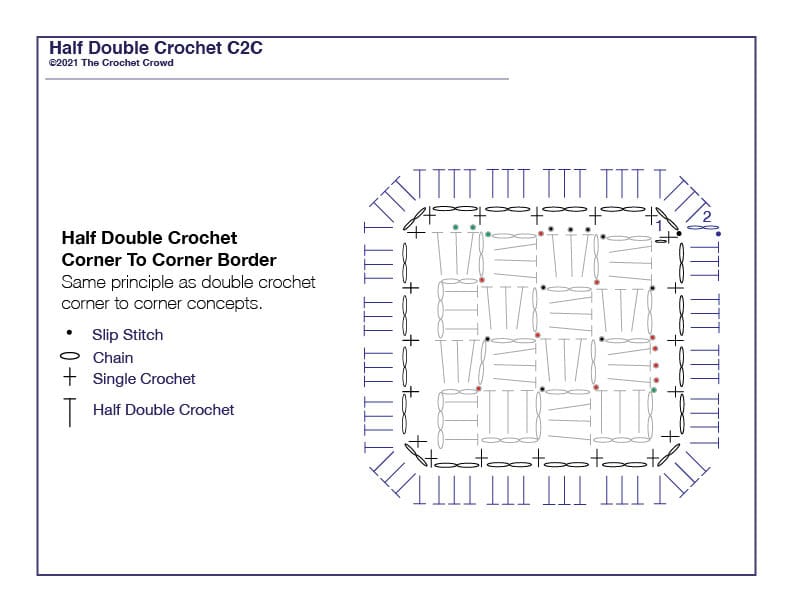
You are welcome to download and print the individual diagrams such as the Half Double Crochet Corner to Corner Diagram and Half Double Crochet Corner to Corner Border. Both of these plus the square format with written instructions is provided in the main download with the blue-button above.
Written Instructions for the Rectangle
Project Concept
- Half Double Crochet can be used for Corner to Corner, known as C2C. There’s just a small difference in the chains but it has its advantages:
- Half double crochet is denser and will pull together a bit tighter. However, if you are following an existing diagram in double crochet format, expect your project to be smaller as the stitches are not as tall.
- It will still be beautifully squared.
- You can still apply a border.
Yarn
Choose any yarn you wish and hook size that compliments the hook. The gauge will be determined by your hook.
Abbreviations
- Approx = Approximately
- Ch = Chain(s)
- Cont = Continue(ity)
- Dc = Double crochet
- Rem = Remaining
- Rep = Repeat
- Rnd(s) = Round(s)
- RS = Right side
- Sc = Single crochet
- Sl st = Slip stitch
- Sp(s) = Space(s)
- St(s) = Stitch(es)
Corner to Corner in Rectangle Format
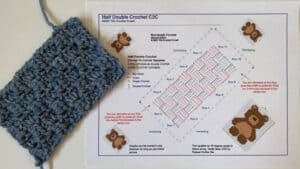
Ch 5. See square diagram for reference.
1st row: (RS). 1 hdc in 3rd ch from hook. 1 hdc in each of last 2 ch. Turn. (1 square made).
2nd row: Ch 5. 1 hdc in 3rd ch from hook. 1 hdc in each of next 2 ch. Sl st in next ch-2 sp. Ch 2. 3 hdc
in same ch-2 sp as last sl st. Turn. (2 squares).
3rd row: Ch 5. 1 hdc in 3rd ch from hook. 1 hdc in each of next 2 ch. *Sl st in next ch-2 sp. Ch 2. 3 hdc in same sp as last sl st. Rep from * to end of row. Turn. (3 squares).
Rep 3rd row as you increase your rectangle to any size you wish. Each row increases the squares by one.
For rectangles, one side will need to decrease (shorter side in the diagram) when the width is decided and the other side (longer side in the diagram) will need to increase to get the rectangle to grow before both sides are decreasing at the same time.
In the diagram, 5th is the beginning of the decrease on one side while the other side is still increasing.
Tip: Decrease Row 1 has us decreasing on the beginning of the row and then increasing at the end of the row.
Decrease row 1: Sl st in each of first 3 hdc. *Sl st in next ch-2 sp. Ch 2. 3 hdc in same sp as last sl st. Rep from * to end of row. Turn.
Tip: Decrease Row 2 has increasing on the beginning of the row and then decreasing at the end of the row.
Decrease row 2: Ch 5. 1 dc in 3rd ch from hook. 1 hdc in each of next 2 ch. *Sl st in next ch-2 sp. Ch 2. 3 hdc in same sp as last sl st. Rep from * to last ch-2 sp. Sl st in last ch-2 sp. Turn. Leave last square unworked.
Rep last 2 decrease rows until the length is to your satisfaction.
Tip: Decrease row both sides are decreasing at the beginning and ending of each row eliminating out 1 square per row.
Decrease row both sides: Sl st in each of first 3 hdc. *Sl st in next ch-2 sp. Ch 2. 3 hdc in same sp as last sl st. Rep from * to last ch-2 sp. Sl st in last ch-2 sp. Turn. Leave last square unworked.
Rep decrease row until last square finishes. Fasten off.
Corner to Corner Border
I prefer a border that has the first round as a floater round, where the second round frames the entire project.
1st rnd: Join to the top of a ch 2 in a corner. Ch 1, (1 sc, ch 2, 1 sc) in same beg st, *ch 2, [1 sc in next sp between ch 2 and hdc st, ch 2] rep [ ] across to next corner. ** (1 sc, ch 2, 1 sc) in top of last hdc, turn to go down next side. Rep from * two more times, then rep from * to ** once. Join with sl st to beg sc.
2nd rnd: Sl st to next ch 2 corner sp, ch 2, 4 hdc in same corner sp. *3 hdc in each ch 2 sp to next corner, ** (5 hdc) in next corner. Rep from * two more times, then rep from * to ** once. Join with sl st to top of beg ch 2.
2nd rnd alternative: Substitute corners for (2 hdc, ch 2, 2 hdc) in you want to build border out more in further rounds.
Tutorial
Rectangle
Border
Gwen says
Hi Mikey. I'm wanting to do the half double crochet tunesian dishcloth. The pattern linked to the tutorial is for C2C which I don't want. Where do i find written instructions for the written sheet I want? Thanks
Mikey says
This is not a tunisian pattern. It's why the pattern is taking you to the C2C Half Double Crochet. You may want to try Ravelry for a pattern for a dishcloth. I think it's called Half Double Stitch in Tunisian terms.