This finished blanket has a back story; you can scroll to the bottom to find out the gossip. My friend Karen, not a confident crocheter, put the time into her blanket and did all of the squares but there was a problem.
Karen's tension is highly motivated by her moods. Some of the squares were exceptionally big and two of the large squares were not even the same design. I don't know how that happened, instead of tossing the blanket and quitting. I offered to help her out.
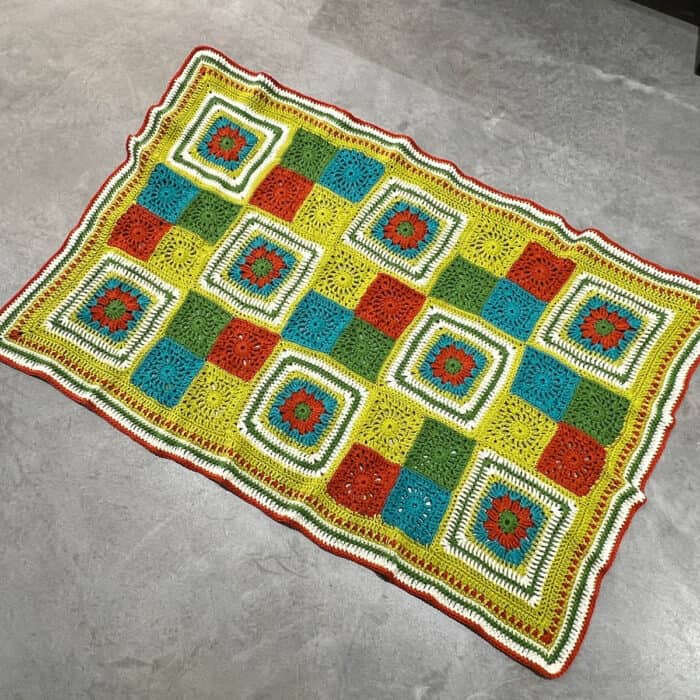
Karen's blanket is missing a row of squares because the squares were too much of a variation of the original. So we converted this into a long lapghan to save her work. Let's not waste her work, right eh!?
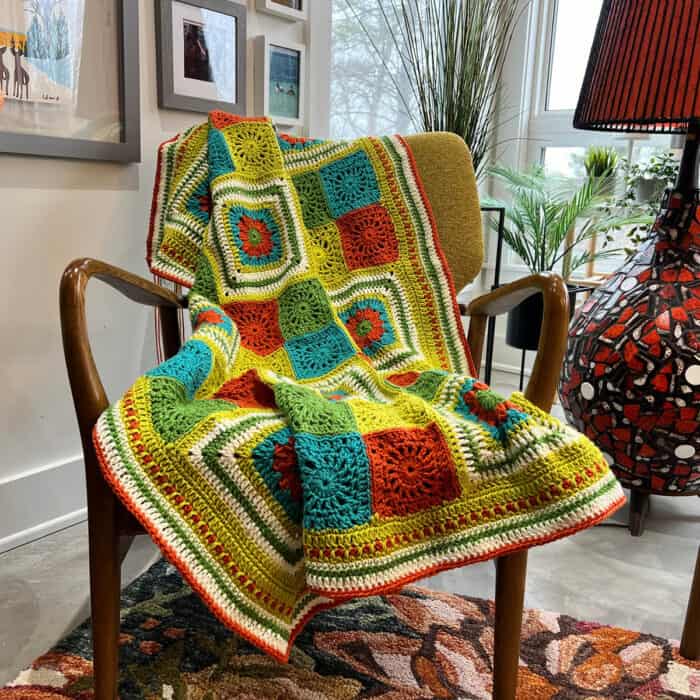
Karen's version is only 36" wide by 54", making it great for chairs and laps. Each big square is 9" x 9", the same as the group of 4 small squares. Mikey's border will add 6" total in either width or length, in other words, 3" per edge.
Karen picked a pattern from Yarnspirations on her own and selected the one below. Usually a newbie crocheter won't pick square formations like this. I applaud her ambition but the sewing of the squares together would be her nemesis in the end. Though I complain about putting it together, I really don't mind as the hard work is already done.
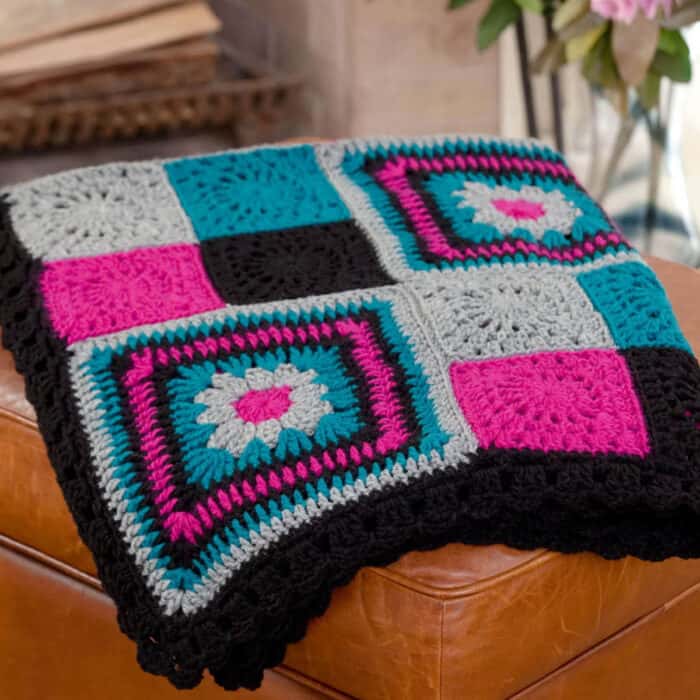
Original Pattern
Original pattern is Crochet Relax Granny Square Blanket pattern by Red Heart.
.
.
Karen's Version
Originally designed by Marianne Forrestal many years ago. I suggested to Karen to compensate for her skill level. I took over the project once the joining came to be to sew it together and then customized a border just for Karen.
There is a different count of squares. Karen used more a vibrant colour palette as well.
Materials and Hook
Bernat Super Value, 197g / 7 oz, 402 meters / 440 yards
- A - Peacock - 1 Ball
- B - Lush - 2 Balls
- C - Redwood Heather - 2 Balls (substitute colour as original isn't available)
- D - Grass - 2 Balls
- E - Natural - 2 Balls
Hook 5 mm / H/8
Gauge = 13 sc and 14 rows = 4” [10 cm]
Abbreviations
- beg = beginning;
- ch = chain;
- dc = double crochet;
- hdc = half double crochet;
- sc = single crochet;
- sk = skip
- slip st = slip stitch;
- sp(s) = space(s);
- st(s) = stitch(es);
- tr = treble crochet;
- [] = work directions in brackets the number of times specified;
- * or ** = repeat whatever follows the * or ** as indicated.
Large Squares - Make 8
With B, ch 5, join with a slip st in first ch to form a ring.
Round 1 (right side): Ch 3 (counts as first dc), 15 dc in ring, join with slip st in top of beginning ch-3—16 dc. Fasten off B.
Round 2: With right side facing, join C with a slip st in any dc, ch 4 (counts as tr here and throughout), (2 tr, ch 2, 3 tr) in same st, skip next dc, 3 tr in next dc, *skip next dc, (3 tr, ch 2, 3 tr) in next dc, skip next dc, 3 tr in next dc; repeat from * around; join with a slip st in top of beginning ch4—4 ch-2 corner spaces. Fasten off C.
Round 3: With right side facing, join A with a slip st in any ch-2 corner space, ch 4, (2 tr, ch 2, 3 tr) in same ch-2 space, [3 tr between next 2 groups of 3 tr] twice, *(3 tr, ch 2, 3 tr) in next ch-2 corner space, [3 tr between next 2 groups of 3 tr] twice; repeat from * around, join with a slip st in top of beginning ch-4. Fasten off A.
Round 4: With right side facing, join D with a slip st in any ch-2 corner space, ch 3, (dc, ch 2, 2 dc) in same ch-2 space, [dc between next 2 tr] 11 times*, (2 dc, ch 2, 2 dc)
in next ch-2 corner space; repeat from * around, ending last repeat at **; join with a slip st in top of beginning ch-3. Fasten off D.
Round 5: With right side facing, join E with a slip st in any ch-2 corner space, ch 3, (dc, ch 2, 2 dc) in same ch-2 space, *[dc between next 2 dc] 14 times**, (2 dc, ch 2, 2 dc) in ch-2 corner space; repeat from * around, ending last repeat at **; join with slip st in top of beginning ch-3. Fasten off E.
Round 6: With right side facing, join B with a slip st in any ch-2 corner space, ch 3, (dc, ch 2, 2 dc) in same ch-2 space, *[dc between next 2 dc] 17 times**, (2 dc, ch 2, 2 dc) in ch-2 corner space; repeat from * around, ending last repeat at **; join with a slip st in top of beginning ch-3. Fasten off B.
Round 7: With right side facing, join E with a slip st in any ch-2 corner space, ch 3, (dc, ch 2, 2 dc) in same ch-2 space, *[dc between next 2 dc] 20 times**, (2 dc, ch 2, 2 dc) in next ch-2 corner space; repeat from * around, ending last repeat at **; join with a slip st in top of beginning ch-3. Fasten off E.
Round 8: With right side facing, join D with a slip st in any ch-2 corner space, ch 3, (dc, ch 2, 2 dc) in same ch-2 space, *[dc between next 2 dc] 23 times, (2 dc, ch 2, 2 dc) in next ch-2 corner space; repeat from * around, ending last repeat at **; join with slip st in top of beginning ch-3. Fasten off D.
Smaller Squares - 28 Squares Total
Make 7 each of the colours A, B, C and D.
Ch 5, join with a slip st in first ch to form a ring.
Round 1 (right side): Ch 3 (counts as dc here and throughout), 15 dc in ring; join with a slip st in top of beginning ch 3—16 dc. Round 2: Ch 5 (counts as dc, ch 2), (dc, ch 2) in each dc around; join with a slip st in 3rd ch of beginning ch-5—16 ch-2 spaces.
Round 3: Slip st in next ch-2 space, ch 1, sc in same space, ch 2, (sc, ch 2) in next 2 ch-2 spaces, (2 dc, ch 2, 2 dc) in next ch-2 space, ch 2*, (sc, ch 2) in next 3 ch-2 spaces; repeat from * around, ending last repeat at **; join with a slip st in first sc—20 ch-2 spaces.
Round 4: Slip st in next ch-2 space, ch 3, dc in same space, ch 1, (2 dc, ch 1) in next 2 ch-2 spaces, *(2 dc, ch 2, 2 dc) in next ch-2 space, ch 1**, (2 dc, ch 1) in next 4 ch-2 spaces; repeat from * around, ending last repeat at **, 2 dc in next ch-2 space, ch 1; join with a slip st in top of beginning ch 3—4 ch-2 corner spaces; 20 ch-1 spaces. Fasten off. Weave in ends
Assembly Instructions
The smaller squares in Karen's blanket are randomly placed for variety but are in groups of 4. Using an invisible seam, sew the squares together.
TIP: To best hide the seam, ensure the colour of the whip stitch is the same colour as at least one of the squares it's attaching to.
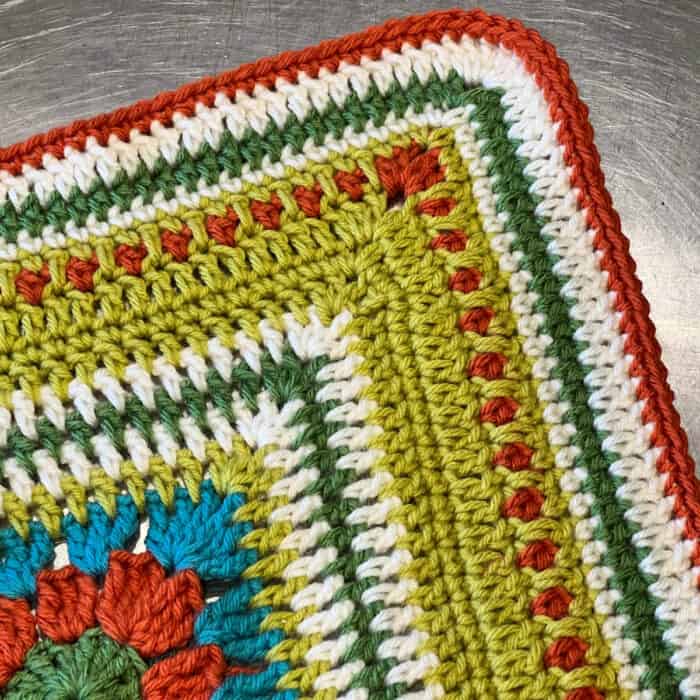
Mikey's Customized Border
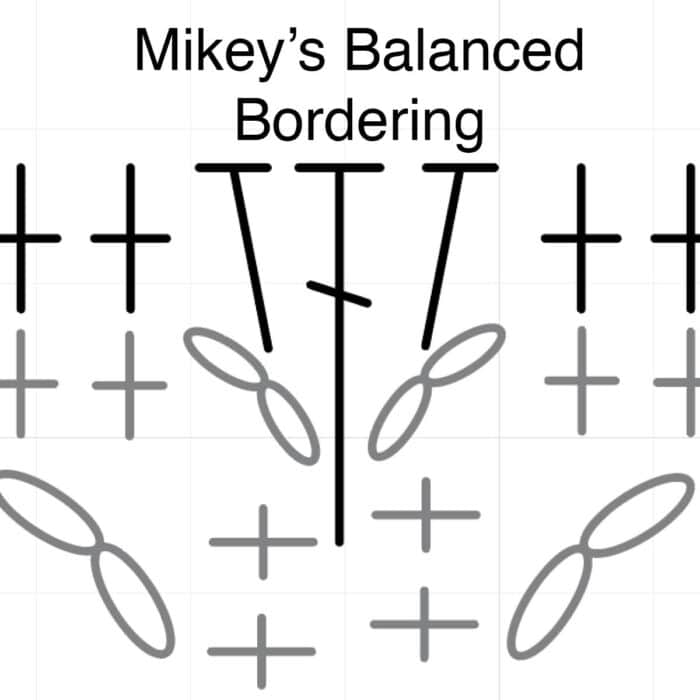
The border is different from the original and consists of 8 rounds. The first round is critical to ensure balance and uniformity.
The counts between the ch-2 corner spaces should be an odd number.
When crossing a connection, place 1 hdc into the ch-2 space, 1 dc into the connection sewing spot and 1 hdc in the next ch-2 sp. The difference of the height of the stitches will keep the top row balanced in height instead of dipping downward.
Round 1: RS. Join D with a slip st in any ch-2 corner space. Ch 1, 1 sc in same st. 1 sc in each st across with adding in the hdc's and dc in the connection spot as shown above to next corner. (if you don't have an odd number, add stitch by putting 2 stitches into the same st). *(1 sc. Ch 2. 1 sc) in ch-2 corner sp. 1 sc in same st. 1 sc in each st across with adding in the hdc's and dc in the connection spot as shown above to next corner. Rep from * around. 1 sc in beg corner sp. Join with hdc to beg sc.
Round 2: Ch 3. (Dc, ch 2, 2 dc) in same ch-2 space, 1 dc in each st to next corner, *(2 dc, ch 2, 2 dc) in next ch-2 corner space. 1 dc in each st to next corner. Repeat from * around. 2 dc in beg corner sp. Ch 2. Join to top of beg ch-3. Fasten off D.
Round 3: Join C with a slip st in any ch-2 corner sp. Ch 1. 2 hdc in same corner sp. Sk next st. Ch 1. [1 hdc in next st, ch 1, sk next st] rep [ ] to next corner. *(2 hdc. Ch 2. 2 hdc) in next corner. Sk next st. Ch 1. [1 hdc in next st, ch 1, sk next st] rep [ ] to next corner. Rep from * around. 2 hdc in beg sp. Ch 2. Join to beg hdc. Fasten off C.
Round 4: Join D with a slip st in any ch-2 corner space. Ch 1, 1 sc in same sp. 1 sc in next 2 sts. [1 dc into empty stitch 2 rows below trapping the ch-1 sp inside st. 1 sc in next st.] Rep [ ] across. 1 sc in next st. *(1 sc. Ch 2. 1 sc) in next corner sp. 1 sc in next 2 sts. [1 dc into empty stitch 2 rows below trapping the ch-1 sp inside st. 1 sc in next st.] Rep [ ] across. 1 sc in next st. Rep from * around. 1 sc in beg corner sp. Ch 2. Join with sl st to beg sc. Fasten off D.
Round 5: Join E with a slip st in any ch-2 corner space. Ch 1, 1 sc in same sp. 1 sc in each st across to next corner. *(1 sc. Ch 2. 1 sc) in corner sp. 1 sc in each st to next corner. Rep from * around. 1 sc in beg corner sp. Ch 2. Join with sl st to beg sc. Fasten off E.
Round 6: Join B with a slip st in any ch-2 sp corner. Ch 1, 1 hdc in same beg sp. 1 hdc in each st to next corner. (1 hdc. Ch 2. 1 hdc) in next corner. 1 hdc in each st to next corner. Rep from * around. 1 hdc in same beg sp. Ch 2. Join with sl st to beg hdc. Fasten off B
Round 7: Join E with a slip st to any ch-2 corner sp. Ch 3. (4 dc) in same ch-2 space, 1 dc in each st to next corner, *(5 dc in next ch-2 corner space. 1 dc in each st to next corner. Repeat from * around. Join to top of beg ch-3. Fasten off E.
Round 8: Join C with a slip st in same st as join. Ch 1. 1 sc in each st around. Join with slip to beg sc. Fasten off.
Backstory
My friend Karen, who I have known for years, back in the Creativ Festival days, built a house beside mine here in Nova Scotia. We are both from Ontario. Her home was finished in the summer of 2023, and she started working on a blanket before her decor was set.
Like we did, she didn't come with much and left most of her stuff behind by selling things and giving things away. She was coming to stitch night with the aspiration to do a blanket for her new home.
Like myself, Karen has ADHD and can only focus for so long. Over the months, she put the time to make the squares. However, she lost her ambition to see the project to the end by joining it.
She was starting to join the square with single crochet using the natural colour, and I literally had a BF over it. I'm like, why are you going to ruin your blanket with that instead of whip-stitching it? She continued away, but she still quit!
So I opened my big fat mouth and said I would put it together. We unjoined some of the squares she had already done and I said, I'm going to whip stitch doing the invisible seam technique.
It took me about 5 hours to put the blanket together and then another 4 hours to do a final border.
Robin says
Beautiful! I love Karen’s color choice. And what an awesome friend she has.
Ellen says
Cool! I’m so glad you did that, Mikey. I’m glad Karen took the help when offered. I’m going to use the border across the join technique. Thank you for sharing the pattern!