Alaskan Cowl
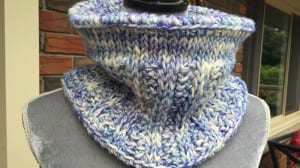
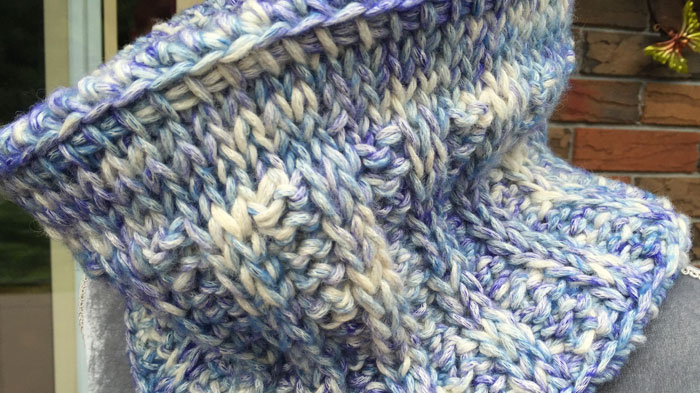
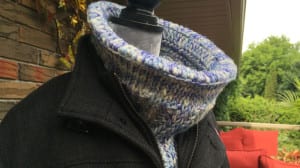
Inspired by the next Crochet Cruise to Alaska in August 2016, I wanted to make a cowl that was heavy and inspired by the colour of the glaciers. This is the Crochet Alaskan Cowl.

I really wanted to play with Tunisian as it's a relatively new skill set for me. I am mentored by Dela Wilkins, Canada's Railway Knitter, who is a Tunisian Expert. She teaches with us on board The Crochet Cruises with us.
This is my very first Tunisian pattern.
The Scoop
I really get cold easily so I designed this cowl to be double stranded using Patons Denim-y Yarn. Patons Denim-y is a mix of 68% Cotton, 16% Wool and 16% Acrylic. It has the warmth properties I am looking for.
I always really wanted a casual look homemade look with thick stitches. I wanted my cowl to be bulky as bulky is in fashion.
Inside the cowl the two stranded are two different colourways. One strand is the Royple Denim and the other strand is the Medium Blue Denim. There are many different colours of the Denim-y. I mixed the two colours together to provide a unique look.
The Stitches & Demonstration Tutorials

Inside this cowl are two different Tunisian Stitches. There are two knit stitches in a row, followed by two purl stitches. This is creating the generous looking ribs you see within the cowl.
- Cast On - See Video Tutorial
- Knit Stitch - See Video Tutorial
- Purl Stitch - See Video Tutorial
- Cast off - See Video Tutorial
You will start at the bottom of the cowl and do this as a large rectangular panel. Once you get to panel, there are two regular double crochet rows added to the top and bottom edges. These additional rows are used to fold over and secure to the inside of the cowl to provide a beautiful rolled edge look. The circular look is done by sewing the two ends together as the very last step.
Pattern Concept
This pattern concept was inspired by the Tunisian Fair Isle Cowl. It's a free pattern on Yarnspirations.
I learned with this pattern how to do rolled over edges to make the cowl sit properly. Free tutorial is also available on how to do that concept.
Size
- 10" Diameter x 8" Tall
- When the panel is laying flat before the two sides are sewn together, it will measure approximately 24"
Materials Needed
- 2 Skeins of Patons Demin-y Royple Denim
- 2 Skeins of Patons Demin-y Medium Blue Denim
- 10 mm or N Afghan Hook. My hook was a Tunisian Hook that was 13" long. I was able to get all of the stitches onto this without having to use a Flexible Cord Afghan Hook.
- Tapestry Needle
Directions
Tips: Using two strands at one time throughout the entire project. Work into horizontal bumps at back of foundation chain for 1st row.
- Ch 70. The first and last chain is consider the edge stitches.
- Forward pass (Right to Left): Insert hook into 2nd ch from hook. Yoh, draw loop through and leave on hook. *Insert hook in next ch. Yoh, draw loop through and leave on hook. Rep from * to end of chain. Do not turn. 70 sts on hook.
- Return pass (Left to right): Yoh and draw through first loop on hook for selvedge st. *Yoh and draw through 2 loops on hook. Rep from * until 1 loop rem on hook. Do not turn. Loop rem on hook becomes first st of next row.
The return pass is always the same throughout the entire Tunisian Stitchwork in this project. Refer to the above Return Pass instructions if you need to remind yourself on how to this. This is always shown in the Knit and Purl Stitch Tutorial Videos listed above in this article.

Knit and Purl Ribbing
- The knit and purl rib section is 6" on this sample. It is 15 rows. You can change the row counts if you like a different height for your cowl. You
- * Knit 2, Purl 2. Repeat * across to selvedge stitch.
- Return Pass.
- Repeat Steps 1 & 2 - 14 more times.
Straight Knitting
The top 1.75" of the cowl is straight Tunisian Knit Stitch across. Instead of doing the Knit and Purl Ribbing configuration, simply just knit stitch across.
You will also notice that the tension of height is much tighter than the Knit and Purl Stitching.
- Tunisian Knit Stitch across.
- Return Pass.
- Repeat 4 more times.
Cast Off
You will now cast off on the final row but DO NOT CUT YARN at the end of the row.
- Cast off using Tunisian Knit Stitch cast off. This technique is shown in the above video tutorial listing. Do not cut yarn.
Upper and Lower Fold Over Edges
We will now begin to make the fold over rows. To do the fold over, we need to ensure we use the proper loop in the stitch to get the material to fold over consistently across.
Upper Fold Over
- Picking back up from the cast off section. Turn your project to the wrong side (so you can see the back side of the cowl).
- Ch 3, 1 DC in each Front Loop across the top edge. Turn.
- Ch 3, 1 DC in each stitch across.
- Fasten off and weave in ends.
Bottom Fold Over
- Turn project to the wrong side so you can see the back side of the cowl when looking at it.
- Fasten on to the 1st front loop. Ch 3, 1 DC in each Front Loop across the edge. Turn.
- Ch 3, 1 DC in each stitch across.
- Fasten off and weave in ends.

Finishing
- You will fold the double crochet rows over to the backside of the cowl.
- Using your tapestry needle, sew the top edge to the inside of the cowl where the top edge stops. Ensure your tapestry needle doesn't pass to the good side of the project as it will ruin your look. Use your needle to secure the edge by slipping your needle behind some strands of your stitchwork but never through the project itself.
- Repeat for the fold over for the bottom edge.
- Fold cowl in half with the back side of the cowl facing up in the width direction so the two shorter edges are overlapping . Whip stitch the two edges together. Project is now inside out.
- Flip the cowl so the good side is out.
- Shape and wear your cowl.
Nancy I Sanchez says
no blue button
Julia Smith says
No blue button
Mikey says
updated