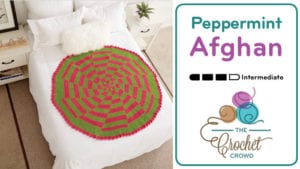
Crochet Peppermint Pinwheel Christmas Tree Skirt
Crocheters have requested this throw be a Christmas Tree Skirt. So to give that option, I am writing my pattern below. I don't have a picture yet to share and crocheters are working on it now. I will update the picture.

More Christmas Ideas
- Crochet Button Christmas Tree
- Christmas Tree Skirt with Slit
- Christmas Tree Blanket
- Small Christmas Socks Ornaments
- Crochet Rainbow Star Blanket + Tutorial
- Crocheted Ballerina Bag Pattern
For the Crocheters who are willing to test and photograph their tree skirt. When completed, send me an email with your photo to [email protected]. Leave me your full name. We will create a gallery of finished tree skirts. Take the best photo you can with lots of light and attention to the background.
Christmas Tree Skirt
This design is not yet tested as crocheters are working on it.
- Size 6 mm or J Crochet Hook
- 2 Balls of Caron One Pound - 2 Different Colours
Tree Skirt is approximately 48" Diameter with a 5" hole in the middle to wrap around artificial and real trees.
Colours
- MC = Main Colour
- A = Secondary Colour
Carrying Colours in Rows
Review the strip that is used in the Flying Geese Blanket. Notice how the colours of the arrows are carried all the way through to edge. Then carried back and used when needed. The Peppermint Pinwheel Tree Skirt will be the same. Both the colours whether it's being crocheted or just carried will go to the edge.
At the end of the project. We will cover this up with single crochet that matches the colour of the pinwheel slice the best.
Ch 49
Row 1: With MC, 1 sc in 2nd chain from hook, 1 sc in each across. Turn. - 48 sts
Row 2: We will introduce a secondary colour. Introduce the secondary colour to be under the stitches at the start of the row. Continue to use MC, Ch 3 (counts as dc here and throughout), 1 dc in next 3 sts. Switch colours at the end of the 3rd dc. *2 dc using A, 1 dc in next 3 sts. Switch colours. Repeat using alternative colour* in the same manner across row. Carry non-used colour to the edge under the stitches. Turn. - 12 sections of colours will appear.
Row 2: Using A, carrying the MC under the stitches. Ch 3, 1 dc in the same stitch. 1 dc in next 3 sts. Switch colours, 2 dc in next stitch, *1 dc in next 4 stitches, switch colours, 2 dc in next stitch. Repeat * across.
Row 3: Using MC, carrying the A under the stitches. Ch 3, 1 dc in next 3 sts. Switch colours, 2 dc in next stitch, *1 dc in next 4 stitches, switch colours, 2 dc in next stitch. Repeat * across.
Row 4: Using A, carrying the A under the stitches. Ch 3, 1 dc in next 4 sts. Switch colours, 2 dc in next stitch, *1 dc in next 5 stitches, switch colours, 2 dc in next stitch. Repeat * across.
Repeat in the same manner until 29 rounds are complete. Fasten off colour that will not be in the solid border.
Final Border
Using 1 colour only that is left, Ch 1, 1 sc in next st, (dc, tr in next stitch), (tr, dc in next stitch), 1 sc in next stitch. *1 sc in next st, (dc, tr in next stitch), (tr, dc in next stitch), 1 sc in next stitch. Repeat * across. Fasten off and weave in ends.
Final Touches
Using the same colour that the pinwheel is on the edges. Fasten on to the 1st row and evenly spaced across the edge. Repeat for the opposite edge using the appropriate colour. Fasten off and weave in ends.
Julie says
Grid
Mikey says
Thanks