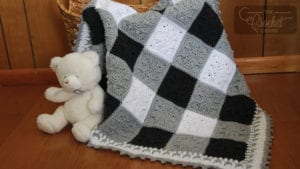
Crochet Social Textures Gingham Blanket
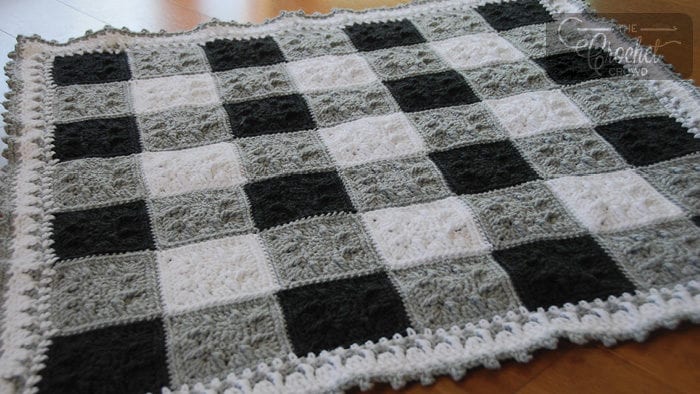
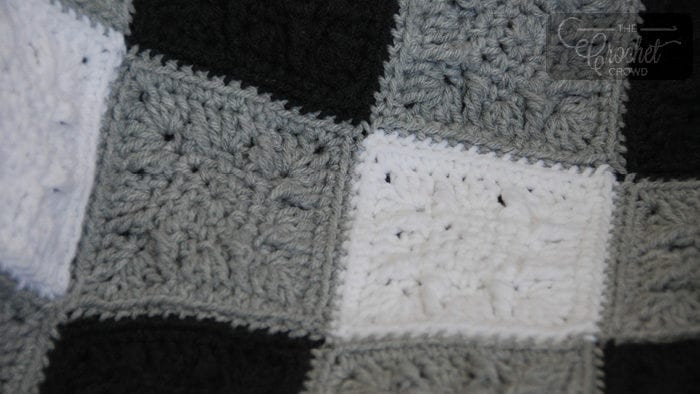
I've always wanted to crochet a gingham style blanket, and decided that small Social Textures squares would make a pretty Social Textures Gingham Blanket Pattern. I have made my design baby sized, but you can easily keep going and make this one any size you like.

This is a variation of the Social Textures Baby Blanket.
I used Caron One Pound yarn in 3 colors for this blanket and had quite a bit leftover. Each square hooked up in about 10 minutes, so it's another great project to take along and still be social with friends while you crochet.
More Blanket Ideas
- Crochet Bright Beginnings Blanket
- Crochet Baby Chunky Blanket
- Crochet Baby Magic Blanket
- Baby Waffle Blanket + Tutorial
- Crochet Extra Lemon Rectangle Blanket + Tutorial
- Crochet Breakaway Waves Blanket
When you upload your project to The Crochet Crowd Stitch Social Group or Instagram, feel free to tag me so I can see what you have crocheted. Follow me on Instagram @ jeannestein or on Facebook. My designs can also be saved in your Ravelry favorites by following me HERE.

Tutorial
Yarn
Caron Big Cakes, 2 Balls - Boysenberry
Hook
5.5 mm / I Hook
Sizing
34” Square
Abbreviations
Beg - Beginning
Ch - Chain
Dc - Double crochet
FPtr - Front post treble crochet
Hdc - Half double crochet
Rep - Repeat
Rnd(s) - Round, rounds
Sc - Single crochet
Sk - Skip
Sl st - Slip stitch
Sp - Space
St - Stitch
Special Stitch
Picot - Ch 3, sl st back into the last sc worked.
Instructions
Rnd 1: Ch 2, in 2nd ch from hook, sc, ch 2, sc, ch 2, sc, ch 2, sc, hdc to beg sc. The hdc counts as a ch-2 sp here and throughout. - 4 sc, 4 ch 2 sps
Rnd 2: Sc around post of hdc, *ch 1, sk sc, (sc, ch 2, sc) in ch-2 corner; rep from * twice more, ch 1, sk sc, sc into beg ch-2 sp, hdc to beg sc. - 8 sc
Rnd 3: Sc around post of hdc, *ch 1, sk sc, sc in ch-1 sp, ch 1, sk sc**, (sc, ch 2, sc) in ch-2 corner; rep from * twice more, then from * to ** once, sc in beg ch-2 sp, hdc to beg sc. - 12 sc
Rnd 4: Sc around post of hdc, *ch 1, (sk sc, sc in ch-1 sp, ch 1) to corner**, (sc, ch 2, sc) in ch-2 corner; rep from * twice more, then from * to ** once, sc in beg ch-2 sp, hdc to beg sc. - 16 sc
Rnd 5: Ch 2 (counts at dc here and throughout), 2 dc around post of hdc, *sk sc, FPtr around post of next sc 2 rnds below, sk sc, 3 dc in ch-1 sp, sk sc, FPtr around post of sc 2 rnds below, sk sc**, (3 dc, ch 1, 3 dc) in ch-2 corner; rep from * twice more, then from * to ** once, 3 dc in beg ch-2 sp, sc to beg dc. - 36 dc, 8 FPtr
Rnd 6: Sc around post of sc, *sc in each st to corner**, (sc, ch 2, sc) in ch-2 corner; rep from * twice more, then from * to ** once, sc in beg ch-2 sp, hdc to beg sc. Fasten off and leave a long tail for sewing squares together. - 52 sc
Sew squares together in a gingham pattern.
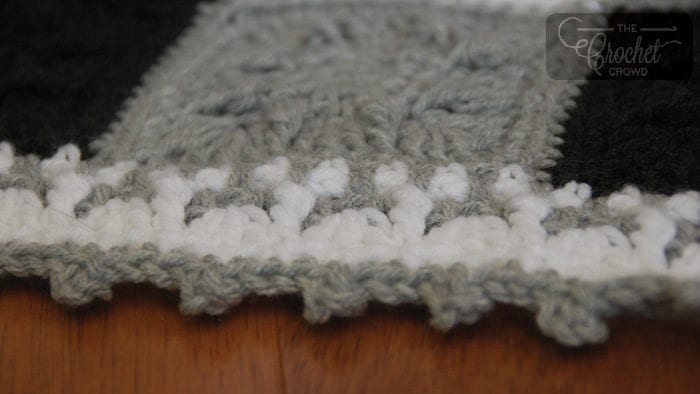
Border
Rnd 1: Attach color A in any corner. Sc in corner, *ch 1, (sk next st, sc in next st, ch 1) to corner**, (sc, ch 2, sc) in ch-1 corner, rep from * twice more, then from * to ** once, sc in beg ch-1 sp, hdc to beg sc. Drop color A, pick up color B.
Rnd 2: Sc around post of hdc, *ch 1, (sk sc, sc in ch-1 sp, ch 1) to corner**, (sc, ch 2, sc) in ch-2 corner; rep from * twice more, then from * to ** once, sc in beg ch-2 sp, hdc to beg sc.
Rnd 3: Rep rnd 2. Drop color B, pick up color A.
Rnd 4: Ch 2 (counts at dc here and throughout), 2 dc around post of hdc, *sk sc, FPtr around post of next sc 2 rnds below, sk sc, 3 dc in ch-1 sp, sk sc, FPtr around post of sc 2 rnds below, sk sc**, (3 dc, ch 1, 3 dc) in ch-2 corner; rep from * twice more, then from * to ** once, 3 dc in beg ch-2 sp, sc to beg dc.
Rnd 5: Sc around post of sc, *ch 1, (sk next st, sc in next st, ch 1) to corner**, (sc, ch 2, sc) in ch-1 corner, rep from * twice more, then from * to ** once, sc in beg ch-1 sp, hdc to beg sc. Drop color A, pick up color B.
Rnd 6: Sc around post of hdc, working into each st and ch-1 sp, sc in next 3, picot, *(sc in next 4, picot) to corner**, (2 sc, picot, sc) in ch-2 corner; rep from * twice more, then from * to ** once, (2 sc, picot, sl st to beg sc) in ch-2 corner. Fasten off.
Yalonda Eubank says
I love this pattern. It's really easy to follow. How do I increase the size of the blanket for a Queen or King size bed? I'm making a queen size for myself, and I want to make a King size as a gift. Thank you!😊
Mikey says
You just have to keep adding more squares. We haven't done that, so we will not know the yarn quantity for the sizing you are looking for.