
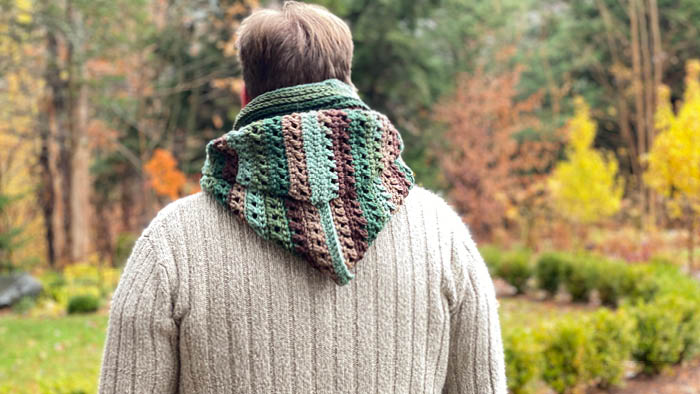
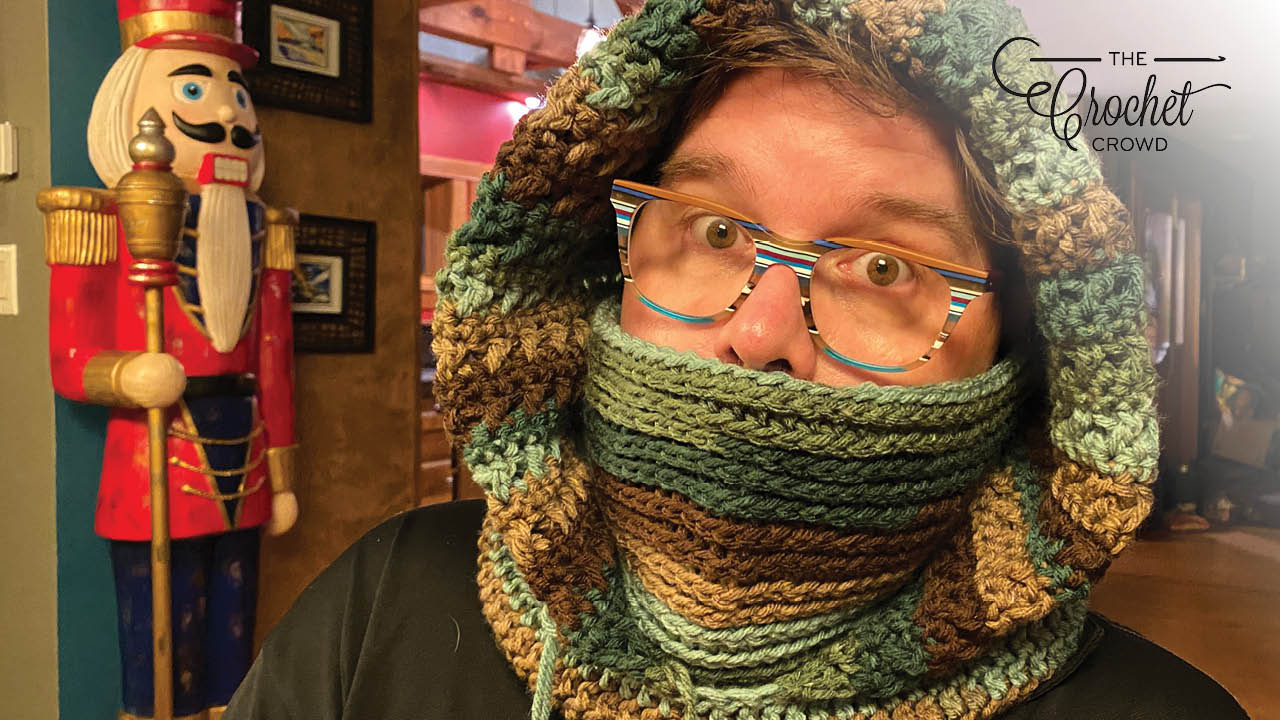
Crochet Toodie The Crochet Toodie is the concept of building a hood onto a cowl or turtleneck. Easy to do for any cowls or turtlenecks.
I am totally surprised at how warm this is to wear. This can be worn in different ways which makes it very versatile.
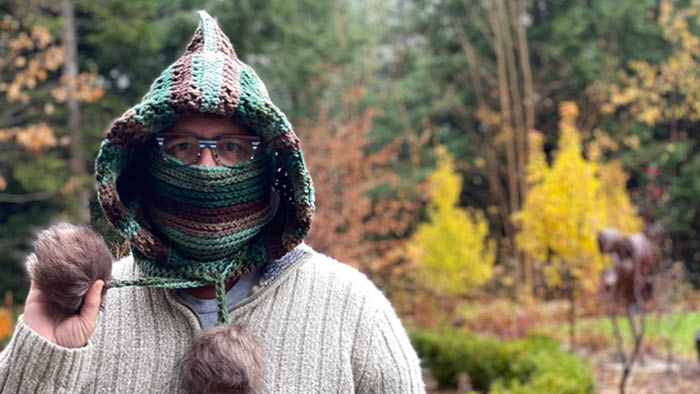
Fully Bundled Up
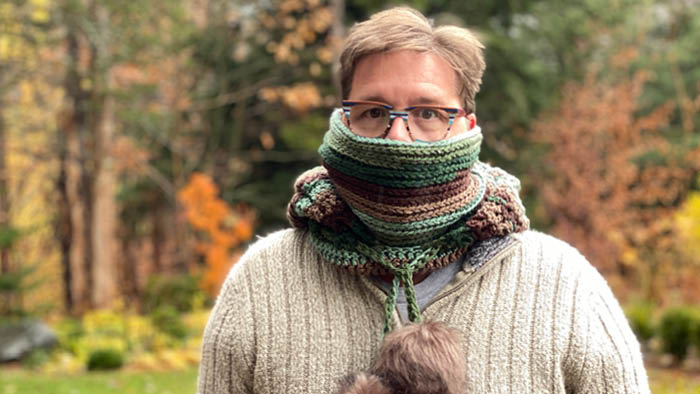
Lower The Hoodie and Wear As Cowl
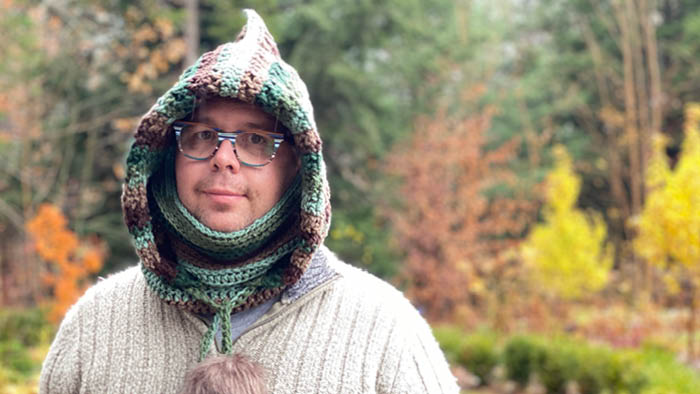
Hoodie Only
Neck Warmer

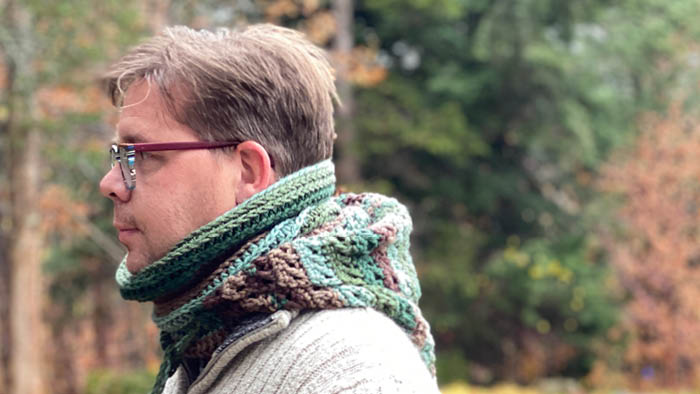
Rests Beautifully Around the Neck
Back View When Hoodie is Down
Customization
I will tell you how to customize any cowl or turtle neck you have with my hoodie design in the pattern below. It works for the perfect increase and rollback of the hoodie.
Yarn & Supplies

Red Heart® Super Saver O’Go™ (141 g/5 oz, 215 m/236 yds) -
- Forest, 2 O’Gos
Optional Faux Fur Pom Poms. I picked mine up at Michaels Stores.
Tapestry needle.
The entire project is 23” long x 16” across the top of the hook x 22” diameter on the cowl.
Sizing
- Use size 6.5 mm / K/10.5 crochet hook.
- The entire project (when not positioned in itsf final format) is 23” long x 16” across the top of the hook x 22” diameter on the cowl.
- It is 14" tall x 11" Diameter once folded up.
- Gauge 12 sc and 12 rows = 4” [10 cm].
The trick to these is understanding that the cowl has to be inserted up through the interior. This means the hood needs to be crocheted on the cowl's wrong side so both are showing right sides when wearing.
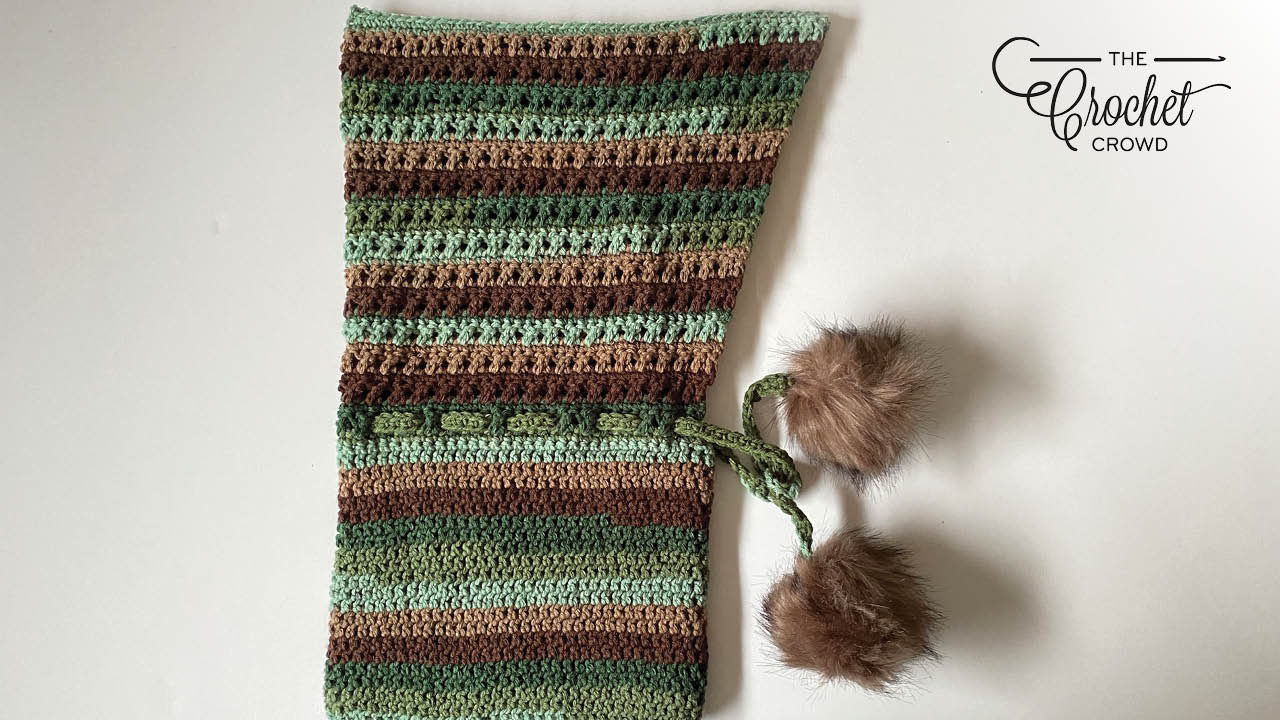
How the Toodie is Folded
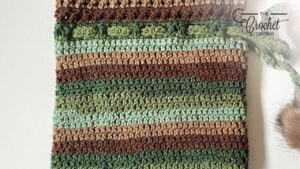
This is how the Crochet Toodie looks when it's not folded into its formation.
- Notice the cowl is showing the WS (Wrong Side) and the Hoodie showing the RS (Right Side).
- If you crochet both sections on the right side only, the cowl or turtleneck will show the wrong side of the project when wearing it.
The cowl is then rolled inward up from the bottom to inside the hoodie. This means the cowl's RS (Right Side) will face outward.
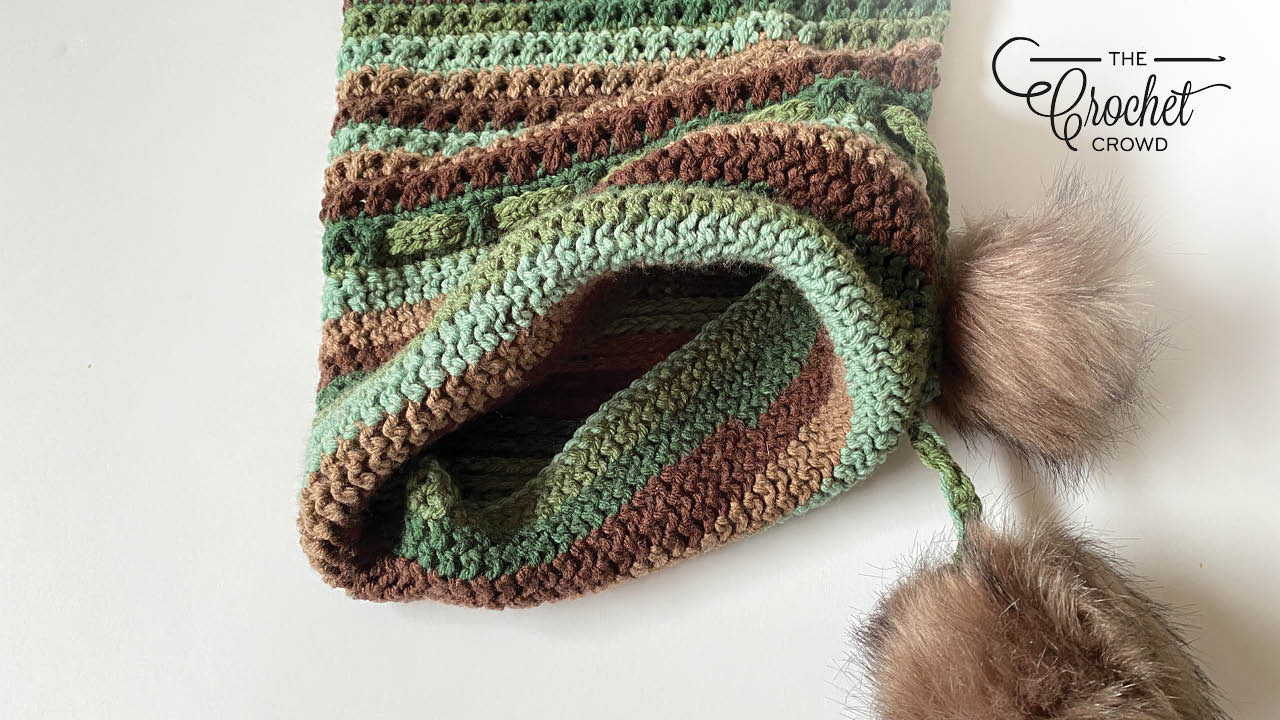
Once the cowl is rolled to the inside, it will be ready to wear.
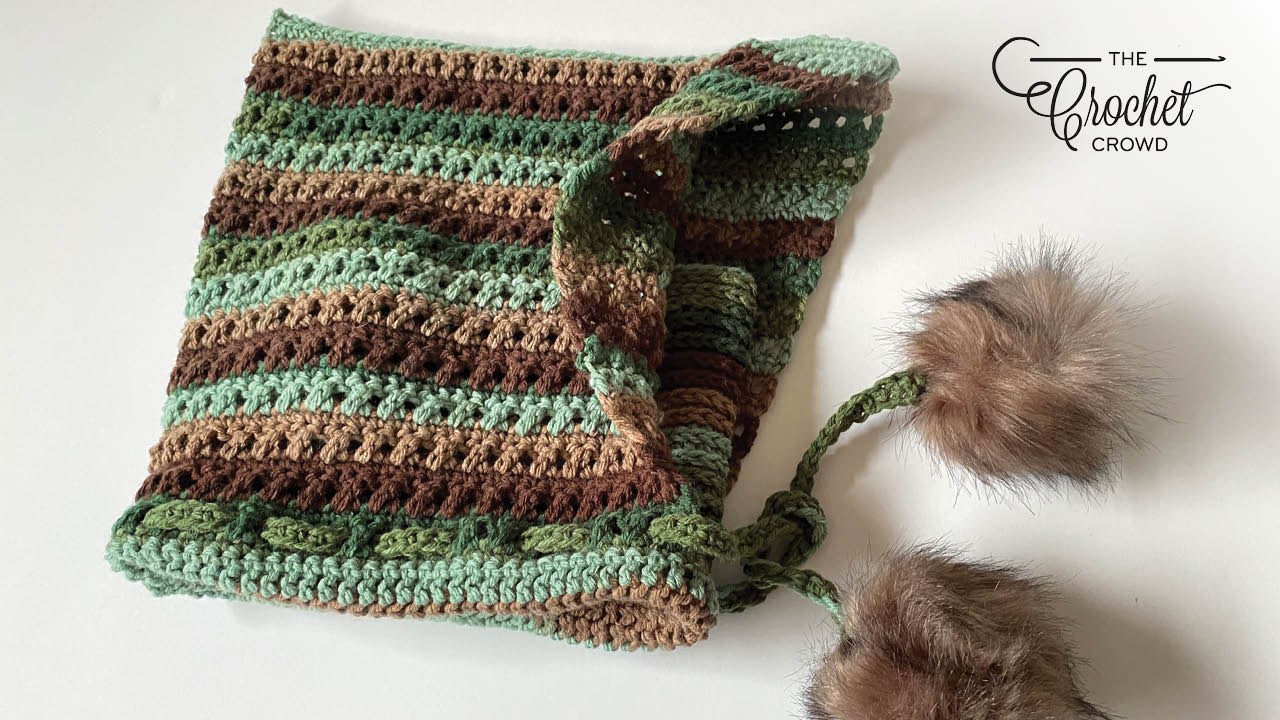
Crochet Toodie Rolled Inside Ready to WearYou can add an optional tie and sew on pom poms for an elevated look to your crochet toodie.
More Ideas
During the testing trial while designing this. Daniel suggested adding a tie and pom-poms to finish the look. You can decide that for yourself. You can add the tie without pom poms as well.
Abbreviations
- Approx = Approximately
- Beg = Beginning
- Ch = Chain
- Hdc = Half double crochet
- Prev = Previous
- Rep = Repeat
- Rnd(s) = Round(s)
- RS = Right Side
- Sc = Single crochet
- Sl st = Slip stitch
- St(s) = Stitches
- X-st = Sk next sc, dc in next sc, dc in skipped sc.
- WS = Wrong Side
Cowl Stitch Counts Advice
Adult size cowls that are tighter to the neck are generally between 55 to 70 sts in the round using 6.5 mm / K/10.5. The example I am wearing has 70 sts. You will be able to tell after the first round if you want to change the size.
Toddler sizes are about 40 chains. You can also chain in an even number and test after the 1st round to see.
It’s important to keep an even number for your stitches for my design. No matter how you customize it, the hood will work out.
Stitches Used In This Project
- You will be doing the camel stitch which is done on the horizontal bar. We have a tutorial just for the cowl already. The hoodie is added to it.
- The hoodie has rows of single crochet and cross stitches known as x-st in the pattern.
Instructions - Cowl Section
Ch 70 (or any even number that best suits you). Join with sl st to first ch to form ring, being careful not to twist chain.
Cowl is worked in continuous spiral. Do not join at end of rnds. Place marker to note beg of rnd and move each subsequent rnd.
1st rnd: Ch 1. 1 sc in first ch. 1 hdc in each ch around. Do not join. 70 sts.

2nd rnd: 1 hdc in back loop only of first sc. *1 hdc into horizontal bar (see diagram). created below next st in prev rnd. Rep from * around.
3rd rnd: *1 hdc into horizontal bar created below next st in prev rnd. Rep from * around. Rep last rnd until work from beg measures 8”.
Final rnd: *1 sc into horizontal bar created below next st in prev rnd. Rep from * around. Join with sl st to first sc. Fasten off.
Please note you ended up with the same number of stitches as your beginning chain.
Instructions - Hoodie Section
The hoodie section is added to this cowl but you have to pay attention to how you do that.
You need to flip the cowl inside out before you begin the hoodie section.
If you do not flip the cowl inside out, once you position this to wear it, the cowl’s wrong side (back of cowl) will be showing. When the cowl is pushed up through the hole, the right side of the cowl (front of the cowl) will face out of the front of the hoodie.
Orientation
- Make sure you are looking at the cowl inside out.
- Rotate the cowl so the fastening off from the cowl is at the centre of the back.
- Locate any stitch closest to the middle of the cowl in front of the cowl.
- Your goal is to leave 2 stitches untouched directly in the middle.
If you have changed the count, ensure that the 1st row below has an even number of single crochet stitches in order to make the rest of the pattern work.
Join yarn to any st near the middle of the cowl.
1st row: RS. Using instructions above for orientation. Ch 1, 1 sc in each st around leaving the last 2 sts unworked. Turn. 68 sts or even number if you customized.
2nd row: Ch 3 (counts as dc here and throughout), x-st across row, 1 dc in last sc. Turn. 68 sts or even number if you customized.
3rd row: Ch 1, 2 sc in first st, 1 sc in each st to 2nd last st. 2 sc in last st. Turn. Increases the row by 2 stitches each time you do this row.
4th row: Ch 3, x-st across row, 1 dc in last sc. Turn.
Rep 3rd and 4th rows 12 times. You can try it on at any time and not do so many repeats or add more if you wish. Keep repeating the 3rd and 4th rows until you get to the size you want.
This has been designed so the increase is on a single crochet row so it’s easier to do without much thought. The x-st rows have no increases.
Rep 3rd row one more time. Do not fasten off.
Fold the top of the hood directly in half.
Final row: Ch 1, 1 sc going through both sides of the hook all the way across. Fasten off and weave in ends.
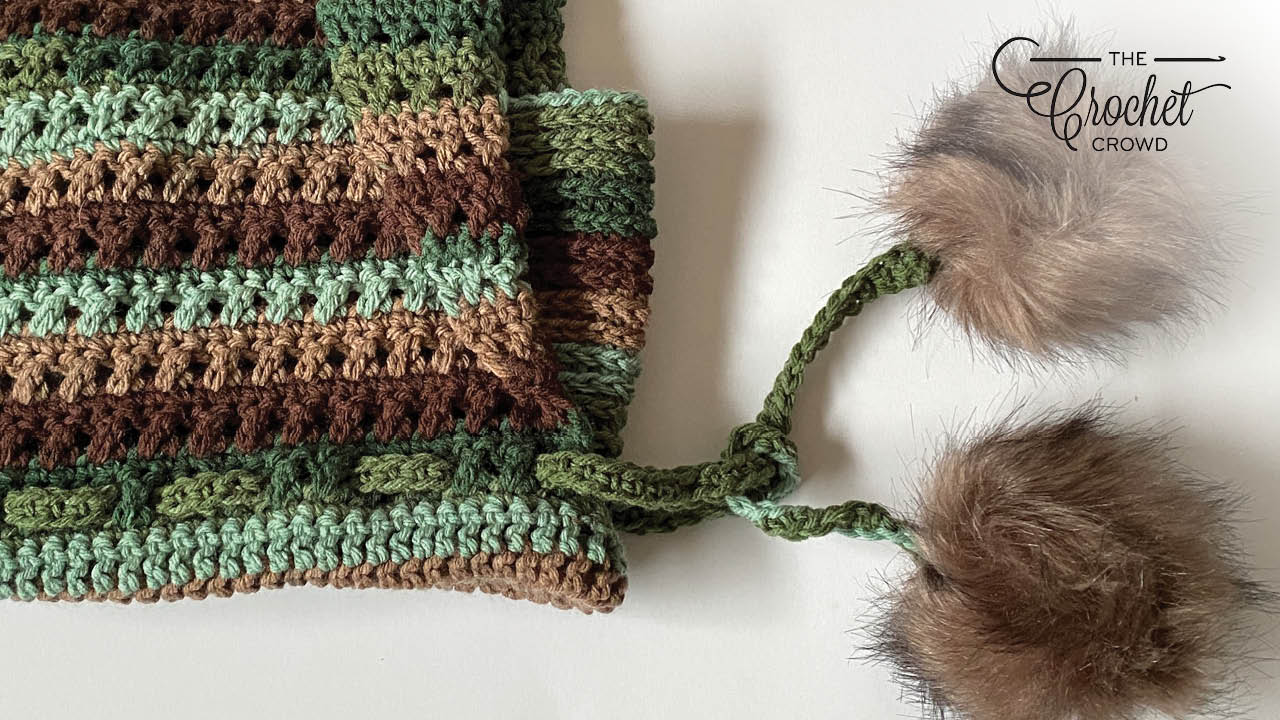
Optional Tie with Faux Pom Pom
Ch 91.
1st row: 1 sc 2nd ch from the hook and in each ch across. Fasten off.
Weave the tie in and out of the first x-st row. Then sew on pom poms to the end of the ties. You can also leave the pom poms off.
Roll the cowl up through the inside so it’s inside the hoodie as shown above.

Buffalo Plaid Hat Shown In Tutorial
It's only been filmed in the right-handed version. It's the Crochet Buffalo Plaid Hat.
Tutorial
This is the base cowl. Notice my pattern above states to stop at 8" and do the last round of the cowl before moving on. If you do exactly like the original pattern, you will run out of yarn and the cowl will be way too deep. This is the original pattern if you want it.
Heather molyneaux says
Grid
Mikey says
Thanks