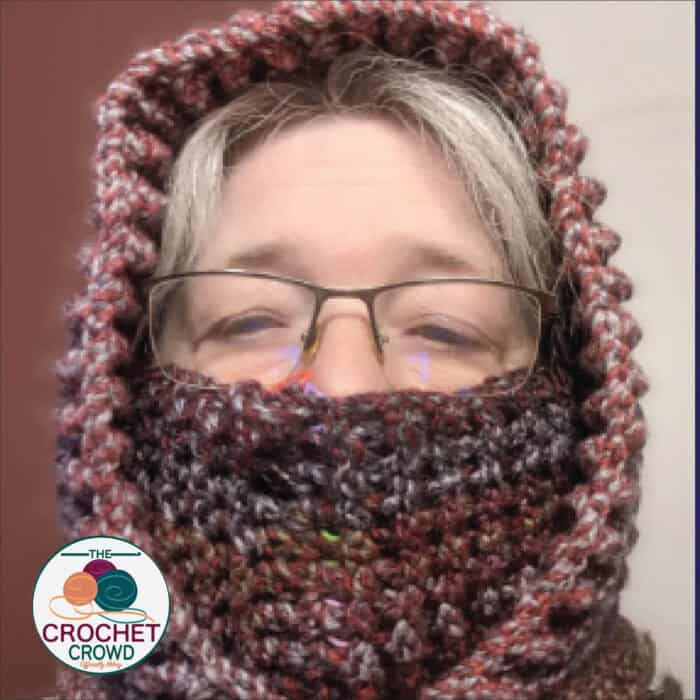
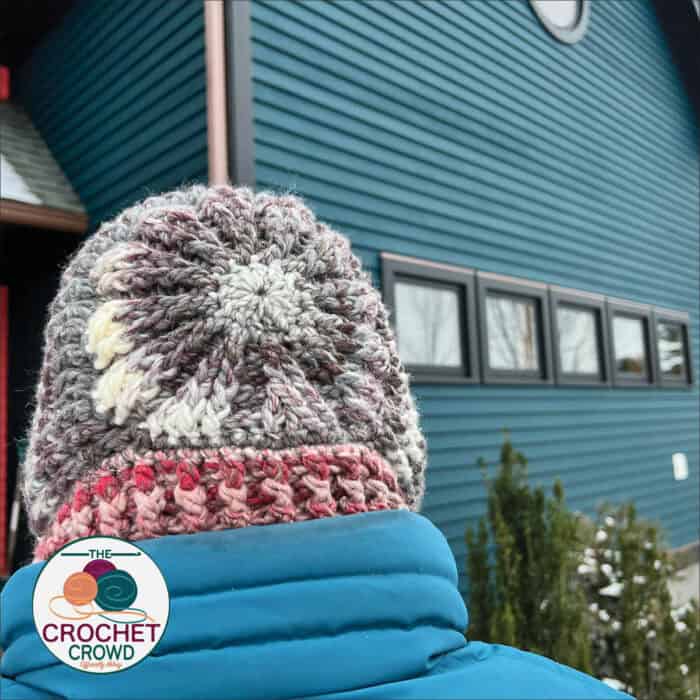
The Crochet Hood and Combination called Crohoodie, designed by our official tester, Nancy Elliott, is a fabulous gift idea.
There was a request from crocheters to change the Crochet Toodie so that it does not have a pointed back part of the hood and to round it off.
Updated Version January 16, 2025
In watching the comments, some information about the original pattern confused some crocheters. Some information was missing. Mikey went back through the pattern to transform the pattern to standard crochet language throughout the pattern and also changed the pattern slightly to make it easier to follow.
The original pattern, in case people prefer it, is still available, and there is a button at the bottom of this article. The latest version has all the written words and a downloadable printable button.
One of these Crohoodies can be completed in an evening.
Yarn & Sizing
Loops & Threads Barcelona Big, 8.8 oz/250g; 410 yds/375m.
- Tapestry - 2 Balls
Hook: 5 mm / H/8 Hook and 6 mm / J/10 hook.
Gauge: unknown
Size: Average Adult
The original pattern doesn’t use any colour strategy and just uses two balls of the same colour. Ignore the colour assignment that is assigned to version 2 only.
Retested Version with Mikey
Bernat Symphony, 7.9 oz/225g; 309 yds/282 m.
- A - Pebbles - 1 Ball
- B - Pomegranate Punch - 1 Ball
Hook: 5 mm / H/8 Hook and 6 mm / J/10 hook.
Gauges:
- 12 sc and 12 rows = 4” [10 cm] using 5 mm / H/8 crochet hook.
- 11 sc and 12 rows = 4” [10 cm] using 6 mm / J/10 crochet hook.
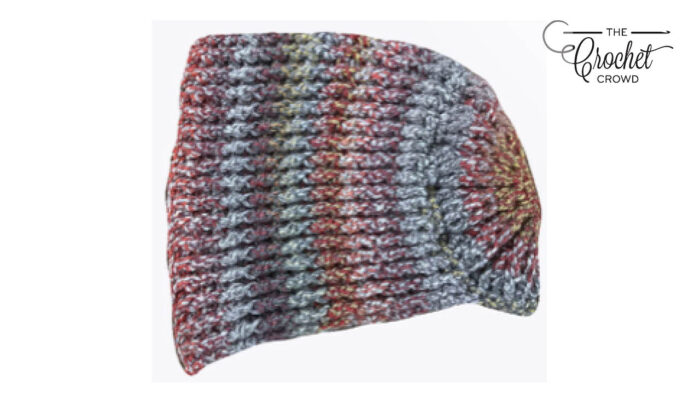
Size: Average Adult. 19” long and the cowl is 12” diameter.
Abbreviations
- Beg - Begin(ning)
- Ch - Chain(s)
- Dc - Double crochet
- Dcbp - Yoh and draw up a loop around post of next stitch at back of work inserting hook from right to left. (Yoh and draw through 2 loops on hook) twice.
- Dcfp - Yoh and draw up a loop around post of next stitch at front of work inserting hook from right to left. (Yoh and draw through 2 loops on hook) twice.
- Hdc - Half Double Crochet
- PM - Place Marker
- Rep - Repeat
- RS - Right Side
- Rnd(s) - Round(s)
- Sc - Single crochet
- Sl st - Slip stitch
- St(s) - Stitch(es)
- WS - Wrong Side
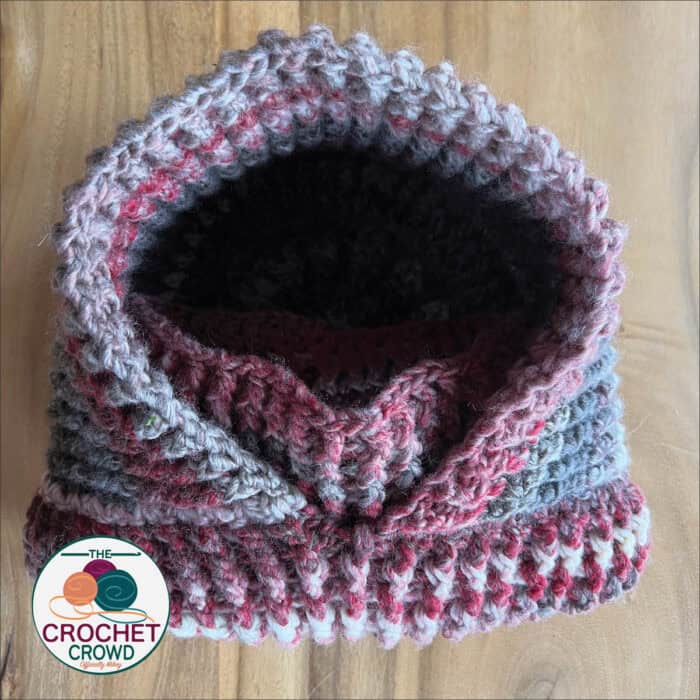
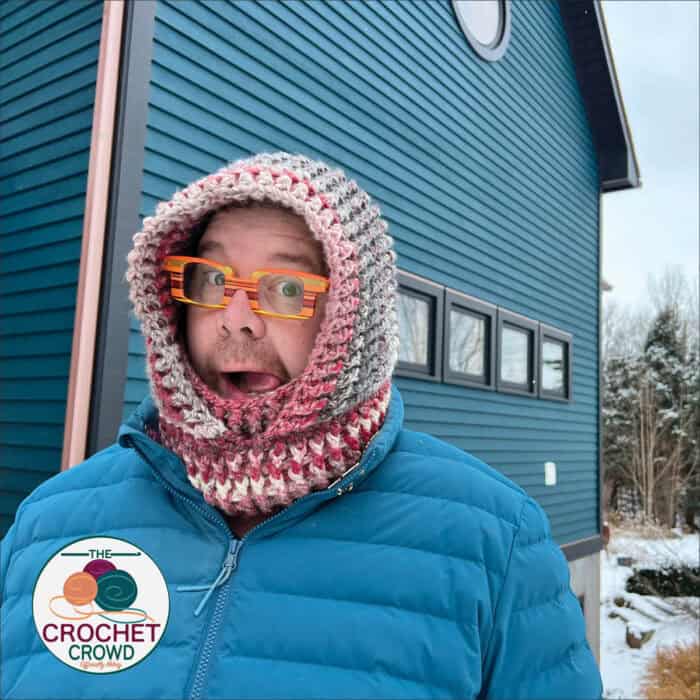
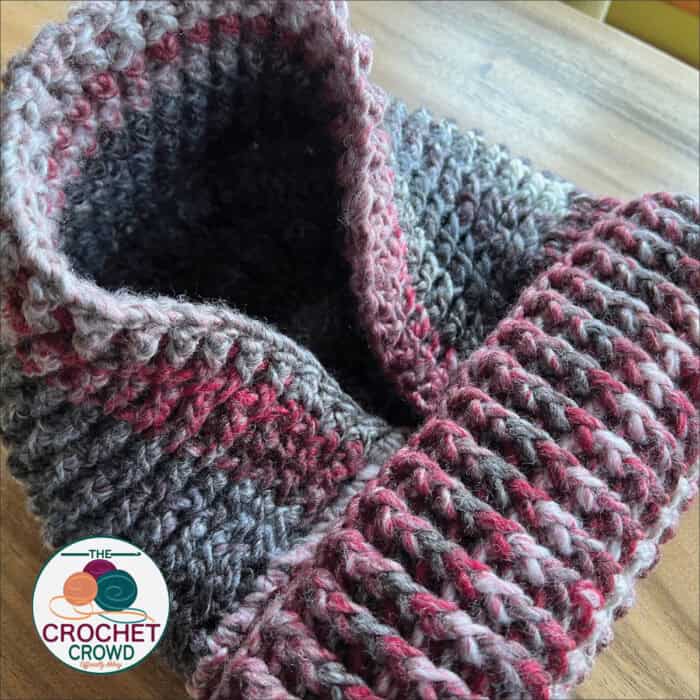
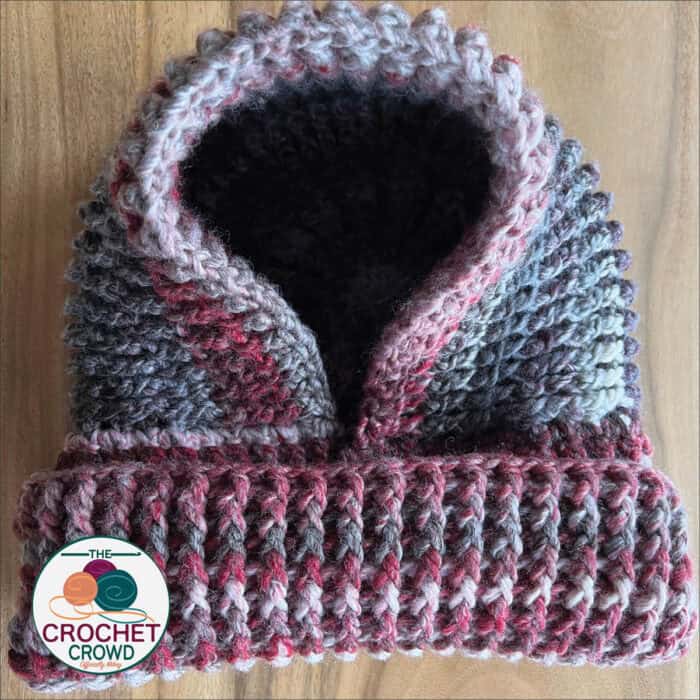
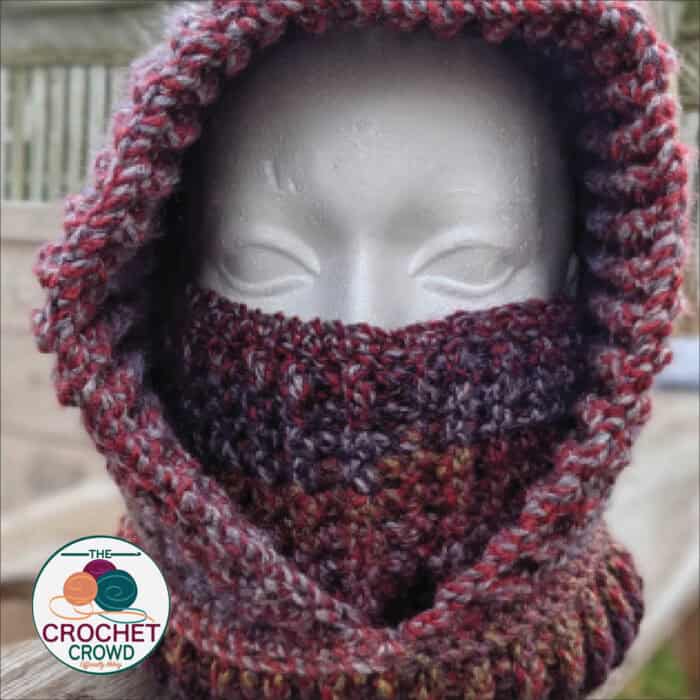
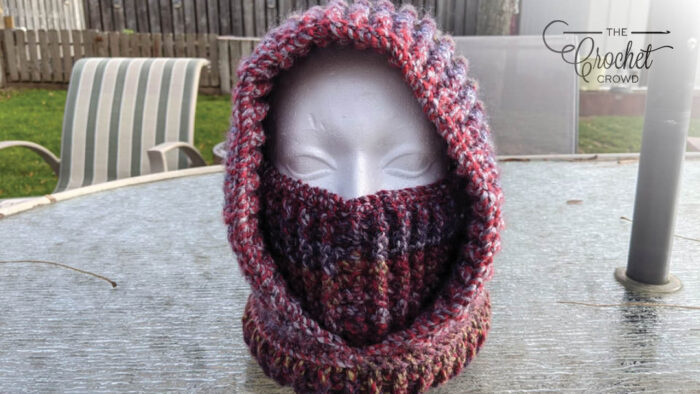
The Crohoodie cowl portion can fold up to the inside of the hood or keep it on the outside. You can not fold it put the long cowl inside your coat—more photos at the end of the pattern.
Instructions
Hood - Use 6 mm / J/10 Crochet Hook
IMPORTANT: Ignore the colour assignment if you are using two balls of the same colour. The colour strategy is for the Bernat Symphony, as you will run out of Colour A before the hood portion is complete.
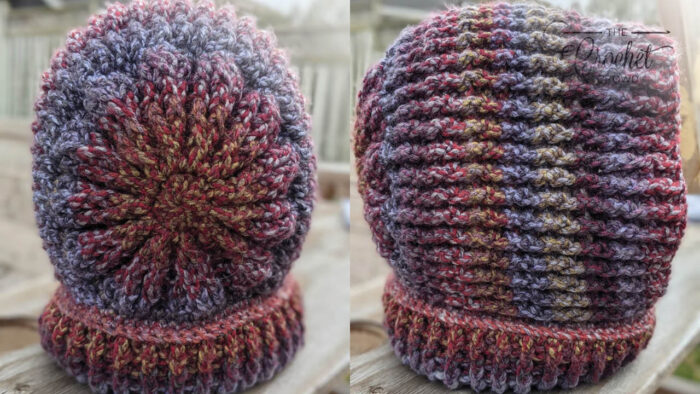
1st rnd: RS. With A, ch 3. 12 dc in 3rd ch from hook. Join with sl st to first dc. 12 sts.
2nd rnd: Ch 1 (does not count as st). 2 dc in each dc around. Join with sl st to beg dc. 24 sts.
3rd rnd: Sl st around the front post of the dc post. Ch 1. 2 dcfp around same post as last sl st. 1 dcbp around next dc. *2 dcfp around next dc. 1 dcbp around next dc. Rep from * around. Join with sl st to beg dcfp. 36 sts.
4th rnd: Sl st around the front post of the dc post. Ch 1. 1 dcfp around each of the first 2 dcfp. 2 dcbp around next dcbp. *1 dcfp around each of next 2 dcfp. 2 dcbp around next dcbp. Rep from * around. Join with sl st beg dcfp. 48 sts.
5th rnd: Sl st around the front post of the dc post. Ch 1. 2 dcfp around same post as last sl st. 1 dcfp around next dcfp. 1 dcbp around each of next 2 dcbp. *2 dcfp around next dcfp. 1 dcfp around next dcfp. 1 dcbp around each of next 2 dcbp. Rep from * around. Join with sl st to beg dcfp. 60 sts.
6th rnd: Sl st around the front post of the dc post. Ch 1. 1 dcfp around same post as last sl st. 2 dcfp around next dcfp. 1 dcfp around next dcfp. 1 dcbp around each of next 2 dcbp. *1 dcfp around next dcfp. 2 dcfp around next dcfp. 1 dcfp around next dcfp. 1 dcbp around each of next 2 dcbp. Rep from * around. Join with sl st to beg dcfp. 72 sts.
7th rnd: Ch 1. 2 sc in same st as join. 1 sc in each of next 5 sts. *2 sc in next st. 1 sc in each of next 5 sts. Rep from * around. Join with sl st to beg sc. Do not fasten off. 84 sts.
Note: Prepare to change from rounds to rows going into the next section. Use a stitch marker to know where to stop.
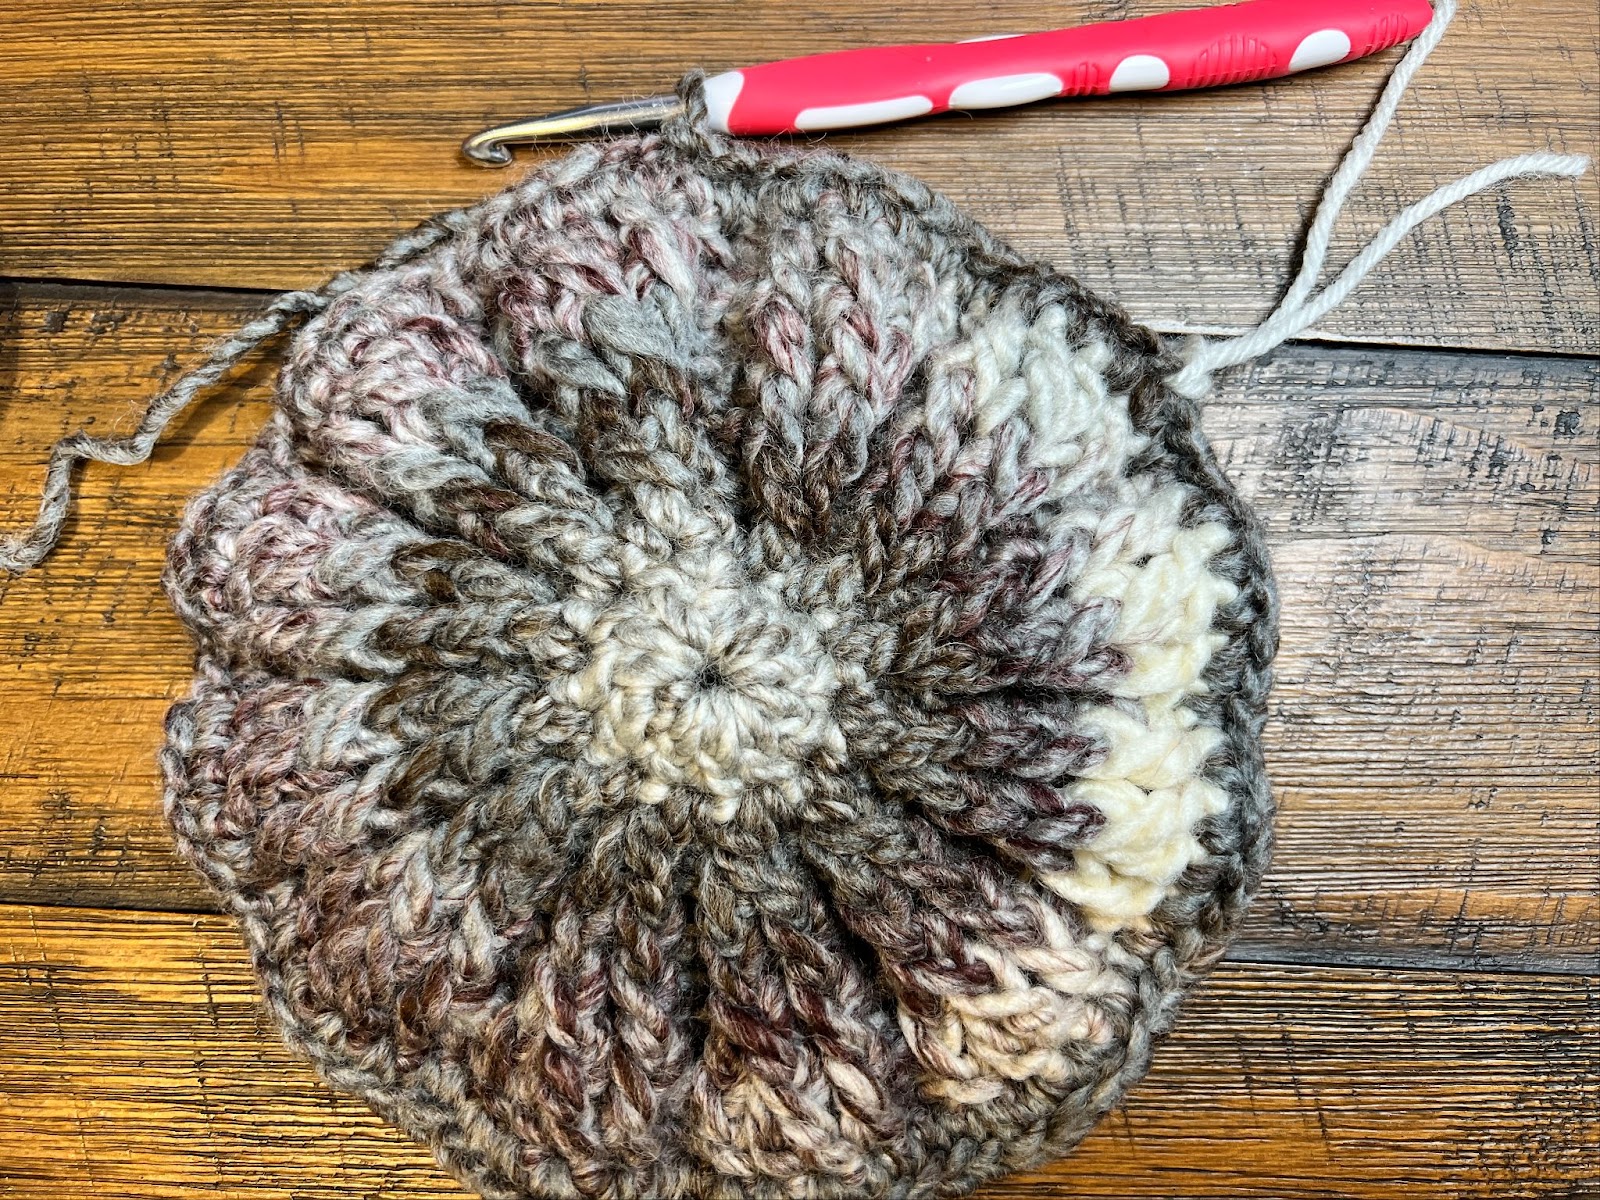
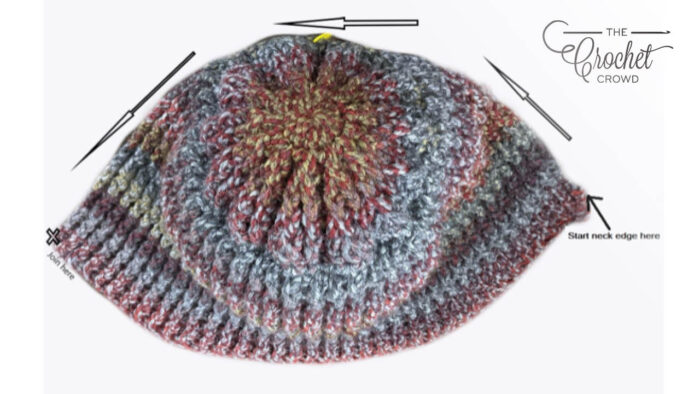
Transition the circle into rows to form the top and sides of the hood. Count 71 sts starting in the same st as join and PM in that stitch before continuing.
The pattern will turn into the rib stitch for the remaining hood.
1st row: RS. Ch 1. 1 hdc in the first st. 1 dcfp around next st. *1 dcbp around next st. 1 dcfp around next st. Rep from * to the 2nd last st before marker. 1 hdc in last st. Turn. 71 sts.
2nd row: WS. Ch 1. 1 hdc in the first st. 1 dcbp around next st. *1 dcfp around next st. 1 dcbp around next st. Rep from * to the 2nd last st. 1 hdc in last st. Turn. 71 sts.
3rd row: RS. Ch 1. 1 hdc in the first st. 1 dcfp around next st. *1 dcbp around next st. 1 dcfp around next st. Rep from * to the 2nd last st. 1 hdc in last st. Turn. 71 sts.
4th row: WS. Ch 1. 1 hdc in the first st. 1 dcbp around next st. *1 dcfp around next st. 1 dcbp around next st. Rep from * to the 2nd last st. 1 hdc in last st. Turn. 71 sts.
SIZING TIP: The next 14 rows are the hood over the top of your head. If you try it on, the round centre point should be at the back of your head. If you are happy with how far the hood extends over your head, you can end the repeat as long as the last row is finished with a 4th row.
Rep 3rd and 4th rows 5 more times. Break A.
Next row: RS. With B, join with sl st to be beg hdc. Ch 1, 1 hdc in the first st. 1 dcfp around next st. *1 dcbp around next st. 1 dcfp around next st. Rep from * to the 2nd last st. 1 hdc in last st. Turn. 71 sts.
Next row: WS. Ch 1. 1 hdc in the first st. 1 dcbp around next st. *1 dcfp around next st. 1 dcbp around next st. Rep from * to the 2nd last st. 1 hdc in last st. Turn. 71 sts.
Next row: RS. Ch 1, 1 hdc in the first st. 1 dcfp around next st. *1 dcbp around next st. 1 dcfp around next st. Rep from * to the 2nd last st. 1 hdc in last st. Turn. 71 sts.
Next row: WS. Ch 1. 1 hdc in the first st. 1 dcbp around next st. *1 dcfp around next st. 1 dcbp around next st. Rep from * to the 2nd last st. 1 hdc in last st. Turn. 71 sts.
Do not fasten off at the end.
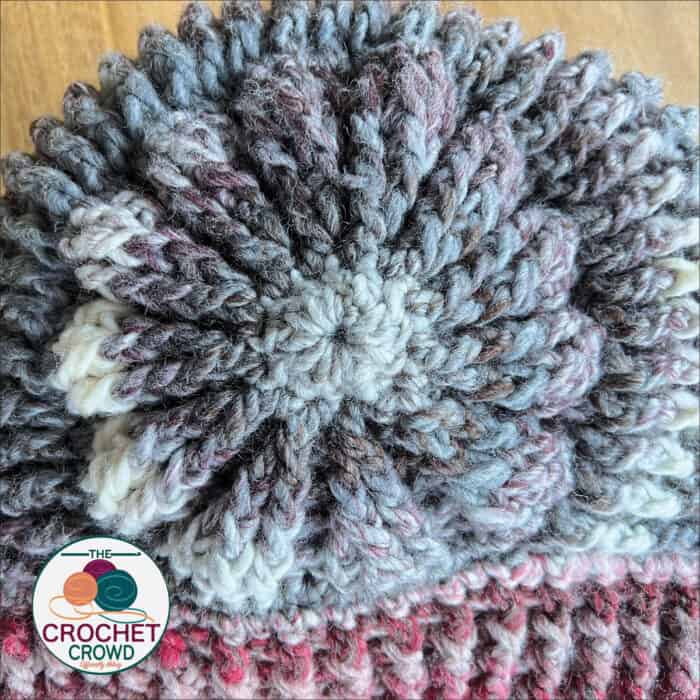
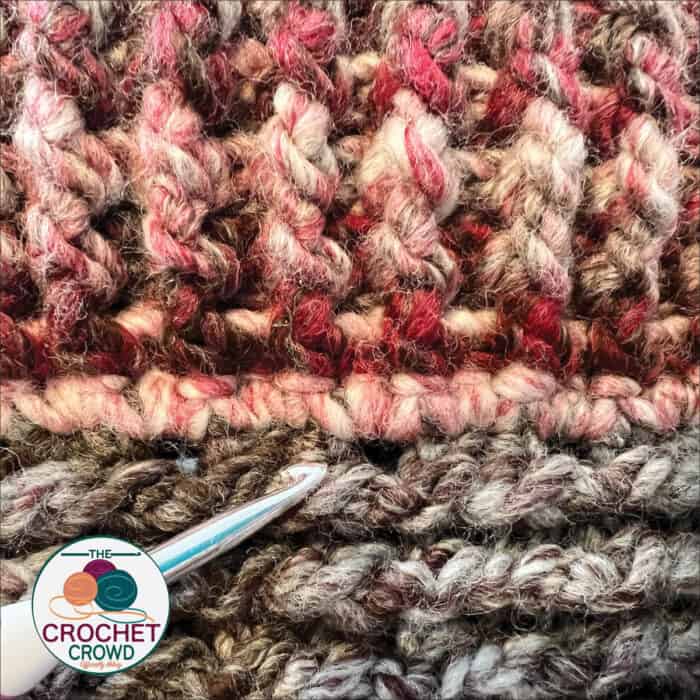
The picture shows the difference between the Pebbles in the hood and the final four rows being Pomegranate Punch. It was needed as Pebbles did run out. The difference in colouring helps frame the hood better.
Sizing Tips for the Cowl Diameter
Transition from the hood to the cowl. The first row across will create the diameter of the cowl. The cowl shown is 80 sts on the first past. We need an even number to make the rest of the cowl work. The cowl is 12” in diameter.
The ribbing creates stretch, and the information below shows when the cowl is not stretched.
For sizing, every 4 sts is approximately 1” in circumference.
80 sts = 12” diameter
76 sts = 11.5” diameter
72 sts = 11” diameter
When you create the first pass, you must space an even number of stitches you prefer. The cowl will fold over itself, which creates double-thickness. If the cowl is tight and not yet folded, it will be super tight when folded.
TIP: Use the hdc posts on the edges when creating the first pass. You can put a maximum of 2 sc around one post.
We will be doing continuous rounds, meaning no joining with slip stitching so there is no seam in the cowl. When finishing this cowl, focus on the back of the cowl at the back of the head region to finish, as it will be less visible.
Cowl - Use 5 mm / H/8 Crochet Hook
1st rnd: With RS facing. Work along the side edge to the back edge of the leftover stitches in the back of the head circle and then proceed to the other edge.
Ch 1. Evenly space sc across the side edge, back edge and side edge. Use the number above for the number of stitches you should target. It has to be an even number. Do not join or turn.
2nd rnd: Work in a continuous round and jump over to the first stitch to close the front of the hood. *1 dcfp around next st. 1 dcbp around next st. Rep from * around. Do not join.
3rd rnd: *1 dcfp around next st. 1 dcbp around next st. Rep from * around. Do not join.
Rep 3rd rnd until the cowl measures approx 8”.
Last half rnd: *1 dcfp around next st. 1 dcbp around next st. Rep from * to halfway around so you are the back of the crohoodie. 1 hdc in the next st, 1 sc in the next st, 1 sl st in the next st. Fasten off.
.
.
Tutorial
More Ideas
- Crochet Baby Blanket and Booties Set Pattern
- Crochet Baby of Mine Hooded Blanket Pattern
- 137 Knit & Crochet Free Patterns
Original Pattern
Be advised the original pattern is not fully written in crochet standards of language and may be harder to follow.
.
.

Margaret Byrne says
A question I’m hoping someone can answer. I have a very small head. I have been known to buy and wear children’s hats because adult ones are too big unless they have a draw string. At what point should I stop increasing? I guess I’m asking how much of the back of my head should be covered before I start the rows.
Mikey says
I don't have an answer for you on that but maybe stop 1 round short. You would be very surprised on how little of a change is needed to completely change a size.
Terri Limbert says
Hi Mikey,
When starting the cowl/mask portion, round 1 says to do 2sc in each chain 2 space at the ends of the rows, what about the back of the head bottom, do you put 2sc in those stitches as well? Not sure how to end up with an uneven number of stitches if you're putting 2sc in each space? idk, am I not reading it correctly?
Mikey says
I will ask Nancy to follow up. THanks.
Nancy says
Hi Terri, My apologies for that round not being clearer. You will put 2sc into each ch2 space along the first side, then continue along the back edge with sc then up the other side with 2sc into each st. You can put 2sc into the back sts as well if you need, to get to the "uneven" number of sts.
Gloria Schofield says
Hi Mikey,
Think there is a glitch on row 7 of the cowl pattern. It tells you to do 2scs in the join st. Then it omits the number of sts.to do before you do another 2scs in the stitch following the number of stitches after the first 2scs. I have been putting 5 scs in between them seems to work out ok.
Mikey says
Thank you. It's been corrected thanks for your heads up so we did a second look at it.
Cassie says
What's the diameter of the back circle on the cowl? Mine is coming out as a kid's size.
Mikey says
I will ask Nancy to see if she can measure her sample to check. I will check with her this coming week.
Sara says
I came here to ask the same question as Cassie. The size of the circle would be really helpful to know in order to make adjustments for gauge and fit. Thanks!
andi says
i think my question would be answered by this as well... i'm working through this pattern now and i'm concerned my face opening is too short. i'd have to undo a lot of work (and a couple balls of yarn) to go back and correct now... some measurements would be very helpful to know if i'm on the right track or not.
regardless, thank you for the pattern 🙂 it's a really cool concept and easy enough for an amateur like me to take on!
Mikey says
I will see if Nancy can do that.