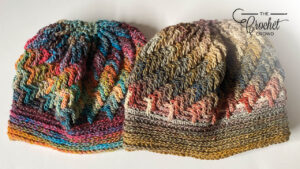
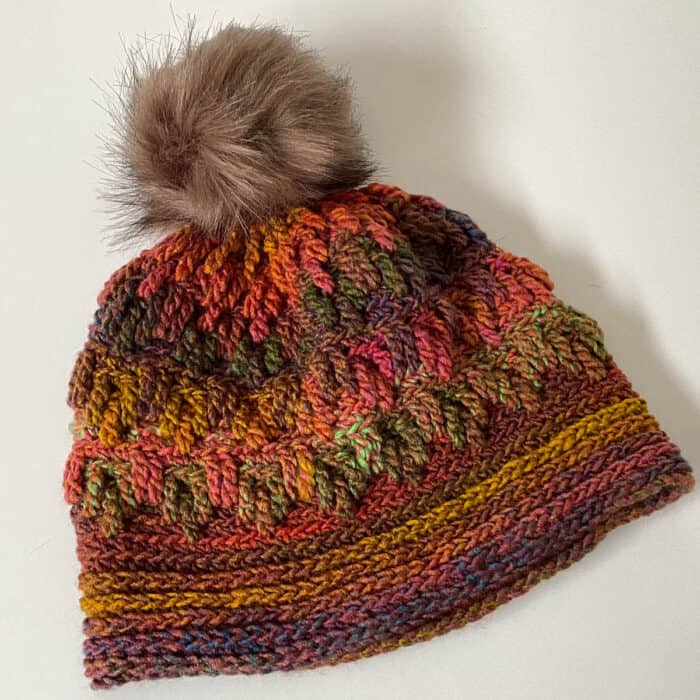
The Crochet Show Time Hat is an adaptation of the original Crystal Ice Hat by Misty Samuelson. Changes were made by changing the yarn to a #4 Medium Weight from a #5 Bulky Weight. The change significantly changed the hook size to 4 mm / G/6 as the yarn is on the thinner side of the medium-weight spectrum.
The starting chain counts were changed from 50 chains to 80 to compensate for the yarn. The stitch multiples to change the sizing is in Multiples of 5.
Due to yarn constantly shifting colours, having a seamline would negatively impact this design. I re-engineered the hat to have no-slip stitching and the hat is worked in a continuous spiral from the very start right to the end. Use a stitch marker to help keep track of the rounds.
The Crochet Show Time Hat is using the camel stitch for the brim and then strategic drop-down trebles.
Newly Released - Sister Hat
I created the Crochet Curtain Call Hat as a sister hat to the Show Time Hat. You can click on the picture for the pattern and matching tutorial.
Inspiration
Originally designed by Misty Samuelson for Schachenmyr. Edit the pattern for the latest yarn and no-slip stitching to prevent seams with Red Heart Roll With it Melange.
Let the colours work itself out. 1 Ball can make 2 hats.
Yarn and Sizing
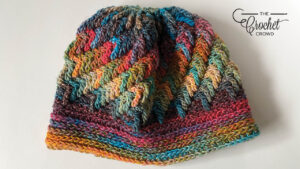
Red Heart Roll With It Melange 150 g/5.29 oz, 356 m/389 yds)
- A - Show Time (In Picture)
- B - Theater (Used in Tutorial)
Project Size: Average Adult
4 mm / G/6 Crochet Hook or size needed to obtain gauge.
Gauge is 16 sc and 17 rows = 4” [10 cm]
Abbreviations
- Approx = Approximately
- Beg = Beginning
- Blo = Back loop only
- Ch = Chain(s)
- Hdc = Half double crochet
- Hdcfp = Half double crochet front post
- Rem = Remaining
- Rep = Repeat
- Rnd(s) = Round(s)
- RS = Right side
- Sc = Single crochet
- Sl st = Slip stitch
- Sk = Skip
- Yoh = Yarn over hook
Special Stitches
Camel Stitch
Yarn over, insert hook into the extra back loop of the next stitch, yoh and pull through a loop (3 loops on the hook), yoh and pull through all loops on the hook.
Fltr - Front Loop Treble Crochet Below
(Yoh) twice, insert hook into the front loop only of the next stitch 3 rows below, yoh and draw through a loop (4 loops on the hook), (yoh and draw through 2 loops on the hook) 3 times.
Back Loop Single Crochet Decrease
(Insert the hook into the back loop of the next stitch and draw through a loop) twice (3 loops on the hook), yoh and draw through all loops on the hook.
Note
This pattern is worked in a continuous round. Use a stitch marker to keep track of your rounds. Suggesting to mark the last stitch of each round.
Instructions
Brim
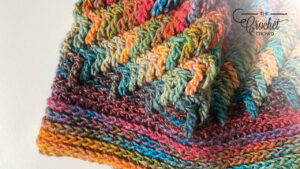
Keep longer tail at the beginning to use to smooth off brim later. Ch 80.
1st rnd: RS. Careful not to twist the chain, start in first ch to form the ring and place 1 hdc in each ch around. Do not join and work in a continuous rnd from this point. 80 sts.
2nd to 6th rnds: Work camel stitch in each stitch around. 80 sts.
7th to 9th rnds: 1 sc in each blo around. 80 sts.
A reminder that when you complete a fltc below stitch that it counts as the stitch it is sitting in front of. Be sure to skip that stitch when starting the next repeat.
10th rnd: *1 blo sc in each of the next 4 sts, fltr. Rep from* around. 80 sts.
11th rnd: *1 blo sc in next 3 sts, fltr below, 1 blo sc in next 4 sts, fltr. Rep from * around. 1 blo sc in last st. 80 sts.
12th rnd: 1 blo sc in next 2 sts, fltr below, *1 blo sc in next 4 sts, fltr. Rep from * around. 1 blo sc in last 2 sts. 80 sts.
13th rnd: *1 blo sc in next st, fltr below, 1 blo sc in next 4 sts, fltr. Rep from * around. 1 blo sc in last 3 sts. 80 sts.
14th rnd: *Fltr, 1 blo sc in next 4 sts, fltr. Rep from * around. 80 sts.
Rep 10th to 14th rnds once, then rep 10th to 12th once more.
Shape Top
23rd rnd: 1 blo sc in next st, fltc, *sk next fltr, 1 blo sc in next 3 sts, fltr. Rep from * around. Sk next st, 1 blo sc in last 2 sts. 64 sts.
24th rnd: *Fltr, sk next fltr st, 1 blo sc in next 2 sts. Rep from * around. 48 sts.
25th rnd: *1 blo sc in next 2 sts, fltr below. Rep from * around. 48 sts.
26th rnd: *1 blo sc in next st, fltr, sk next fltr. Rep from * around. End 1 st before the stitch marker as the stitch marker is sitting on a skipped st. Move stitch marker to the new last st. 32 sts.
27th rnd: Ignore the fltr that has the last stitch marker. Hdcfp around each fltr in the last rnd. 16 hdcp sts.
28th rnd: 1 sc in each hdcfp st ar ound. 16 sc. Fasten off leaving long yarn tail. Use long tail to gather remaining stitches and pull top of hat closed.
Sew the brim long strand to even off the brim line.

Original Hat
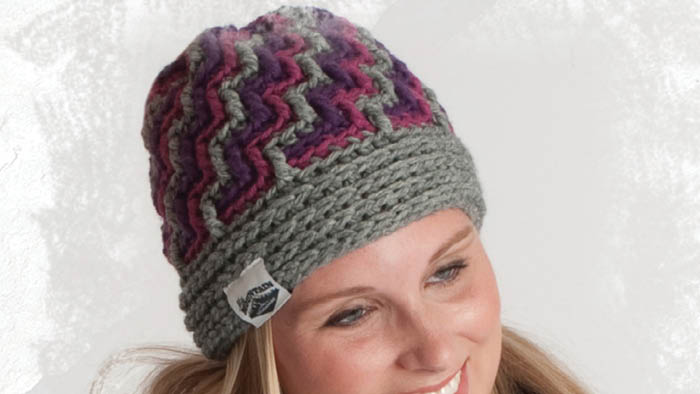
Introducing the Crystal Ice Hats by Schachemayr Yarns. This clever design is a lot simpler than it looks. I love how it looks more complicated than it really is.
This pattern can be adapted to change sizes by chaining the starting chain that wraps around your forehead. Keep the chain in sets of 5 and you will end up with a perfectly fitting hat. The final three rounds of the hat are the decreasing rounds which can be done in virtually any size as the top of the hat is bunched up and sewn together.
The zigzag effect is just an optical illusion formed by front post treble crochets that come down over two rows and are connected to the next row with the same colour. It makes it appear that you have had to crochet on a zigzag formation but that’s where the fun is.
With the brim using a Camel Stitch, you will notice that the brim will have nearly a double thickness to it. This is perfect for those, like me, who live in cold regions of the world.

Pattern Suggestions
- American Loom Baby Hat Pattern
- Crochet Women’s Peak Cap Pattern
- Nature’s Gifts for Baby by Sara Leighton
- Crochet Double Layered Braided Cowl Pattern
- Crochet Hugs & Kisses Car Seat Cover Pattern
Tutorial
Show Time Version Hats
Original Only available in Right Handed.
Terry says
Thank you, Mikey, for making the video to accompany this beautiful pattern. It certainly clarifies the “*” placement error in the pattern on rounds 11, 13, and 14. The hat turned out beautifully!
Mikey says
I'm glad you love the hat. 😀