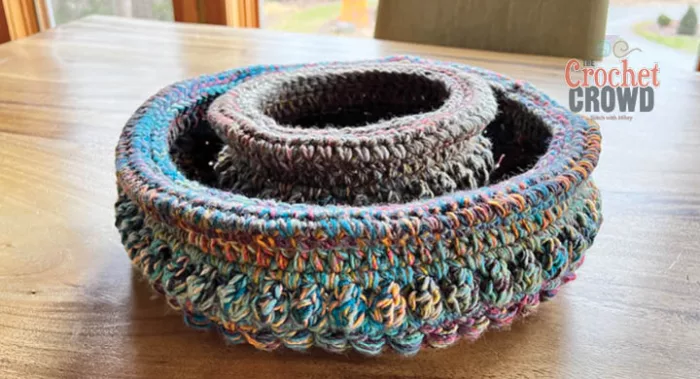
The Small Crochet Foyer Basket Bowl is the right size to toss keys, wallets, spare change and even a dog leash into.
Are you like me and inconsistently throw your keys in random spots? Usually the same spot but without thinking, you toss it somewhere else like a dresser, countertop or foyer table. It drives me nuts, to be frank.
These little bowls can pair together with the Large Crochet Bowls too.
Pattern Details
Red Heart Roll With It Melange 150 g/5.29 oz, 356 m/389 yds)
Colour is Theater. I used three balls to use three stands together.
Project Size: 8” dia x 4” high.
6 mm / J/10 Crochet Hook or size needed to obtain gauge.
Abbreviations
Beg = Begin
Bs = Bead Stitch - Dc in next st, yo
around same dc post just created - 3
times. Yo and pull through all but final
Ch = Chain
Cl = Cluster - Dc 3 tog in same stitch.
Rem = Remaining
Rep = Repeat
Sc = Single Crochet
Sl St = Slip Stitch
Sp = Space
Tog = Together
Yo = Yarn Over
Sk = Skip
Note: Ch 2 at beg of round does not count as hdc.
Use 3 strands together. This will create a marled look with colours transitioning naturally.
With 3 strands held tog, ch 4. Join with sl st to first ch to form ring.
1st rnd: 8 sc in ring. Join with sl st to first sc. 8 sc.
2nd rnd: Ch 1. 2 sc in each sc around.Join with sl st to first sc. 16 sc.
3rd rnd: Ch 1. 2 sc in first sc. 1 sc in next sc. *2 sc in next sc. 1 sc in next sc. Rep from * around. Join with sl st to first sc. 24 sc.
4th rnd: ch 1. 2 sc in first sc. 1 sc in each of next 2 sc. *2 sc in next sc. 1 sc in each of next 2 sc. Rep from * around. Join with sl st to first sc. 32 sc.
5th rnd: Ch 1. 2 sc in first sc. 1 sc in each of next 3 sc. *2 sc in next sc. 1 sc in each of next 3 sc. Rep from * around. Join with sl st to first sc. 40 sc.
6th rnd: Ch 1. 2 sc in first sc. 1 sc in each of next 4 sc. *2 sc in next sc. 1 sc in each of next 4 sc. Rep from * around. Join with sl st to first sc. 48 sc.
7th rnd: Ch 1. 2 sc in first sc. 1 sc in each of next 5 sc. *2 sc in next sc. 1 sc in each of next 5 sc. Rep from * around. Join with sl st to first sc. 56 sc.
Side
1st rnd: Ch 1. Working in back loops only, 1 sc in each st around. Join with sl st to first sc. 56 sc.
2nd rnd: Ch 1. Working in both loops, 1 sc in each st around. Join with sl st to first sc. 56 sc.
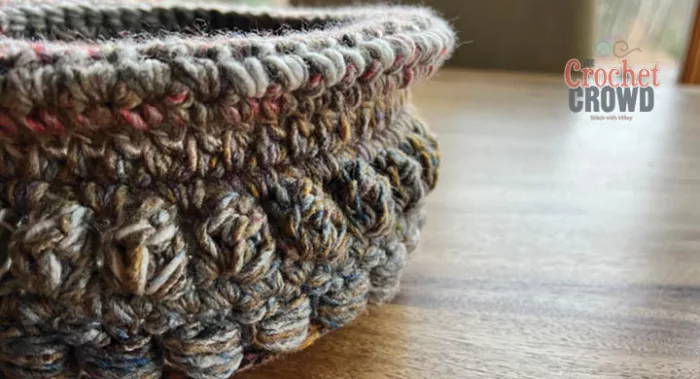
TIP: When you create a bead stitch, it has the top of the first double crochet created and the wrapping around the post creates the second stitch. There are two stitches created with this configuration. In rnd 4, you will see you need to single crochet in each stitch around, it’s how you get back to 56 sc.
3rd rnd: Ch 2. Bs in same st at join. Sk next st. *Bs in next st. Rep * around. Join with sl st to beg bs. 28 bead sts = 2 sts each.
4th rnd: Ch 1. 1 sc in each st around. Join with sl st to beg sc. Turn. 56 sc.
5th: Ch 2. Cl in same stitch. Ch 1. *Sk next st, cl in next, ch 1. Rep * around. Join with sl st to top of beg cl. Turn. 28 clusters and 28 ch-1 sps.
6th: Ch 1. 1 sc in each st and ch-1 sp around. Join with sl st to beg sc. 56 sc.
7th rnd: Ch 3, (counts as first dc). 1 dc in each st around. Join with sl st to top of beg ch-3. 56 dc.
Bowl Brim
8th rnd: Ch 1. Using front loops only, 1 sc in each st around. Join with sl st to beg sc. 56 sc.
9th to 11th rnds: Ch 1, 1 sc in each st around. Join with sl st to beg sc. 56 sc.
TIP: The 12th round forces the top to curl over and crochet into position.
12th rnd: Ch 1. Folding 8th to 11th rnds tog to form ridge and working through front loops of 11th rnd and rem back loops of 8th rnd, 1 sc in each st around. Join with sl st to first sc. Fasten off.
Kim Bosley says
GRID
Mikey says
THankx
Amazing world says
this website is very use full thanks you