Spring/Easter Crochet Topiary Tree
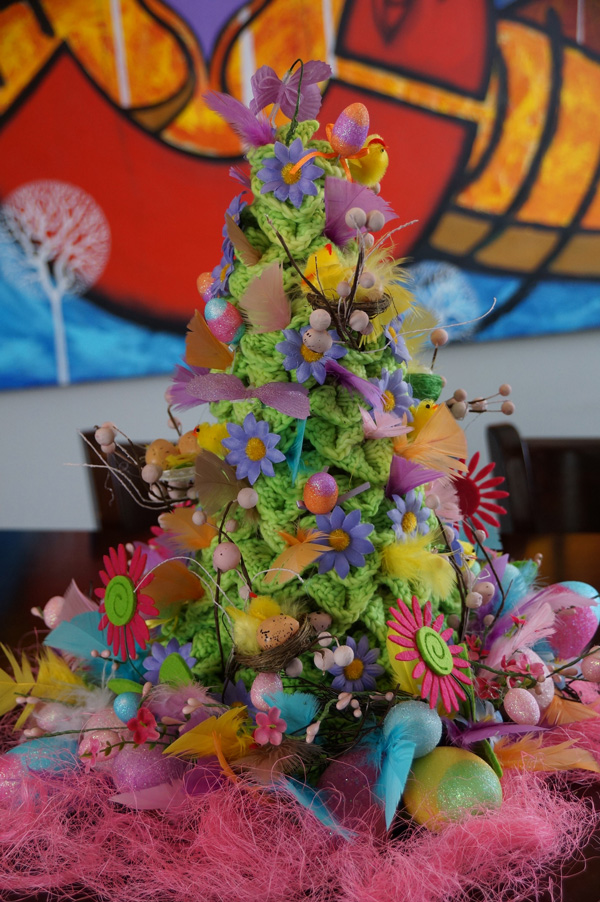
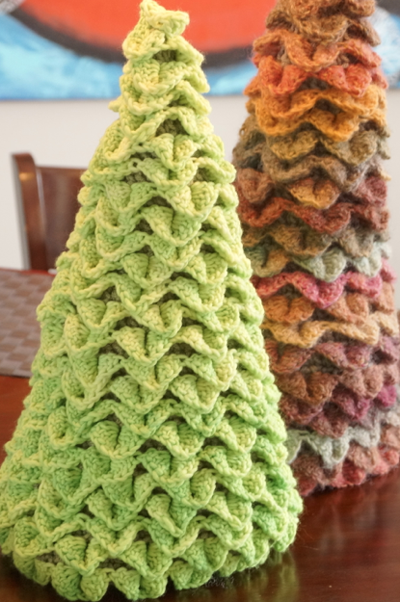
Spring is here and it's time to bring a little bit of life into your home with this amazing 16" Spring Crochet Topiary Tree. The base diameter is nearly 11". This is a super great gift for the elderly stuck in long term care facilities. All decorations are from a dollar store making this an inexpensive gift-giving idea. I will put a larger photo below under read more for you to examine this tree closer up. The pattern was originally for the Amazing Topiary Tree, please substitute your yarn colours to make your spring-themed tree.
This has been designed to match your home decor year around instead of just a seasonal item. The colours and yarn choices are up to you. This tree takes approximately 3.5 hours to crochet.
Tree Top Tip: You can simply glue a thin dowel to the back or bottom of a decoration, then slipped the dowel down through the top of the crochet project and inserted it into the Styrofoam so it stays standing up.

Pattern Suggestions
Pattern Notes:
- Create the foundation of the Tree. Spiralling from Top to Bottom.
- Create branches of the Easter & Spring Tree from Bottom to Top, spiralling back up.
- Decorate to suit you.
- I used pictures from the Christmas Tree to help illustrate the steps involved.
Materials Needed:
- Size J or 6.0 MM Crochet Hook
- 1 Ball of Red Heart Super Saver or Equivalent
- 1 Balls of 4 ply, medium 4 yarn.
- Substitute the yarn for any brands you prefer to make your tree customized to fit your personality.
DC = Double Crochet
Ch = Chain
SL ST = Slip Stitch
BEG = Beginning
SC = Single Crochet
V Stitch 2 DC into the same Stitch,
Create Your Foundation First:
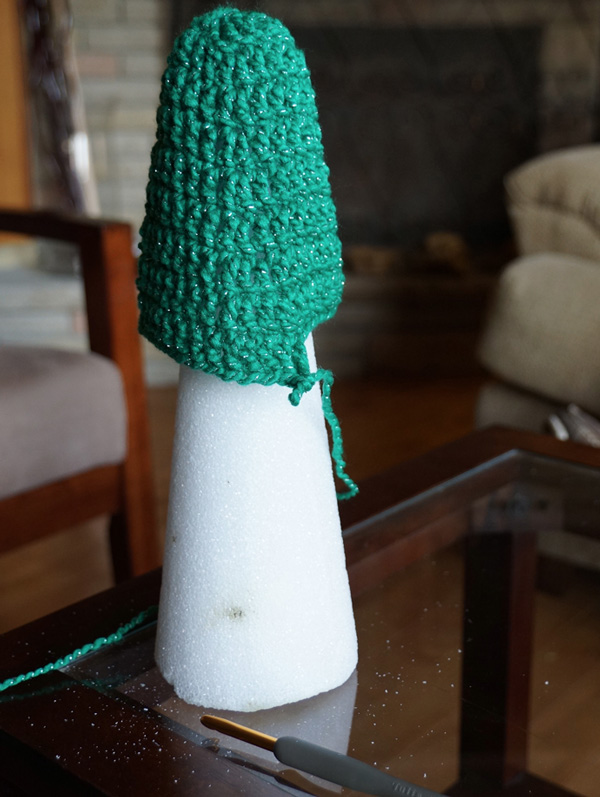
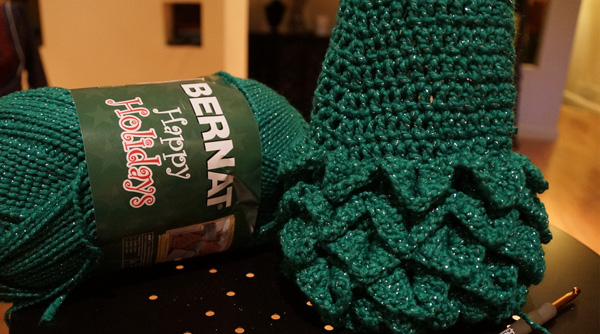
 Using Super Saver or Equivalent Yarn. This yarn can't be seen from the outside but recommend you get a colour that comes close to the colour of yarn you chose for the leaves. There is grey yarn behind my above Topiary sample.
- Ch 4, SL ST to the BEG Ch to form a ring.
- Ch 2, 16 DC around the ring, do not SL ST at the end.
- Immediately DC 2 Times (V Stitch) into the first DC from the previous round. This creates the start of the spiralling effect. DC into the next 7 stitches, Next stitch DC twice (V Stitch) into the same stitch. DC remaining stitches around.
- To continue the spiralling effect and growing your tree into a cone, you will go over the V Stitch in the previous round, on the 2nd DC of the V Stitch, Place another V Stitch to continue the cone widening growth. Do this for every V Stitch you crochet over.
- Continue to crochet in a never-ending spiral until you get the height you want. The height is determined by a Styrofoam Cone or whatever height you have in mind. You don't need to count your revolutions. Mikey has also stuffed his tree with polyester stuffing instead of using a cone as well.
- When you have your desired height, fasten off and weave in your ends.
Crochet Diagram Showing Stitches
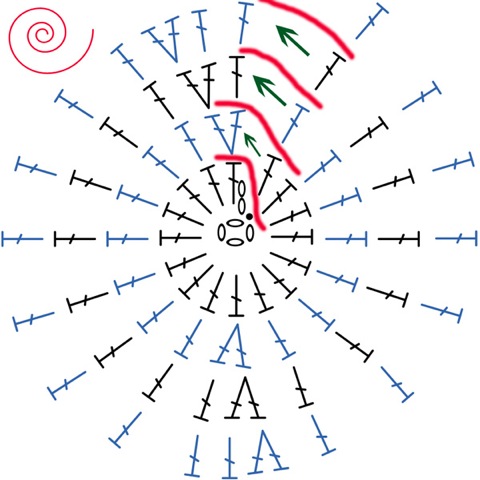
- Red Lines indicate where I am showing you to immediately crochet without slip stitching. This will make one continuous row from the top of the tree all the way to the bottom of the tree.
Creating Your Branches
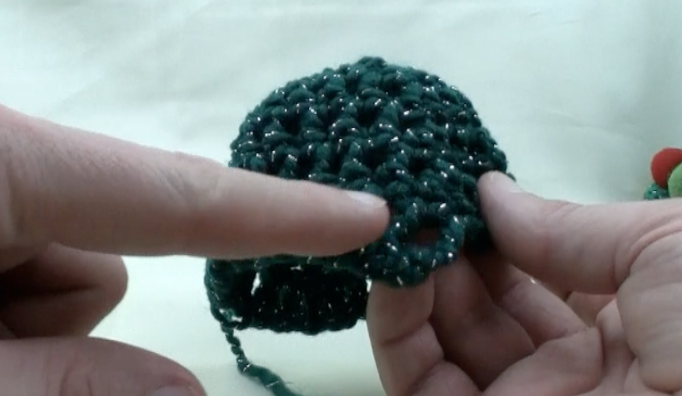
The picture to the right is showing you how I want you to look at your project. You will need to turn your project inside out to get this look. If right-handed, the bottom of the spiral must start at the bottom and go left. For left-handers, your spiral will go right.
- Fasten on the yarn you want for the outside colour of your branches on the side of the first post. CH 3.
- Immediately DC 4 times on the same post. The way we are grabbing each post to DC onto is referred to as FPDC (Front Post Double Crochet). Ch 1, then FPDC 5 Times immediately on the next post directly beside it.
- *Skip 3 posts and on the 4th Post, 5 FPDC, Ch1 and 5 FPDC on the next post and repeat from * all the way to the top of the tree.
The diagram below the way the foundation looks before adding your branches. Essentially we are going to add the Crocodile Stitch to the existing posts and work our way back to the top of the tree.

 The diagram below is what the branches will do to the existing foundation. The bottoms of the crocodile scales face down, it is much easier to crochet the stitches from the bottom to the top of the tree for easier access to the posts. Because we have worked down in a continuous spiral, this means the end of the row is at the top of the tree. We continue to work on the row (crocheting left if you are right-handed or moving right if you are left-handed).
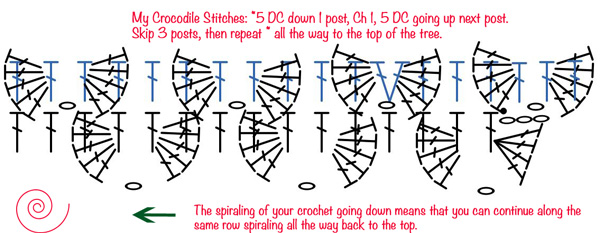
- Finish the final scale at the top of the tree when you have run out of posts to crochet.
- Simply fasten off at the end of the final 5th FPDC stitch. This will allow the scale to stand up on one side to form a perfect top.
Decorate Your Tree
- I used a hot glue gun to fasten the balls into place onto the tree.
- I had yarn that simulated tinsel but found it hid my stitch work too much for me to like it. That's up to you. You can just take yarn and chain it into a large strand and wrap around your tree.
Kim Bosley says
GRID
Mikey says
THanks