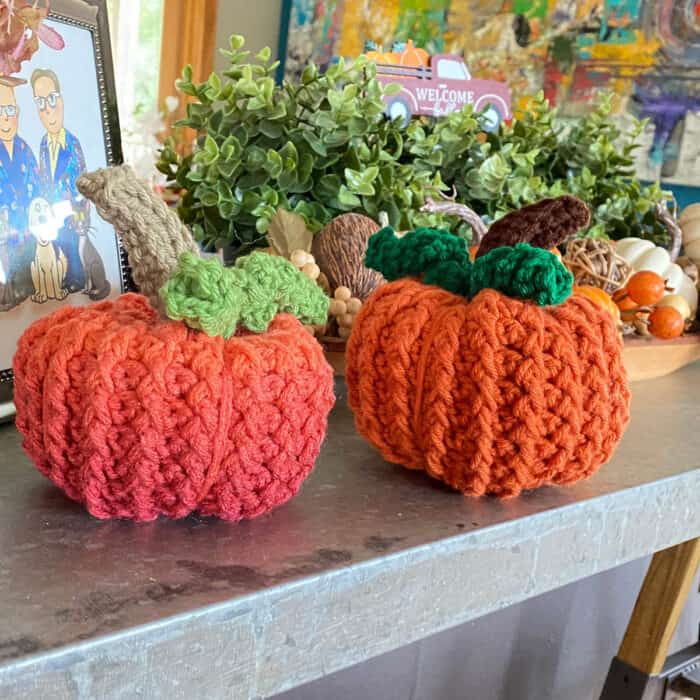
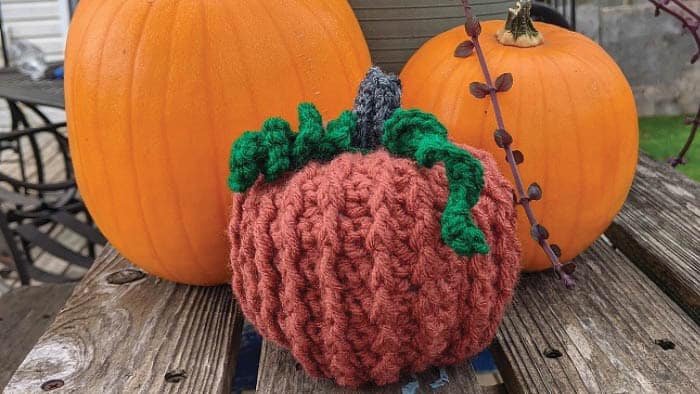
The Crochet Table Pumpkin Patch Pattern is a hand-size crochet pumpkin designed by Mikey from The Crochet Crowd.
The pumpkin is 5" in diameter by 4.5" tall without the stem. It's designed as a 5 sided object for easy repeating. Doing the sides as an odd number allows the pumpkin to appear more ordinary and unusual. It's not symmetrical like a circle pretending to be a pumpkin.

I used Caron One Pound for the original but in the tutorial, I used Red Heart Super Saver Ombre in the colour of Hot Sauce for the transition look. Either one is a winner, in my opinion.
Our tester, Nancy, also completed one to run her eyes through my instructions to help me out.

Project Concept Using my signature love for texture, I decided to experiment with rib stitching for this. You will need polyfil to stuff this pumpkin at the end. I have designed more complex pumpkins than this for the 2nd Book for 2022. These will compliment those pumpkins in the future. Testing by our Nancy Elliott.
Yarn
Caron One Pound (454g / 16 oz, 742 meters / 812 yards)
- A - Carrot
- B - Expresso
- C - Kelly Green
Tutorial Version
- A - Red Heart Super Saver Ombre - Hot Sauce
- B - Caron One Pound - Taupe
- C - Caron One Pound - Grass
Size is 5" diameter x 4.5" tall without stem.
Gauge 15 sc and 15 rows = 4” [10 cm].
Abbreviations
- Beg = Beginning
- Ch = Chain
- Dc = Double Crochet
- Dcbp = Double Crochet Back post. Yoh and draw up a loop around the assigned post at the back, inserting hook from right to left if right-handed or left to right if left-handed. (Yoh and draw through 2 loops on hook) 2 times.
- Dcfp = Double Crochet Front Post. Yoh and draw up a loop around the assigned post at the front, inserting hook from right to left if right-handed or left to right if left-handed. (Yoh and draw through 2 loops on hook) 2 times.
- Hdc2tog = Half Double Crochet 2 Together. Yoh and draw up a loop around the assigned st and draw up a loop in the next assigned st. Yoh and draw through all 5 loops on hook.
- Rep = Repeat
- RS = Right Side
- Sc = Single Crochet
- Sc2tog = Single Crochet 2 Together. Draw up a loop around the assigned stitch and draw up a loop in the next assigned st. Yoh and draw through all 3 loops on hook.
- Sl st = Slip Stitch
- Sk = Skip
- St(s) = Stitch(es)
- WS = Wrong Side
Notes:
- Join means to sl st to beg st.
- At the start of the round, the next stitch is the first st after the join.
- The project is turned at the end of each round so the pumpkin can grow without a spiral.
- Stitch counts are given per side and full rnd. Example 5 sts, 20 sts. 5 stitches are per side and 20 stitches are the total round.
Instructions
These pumpkins start at the bottom and finish at the top.
With A, ch 2.
1st rnd: WS. 10 sc in 2nd ch from hook. Join. Turn. 10 sc.
2nd rnd: RS. Ch 1. *(1 sc and 2 dc) in next st. (2 dc and 1 sc) in next st. Rep from * around. Join. Turn. 6 sts, 30 sts.
3rd rnd: WS. Ch 1. *1 sc next st, 1 dc in next st, 2 dc in next st, 1 dc in next 2 sts, 1 sc in next st. Rep from * around. Join. Turn. 7 sts, 35 sts.
4th rnd: RS. Ch 1. *1 sc in next st, 2 dc in next st, 1 dc in next 4 sts, 1 sc in the next st. Rep from * around. Join. Turn. 8 sts, 40 sts.
5th rnd: WS. Ch 1. *1 sc in each st around. Join. Turn. 8 sts, 40 sts.
6th rnd: RS. Ch 1. Using posts from 2 rounds below, *(1 dcfp around next st, 1 dcbp around next st) 4 times. Rep from * around. Join. Turn. 8 sts, 40 sts.
Rep 5th and 6th rnds 6 times, then rep rnd 5 once more.
20th rnd: RS. Ch 1. Using posts from 2 rounds below. *Sk next dcfp st, (1 dcbp in next st, 1 dcfp in next st) 3 times, sk next dcbp st. Rep from * around. Join. Turn. 6 sts, 30 sts.
21st rnd: Rep 5th rnd. 30 sts. Begin stuffing pumpkin firm with polyfil.
22nd rnd: RS. Ch 1. Using posts from 2 rounds below. *Sk next dcfp st, (1 dcbp in next st, 1 dcfp in next st) 2 times, sk next dcbp st. Rep from * around. Join. Turn. 4 sts, 20 sts.
23rd rnd: Rep 5th rnd. 20 sts.
24th rnd: RS. Ch 1. Using posts from 2 rounds below. *Sk next dcfp st, (1 dcbp in next st, 1 dcfp in next st, sk next dcbp st. Rep from * around. Join. Turn. 2 sts, 10 sts.
25th rnd: Ch 1, sc2tog around. Join. Fasten off with a long tail. Use tail to collect 5 sts and pull closed. Using the same tail, put the tapestry needle down through the middle and through the pumpkin to the bottom and go around the beg ch and then back up to the top of the pumpkin on the inside. Pull to force the pumpkin to squat in the middle. Secure with a knot and weave in end.
Exterior Shaping
Use 60” [152 cm] A strand. Thread through the tapestry needle so the needle is halfway across to create a double-strand.
- The pumpkin is in 5 sections. Start at the bottom of the pumpkin by securing the strand and go through the centre on the inside of the pumpkin to the top of the pumpkin.
- If you look at the bottom of the pumpkin, you will see the 5 bulges. Wrap the strand down the side of the pumpkin so the strand is inside an indented rib and between two bulges. Pull firm to force it to sink into the pumpkin on the side.
- Go up through the interior of the pumpkin to the top and go down the side between the next bulges. Pull tight to match the first sinking look. Repeat this so there are 5 around the pumpkin.
- Secure the strand on the bottom of the pumpkin and weave in the ends. Shape the pumpkin with your hands to adjust the stuffing inside.
Pumpkin Stem
With B, ch 11.
1st row: 1 sc in 2nd ch from hook, 1 sc in each chain across. Turn. 10 sts.
2nd to 7th rows: Ch 1, using back loops only across,1 sc in each st across. Turn. 10 sts. Fasten off leaving 24” [61 cm] yarn tail.
Proceed to stem finishing.
Roll the stem so the long sides are touching each other. Favour just one loop closest to each other while doing the whip stitch to make the seam invisible. Whipstitch along both edges so it forms the stem into a cylinder shape. Once across, gather the side of the rows to pull closed. This is the top of the stem. Fasten off and weave in ends.
Sew the stem to the top of the pumpkin. I intentionally sewed the stem so it has a lean so it doesn’t stay straight up and once sewn for the smaller pumpkin you are done.
For styling, bend the stem and twist it a bit. It should hold its position.
Curly Vines
When fastening off, leave long tails to sew to the base of the pumpkin stem.
With C, make 2 vines in different sizes.
With a long-tail before the first chain: Vine 1 - Ch 21. Vine 2 - Ch 15.
1st row: 3 sc in 2nd ch from hook. 3 sc in each ch across. Fasten off. Sew each vine to the base of the stem where you think it looks the best. Use pictures of projects for an idea.
More Ideas
- 28 Crochet Pumpkin Patch Pattern Round Up
- Crochet Extra Thick Blanket Pattern
- Crochet Driftwood Hooks
- Table Top Crochet Wreath Pattern
- Crochet Modern Flower Patch Blanket
- Crochet Flower Patch Granny Blanket Pattern

Kim Bosley says
GRID
Mikey says
THanks
Karen Armstrong says
Grid
Mikey says
THankx
Mitzy Hileman says
In the written instructions it says to repeat 5th and 6th rounds but I don't see a 6th round that's written. Is it possible to edit and add the 6th round to the written instructions?
Mikey says
Wendy Responded. Looks like I forgot to press enter on the PDF. I will have to fix that tomorrow.
Mikey says
Article has been fixed to provide the space so you can easily see rnd 6. Sorry about my error.