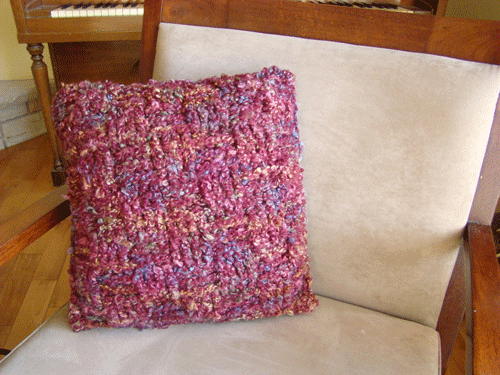
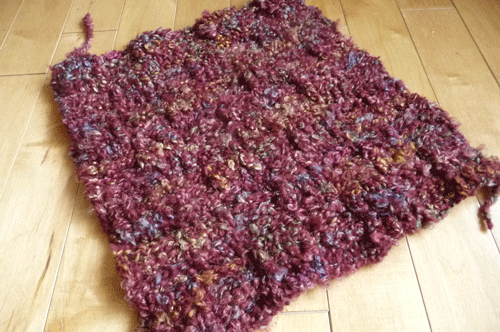
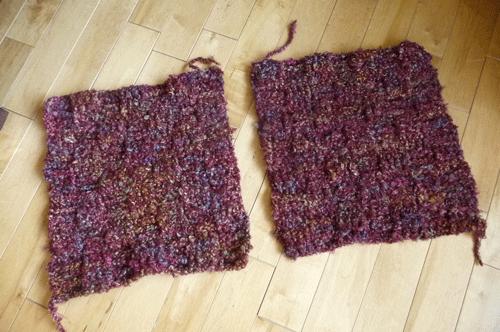
Create your own pillow using this design. This is simply a basket weave pillow. They are not hard to crochet and I thoroughly enjoyed making them. In fact, I made a set of 4 of them.
This was originally filmed back in 2012 for our very first Stitch Along with AllFreeCrochet.com.
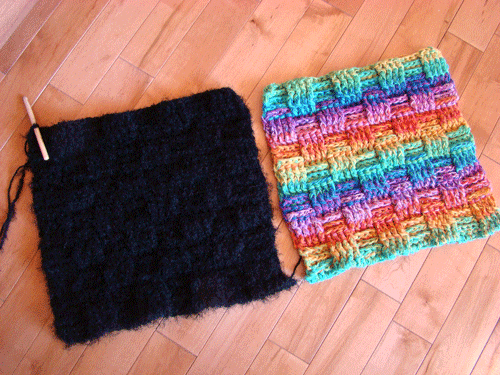
There are two major differences between the two projects. Pillow 1 is about 4 - 5-hour project. Pillow 2 is about 5 - 6-hour project. The attaching method between the two varies from Pillow 1, which has a Single Crochet Joining of the two panels. This caused the pillow to be a tight form-fitting look.
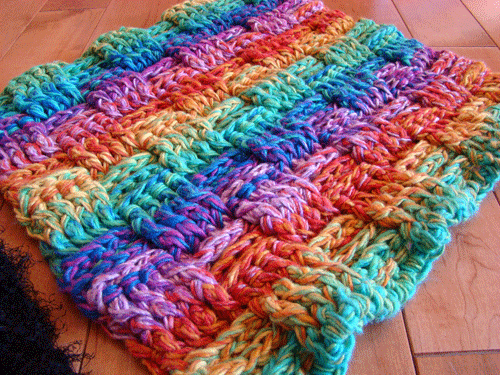
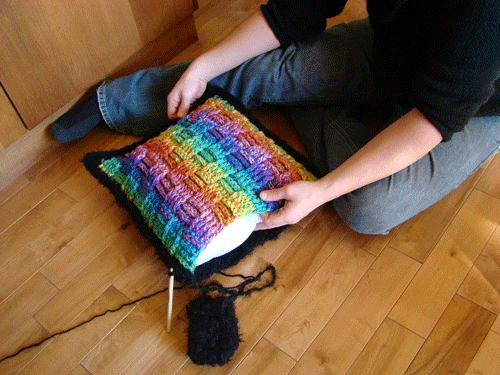
Pillow 2 has a Double Crochet joining finish with granny square corners of 3 DC, 2 CH and 3 DC. This allows the material to have an over the fringing border.
Needed Materials For Pillow 1
Size 9 mm or 10 mm or M or N Size Crochet Hook
3 Balls of Red Heart Light & Lofty, 127 g or 4.5 oz size.
1 Pillow Form measuring 16" x 16"
Estimated costs for this project are roughly $20.00
When using light and lofty yarn, you will use 1 string at one time on the hook. You use the same material to join the panels together.
Needed Materials For Pillow 2
Size 9 mm or M size Crochet Hook
3 Balls Bernat Mosaic - 100 g or 3.5 oz Psychedelic Color, get an extra ball just in case. See the paragraphs below.
3 Balls black eyelash yarn - 50 g
1 Red Heart Super Saver - Black 197 g or 7.5 oz
1 Pillow Form measuring 16" x 16"
Estimated Costs fort his project is $36.00
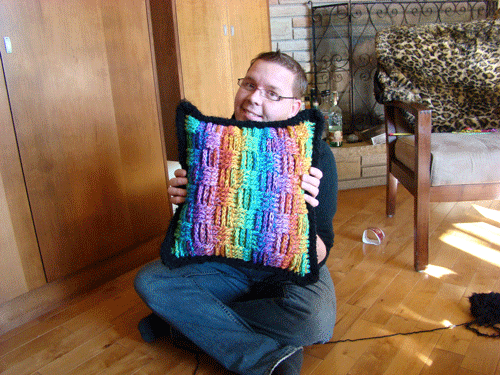
When doing the colour side, you will use 3 balls of Bernat Mosaic at the same time. The yarn is thin and needs to be thickened up for the size of the hook. I made sure then when I used each ball. The colour of each ball's string was similar to each other. One ball is in the blue... the second ball is just starting to turn blue... the third ball is near the end of the green. This makes the colours transition slowly and makes the colouring very effective.
My method of doing the colour transition will cause wasted yarn as you need to start each other at a specific point. This means you have to get to the point in the ball that matches the rest of the balls to be consistent with the colouring. You might want to buy a 4th ball just in case.
When doing the black side of the pillow. You will use Eyelash and Black Worsted yarn at the same time.
Working with extra yarn balls at the same time causes you to slow doing when making this project.
Abbreviations
Beg = Beginning
Ch = Chain
Dc = Double Crochet
Dcbp = Double Crochet Back Post
Dcfp = Double Crochet Front Post
Hdc = Half Double Crochet
Sc = Single Crochet
Sl st = Slip Stitch
St(s) = Stitch(es)
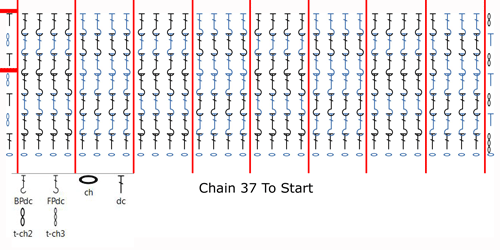
This diagram needs to be updated.
Crochet Chart for this pattern... I wanted to show you the repeat pattern. The red lines going up and down show you that each basketweave is in sets of 4. The red solid line on the left side is where we reverse the pattern to create the basketweave look.
Instructions
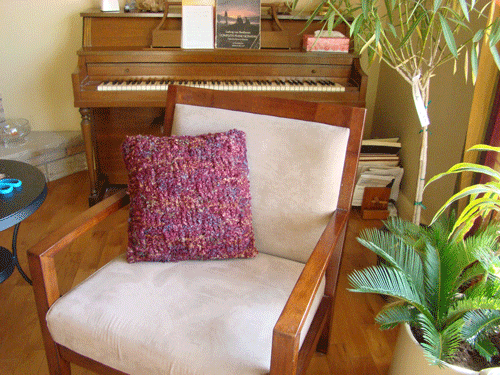
For Pillow 1 Front & Back - You will only use a strand of Red Heart Light & Lofty.
For Pillow 2 - You will use three strands of Bernat Mosaic Yarn at the same time for the front. For the back, you will use 1 strand of Red Heart Super Saver Black and 1 Strand Eye Lash at the same time.
This pattern was updated since the last filming to change the starting count and eliminate 1 chain.
Stitch multiple is 8 chs + 8.
Ch 36.
1st row: 1 dc 4th ch from hook. 1 dc in each ch to end of ch. Turn.
2nd row: Ch 1. 1 hdc in first st. *1 dcfp around next 4 sts. 1 dcbp around next 4 sts. Rep from * to the last 6th last st. 1 dcfp around next 4 sts. 1 hdc in last st. Turn.
3rd row: Ch 1. 1 hdc in first st. *1 dcbp around next 4 sts. 1 dcfp around next 4 sts. Rep from * to the last 6th last st. 1 dcbp around next 4 sts. 1 hdc in last st. Turn.
4th row: Ch 1. 1 hdc in first st. *1 dcfp around next 4 sts. 1 dcbp around next 4 sts. Rep from * to the last 6th last st. 1 dcfp around next 4 sts. 1 hdc in last st. Turn.
The basketweave will switch directions in the next row.
5th row: Ch 1. 1 hdc in first st. *1 dcfp around next 4 sts. 1 dcbp around next 4 sts. Rep from * to the last 6th last st. 1 dcfp around next 4 sts. 1 hdc in last st. Turn.
6th row: Ch 1. 1 hdc in first st. *1 dcbp around next 4 sts. 1 dcfp around next 4 sts. Rep from * to the last 6th last st. 1 dcbp around next 4 sts. 1 hdc in last st. Turn.
7th row: Ch 1. 1 hdc in first st. *1 dcfp around next 4 sts. 1 dcbp around next 4 sts. Rep from * to the last 6th last st. 1 dcfp around next 4 sts. 1 hdc in last st. Turn.
The basketweave will stitch directions again in next repeat.
Rep 5th to 7th rows until the square measures approximately 16" from beg. Fasten off.
Do a second panel by repeating the above instructions.
Let's Assemble Project - Visual Instructions
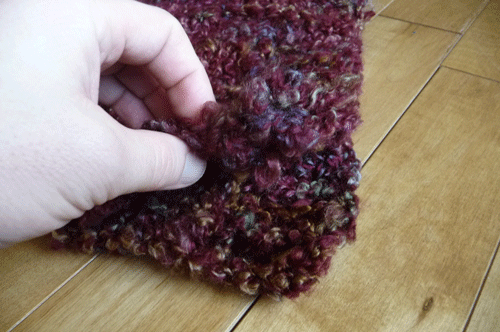
The Basket Weave thickens up the yarn so you cannot see the pillow form under it. Here's a close up of the pattern. You may think the Light & Lofty Yarn is a waste to do the basketweave but this gives the pillow a slightly textured look.
Two Panels should be constructed. You can mix them up so the pillow has different colours on either side.
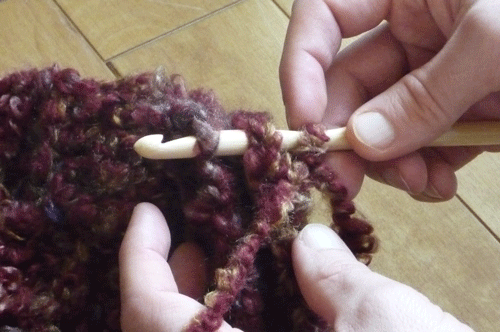
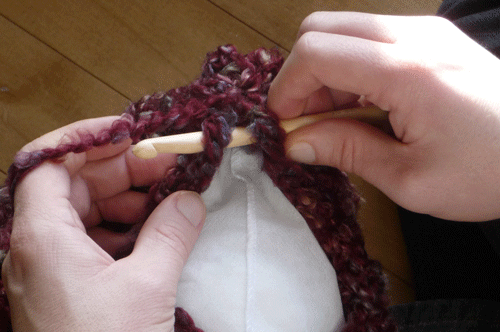
Attach the two panels together. Place the panels over the top of each other.
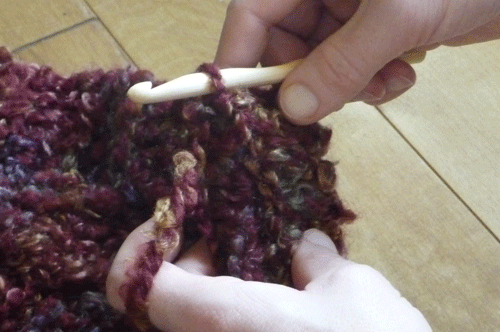
FOR PILLOW 1 - Create a slip knot and slide onto the hook. Slip Hook through both panels. I have chosen to slip it between to posts to be consistent. Single Crochet the two panels together all the way around.
FOR PILLOW 2 - Create a slip knot and slide onto the hook. Slip the hook through both panels. CH 3, 2 DC into the same corner piece. DC all the way around. I double crocheted between each post on both panels to ensure I was attaching them at the same spot on both panels.
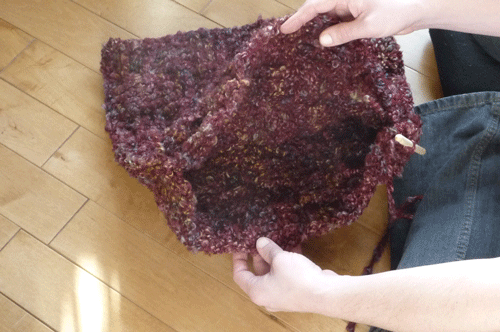
Continue to SC the two together for 3 sides.
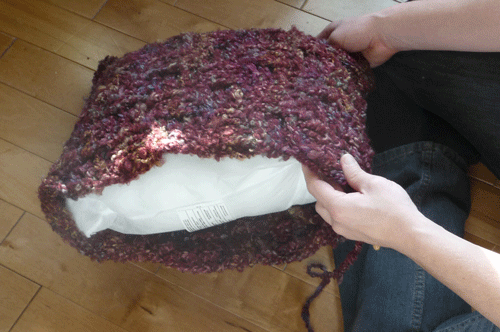
Once 3 sides are SC together... Slip In Pillow Form.
Continue to SC the two panels together. Pillow Form will be trapped inside.

Florence Frech says
No blue button
Nancy I Sanchez says
no blue button
Debbie says
Chaining 37 does not cover my 16 inch pillow forms, what am I doing wrong. If I chain 57 it would work