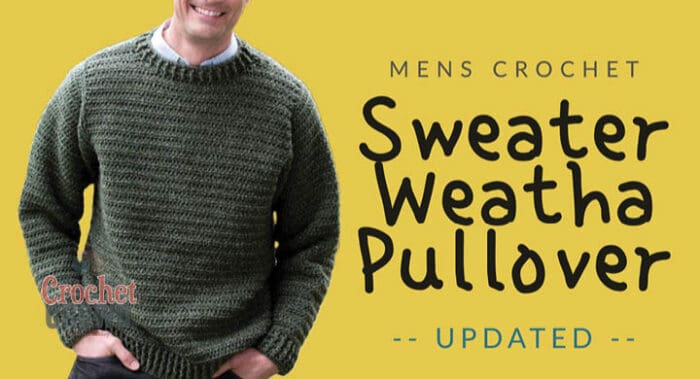
I've been working on this pattern for a tutorial and read the reviews about the writing of the pattern. The pattern was revised in April 2022, and the latest reviews suggest the pattern is still confusing. It's the Father's Pullover Crochet Sweater.
A beautiful pattern by Melissa Leapman.
In checking with Yarnspirations, a further revision wasn't underway, and I went into the project open-minded that the corrections were proper. I found it confusing, and I struggled. I have provided a rewrite in the article below for the sleeves. I've not changed the designer's instructions but separated them to make them easier to follow.
Be sure to check your gauge before you start this pattern. The gauge matters so you will get close to the size you want. I have left you a tutorial below.
Sleeves Re-Write
I have included stitch counts to verify along the way instead of near the end of the sleeves. This will allow you to confirm you are on the right track.
With smaller hook, ch 33.
Foundation row: (RS). 1 dc in 4th ch from hook and each ch to end of chain. Turn. 31 dc.
Work even in rib pat as given for Back until work from beg measures 2½" [6.5 cm], ending on a WS row.
Change to larger hook.
1st row: (RS). Ch 2. Skip first st. 1 hdc in each st to end of row. Turn.
2nd row: Ch 2. Skip first hdc. 1 hdc in each hdc to end of row. Turn.
3rd row: (RS). Ch 2. 1 hdc first hdc. 1 hdc in each hdc to last hdc. 2 hdc in last hdc. Turn. 33 hdc.
4th row: Ch 2. Skip first hdc. 1 hdc in each hdc to end of row. Turn.
Rep last 2 rows 7 (11- 13-17-17) times more. 47 (55- 59-67-67) hdc.
Sizes XS/S, M and L only: Next 2 rows: Ch 2. Skip first hdc. 1 hdc in each hdc to end of row. Turn.
Next row: (RS). Ch 2. 1 hdc first hdc. 1 hdc in each hdc to last hdc. 2 hdc in last hdc. Turn. 49 (57- 61) hdc.
Next 3 rows: Ch 2. Skip first hdc. 1 hdc in each hdc to end of row. Turn.
Rep last 4 rows 3 (2- 1) times more. 57 (61- 63) hdc.
Next row: Ch 2. Skip first hdc. 1 hdc in each hdc to end of row. Turn.
Rep last row until work from beg measures 22 1⁄2 (23 1⁄2-23 1⁄2-23 1⁄2- 23 1⁄2)" [57 (60-60-60-60) cm]. Fasten off.
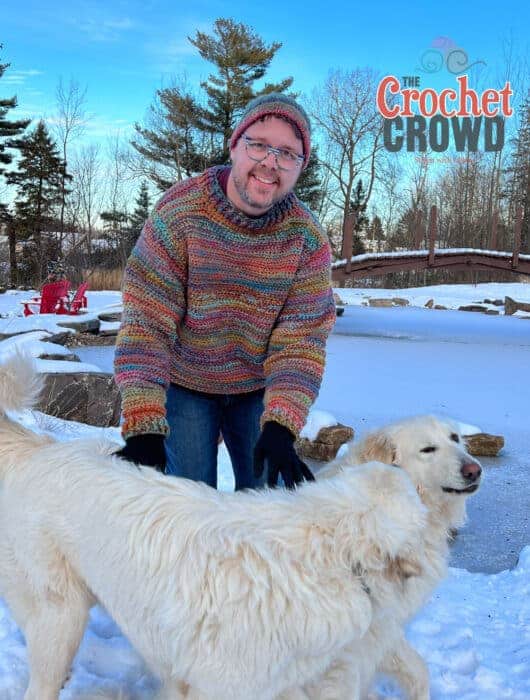
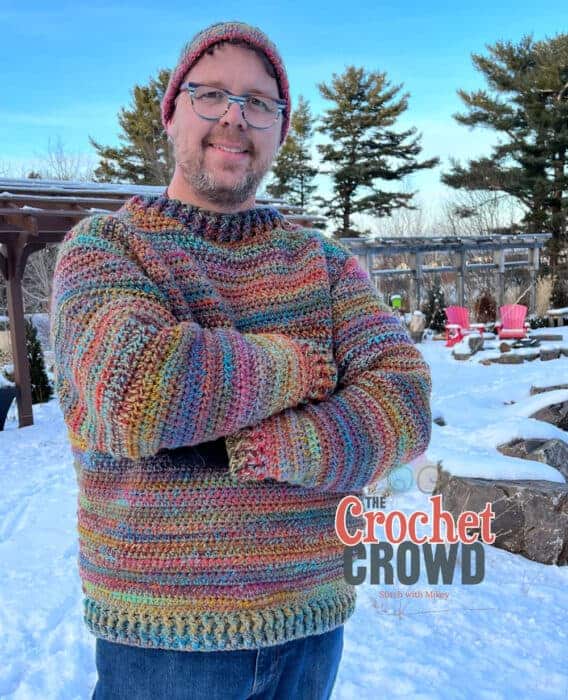
Mikey's Sweater Marled Version
I decided to make my sweater instead of teaching a size that won't fit me. I decided to look at my yarn collection, and my love for Red Heart Roll With It Melange is strong. Knowing the yarn is on the thinner size of Medium #4 Weight Yarn. I decided to marl the yarn.
I used two colours at the same time, making them marl together. See the below tutorial on what marling is. Essentially it means double stranding.
I used eight balls in total—four balls of the colour Curtain Call and four balls of Paparrazi.
I completed a gauge to see where I would land. I adjusted my hook to hit the gauge with the marling. The smaller hook in my version ended up being 5 mm / H/8, and the larger hook was 5.5 mm / I/9. I did the size large in the pattern. I think a medium would have been a better fit for me. However, this allows me to wear items under my sweater and let my sweater be outerwear.
The only difference in my sweater is one additional round of stitches in the neckband. On the last extra round I did, I put two stitches together over each of the shoulders to make it closer to my neck.
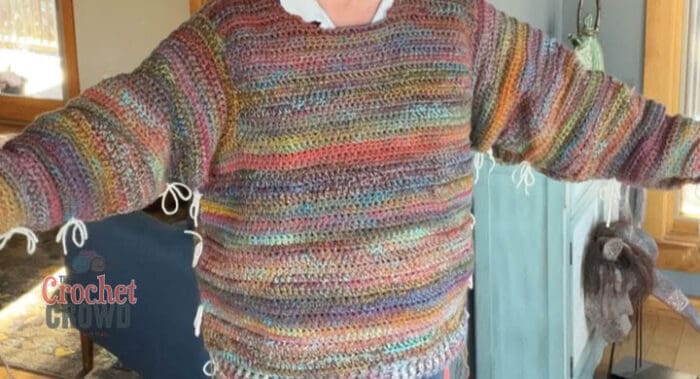
The sizing in the pattern for me was pretty perfect. I was questioning how the sleeves could be so big, but it all makes sense when you see it being put together. We see the sleeves from a flat point of view, but the sleeves have to wrap around a three-dimensional object and under the arms.
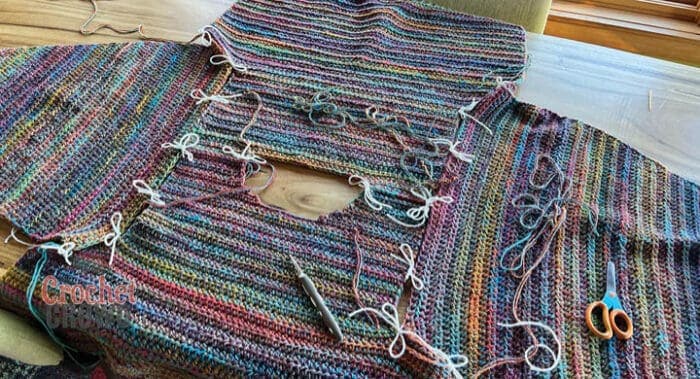
The tutorial will show you how I joined it. In the picture below, you are looking at the wrong side of the sweater panels, and I have used spare yarn to temporarily join the panels before sewing, so everything stays aligned.
Once I sewed on the sleeves. I then joined the sides with the temporary yarn and tried on the sweater. You can see the picture below. I was so excited on the first try to realize the sleeves were perfect and even the exact length I needed. So happy.
I will show below how to marl the yarn using two or more strands of yarn. It changes the look, especially in colour-changing yarn like Red Heart Roll With it Melange.
Hat Mikey is Wearing
Mikey made his own knit hat. This is the first hat he ever knitted. Here are the details. There is a knit hat with a brim and a beanie version. There is a tutorial to follow for first-time knitters too. See Mikey's First Knit Hats here. Mikey's hat uses Red Heart Roll With It Melange in colour called Showtime. Daniel's hat in beanie format uses the colour Theatre.

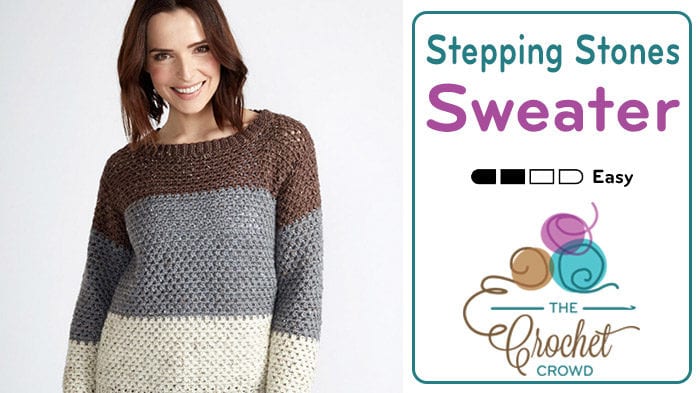
Another Crochet Sweater Idea
The stepping stones crochet sweater is another free pattern to enjoy.
Tutorial
A tutorial is in production for the Men's Sweater. It's not very hard at all. I am making my first sweater for myself.
Karen says
Mikey, WELL DONE!!! The sweater looks great on you. Love the colors.
Mikey says
Thanks Karen.
Wendy says
FANTASTIC!!!! That sweater design is EXACTLY what I've been keeping watch for, and it looks like something I can actually do LOL. Very nicely done!!!
Thank you!!!!!!!
Wendy