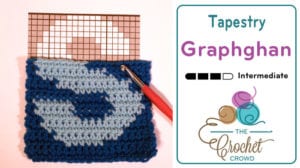
Crochet Tapestry Graphghans
Crochet Tapestry Graphghans are for the beginners of this concept, not necessarily beginners of crochet as you need to know how to crochet in order to do this concept.
Tapestry Crochet Definitions
This concept is referred to as Jacquard Crochet, Intarsia, Mosaic, Fair Isle and Colorwork. The yarns are changed as they are being dragged under the stitchwork when not in use. Don't confuse dragging the yarn under the work as being behind the work, the unused yarns are set directly under the stitches to carry them across.
More Tapestry Project Ideas
- Crochet Flying Geese Baby Blanket + Tutorial
- Introduction to Wayuu Crochet: Mochilas + Tutorials
- Baker's Mix Throw
- Crochet #NAPS Baby Blanket
Things to Watch For
Due to the yarns being under the stitchwork, colours from the dragging strings can be faintly seen when looking up close to a project. You will want to select your colours carefully so the two colours are not conflicting with each other visually.
I would highly recommend that you restrict yourself to the use of 2 colours in your project for this concept. The more strings you drag under the stitchwork, the opportunity for bloating stitches looking more sloppy and unknown results from occurring.
The Difference Between Graphghans - Regular Concept
In regular graphghan work, there is what is referred to as bobbins. In the thumbnail below of the Wave Pillow Tutorial on that particular concept. Each section of the pillow is a separate yarn ball.
So while you see white on both sides of the wave, those are two different yarn balls and not done like Tapestry Crochet. The video tutorial below will show you that concept.
In the Tapestry Crochet Tutorial, I show two images from the below tutorial in showing how to do the Big Tartan Scarf. Again, showing the concept of different bobbins used to form that scarf.
Tapestry Crochet - Easier than Regular Graphghans
Of the regular graphghan concept and tapestry crochet, the tapestry is much easier to plan ahead and implement without too much fuss. If I were given a choice, I would choose Tapestry.
Resources Used in Tutorial
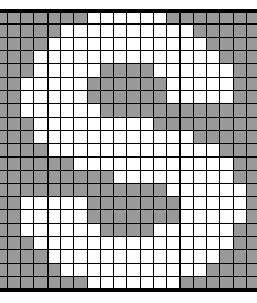
You are welcome to right click and save the photos for use to give this concept a try.


More Information about Stitch Fiddle
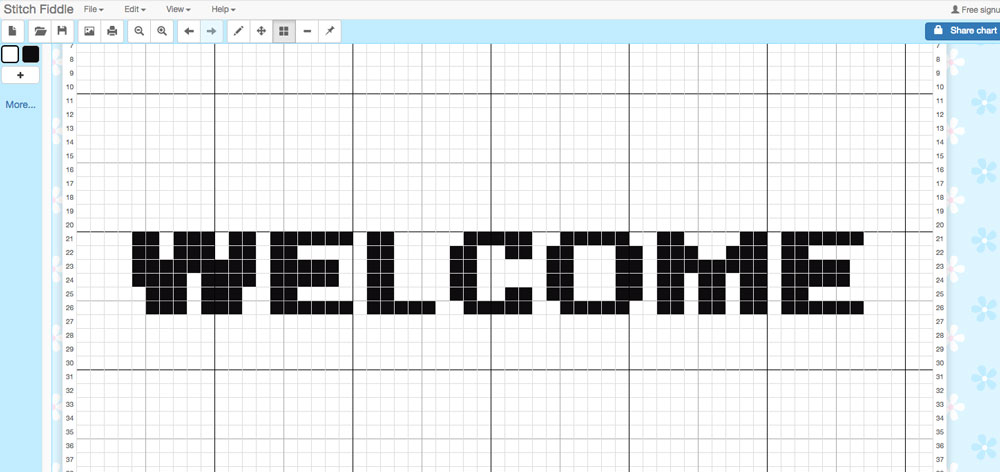
Stitch Fiddle is a free program that requires free membership to get the final results. It has different options. To form the graphics, you will want to use the EMBROIDERY section as you want the boxes to have colours and not just symbols.
How it Works
You can use a blank graph and fill in the squares with colour if you want to free-form your own shapes into your graph. When completed, you can print it off.
If you want to try to insert your own graphics, it can do graphics really well. It can even do great jobs for colourful graphghans. However, for tapestry, you will want to set the colour to use only 2. Once you see it on the graph, you can make alterations to changing box colours if you need to refine or make corrections prior to printing.
Understanding Sizing
In the Tapestry Tutorial, I review how to gauge your work. I would strongly recommend you follow the instructions I have outlined to ensure you set the boxes correctly on Stitch Fiddle prior to making the graph.
The number of boxes = the number of single crochets. So you have to understand your own gauge to ensure you get close to the size you wanted. The gauge of my personal crochet may be different from yours. So for me to tell you to set your boxes to a certain number wouldn't be accurate to some of you.
I show you how to gauge your work and figure out how many boxes you need before you create your graph.
Helpful Links
- Make your own Graph Paper
- Stitch Fiddle - Insert your Image to Make Your Own Graph
Tutorial Chapters
I have separated the one tutorial into 7 different chapters. There is a title overlay on the bottom left of the screen while playing to tell you what chapter you are on. Let me tell you more about the chapters.
Chapter 1 - Overview
- We will cover the difference between Tapestry Crochet and regular graphghan work.
Chapter 2 - Review Picture
- Line thicknesses.
- Colours.
- Understanding the boxes in a graph for the image.
- Sizing a Graphic. Boxes per inch.
Chapter 3 - Yarn & Supplies
- Consider the gauge and yarn.
- Tapestry needle, graphs, pen and highlighters.
Chapter 4 - How to Make Graphs
- How to make a graph. Sizing and gauge.
- Conventional graph paper.
- Stitch Fiddle Free Program. Corrections to graph on Stitch Fiddle.
- Where to start on the graph.
- Following a graph.
Chapter 5 - Front & Back of Graphs Tips
- Does your image have something that matters if the afghan is turned over?
- Tips for keeping track of the front and back.
Chapter 6 - Carrying Yarn
- Starting point.
- Changing yarn techniques.
- Burying Yarn and Switching.
- Starting Colour Earlier than in the previous row.
- Starting Colour Later than in the previous row.
- Ending Colours.
Chapter 7 - Making Mistakes
- Adjusting the graph on the fly.
Gale says
Can you use a c2c pattern graph for tapestry crochet?
Mikey, The Crochet Crowd says
I don't think so. Carrying the yarn would peek out too much.
Molly says
Thank you..can you use c2c graphs for row by row sc,dc,hdc Afghans? Love this and all your videos. Great job in explaining.
Rhonda Boggs says
Help, ok i am trying to do the letter A in a block square , i have ruined 2 balls of 300 gr red and white each trying this , it is impossible to go back and forth like the tutorial please help frustrated
June Ryan says
need help for making crochet graph for Auburn University for afghan for 14 yr old grandson. he is 6'2, 285, and wears size 16 shoe. very involved in football in high school. have difficulty reading patterns due to brain surgery and stroke thank you