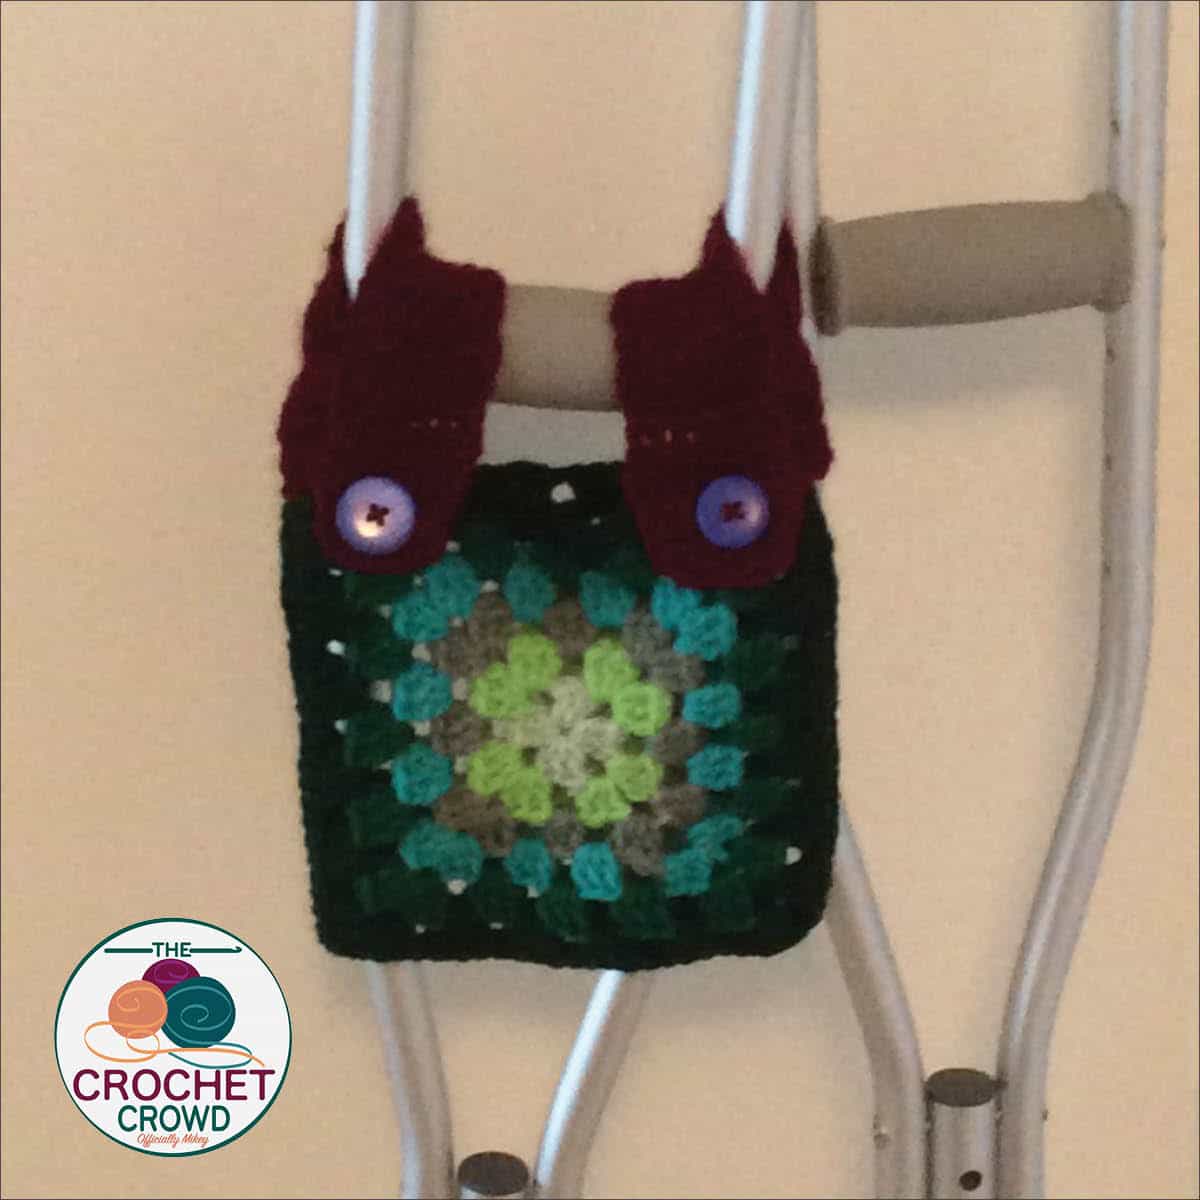
For those with mobility issues using crutches, walkers or scooters, here is a Crochet Crutch & Walker Bag. Guest designer Heather Wilson has written up a convenient pattern for being mobile and keeping her hands free.

Heather finds herself need crutches after an injury. She just needs small things to help her manage better. Possibly a wallet, tissues, medications or whatever. The bag is just two granny squares sewn together with 2 straps connecting to the medical equipment's crossbars.
Though Heather wrote this like a typical granny square, you can do a solid granny to have fewer openings. Also, you could line the bag with solid fabric to prevent anything like keys from slipping through the small crochet gap spaces.
Heather offered to write a pattern for this particular use and share it with others.
Yarn and Details
Used Assorted Scrap Yarn
- Red Heart Super Saver
- Bernat Super Value
- Caron One Pound
Hook
5.5 mm / Size I/US 9 - Buttons to Slide Between Stitches
Abbreviations
- Beg = Begin
- Ch = Chain
- Dc = Double Crochet
- Rep = Repeat
- Rnd = Round
- RS = Right Side
- Sl St = Slip Stitch
- Sp = Space
Instructions
The granny square is 7” x 7” with 9” x 2” long straps. Change colour as often or as little as you wish.
Granny Square - Make 2
Ch 4, join with sl st to beg ch to form ring.
Round 1: Ch 3 (counts as dc from here and throughout), 2 dc into center ring, ch 2. *3 dc in ring, ch 2. Repeat around. Join with sl st to top of beg ch-3. Fasten off if you wish to change colour.
Round 2: Fasten on new colour to ch-2 space with sl st. If not changing colour, just continue. Ch 3, 2 dc in same sp. Ch 1, *(3 dc, ch 2, 3 dc ) in next ch-2 space, ch 1. Repeat * around. Final space has 3 dc, ch 2 and sl st to the top of the beg ch-3. Fasten off if wanting to change colour.
Round 3: Fasten on new colour to ch-2 space with sl st. If not changing colour, just continue. Ch 3, 2 dc in same sp. Ch 1, 3 dc in next ch-1 space, ch 1. *(3 dc, ch 2, 3 dc ) in next ch-2 space, ch 1, 3 dc in next ch-1 space, ch 1. Repeat around. Final space has 3 dc, ch 2 and sl st to the top of the beg ch-3. Fasten off if wanting to change colour.
Round 4: Fasten on new colour to ch-2 space with sl st. If not changing colour, just continue. Ch 3, 2 dc in same sp. (Ch 1, 3 dc in next ch-1 space, ch 1) twice. *(3 dc, ch 2, 3 dc ) in next ch-2 space, ch 1, (3 dc in next ch-1 space, ch 1) twice. Repeat * around. Final space has 3 dc, ch 2 and sl st to the top of the beg ch-3. Fasten off if wanting to change colour.
Round 5: Fasten on new colour to ch-2 space with sl st. If not changing colour, just continue. Ch 3, 2 dc in same sp. (Ch 1, 3 dc in next ch-1 space, ch 1) three times. *(3 dc, ch 2, 3 dc ) in next ch-2 space, ch 1, (3 dc in next ch-1 space, ch 1) three times. Repeat * around. Final space has 3 dc, ch 2 and sl st to the top of the beg ch-3. Fasten off if wanting to change colour.
Round 6: Fasten on new colour to ch-2 space with sl st. If not changing colour, just continue. Ch 3, 2 dc in same sp. (Ch 1, 3 dc in next ch-1 space, ch 1) four times. *(3 dc, ch 2, 3 dc ) in next ch-2 space, ch 1, (3 dc in next ch-1 space, ch 1) four times. Repeat * around. Final space has 3 dc, ch 2 and sl st to the top of the beg ch-3. Fasten off if wanting to change colour.
Round 7+: If you want to keep going to make the square bigger, just continue in the same manner. Make two granny squares. Using single crochet, place the granny squares together and single crochet around the sides and bottom of the granny to close 3 sides.
Straps - Make 2
Row 1: Sl st to corner of one of the granny squares. Ch 1, 2 sc in same space, sc next 3 stitches, 2 sc in next ch-1 space. Turn. - 8 sts
Row 2: Ch 3, dc in each stitch across. Turn. - 8 sts Repeat row 2 until strap measures 9”.
Optional Not Shown In Pic: Evenly space sc around 3 strap edges for a more finished look. Place 3 sc in corners.
Attach buttons to the top corners of the opposite granny square. Be sure to ensure the button will slide between the double crochet stitches.
Attach to Crutch or Walker: Secure around handle and attach the straps by fastening the buttons.
Optional for Privacy
Use Solid Granny Square. We have tutorials available on The
Crochet Crowd if you need help with that. Still only complete 6
rounds to keep the size consistent.
.
.
Pattern Ideas
- Crochet Pumpkin Dishcloth Pattern
- Crochet Garden Tote Bag
- Crochet Ocean Waves Afghan Pattern + Tutorial
- Crochet Mock-Rame Bag
- Crochet BBQ Apron Pattern
Here are a Couple Tutorials
Typical Granny Square
Solid Granny Square. Use the same size hook and do 6 rounds as stated in the pattern.
Ann says
No blue button
Marina King says
button added
Paula ? says
I have been on crutches for 16 years. Cute Idea
Carol says
Would anyone know what adaptations are needed to make one of these for a cane?
Heather says
The challenge with a cane is there is nothing for yarn to hold onto. It would just slide down to the ground. Maybe, a bag like this one with the straps that you could either a) hold onto under your hand on the cane or b) affix it to your forearm. This pattern can also be adapted for use wearing around your waist.