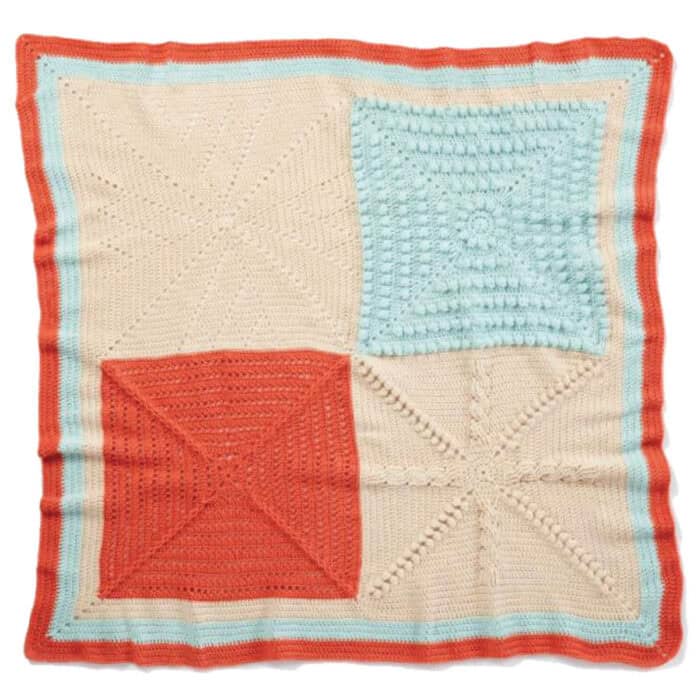
It's your favourite time of the year, yep, the Stitch Along with our friends at Joann Fabrics and Crafts is back! Based on your interest, the designer has created another fun mystery that is intended to build your skills.

It's A Stitch Sampler
This one is like a stitch sampler. Each week, I am showing you a unique concept. Though we stop at a certain point each week, each clue can be an afghan all to itself. So if you like a particular week, you can expand the clue to continue onward. It's a neat idea.
If this is your first time working through total mystery crochet along with us here’s how it works. Each week a new clue is released here. If you miss a week, don’t worry! The progressive clues are collected here as well.
The Clues
Like always, we save the clues here on our website and keep the videos forever. So if you miss the Stitch Along with this time around, you can always come back another time.
Pattern Suggestions
- Crochet Hibernate Blanket Pattern
- Crochet Amigurumi Toy Patterns
- Crochet Step Up Pillow Pattern
- Crochet Clapboard Blanket Pattern
- 10 Crochet Catherine Wheel Stitch Patterns
Let Me Share More - Introduction
You may be wondering how to choose your yarns or colours, or even what this project will look like when it’s done! While that’s all part of the fun, we do have colour clues for you. I’m going to treat you to the clue right now!
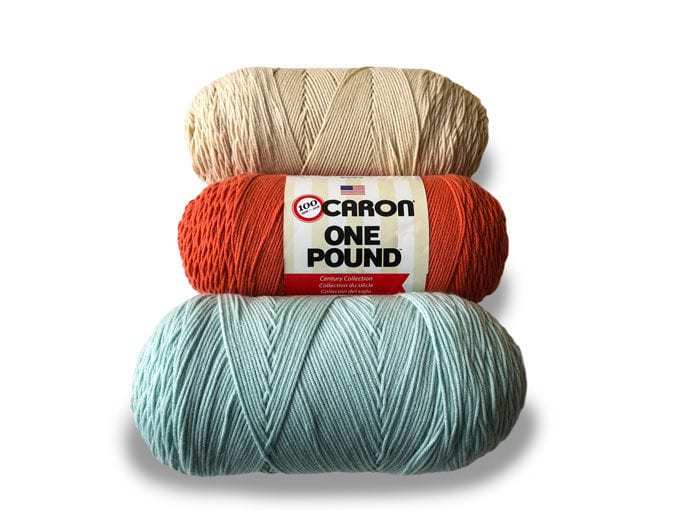
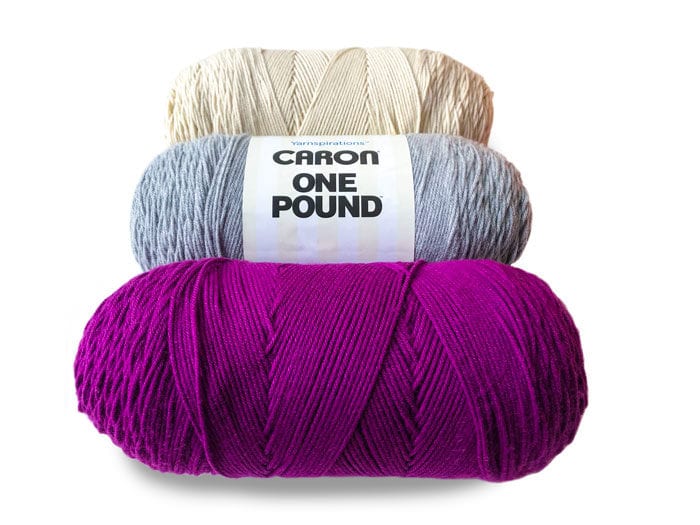
In the pattern, the instructions call for specific colours for each version. We’ll be using Caron One Pound for this pattern.
- Contrast A – 2 balls
- Contrast B – 1 ball
- Contrast C – 1 ball
Version 1
- Contrast A: Off White
- Contrast B: Pale Green
- Contrast C: Light Terracotta
Version 2
- Contrast A: Off White
- Contrast B: Soft Grey Mix
- Contrast C: Hollyhock
Version 3
- Contrast A: Sunflower
- Contrast B: Dark Pink
- Contrast C: Grass Green


The project we’ll be making together is at an experienced beginner to intermediate skill level. We’ll release weekly tutorial videos to accompany the pattern clue.
.
.
Pattern Tutorials with Crochet Timings
Week 1 - March 12
- Follow the lines to greatness as you make your first clue. While the instructions appear to be a lot, take a look at the crochet diagram available and see how the lines work their way through the project. All of the squares only have 18 rounds to complete.
- Finished square is approximately 23" x 23".
DOWNLOAD YOUR CLUE 1 PATTERN HERE
- The clue will take between 3 - 4 hours to complete.
Tutorials
Right Handed
Left Handed
Week 2 - March 19
- The centre of this square starts off as a circle and then transitions to a square not too far into the project. Once beyond the circle, the remaining of the square has a 3 round repeat pattern going on. With an eye-popping texture that will appear instantly from the very beginning. Essentially, you have 2 of 3 rounds of straight double crochet and the 3rd round is the texture being applied. So it's nice to have texture but 2 rounds of regular crochet to zoom through.
- Finished square is approximately 23" x 23".
Download YOUR WEEK 2 PATTERN HERE
- Use the same hook size and yarn you selected for Week 1. If your square isn't to the size of everyone else's, don't worry about it if your square isn't buckling. Just means you are either a tight or looser crocheter. By using the same hook size and yarn, each square should work out for you.
- You will use Colour B for this clue. So not the same colour as you used in Week 1.
- The clue will take 4 - 5 hours to complete. It's the longest square for the entire project.
Tutorials
Right Handed
Left Handed
Week 3 - March 26
- The centre of this square starts off as a circle and then transitions to a square not too far into the project. Once beyond the circle, the remaining of the square has a 3 round repeat pattern going on. With an eye-popping texture that will appear instantly from the very beginning. Essentially, you have 2 of 3 rounds of straight double crochet and the 3rd round is the texture being applied. So it's nice to have texture but 2 rounds of regular crochet to zoom through.
- Finished square is approximately 23" x 23".
Download YOUR WEEK 3 PATTERN HERE
- Use Colour A (Same as week 1). Use the same hook size, 5 mm/ H Hook and yarn brand you selected for this stitch along. If your square isn't to the size of everyone else's, don't worry about it if your square isn't buckling. Just means you are either a tight or looser crocheter. By using the same hook size and yarn, each square should work out for you.
- This square won't take as long as week 2 as the cables start to materialize before your very own eyes. With a unique perspective on the corners, I touched on areas where I think you may lose stitches so you know exactly where to go.
- The clue will take 3 - 4 hours to complete.
Tutorials
Right Handed
Left Handed
Week 4 - April 2nd
- The clue will be taken 2 - 3 hours to complete.
- Final Border will take about 2 - 3 hours.
- Once completed, you will be ready to sew the 4 squares together. Match each side together and do an invisible join as suggested in the tutorial.
DOWNLOAD YOUR WEEK 4 PATTERN HERE
- When the four are sewed together, you will complete the border as suggested. There are 3 rounds required for each of the 3 colours. However, I have made an exception for the challenge to eliminate out 2 rounds. Colour A - 3 Rounds, Colour B - 2 Rounds, and Colour C - 2 Rounds.
- When you are done, snap a photo and proceed below to learn how to submit a photo for the official gallery.
Tutorials
Right Handed
Left Handed
Assembling
Right Handed
Left Handed

Pam Morris Bridges says
I thoroughly enjoyed doing his afghan with you, Mikey. You are a terrific teacher. I love that I got to learn new stitches and ways of doing things. I will be entering my photo tomorrow. I'm especially proud of it because it's the first one I've ever done. I think it looks amazing, but part of that is because of Mikey's instructions. Thanks for doing this. I can't wait until the next one!
Bailey says
Hey mikey is there a spacific count for the border ?
Ashley says
On the fourth and final square I’m habing problems braiding the corners together. Whenever I braid it the square will no longer lay flat. Should I go ahead and stitch it together and it improve? Or is there a fix I need to make before I assemble it all? I’d really like to avoid re-doing the same square again so I’m open for tips!!! Thanks!!!
Carolyn says
I haven't quite finished that block yet but, in the video, Mikey mentions that once you have it braided, that pulls on the block and makes it tight. You have to play with it and pull on it to get it laying flat again. Maybe that is your problem? I might stretch on it some before I started it all over again, and I'm the Queen of Frogging! LOL!