Crochet Graphghans & Picture Projects
This is a comprehensive video tutorial for learning how to do Grapghan and Picture Projects for afghans, pillows and whatever else you may have in mind.
This type of project is exceptionally popular at this time as many crocheters want to make heirlooms or capturing time inside their projects. From family photos, logos, names and much more.
Pattern Suggestions
- Crochet Women's Party Wristlets + Tutorial
- Crochet Social Distancing Bunting Pattern
- Crochet Spiked Stitch Pillow + Tutorial
- Crochet Granny Ripple Pattern + Tutorial
- Crochet Cablework Afghan Pattern + Tutorial
More Graph-Based Patterns to Enjoy
- Introduction to Wayuu Crochet: Mochilas + Tutorials
- How To Make a Graph for a Crochet Picture Afghan
- Complete Graph Patterns Collection
- You Are My Sunshine Blanket - Paid Pattern
- Bold Angles Pillow
We have a list of free and paid services to help you make these graphs. Keep in mind, you pay for what you get. Free is free but has limitations, I leave it to you to decide what you want.
 Make Your Own Graphs or Have it Made For You
There are two types of graph services. Graph makers that produce a graph for you. Numbers is when they provide a graph and provide line by line instructions which is much easier to follow. At this time, there are no services that are available for free to provide the numbers option.
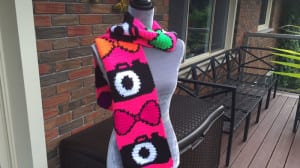
Picture of the Bow Tie with Camera is showing a Momma's JAM Pack pattern created for us. You can get this free pattern and see the difference between a regular graph versus a Graph by Words or Numbers. For me, this is the most preferred type of pattern to receive.

Graph Only
- Graphghans.com - Paid Custom Graph Service
- Stitch Fiddle - Free Graph Maker (my favourite in the free area)
- Pattern Wizard - Free but not at detailed as Stitch Fiddle. Due to volume, this site is not always available as it hits its monthly quota.
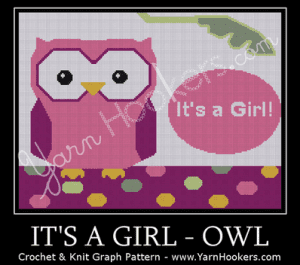
- Yarn Hookers - Paid Simplistic Graphs. The picture on Left.

Graph by Words or Numbers
- Linda's Yarn Art - Paid Custom Graph that includes photographs. The picture on Left.
- Momma's JAM Pack - Paid Whimsical Graphs & Some Custom Work.
- Crochet by Numbers - High-End Customized Pictorial Graph Maker.
None of the graph makers are sponsors of The Crochet Crowd. They are listed in no particular order. We have no association with any of these makers and have been listed here out of courtesy. For the paid services, there are price differences between them for services that are similar to each other. We leave it to you to shop it around and make a decision that works for you and your budget.

The Tutorial Info
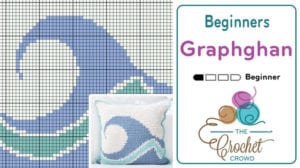
In the tutorial, I am going to use the Catch A Wave Crochet Pillow by Yarnspiraitons as my base for teaching the techniques. This pillow is done using the Bobbin Technique. I have the original sample here at my studio. I could tell instantly that it was done that way but also confirmed by the designer at Yarnspirations.
How could I tell it was done through Bobbin Technique?
I've done a pillow in the past where I left the yarn strands to the backside knowing it would be inside the pillow. The problem is simple, it's not invisible. Especially with a pillow like this, if the steel blue strands are loosely behind the cream colour. You will see from a distance imperfection that has nothing to do with the stitches. The colour of yarn behind may peek through the cream and also creep out through the gaps of the stitches. Also, loose ends tend to poke out or find openings to peek out. So it will never be truly picture perfect.
It depends on your lighting conditions. For me, this particular example, I would never be happy with myself if I didn't do the bobbin method. I want people to be amazed that even if they cannot see the reverse of the wave, I know the backside is just as picture-perfect as the front side. The choice is up to you.
This pillow lends itself to teach the following steps:
- Review the picture and graph.
- Review colours and lines in the project.
- Yarn and supplies review.
- Yarn requirements and other items needed if necessary.
- How to read the graphs.
- Where to start in the graph and how to follow it.
- How to figure out bobbins and detailed examination of the graph.
- Break the pattern into sections to consider how many bobbins you may need.
- How to identify each section and use my analogy of an overflowing swimming pool to visually assist you.
- Tips when to make bobbins and when you should use the full-size ball to save yourself time.
- Tip on when to carry yarn under the strand when doing fine detail.
- Adding and subtracting bobbins. Yarn techniques of switching yarn.
- Knowing your limits for what to expect.
- Adding bobbins.
- Subtracting bobbins.
- Carrying yarn under the stitches.
- How to move yarn strands straight up.
- How to carry yarn backward when the colour is needed earlier. (see tutorial)
- How to carry yarn forward when the colour is needed after. (see tutorial)
- Adjusting for errors you may make.
- Tips for improvising if you see an error.
- When frogging doesn't really need to be done if you have the opportunity.
- Final touches.
- Weaving in ends and finishing advice.
Some of the graphghans and techniques are done so that the pattern is one-sided with yarn strands hanging out the back end. While the front face is perfect, there could be yarn strands behind the work. For afghans, this concept will not work as you will have a project that you cannot turn over without displayed a bird's nest of loose yarn tails. My tutorial will be showing you how to use bobbins so that your project can be turned over without worry of loose ends hanging out.
You will need to decide which method or methods you prefer. Knowing if someone is going to turn around your project to see the backside might make the difference in how you do it.
Follow the tutorial and use the steps I am teaching you to make your own graphs and execute your own ideas. Once you get how to change the yarn strands, graphghans and picture projects like this may become something that speaks to your creative heart.
Margie says
Love the video. I watched it before I started my project but realized that I need to check out the color change procedures again. I have a question, how many stitches before or after a color change can I drag my yarn? I got frustrated and just used a new bobbin even when it's only to or three stitches. As you can imagine I spend a great deal of time weaving in ends.