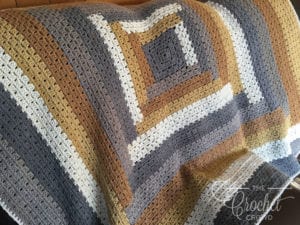
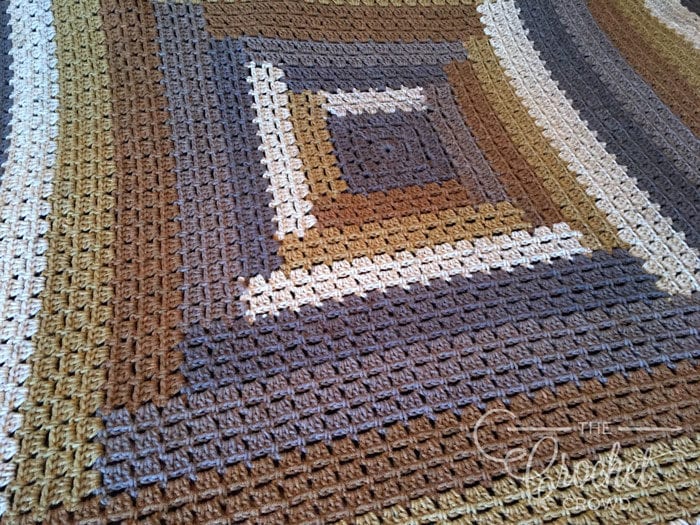
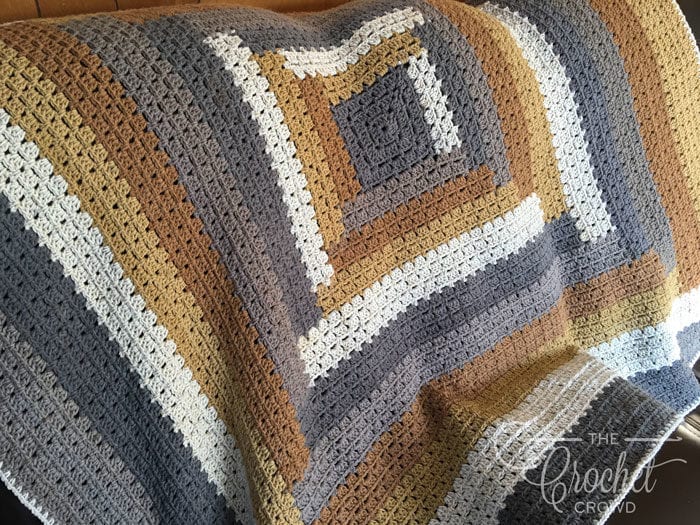
Crochet Log Cabin Quilt Style Modern Granny Afghan
Besides crocheted blankets, I love the style of a beautiful, handmade quilt, so why not a Crochet Log Cabin Quilt Style Modern Granny Afghan. Over the years, I have done a few simple quilts, so I totally appreciate the workmanship that goes into a really creative one. I am currently knitting a log cabin quilt style blanket using up scraps from completed projects. So I got to thinking that why can't I crochet something similar.

Quilting is an art form, so I am offering this project to you today as more of a recipe or inspiration, rather than a specific pattern to follow. Use my instructions here as a guide to create your own work of art and express your own creativity with yarn instead of fabric.
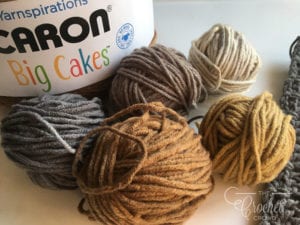
I used Caron Big Cakes for my afghan. Would I do it again? Maybe, maybe not. I fell in love with the colors of this Tiramisu Cake and don't regret to finished project. I am absolutely in love with it. But many would say there are simpler ways than cutting the Cake apart. Either way, it's all good. Even Mikey says it's ok. Check out his How to Cherry Pick Your Caron Cake tutorial.
For my finished throw of 62" x 62", I used most of 5 Big Cakes and one color band of a 6th Cake. But look thru your yarn on hand. This would be a great stash buster project. Just keep your yarns to the same worsted weight and play all you want with colors. I suggest at least 5, but feel free to use more colors if you desire. As Mikey says, "You are the artist".
Log Cabin Quilt Style Modern Granny Afghan
Designed by Jeanne Steinhilber
- 50 oz of worsted weight yarn, 5 colors
- Crochet Hook 5.0mm Size H
Finished Size: 62" x 62"
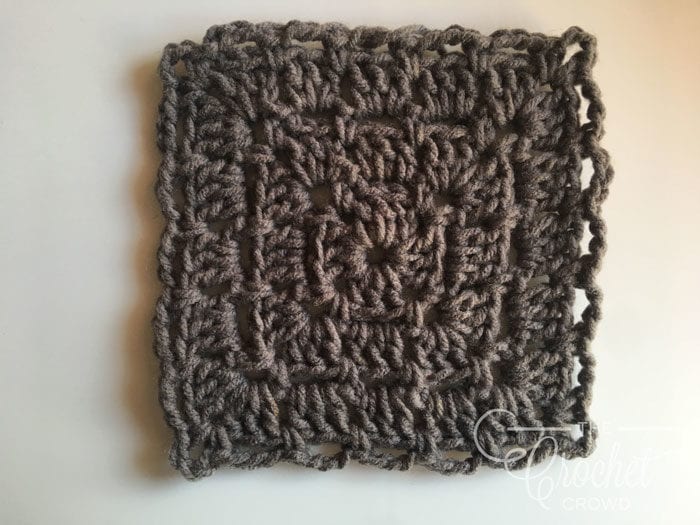
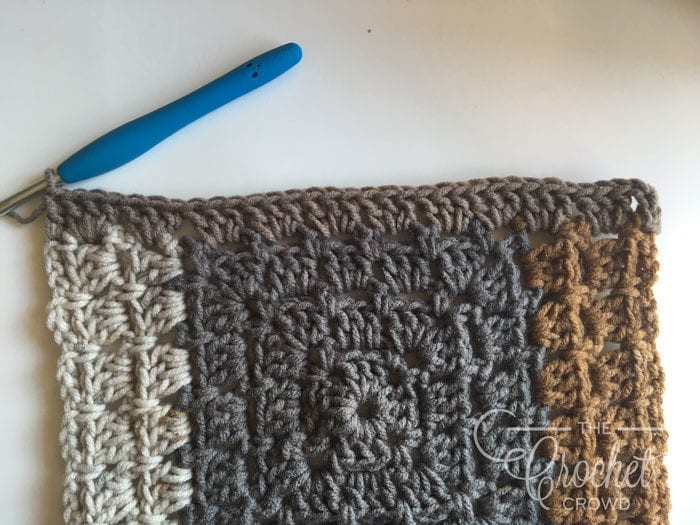
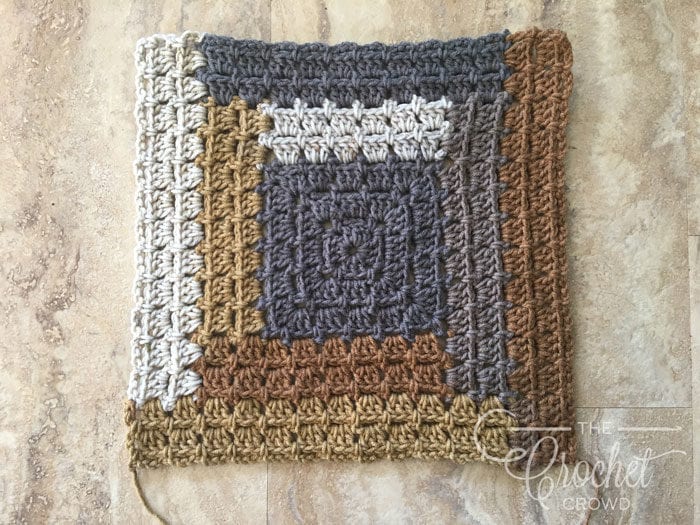
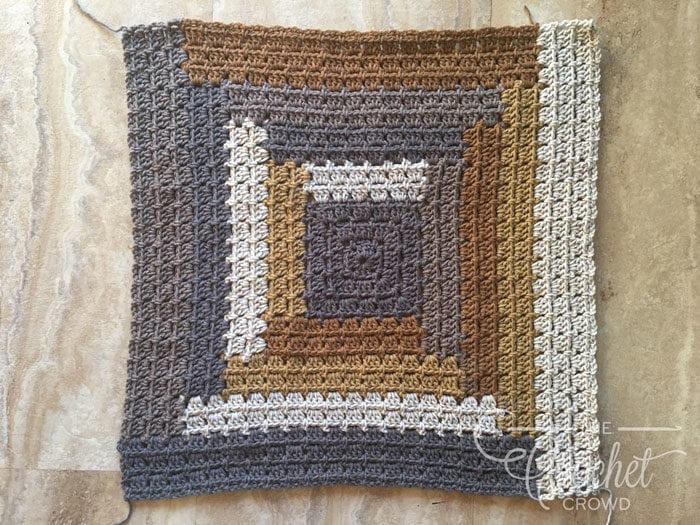
This project starts with the basic Modern Granny square, then is worked in block stitch back and forth in rows of color to create the log cabin design. This creates color blocks. As the project grows, you can keep your blocks of color the same width or grow your blocks as your project grows. Use your own creativity.
- Round 1: (RS) Ch 3 (counts as first dc here and throughout), 2 dc in ring, ch 1, [3 dc in ring, ch 1] 3 times; join with sl st in top of beginning ch—Four 3-dc groups, and 4 ch-1 sps.
- Round 2: Sl st in next 2 dc, [(sc, ch 3, sc) in next ch-1 sp (corner made), ch 3] 4 times; join with sl st in first sc—4 corners, 4 ch-3 sps.
- Round 3: (Sl st, ch 3, 2 dc, ch 1, 3 dc) in first corner ch-3 sp, 3 dc in next ch-3 sp, [(3 dc, ch 1, 3 dc) in next corner ch-3 sp, 3 dc in next ch-3 sp] 3 times; join with sl st in top of beginning ch—4 corners, and four 3-dc groups.
- Round 4: Sl st in next 2 dc, *(sc, ch 3, sc) in next corner ch-1 sp, ch 3, sc in next space between corner and next 3-dc group, ch 3, sc in next space between next 3-dc group and corner, ch 3; repeat from * 3 more times; join with sl st in first sc—4 corners, and 12 ch-3 sps.
- Round 5: (Sl st, ch 3, 2 dc, ch 1, 3 dc) in first corner ch-3 sp, 3 dc in next 3 ch-3 sp, *(3 dc, ch 1, 3 dc) in next corner ch-3 sp, 3 dc in next 3 ch-3 sp; repeat from * 2 more times; join with sl st in top of beginning ch—4 corners, and twelve 3-dc groups.
- Round 6: Sl st in next 2 dc, *(sc, ch 3, sc) in next corner ch-1 sp, ch 3, [sc in next space between 3-dc groups, ch 3] to next corner ch-1 sp; repeat from * 3 more times; join with sl st in first sc—4 corners, and 20 ch-3 sps. Finish off Color A.
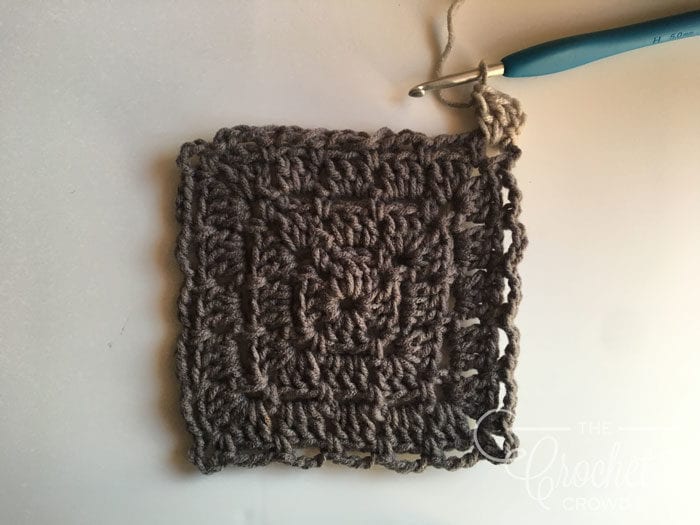
Begin working in rows along the sides. Join Color B in any corner ch-3 sp.
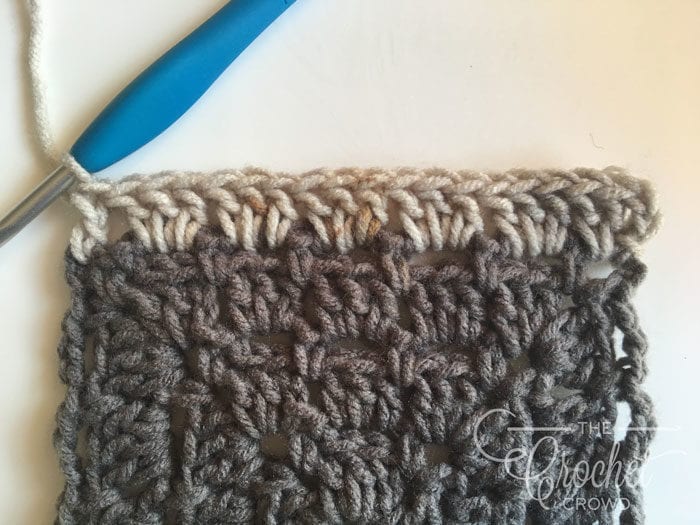
- Row 1: Ch 3, 2 dc in same sp as join, 3 dc in each ch-3 sp to next corner, dc in corner ch-3 sp. Turn.
- Row 2: Ch 1, sc in gap before next dc, *ch 3, sk 3-dc, sc in gap between groups, to last group, ch 3, sk 2 dc, sc in last dc. Turn.
- Row 3: Ch 3, 3 dc in each ch-3 sp, dc in last sc. Turn.
- Row 4: Ch 1, sc in gap before next dc, *ch 3, sk 3-dc, sc in gap between groups, to last group, ch 3, sk 3 dc, sc in last dc. Finish off Color B.
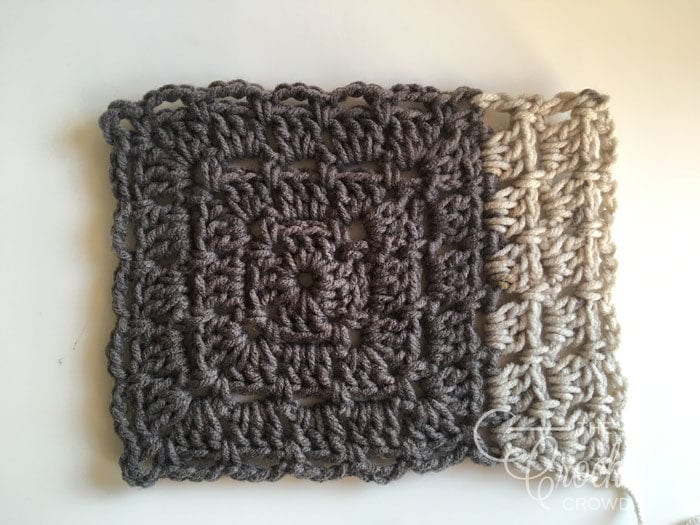
Every time you finish off a color block, flip over to the right side, turn your project 90° to the right and work in the edges that are now at the top.
Join Color C in first sc from Row 4 of last color block.
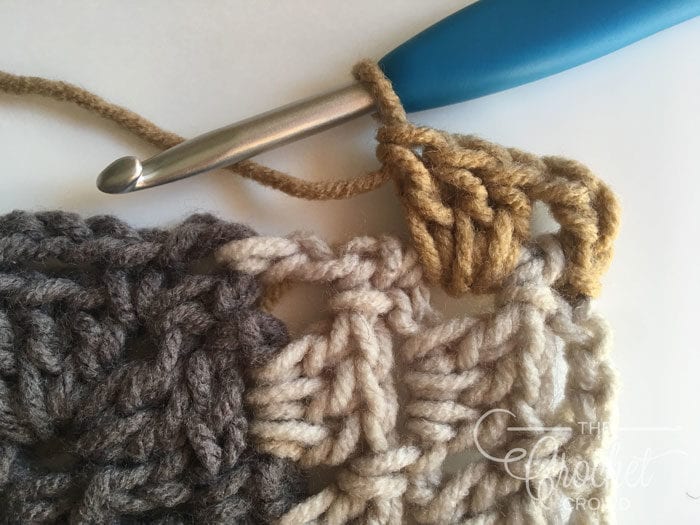
- Row 1: (RS) Ch 3, 3 dc around post of next dc, twice, 3 dc in ch-3 sps, across to corner, dc in ch-3 corner sp. Turn.
- Row 2: Ch 1, sc in gap before next dc, *ch 3, sk 3-dc, sc in gap between groups, to last group, ch 3, sk 3 dc, sc in last dc. Turn.
- Row 3: Ch 3, 3 dc in each ch-3 sp, dc in last sc. Turn.
- Row 4: Ch 1, sc in gap before next dc, *ch 3, sk 3-dc, sc in gap between groups, to last group, ch 3, sk 3 dc, sc in last dc. Finish off Color B. Flip to RS and turn 90° to the right.
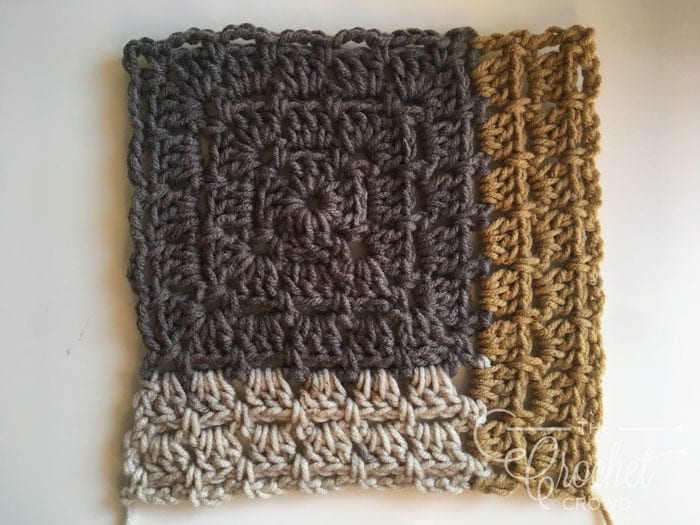
Join Color D in first sc from Row 4 of last color block.
- Row 1: (RS) Ch 3, 3 dc around post of next dc, twice, 3 dc in ch-3 sps, across to corner, dc in ch-3 corner sp. Turn.
- Row 2: Ch 1, sc in gap before next dc, *ch 3, sk 3-dc, sc in gap between groups, to last group, ch 3, sk 3 dc, sc in last dc. Turn.
- Row 3: Ch 3, 3 dc in each ch-3 sp, dc in last sc. Turn.
- Row 4: Ch 1, sc in gap before next dc, *ch 3, sk 3-dc, sc in gap between groups, to last group, ch 3, sk 3 dc, sc in last dc. Finish off Color B. Flip to RS and turn 90° to the right.
Join Color E in first sc from Row 4 of last color block.
- Row 1: (RS) Ch 3, 3 dc around post of next dc, twice, 3 dc in ch-3 sps, 3 dc around post of next dc, twice, dc in ch-3 corner sp. Turn. -- 10 3-dc groups and 2 dc.
- Row 2: Ch 1, sc in gap before next dc, *ch 3, sk 3-dc, sc in gap between groups, to last group, ch 3, sk 3 dc, sc in last dc. Turn.
- Row 3: Ch 3, 3 dc in each ch-3 sp, dc in last sc. Turn.
- Row 4: Ch 1, sc in gap before next dc, *ch 3, sk 3-dc, sc in gap between groups, to last group, ch 3, sk 3 dc, sc in last dc. Finish off Color B. Flip to RS and turn 90° to the right.
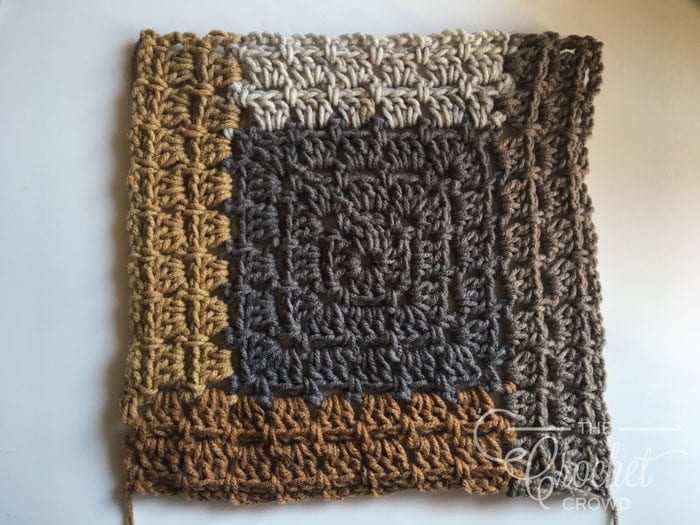
Join Color A and continue to work your blocks. Remember to flip over to the right side and turn your work every time you finish a color section. You can keep the block the same 4 rows or you can increase the width of your rows at anytime. You can work this into a large square as I have done, or you can work smaller blocks and join the blocks together. Just like in quilting, the options are endless.
Frida says
Hi! i really love this pattern! But I am bothered that it gets skewed after the first round with color a-e. would have been great if you could make a video for your youtube for this pattern. Because I do not understand what I am doing wrong..
Martha Anne Moore says
No blue button.
Mikey says
updated