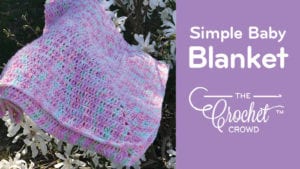
Classic High Top Booties
These booties take Mikey back to his child hood nearly 35 years ago when these high tops were the craze. They bring a sense of nostalgia and good feelings over all. Many people who receive these as a gift are blown away by the look. You can always change any colours and/or substitute the crochet laces for real laces or ribbons. This pattern comes in 4 sizes, newborn to 4 year old children. These are Classic High Top Booties.

You may sell any projects you make from this pattern. Please refer your friends to this web page if you want to share this pattern.
4 Sizes of Booties Based on Hook Size – Choose Your Hook Size Below
According to Bev at Bev’s Country Cottage, baby’s feet range in sizes by pounds and age of the baby or toddler.
- Newborn to 3 months, use a size F or 3.75 mm Crochet Hook.
- 3 – 6 months, use 4″ – 4.5″, use size G, or 4.5 mm Crochet Hook.
- 6 months – 18 months, use size H or 5 mm Crochet Hook.
- 18 months – 4 years, use size K or 6.5 mm Crochet Hook.

Select an appropriate hook size to get the size of baby / toddler bootie you want. The pattern doesn’t change for the different sizes. Simply choose the right size hook and get the size instantly. The hook sizes changes the tension of the stitches and makes it bigger naturally without having to count extra stitches or do anything different.
You will see a blue high top depicted below in photographic examples to help you along with these instructions. The pattern is the same.
Materials Required
- 1 Hook Size chosen from the above options.
- 3 Crochet Markers or spare string to mark stitches for quicker completion.
- 2 balls of yarn, 4 ply Worsted. Medium 4. You can use Red Heart Super Saver, Red Heart With Love, Bernat Super Value or something equivalent in Lion Brand Yarns. The yarn used in the photograph is Red Heart With Love in Black and White.
- Button for the side of booty if desired. OR do a circle in crochet to be sewn on at the end. Buttons used by Mikey are under the brand of Dress it Up.
- Scissors
- Needle and Thread
It’s Just a Suggestion
- The colours used in this pattern are cool but you can opt to change the colours to suit the personality of the child.
- You are the crochet artist, don’t be scared to experiment and try other colour options.
Abbreviations
Instructions
Crocheting the Bottom of the Sole
- You will be working in a complete rectangular circle, see picture to the right: Using white, CH 12, SC in 2nd ch from hook, then SC in next 7 Sts, HDC in next, 2 HDC in next, 5 HDC in last chain. Rotate and now crochet on the opposite side, 2 HDC in next, HDC in next, SC in next 7 Sts then 2 SC in final stitch. Join with a SL ST to the beginning stitch.
- CH 1, 2 SC in 1st Stitch, then SC in next 10 stitches, next is *2 SC then 1 SC in next . Repeat from * 2 more times. SC in next 9 stitches, 2 SC in the second final stitch, then SC in last stitch. Join with a SL ST to the beginning stitch.
- Ch 1, 2 SC in 1st stitch, SC in next 11 Sts, *2 SC in the next, then SC into the next. Repeat from * 3 more times. Then SC in next 11 sts, 2 SC in next, then SC into the final stitch. Join with a SL ST to the beginning stitch.
See picture to the right for the edge of the sole. This row forms a ridge for sole. Ch 1, then BPHDC into each stitch all the way around. SL ST to the beginning stitch at the end. It is imperative to carefully go around as the posts for Single Crochet are really small and easy to miss. Missing one will show in your work afterwards. See this video on doing back post. Be advised the video is for Back Post Double Crochet, you need to do the same method but using Half Double Crochet Instead.
- We are now ready to move onto the sides of the sole. Fasten off Yarn.
Sides of Sole – Different from Sweet High Tops, Sneakers and Camouflage
Optional: It’s assumed you wanted the white sole to continue up the side. If you wanted just the bottom of the sole to be a different colour, fasten off the yarn used in the bottom and now begin with another colour for the sides of the sole.
- Fasten on Black Yarn, then CH 1, then SC into each stitch going around. At the end of the round, Join with a SL ST. Fasten off and eave in ends.
- Fasten on White. CH 1, the SC into each stitch all the way around. Join with SL ST. Repeat this step 1 more time.
- Fasten off and weave in the ends.
Your bootie is how half way done.
When the sole is done, you are now ready to build the bootie by using the sole as a foundation. The top of the bootie consists of 2 parts. You have a tongue and the rest of the bootie that surrounds the ankles and back of foot.
Locate the Front of the Bootie
- At this moment, you appear to have a crocheted bathtub. Ensure the outside has that sole bottom edge line as indicated in Bottom of the Sole, Step 4, is on the outside. With the back of the sole to your chest area and the front of the sole away from you. (As depicted on the right). Look down and find the very top stitch of the front edge of the sole. Follow the bottom centre line up or position it as one stitch will be at the very top. Mark it with a stitch marker.
TIP: From my experience, if I give you an exact stitch count to what the centre stitch should be and you have skipped or added stitches, the tongue will not be centred to your bootie sole. It is extremely obvious when you are done and the bootie will not sit or look proper. Eyeing it up is a safe shot of the shoe coming out right.
- Once you have determined the very centre of the front of the sole. Count to the right 3 stitches and mark with at stitch marker.
- Go back to the centre marker and count left 3 stitches and mark with at stitch marker.
- The 7 front stitches have been marked from start to finish.
- LOOK AT IT A SECOND TIME and ensure you are in the centre of the sole. If not, adust it.
Crochet the Tongue
- Turn the bootie so you are looking at the front of the sole to begin.
- You will fasten on the top bootie colour yarn that you want to use to the back loop of the left or right stitch marker. Begin on either right or left hand side stitch indicated by the stitch marker. If right handed, you will start on the right, if left handed you will start on the left. SC in each BACK LOOP going across the front of the sole to the stitch marker on the other side of the centre line. Total of 7 Stitches. Turn.
- CH 1, and SC into each stitch across. Repeat this step, 11 more times.
- Fasten off yarn and weave in ends and remove the stitch markers from the front of the sole.
Ankle and Back of Bootie
If you are right handed, you will turn the bootie sole and tongue exactly like you see it in the photo to the right. If you are left handed, the bootie will be turned in the opposite direction.
- Fasten on the yarn for the shoe colour that you want to the same BACK LOOP stitch of where the tongue stops. (This means there will be two stitches sharing one stitch to make the finish nicer.)
- SC across the top of the sole (going left for right handers and going right for left handers) using the BACK LOOPS only and stop on the stitch that the tongue on the other side is using. Turn.
- CH 1, SC across. Turn.
- We are now going to start creating the angle that defines the shoe shape. Ch 1, skip 1st Stitch and next still will be a 2 SC TOG, then SC the remaining stitches UNTIL you get to the final 2 stitches where you will make another 2 TOG SC. Turn. Repeat this step 3 More Times. Each row is going to define the angle and build upward, making each row shorter on both edges.
- CH 1, SC across. Turn. Repeat this Step, 4 More Times.
- Fasten off yarn and weave in ends.
Finishing Edges
Tongue Edge: Fasten on complimentary colour for a trim around the tongue. SC into the side of the tongue, working into the top of the tongue and back down the other side. Fasten off and weave in ends. Be sure not SC trim anywhere attaching to the sole. Stay within the the top body colour of the bootie only.
- Ankle /Back of the Bootie: Fasten on the same colour to the bottom edge near where the tongue is starting and work SC along the edge going up to the back and around back to the tongue on the other side. Fasten off and weave in ends.
Side Emblem Shape / Button
Typically an emblem only goes on the outside of the bootie. So you will need to put one of these emblems on both booties on the outside only.
- Pick and appropriate size button. I’ve chosen the colour of the yarn based on the colour of button I wanted to use. Keep in mind that these could be choking hazards. Some people sew on the buttons and then hot glue the back of the button to the crochet project for extra security. Please exercise you own judgement if doing buttons to any projects for young children.
- Create a crochet circle in the colour of your choice. CH 2, then put in 7 SC into the beginning Ch 2 to form a circle. Fasten off and weave in ends. Sew securely to the side.
Bootie Laces
- Pick a yarn colour for the Bootie Laces Ch 85 and fasten off.
- Lace up the bootie like a regular shoe. I opted to pull the laces through the 2nd gap space in from the edge and it’s between a row of stitches.
Option: You may want to use ribbon instead of crocheted laces.
TIP: If you are too close to the trim, you loose the cool affect of the bootie laces. Also, if you look at the picture, you can see the laces are placed between two rows of stitches.
Start all over again for the 2nd bootie. One bootie takes me just over 1 hour.
Tutorial
https://www.youtube.com/watch?v=kmXwSbfOrBQ&t
Enjoy!
©2013 The Crochet Crowd
No Blue Button
No blue button
No blue button.