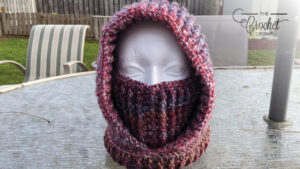
The Crochet Hood and Combination called Crohoodies, designed by our official tester, Nancy Elliott is a fabulous gift idea.
There was a request from crocheters to change the Crochet Toodie to not have a pointed back part of the hood and round it off.
Nancy took on the challenge and used her own thoughts to work into a Crochet Hoodie Cowl Concept.
Yarn & Sizing
Loops & Threads Barcelona Big (8.8 oz/250g; 410 yds/375m)
- 2 Balls - Tapestry
I used approximately 300 g of yarn to make this Crochoodie. This pattern is completely adjustable without any specific gauge to match. If you crochet on the tighter side, you’ll need a bit more yarn, if you crochet on the looser side, you can probably get away with less.
- Tapestry needle.
- Fits the average adult.
- Size U.S. J/10 (6.0 mm) crochet hook (for hood portion)
- Size U.S. H/8 (5.0 mm) crochet hook (for neck portion)
Abbreviations
- Alt - alternative
- Blo - back loop or back loop only
- Bpdc - Yoh and draw up a loop around post of next stitch at back of work inserting hook from right to left. (Yoh and draw through 2 loops on hook) twice
- Ch - Chain(s)
- Dc - Double crochet
- Fpdc - Yoh and draw up a loop around post of next stitch at front of work inserting hook from right to left. (Yoh and draw through 2 loops on hook) twice
- Mr – magic ring
- Pm - place marker
- Rep - Repeat
- Rs - right side
- Rnd(s) - Round(s)
- Row(s)
- Sc - Single crochet
- Sl st - Slip stitch
- St(s) - Stitch(es)
- Ws - wrong side
Instructions
Hood Portion - 6 mm / J Hook
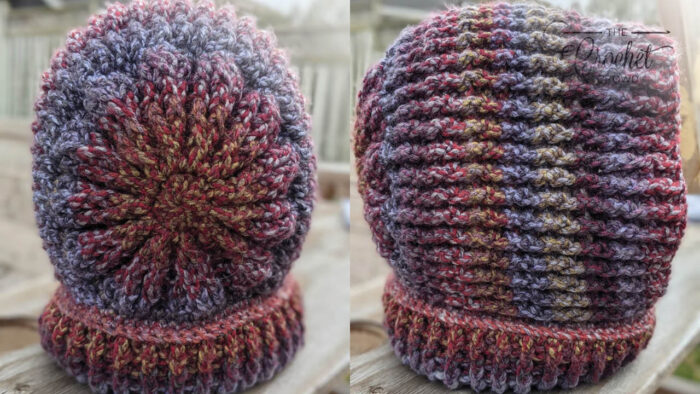
1st rnd: Ch 3, 12 dc in 3rd ch from hook. Join with sl st to first dc. (12 sts)
2nd rnd: Ch 2 (does not count as st). 2 dc in each dc around. Join with sl st to first dc. (24 sts)
3rd rnd: Sl st around first dc post. Ch 3. 1 dcfp around same post as last sl st. 1 dcbp around next dc. *2 dcfp around next dc. 1 dcbp around next dc. Rep from * around. Join with sl st to top of ch 3. (36 sts)
4th rnd: Sl st around first dcfp. Ch 3. 1 dcfp around next dcfp. 2 dcbp around next dcbp. *1 dcfp around each of next 2 dcfp. 2 dcbp around next dcbp. Rep from * around. Join with sl st top of ch 3. (48 sts)
5th rnd: Sl st around first dcfp. Ch 3. 1 dcfp around same post as last sl st. 1 dcfp around next dcfp. 1 dcbp around each of next 2 dcbp. *2 dcfp around next dcfp. 1 dcfp around next dcfp. 1 dcbp around each of next 2 dcbp. Rep from * around. Join with sl st to top of ch 3. (60 sts)
6th rnd: Sl st around first dcfp. Ch 3. 2 dcfp around next dcfp. 1 dcfp around next dcfp. 1 dcbp around each of next 2 dcbp. *1 dcfp around next dcfp. 2 dcfp around next dcfp. 1 dcfp around next dcfp. 1 dcbp around each of next 2 dcbp. Rep from * around. Join with sl st to top of ch 3. (72 sts)
7th rnd: Ch 1. 2 sc in same sp as sl st. 1 sc in each of next 5 sts. *2 sc in next st. 1 sc in each of next 5 sts. Rep from * around. Join with sl st to first sc. Do not fasten off. (84 sts)
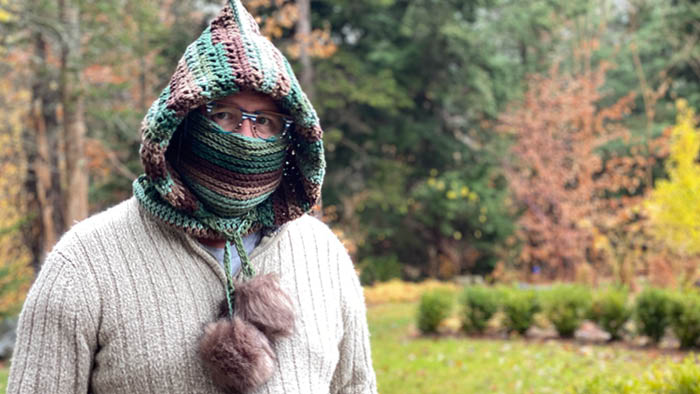
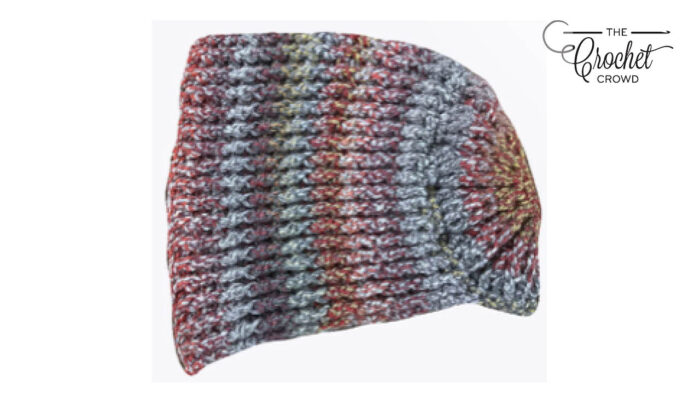
In order to get a “rounded, rather than pointed” hood we will need to transition the circle into rows to form the top and sides of the hood.
Count 72 sts around and PM around that st before continuing. Also PM into the top of each ch2 at each end (and move them up each row as you proceed)
1st row: RS. Ch2. Alternate between fpdc and bpdc into each st across, placing last bpdc around the 72nd st. Turn (72 sts)
2nd row: WS. Ch2, alt bpdc and fpdc across, hdc into ch2. Turn (73 sts)
3rd row: RS. Ch2, alt fpdc/bpdc to end, hdc into ch2. Turn (73 sts)
4th row: WS. Ch2, alt bpdc/fpdc to end, hdc into ch2. Turn (73 sts)
Note: I made my hood so it’s a little longer in the front. If you want a shorter (closer to your head) front you can omit Rows 11-17, or customize to your liking by trying it on after completing Row 10. Alternately, you can also lengthen it by adding more rows by repeating rows 3 and 4 as needed. Do not fasten off at the end of the last row, we will transition into the cowl/mask piece.
Continue in pattern as follows:
Rows 5, 7, 9, 11, 13, 15 and 17 – repeat row 3.
Rows 6, 8, 10, 12, 14 and 16 – repeat row 4 .
Change to 5mm hook. We will now be transitioning into the cowl/mask portion of the pattern and for the first row you will be working your sts into the ch2 spaces from the rnds above sideways.
Note: If you’ve added/subtracted rows in hood portion you will need to adjust the number of sts you will work along the neck edges accordingly. Make sure you sc and “uneven” number of sts. (e.g.: 67,69,71,73, 77, 79, 81 etc.)
Cowl Portion 5 mm / H Hook
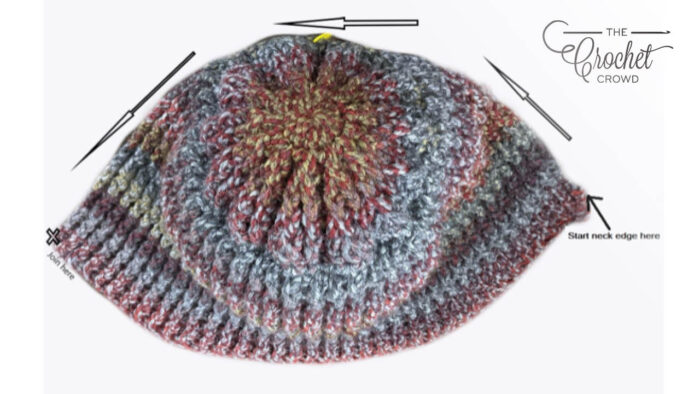
1st rnd: Ch 1, and continue into neck edge (see pic) doing 2sc into each ch2 space along the first neck edge, 1sc into each st along the back edge and 2sc into the other side’s neck edge, join to sc on other side of edge. Turn (75 sts)
2nd rnd: WS. Ch1, 1sc into each st across, join with a sl st to first sc. Turn (75 sts)
3rd rnd: RS. Ch2 (does not count as a st) 1dc blo (this rnd only) into each sc around, join with sl st to first dc. (75 sts)
4th rnd: Ch2, fpdc into first dc of rnd 3, bpdc into next dc. *Fpdc into next st, bpdc into next st. Rep from * around, ending with a fpdc, join with sl st to first fpdc. (75 sts)
Note: The ch2 will “act as a bpdc and fill in any potential “hole” between the first st and last st.
5th rnd: Rep rnd 4 until cowl/neck portion measures 8” (or desired length based on any customization).
6th rnd: Ch1, 1sc in each st around, join with sl st to first sc. Fasten off, weave in end.
Note: You will always have the same amount of sts (75) or whichever number you customized your pattern too throughout the rest of cowl/neck portion.
More Ideas
- Crochet Baby Blanket and Booties Set Pattern
- Crochet Baby of Mine Hooded Blanket Pattern
- 137 Knit & Crochet Free Patterns

Tutorial
Not available at this time.
Karen says
Not understanding the joining of the cowl to hoodie , I am doing the crohoodie , I learn better with pictures, and I am a lefty, please help , thank you.
Mikey says
Leave this with me. Another person asked for filming of it on YouTube. I haven't decided yet.
Nancy Ellio says
The measurement for the back circle (first 7 rnds of the pattern) on my original that is in the pattern is 16.5cm (6.5") in width. This is using chunky yarn. I did not include a gauge or measurements because using the types of stitches that I did for the pattern makes it really stretchy and also because I only made the pattern using chunky weight (#5) yarn. Others have made the pattern using #4 worsted weight with the same hook size in the pattern and had theirs come out okay but I haven't done one in that weight yarn. The hood portion folded in half and laying flat measures 11" from chin to top of hood. I hope that helps 🙂
Melanie Raymond says
Thank you for this pattern. I have been able to follow the pattern for the hood and cowl portion, I don't see instructions on how to do the mask portion. I found Rev.3 dated 11/30/2021 and was hopeful the mask instructions had been added, but no luck.
Please help so I can finish this.
Thank you, Melanie
Mikey says
The 'mask' portion is the cowl portion referenced in the pattern. I double-checked the PDF and it's on there as it's written in long-form on the blog as well.
Melanie says
Thank you for clarifying that. I was using Rev. 2 of Nancy's pattern and one of the photos looked like the mask was single crochet and not fpdc/bpdc. I continued to look at photos on the blog and figured it out. An instruction about folding cowl to the inside to form mask would have helped. I finished mine and wore it today walking my dog, worked great other than my glasses steaming up, but that's nothing new with masks. Thanks again.