The Crochet Crowd

  • PATTERNS
  • STITCH ALONGS
  • TUTORIALS & STITCHES
  • COMMUNITY & EVENTS
  • ABOUT
menu icon
go to homepage
  • PATTERNS
  • STITCH ALONGS
  • TUTORIALS & STITCHES
  • COMMUNITY & EVENTS
  • ABOUT
    • Facebook
    • Instagram
    • YouTube
  • search icon
    Homepage link
    • PATTERNS
    • STITCH ALONGS
    • TUTORIALS & STITCHES
    • COMMUNITY & EVENTS
    • ABOUT
    • Facebook
    • Instagram
    • YouTube
  • ×
    Home » Crochet Video Tutorials

    How to Crochet Herringbone Stitch Wave Pattern + Tutorial

    Sharing is caring!

    • Facebook
    • Email
    Herringbone Crochet Wave Pattern
    Herringbone Crochet Wave Pattern

    Crochet Herringbone Stitch Wave

    This Herringbone Wave pattern is part of The Stitch is Right Wave Game. It’s been designed for being multi-purpose so you can change the size of the project to the width of a scarf or up to the size of a king-size afghan.

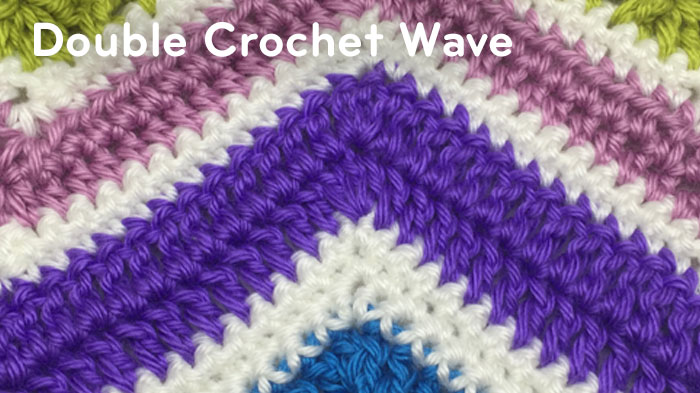
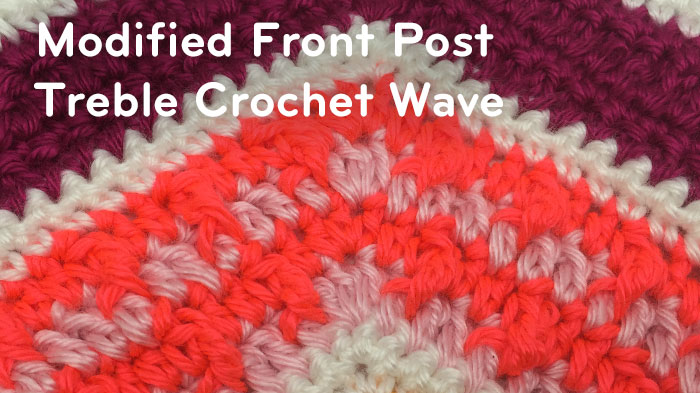
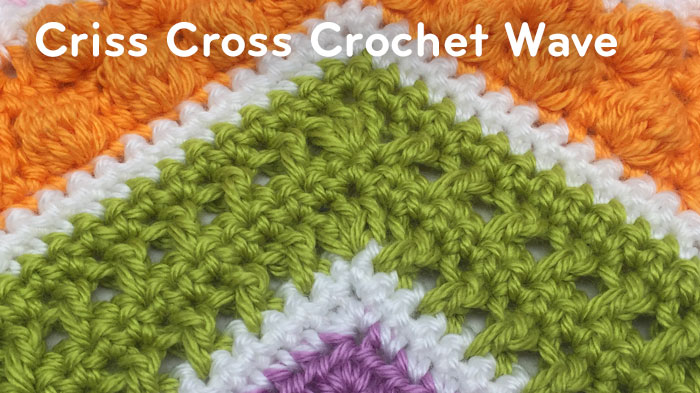
    The Stitch is Right Wave Game, this pattern matches 7 other Crochet Wave Patterns. Each of the other 7 concepts has the exact correct stitch counts and can work with each other. Even if you decide not to do The Stitch is Right Game, you can still use the concepts together like choosing from a crochet stitch buffet to make your own unique afghans.

    Get Crochet Crowd Free Pattern
    Crochet Herringbone Stitch Wave Pattern

    Pattern Suggestions

    1. Crochet Frosted Tips Afghan + Tutorial
    2. Crochet Multi Stripes Hat Pattern
    3. Crochet Triangle Shawl Pattern
    4. Crochet Chevron Self Striping Blanket Pattern + Tutorial
    5. Crochet Dashing Holiday Throw Pattern

    Materials Needed

    • I’ve used Caron Simply Soft. I don’t have a yarn quantity for you as The Stitch is Right Game has multiple types of stitches that each use a different quantity of yarn.
    • Size 5 mm or H Hook

    To make it easier, all 8 Stitch is Right Waves have the same starting if starting from scratch. Once you get past Row 1, the 8 different designs can be started.

    Stitch Multiples

    Stitch Multiples for This Crochet Wave Design. Each chevron = 28 sts. Side edges need 18 to keep the project balanced. Therefore; stitch multiple is 28 + 18 chains.

    Project Sizes

    • Custom Size Multiples of 28 + 18. Each Chevron is 28 sts and 18 sts for the sides.
    • Scarves Ch 46 – 1 Chevron + Sides = 10″ Wide and Typically 70″ long for adults.
    • Receiving Blanket Ch 130 – 4 Chevrons + Sides = 28″ Wide and Typically Square.
    • Large Cradle Ch 102 – 3 Chevrons + Sides = 22″ Wide x 33″ Long.
    • Baby Blanket Ch 186 – 6 Chevrons + Sides = 40″ Wide and Typically Square.
    • Children Blanket Ch 214 – 7 Chevrons + Sides = 46″ Wide and Typically Square.
    • Teenagers Blanket Ch 242 – 8 Chevrons + Sides = 52″ Wide by 60″ Long.
    • Throw Afghan Ch 298 – 10 Chevrons + Sides = 64″ Wide by 70″ Long.
    • Lapghans & Wheel Chairs Ch 186 – 6 Chevrons + Sides = 40″ Wide and Length of Legs.

    Project Sizes for Mattress WITH Drape Hanging Over Mattress

    • Crib Ch 214 – 7 Chevrons + Sides = 46″ wide x 75″ long.
    • Twin Ch 354 – 12 Chevrons + Sides = 76″ wide x 90″ long.
    • Full / Double Ch 410  – 14 Chevrons + Sides = 88″ wide x 90″ long.
    • Queen Ch 438 – 15 Chevrons + Sides = 94″ wide x 95″ long.
    • King Ch 522 – 18 Chevrons + Sides = 112″ Wide x 95″ long.

    Mattress Sizes WITHOUT drape that Hangs over Mattress

    The starting chain is significantly less when there is no draping.

    • Crib Ch 158 – 5 Chevrons + Sides = 34″ wide x 54″ long.
    • Twin Ch 214 – 7 Chevrons + Sides = 39″ wide x 75″ long.
    • Full / Double Ch 270  – 9 Chevrons + Sides = 54″ wide x 75″ long.
    • Queen Ch 298 – 10 Chevrons + Sides = 64″ wide x 80″ long.
    • King Ch 354 – 12 Chevrons + Sides = 76″ Wide x 80″ long.

    Starting Instructions – If Starting From Scratch

    Either choose a project size above or use a customized calculation for your starting chain counts.

    1. Chain the desired width that is listed above.
    2. Dc 4th chain from hook (Chain and dc counts as 2 dc in the same stitch), 1 dc in each next 5 ch. *Dc3tog using the next three chains (bottom of chevron). 1 dc in each of the next 12 chains. 3 dc in the next chain (top of chevron). 1 dc in each of next 12 chains. Repeat from * across until the last 9 chains remain. The final ending of row is dc3tog using the next three chains. 1 dc in each of the next 5. 2 dc in the final chain.
    3. Mark this side as your right side with a stitch marker. You will need to keep an eye on this stitch marker as some of the stitches used in The Stitch is Right to have characteristics where it matters which side you start the pattern on.
    4. You may need to fasten on a new colour and pay attention to the right side and wrong side.

    From this point, the below stitching instruction plus 7 others that are part of The Stitch is Right is ready to be built onto this point.

    The Stitch is Right Afghan Game
    The Stitch is Right Afghan Game

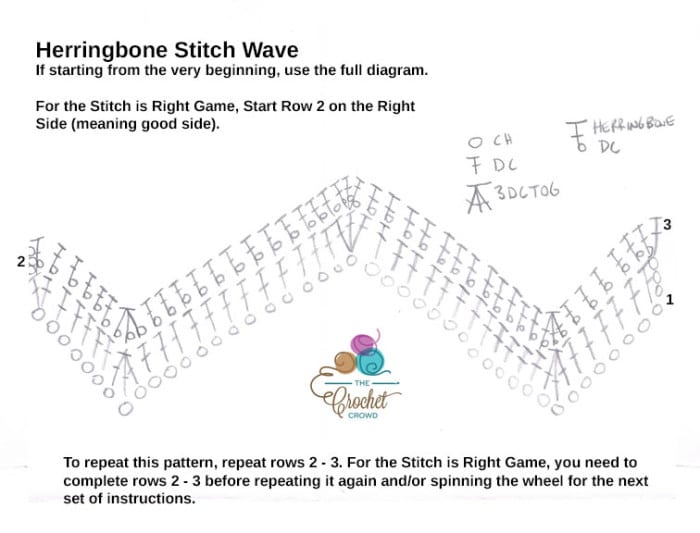
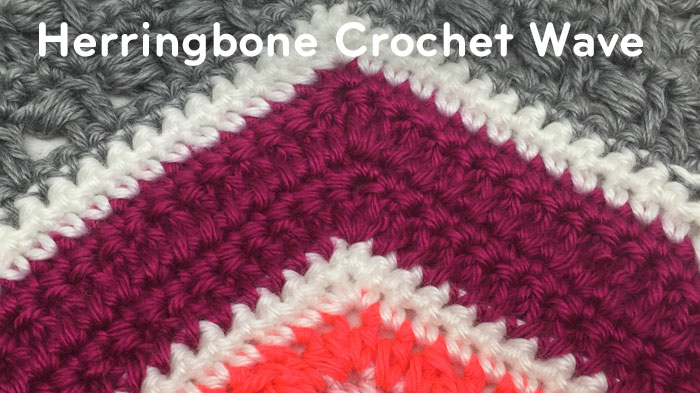
    Herringbone Stitch Wave – Stitch 6 on The Stitch is Right

    The Stitch is Right, there are two rows for each repeat.

    hbdc Herringbone Double Crochet - Yarn over, insert hook into the next st, yo and pull through st and the first loop on hook, yo and draw through one more loop on hook, yo and draw through two remaining loops on hook.

    hbdc3tog - yo, insert hook into next st, yo and pull through the st and first loop on hook, yo and draw through one more loop on hook, yo insert hook in the next st and pull through st and the first loop on hook, yo and draw through one more loop on hook, yo insert hook in the next st and pull through st and first loop on hook, yo and draw through one more loop on hook, yo and pull through all 4 loops on hook.

    For this set of instructions, you need to start on the Right Side.

    1. Turn to the right side and fasten onto the first sc. Ch 3, hbdc in the same sp, and across, with hbdc 3tog
      in the valley and 3 hbdc in peak, dc increase in the last stitch. Turn.
    2. ch 1, 2 sc into the same stitch. 1 sc in each next 5 ch. *sc3tog using the next three stitches (bottom of chevron). 1 sc in each of the next 12 stitches. 3 sc in the next chain (top of chevron). 1 sc in each of next 12 stitches. Repeat from * across until the last 9 stitches remain. The final ending of row is sc3tog using the next three stitches. 1 sc in each of next 5. 2 sc in final stitch.

    This is the end of the repeat pattern for The Stitch is Right. If you would like to use this concept for entire projects or even make more rows. Just continue to follow steps 1 & 2.

    Crochet Diagram

    Crochet Herringbone Stitch Wave Diagram
    Crochet Herringbone Stitch Wave Diagram. Click Pic to Download, Save or Print. Single Crochet Instruction for Row 3 is missing from this diagram.

    Gallery

    Modified Front Post Treble Crochet Wave Pattern
    Stitch 4: Modified Front Post Treble Crochet Wave Pattern
    Bobbles Stitch Crochet Wave Pattern
    Stitch 5: Bobbles Stitch Crochet Wave Pattern. Represented in Mango in Picture.
    Herringbone Crochet Wave Pattern
    Stitch 6: Herringbone Crochet Wave Pattern
    Double Crochet Wave Pattern
    Stitch 3: Double Crochet Wave Pattern
    Bead Stitch Crochet Wave Pattern
    Stitch 7: Bead Stitch Crochet Wave Pattern
    Criss Cross Crochet Wave Pattern
    Stitch 8: Criss Cross Crochet Wave Pattern
    Half Double Crochet Wave Pattern
    Stitch 2: Half Double Crochet Wave Pattern

    Video Tutorial

    Like this:

    Like Loading…

    Related

    More Crochet Tutorials

    • Crochet Waving to Granny Throw Pattern + Tutorial
    • Crochet Christmas Scalloped Dishcloth Pattern + Tutorial
    • How To Crochet Granny Bag + Tutorial
    • Crochet Men's Sweater Stitch Along with Mikey + Tutorials for Everything

    Filed Under: Caron Simply Soft Yarn Patterns, Caron Yarn Patterns, Crochet Scarf Patterns, Crochet Stitches, Crochet Video Tutorials

    Comments

      Have you completed this project. Show me! Cancel reply

      Your email address will not be published. Required fields are marked *

      The maximum upload file size: 360 MB. You can upload: image, document. Links to YouTube, Facebook, Twitter and other services inserted in the comment text will be automatically embedded. Drop file here

    1. Kim Bosley says

      April 30, 2024 at 2:33 pm

      Grid

      Reply
      • Mikey says

        May 01, 2024 at 11:44 am

        Thanx

        Reply
    2. Ann says

      May 11, 2020 at 6:55 pm

      No blue button

      Reply
      • Marina King says

        June 12, 2020 at 9:03 am

        button added

        Reply
    3. Patricia Harris says

      March 02, 2016 at 12:31 pm

      Mike, I like the concept of the spin wheel design, however I have one question? I have stitch 6 which is the Herringbone crochet wave. I'm to pick 10 colors, however, I'm a little lost on the third spin, which I got "do only once". Does this mean I that I change the color every row? I'm not get the third spin. Could you please let me know. Thanks.

      Reply
      • Laura Jean Bartholomew says

        March 04, 2016 at 9:59 am

        Hi Patricia, the 3rd spin tells you how many times you need to do the particular pattern you spun with wheel #1 If it says do once = 1 time, repeat 1 times = 2 times and repeat 2= 3 times.

        Reply
    4. Dulce Garza says

      February 25, 2016 at 3:37 am

      I will follow the vídeo, but I think I found another mistake...on the written instrucciones it says to start on the right side, but on the vídeo Mikey says to start on the wrong side so that the stitchwork will appear on the right side.

      Reply
    5. Julie Riha says

      February 17, 2016 at 9:50 pm

      The written instructions differ from the video, as stated by another person. The video tells you to do herringbone on wrong side, followed by SC on right side. The written instructions say to do herringbone stitch both ways. Which is the correct way for this game we are playing? I don't want to end up frogging perfectly good hooking to go back and fix the herringbone stitch. Therefore, I am having to pause until this is solved. Pretty please and thank you.

      Reply
    6. RB says

      February 17, 2016 at 6:29 pm

      I'm a little confused about this one - I generally only follow the written pattern and don't watch the videos, but it was pointed out on FB that the video instructions on this one differ from what's written. The written pattern says to do the herringbone stitch in both directions, but the video says to do it in one direction and then single crochet back. Could you please clarify? Thank you! 🙂

      Reply
      • Lori S. says

        February 23, 2016 at 12:46 am

        Hi RB,
        I just saw the video too and was looking at the written instructions and saw where Mikey wrote under the diagram that row 3 for single crochet was actually missing in his diagram. The stitch consists of one row of the herringbone stitch and one row of sc. Have fun!

        Reply
    7. Teddi Timlock Ridler says

      February 16, 2016 at 10:54 pm

      I would have preferred that the video instructions for each individual stitch was just about the stitch and not the whole intro as well. Am having to forward thru the whole 20 = minutes to find just the part demonstrating the stitch itslef.

      Reply
      • Mikey, The Crochet Crowd says

        February 17, 2016 at 9:36 am

        I hear you... I was going to put the introduction separate from the 8 stitches but then I have done that before and walluped hard with complaints with people having to find the starting video. I just cannot win in this sort of situation.

        Reply
        • Sally Martin says

          March 02, 2019 at 10:18 am

          It's not that hard to use your mouse to fast forward...I'm a visual person, so you can start after you see that the double crochet row is complete... Love this challenge...

    Michael Sellick - Crochet Designer & YouTube Host

    Welcome!

    I'm Mikey. Join me in learning crochet as I am always learning, too!

    More about me
    Mikey Stitch Studio Browse Patterns
    The Crochet Crowd Design

    AI Design

    Learn about our designs. Why don't we use AI to design?

    Designing
    • Super-Duper Exclusive Retro Revival Vintage Patterns for Free
    • Crochet Firework Waves Celebration Blanket Pattern
    • Mikey, Daniel & Jonathan - Hawaii Knit and Crochet Cruise Collab
    • Stitches & Glaciers Crochet Cruise July 10th to 17th, 2026
    • Crochet Coastal Sea Glass Baby Blanket Pattern
    • What is Mikey's End-of-Life Plan?
    • I Need This Crochet Blanket - Any Size + Tutorial
    • Crochet Wicker Stitch Blanket Pattern + Tutorial
    • Many Trending Whimsical Crochet Dishcloth Patterns to Try
    • All-New Pattern Searching To Narrow Down Results
    • Crochet C2C Bobble Pillow Pattern + Tutorial
    • How To Crochet Mermaid Tears Purse Pattern + Tutorial
    • Stunning Crochet Globetrotter Shawl Stitch Along + Tutorial
    • New Warped Tunisian Entrelac Online Workshop + Tutorials
    See more Crochet Stitch Along Patterns →

    Footer

    Stitch Alongs With Mikey

    • Crochet Study of Variegated Blanket Pattern + Tutorial
    • Free Lily Sugar'n Cream Crochet Garden Tote Bag Pattern + Tutorial
    • Crochet Beach Bag Pattern + Tutorial
    • How Many Chains to Start a Blanket or Afghan?
    • Easy Crochet Study of Blue Blanket Pattern
    See more Crochet Stitch Along Patterns →
    ↑ back to top

    Explore

    • About
    • Before 2023
    • 2023 Patterns
    • 2024 Patterns
    • 2025 Patterns
    • 2026 Patterns

    More

    • FAQ
    • Contact
    • Privacy Policy

    The website has been active since 2010. Articles and patterns are reviewed from time to time. Some patterns get updated with newly written instructions, photography and keeping the patterns current.

    Copyright © 2026 The Crochet Crowd • Some links may contain affiliate connections.

    %d