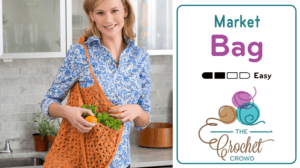
This Little Bag Went to Market
We had fun with this crochet little market bag a few years back. It has an interesting stitch which I hadn’t seen before that allows the bag to expand in a geometric mesh formation. It’s pretty spectacular.

More Ideas
- Shine Like Diamonds Shawl + Tutorial
- Free Crochet Workshop for Beginners + Tutorial
- 22 Portable Knit and Crochet Projects
- Crochet Textured Wheels Bag + Tutorial
- 15 Crocheted Summer Tops
If you are in the ‘market’ for a new market bag, you should try this pattern. The tutorial is below to help you with the special stitch that is required.
We have actually done a Challenge with this bag a few years ago. You can see all the different bag colour combinations that were submitted for this same pattern. View The Submissions Gallery
Video Tutorial – Follow Along
Right handed video version is only available for this bag.
Love this tote bag! Thanks for the free pattern and video! Found it on twitter and re-tweeted!
Thanks a ton for the wonderful tutorial. Was great to learn a new stitch. Just finished making the bag but tweaked it a little. I made it a bit smaller by working the handles after row 19. Will post it on my Facebook page – Calming Crafts- shortly.
Hi. I’m wondering what yarn you used as the Red Heart Luster is discontinued.
Thanks.
I did not finish my market bag either. I ripped out more rows than crocheted it seemed like…lol. Had a hard time when starting the next star row…. well it was the following row that had the issue because I would have too many arms to my stars when I slipped stitched to the next row because I didn’t follow directions at the beginning of a row and would have to rip the entire row out. Finally paid attention and got to row 15 last night. I will get this finished and can’t wait to use it. Thanks for this challenge. I haven’t crocheted much in years and this made me realize I can read a pattern, if I put my mind to it.
Didn’t get done before deadline. I was going to work on it exclusively yesterday, but ended up having to frog back to Row 8. 🙂 Everytime I picked it up to work on it, I ended up frogging. I was trying to work from the red heart written pattern. Finally watched Mikey’s video and got on the right track, but I didn’t have time to finish. I am using the Luster Sheen in the natural color. I have learned a lot. Also, I plan to use the Luster sheen on some future projects. Also, I’ll watch the video first before starting a pattern. I have been crocheting for 60 years and thought I knew everything. I’ve never had so much trouble following a pattern. The diagram you drew in the video was the lightbulb moment for me. Red Heart should consider adding a diagram of Rows 9 and 10.
I don’t know if anyone has noticed, but Red Heart has updated the pattern to make it MUCH easier to read and understand. I noticed in the flickr gallery for the challenge, that it was easy to tell those who had worked exclusively from the original written pattern (tall, thin bag) versus those who had worked from Mikey’s excellent tutorial (a larger, more usable bag). Way to go, Mikey for challenging us! And way to go to the Crochet Crowd for their talent, their skill, and their willingness to speak up when a pattern just wasn’t making any sense.
I started this, was almost finished, when I realized how out of shape mine had gotten. Somehow in the latter rows, I was increasing the pattern (not paying enough attention to ending one row and starting the next). Plus, I realized because I was using wool, mine was huge and I was afraid it couldn’t handle the weight. Starting once again.
I don’t think you are alone.. Others have done the same thing. 🙂 Keep Smiling!
I did the challenge – it was fun, but I don’t think I got the gauge right – even on my third try….usually I crochet big, but not with this one…I did it with the g hook and the luster sheen and it was so small….it was funny looking…took it out and did it with an H, it was bigger but I still think it is too small…
Just want to initiate a little humor in here on this bag. I completed the bag using cotton yarn and G hook. I’m going to make another bag using the cotton yarn but with an F hook. We’ll see what that one looks like. I almost frogged it because it looked so much bigger, but I wanted to see what it would look like so I kept going. I think it’s beautiful and can be used as beach bag and a market bag.
I haven’t entered any of the challenges so maybe that’s why I’m having such fun with these. I also am not that good with the camera thing yet, but that’s just one more hurdle to jump. Right now I’m just enjoying being able to learn and complete these projects. The challenges I have followed have been a wonderful learning experience!
I started the Spectrum Afghan right after doing the Market Bag. My fingers seemed to take control and I couldn’t seem to get “Wrap, Wrap, Wrap” out of my mind. I’ve laughed to myself each time it happened! I guess I’m just trying to say just go with the flow. I’m having a ball! Thanks, again, Mikey, and to all who are so very helpful! It’s a great place to be!
Hello, I´ve just entered the challenge. I love the pattern but watching the video I thought ” it´s so easy”.
I reached the row 9, row 10 and followed crocheting thinking I don´t know why people say that it is so weird . As I was going up with the bag I realised that the bag was wider and wider .At row 20 I thought that something had to be wrong because the appearance was not the same as the pattern.
Counting and counting all the stars and looking for anything that could be wrong. At last, in row 10 the very first union star had “seven legs”. I had to undo all the stars and redo again .At this point I read the written instructions and they were more confusing but at last with the video again I could finish my very first market bag and send to the crochet crowd.
Thank you very much for this challenge. I have a fantastic market bag .
MICHAEL… THIS IS YOUR MOTHER…
Now that I have your attention (LOL) I have entered this giveaway, twice so far, but have been unable to view the gallery to check as to whether they are there. I have tried viewing the gallery in Safari, Firefox, Chrome, on my computer and my ipad. I must have tried x30 times. The same thing happened with the giraffe mystery challenge… any ideas why it’s happening and how I can get to view the gallery? Ta.
PS: sorry about the mother thang, but I have had not joy and no response to my posting.
Hi. I have entered this giveaway, twice so far, but have been unable to view the gallery to check as to whether they are there. I have tried viewing the gallery in Safari, Firefox, Chrome, on my computer and my ipad. I must have tried x30 times. The same thing happened with the giraffe mystery challenge… any ideas why it’s happening and how I can get to view the gallery? Ta.
PLEASE HELP!!!!!!!!
I just went back and re-read the pattern after watching your video. I have no idea how you figured out to do this from that pattern. I have been crocheting for years and can follow a pattern but………anyway I ripped out what I had for row 10 and above and have started following the instructions in the video. THANK YOU, THANK YOU, THANK YOU. This bag would have been a mess without your instructions. You have much more patience than I also as I was about to give it up so again THANK YOU THANK YOU THANK YOU.
Lori
I agree with you, Lori. When I follow the written instructions, not only is it different than Mikey’s version, but it does not match the bag in the picture. I tried it several times, stitch-by-stitch, going slower and slower each time; I even had my husband read the directions to me stitch-by-stitch and it still did not turn out correctly. I don’t believe it’s written correctly. I can understand how Mikey came up with his version and I’m glad he did, I love my bag and it’s something I wouldn’t have done if not for this challenge.
According to the Red Heart website Listed Sheen is discontinued.
*Luster
I’m frustrated. I have frogged the bag from row 20, because row 9 didn’t give me the right amount of stitches when I got to the band (using the pattern), and again from row 3 because it was getting bigger around than I think it is supposed to be (after watching the video). My other frustration is that I posted a question here, got a response, came back to reference the response, and it all seems to be gone.
I’m usually not one for giving up; I’m too stubborn for that (ask my husband). But this is just not working out too well as far as the bag is concerned. I have the stitch pattern down, and it looked really good, but it wasn’t going to hold much when I finished.
Reposting my original question: how many crossbars are there supposed to be on each row? Is it the same number going up (shouldn’t it be if you repeat row 10 for rows 11-25?)? I went from 30 (I think) on row 9 to 32 on row 10. I really would like to finish the bag, but I can always use the base as a potholder….
Linda, I think this project has caused more problems for more people than any others! First, if you followed the original pattern, it is wrong! Every third stitch on row 8 (96 stitches) should have 2 double legs coming out of it in a v pattern. This gives you 32 cross spaces around on row 9. The written pattern, skips 2 st between each double leg. This gives you 16 cross spaces and sides as large as the base.
The first three pattern rows will keep spreading out. If you think about this, it is logical. You would need the exact same number of stitches on each row, to go vertical. This pattern has double the number of stitches in each bar as the number used on the base, So it takes about 3 rows of v pattern to start going up, and you end up with about double the base diameter (not quite). There is no adding of cross spaces from row 9 to the top. So you will end up with 32 cross spaces at the top same as for the bottom. Perhaps you looked at row ten the wrong way?
Pretend you are starting row 10, the same as for row 9. chain 5, do a DT in the same hole the chain started in, pull a loop through both loops on hook. Chain 5, go back into the loop this chain came out of and make another DT in IT.(first cross bar in this row made,) Now come back down to the same stitch the beginning leg came out of on row 9 and make 2 DT’s there. Now you have an inverted triangle again, go to the very next gathering place from row 9, and make another double leg there. Gather all 6 loops on hook with one loop and you are ready to make another cross space pair. Now look at what you have made. The cross space of that first inverted triangle is directly over the gather place of the row below. Every space is over a matching gather place below, every gather place on the new row, is over a cross space below. It will proceed evenly all the way up. It must, because you need 32 cross spaces at the top to make the handle area. (10 spaces between each handle on each side, and 6 spaces under each handle) I hope this has helped you a bit. I enjoy crochet so much and like to see others enjoy it too.
You sound as stubborn as I am. I don’t give up either! I do not like how big the bag is though, I am using 4 weight worsted and need smaller diameter sides. I have reduced the cross spaces to ch 4 and a TC and like the size much better with a G or F hook. I made one per instructions for the challenge and then frogged it back to the base to make it MY way! LOL I just can’t keep my fingers out of the recipe! But these ARE lovely and I will be making several with different materials. Good Luck, and happy crocheting!
One more thing…. in case you looked at this wrong. When you get back to the beginning of the row, you should have 4 loops on your hook, 2 from the cross space and 2 from the last forward pointing leg pair. This is where you connect to the projecting corner of the inverted triangle you started with. If you mess up this step, you will end up with adding or subtracting cross spaces. Sorry I didn’t add this above!
Wow, Chrystalkay, you have a wonderful way of explaining the pattern… way to go!
Thank you, Chrystalkay, for your response. I read through your instructions a couple of times to make sure I understood what you were trying to explain. Your instructions were good. I am pretty sure I was doing it the way you explained because I had watched the video and understood what Mikey was doing. It just didn’t look right because those first three rows of the stars looked like it was getting bigger and bigger, and that didn’t seem right either. My husband commented on it’s
“growth”, too.
The key for me is being able to count, stitches, spaces, clusters, whatever is relevant to the pattern, and there is not a lot of help with counting once you leave row 8. Knowing that I am supposed to have 32 cross spaces will help tremendously. I think that you had given me that information in a previous post, but it got lost somewhere.
Thank you, again, for taking your time to help me along. I can’t think of a project I have ever done, that I didn’t complete the project, whether I liked it or not when I was done! (If I didn’t like it at the end, I gave it away.) I’ve been hooking a long time, and I was hoping this project would not be the first. I think you have provided the missing link. 🙂
Wow! Thank you for your return comment! I am glad if i was able to help. I too, will follow a challenge and then take it apart if I don’t like it. But I LOVE the challenge!
Maybe this will help you. If you are a member of Ravelry ……. I have a photo with captions showing the progression of the stitches. I’m Lnb804.
Link to photo: http://bit.ly/1uDsDQ1
I have added you to my friends on Ravelry, and left you a comment on your market bag. I also checked out the link to the picture. I do believe I was doing it right the second time, I just frogged before I asked my question. At least it was only two rows the second time. There is hope for my market bag!
I got lost after finishing the second row of the star. I wish you would have showed us that next piece. Very frustrated and don’t want to have to ditch the project. Any Help would be appreciated.
Each round is the same for the stopping and starting Linda.
Linda, read the answer I gave Linda H (above your question) and it might help. It is the exact way you start and finish every row. ( I added the way to end them in my reply reply to that thread)
Don’t get frustrated. You are smarter than that lump of yarn and you will get the better of it!
Hi. I have entered this giveaway, twice so far, but have been unable to view the gallery to check as to whether they are there. I have tried viewing the gallery in Safari, Firefox, Chrome, on my computer and my ipad. I must have tried x30 times. The same thing happened with the giraffe mystery challenge… any ideas why it’s happening and how I can get to view the gallery? Ta.
I am finishing the handles today and would like to know if it is okay to do the stitches between each handle with the 4 sc also? They are left undone in the pattern but I’d like them to go in the stitches all the way around. (It’s written in the pattern: *4 sc around
first leg of next star st, sc in eye of same star
st; repeat from * 9 more times) Can I do this same thing in the ones not done (in between each handle?) Would I still be eligible to enter the challenge? Thanks very much!
You can always do MORE…. you just can’t do LESS. The idea is not to let someone skimp and not do the work everyone else is doing and still get to submit it. Handles can be thicker, wider, longer rim can have SC, DC, HD, all the way around for as many rows as you like. The bag can be longer but the min size is ten rows of the star pattern stitches. You can add bows, ribbons, pockets …. whatever! Just not LESS than the pattern asks for. Good Luck!
Thank you very much for responding 🙂 I decided to just stick with the pattern THIS TIME lol… it definitely seems sturdy enough for my veggie shopping!
Got as far as the first row of pattern done but struggled, when i got to the 2nd row pattern i gave up it was to much for my head to take in over just a few hours… althought up to the 2nd row i did do using it as a placement mat 🙂 couldnt bear to open it up again.. i might give another try later but It certrainly was a brain teaser… but always something to learn here… thank you
Don’t give up, I think you’re almost through the hardest part! I struggled a little with the first row of the “star” pattern (after the bottom base) and the beginning of the second row, but once you get past that, it’s smooth sailing. 🙂
Mikey: I know you feel you’ve answered this question, but the information is still elusive. What was the yard/meter length on the actual skein you used? Yes, that kind of information is on the packaging. But there is no way to know if your packaging is the same as mine. my LYS may have had its yarn in storage of a while. In general, this may be a small point. However, I’m interested in working a variety of projects in exclusively plant-based yarns. I’m up for the arithmetic… and I can contain the costs…but only if I know you used three skeins/balls of 50 g/220 yard (for a total of 660 yards) or 100g/303 yards for a total of 909 yards. (numbers are examples only)
If you go on Red Heart’s website… look up their yarn… it has the details. Most of the yarn companies have those details available to us.
I used regular red heart with love yarn (which made it much bigger than it was suppose to be), so I can’t enter the challenge, but I loved it nonetheless!!!!! 😀 I can’t wait to make more! Thank you Mikey!
There is no size limit on the bag. Go ahead and enter it! The only requirement is to use at least the amount of stitches asked for. More is okay, different size hook or yarn is okay. Go for it girl!
Thank you for responding.
I am ready to do the band and handles, but it seems like my bag doesn’t have enough stars going around. How many are there supposed to be? I double-checked my count on row 8, and it was correct. Round 1 of the band isn’t working out right, though.
Hi Linda!
The 8th row has 96 stitches around, so working every 3rd stitch leaves 32 large spaces (and 32 stars) around, all the way up. That allows for 12 spaces under the 2 handles (6+6) and twenty between each handle (10+10).
I watched the video as I frogged the project. I followed the written pattern, and row 9 is obviously not right. Oh well, hubby says I frog as much as I make. Here we go again…. :/
Pattern is a hot mess. Go with the Mikey’s video and you can’t go wrong! My first bag was perfect. Working on the second one now.
I have followed Mikeys video step by step. I am about to start the handles.
Will I be disqualified if I do a few rows of dc before I do the actual handle?
And a huge thanks to you Mikey for the fantastic videos you provide us with. I tore up the printed version as I just couldn’t get it right. But I’m pretty sure I have this perfect now.
I haven’t had this much fun making something in a long time 🙂
No no… you are doing more than required… it’s when people try to skip steps to make the the project go faster… that’s when we worry. Go for it.
Thank you very much for the confirmation Mikey. I’m off to finish this bag as I already have the next one planned in my head 🙂
I’m on row 19 and don’t believe that I joined each round as I should have, rather just continued each round instead of doing a slip stitch to start each new round. I can’t tell a difference in the look of the bag but wonder if this will mess me up in the end? I used Caron yarn and an h hook and my bag is huge, but that’s good because I usually get a lot of “stuff” at our local Farmer’s Market. Thanks so much for all of your guidance….you are the best”
It won’t mess you up… I did the same thing… Keep on going!
Here is a brief visual explanation of the pattern VS video confusion.
http://youtu.be/HBedG64dBE8
Yep, that’s it. When I followed the pattern for row nine I got all those spaces. Then I watched the video and pretty much ditched the pattern. I have personally found that a lot of free patterns from yarn manufacturers have never been tested before being published.
I used sport and H hook for my first bag and it did come out large, width 21″ x 25″ height including 8″ for straps. I added 10 stitches to the handles for more shoulder room. Nice size beach bag.
Thanks for sharing.
I just wanted to say your input and video here have been tremendously helpful. Your responses have helped me through many rough spots with this project. Thank you so much for taking the time to help! 🙂
My comment/thanks above was directed at Chrystalkay. Sorry I left your name out of the comment. 🙂
You are very welcome Deborah. I just want people to get as much fun and satisfaction out of crocheting as I do. In this forum we all pitch in and help as we can.
I actually tried this pattern a while back and got SO confused, I ripped up what I had done so far and started over with a different pattern. Your video makes this SO much easier! Thank you!!! My question is: I have a bunch of Bernat handicrafter cotton yarn and decided to use that for the bag but am wondering now if I have made a giant mistake by using this yarn. It just seems so much bulkier and is harder to distinguish the pattern, maybe? Or maybe I haven’t done enough of the bag yet? Has anyone else attempted this with the bulkier kitchen cotton?
I am making one out of the same yarn. The first one i used a Red Heart super saver yarn and an H hook… HUGE! So I switched to the Bernat Handcrafter and an F hook and it is working out to just the right size.
For those who are still looking for Luster Sheen. Joann.com has the “Baby” sheen on sale for $3.82 a skein with special $1.99 shipping for today 6/10/14 only. Baby sheen is the same as Luster sheen except for the colors, which are pastels.
If I follow the entire pattern, but just add on some to make wider handles, is that still eligible for the challenge? 🙂
Yes
Awesome! I am very much enjoying my first challenge here! ^_^
Well, doing the bottom was realistic, but after several attempts at the pattern and watching that part of the tutorial I am ditching the attempt at this. Mind you, I am not a novice. I have been crocheting for 50 years now. I will find a more peaceful outlet for my creativity! It is extremely confusing and I like to relax when I crochet.
Your diagram was a life saver! Been pulling my hair out from going off the RH pattern for two days now but your diagram clicked it for me. Thanks so much for all the help you give us in your videos, challenges, etc!
OMG!!! What am I doing wrong?? I completed row 9 and 10 with no problems however, as I’m working my way up, I am some how increasing…this bag is going to be huge!! What the heck am I doing wrong???
It will start going up. It is just that you have gone from 3 stitches at the base, to 6 stitches on the rim. So don’t expect it to be the size of the base. I didn’t realize that myself until I had a 2′ size ang growing! I used 4 weight worsted and an H hook and WOW! So… nothing done wrong, it will just be larger by half at least than the bottom. I think the original base was supposed to be 8 or 9 inches and the width if the bag was supposed to be 16″.
Thanks for your help! What was happening, and only because I didn’t pay close enough attention to Mikey’s video, is that I was ‘increasing’ each round between the last star and the 1st join (don’t even ask me how I was doing it). So I went from 32 stars up and up and up! Now it’s 1/2 done and going great!
I need help. I need to know how to add more yarn? I just started row 9 and before I get to far into the pattern I want to make sure I can finish it. My yarn balls are only 30g so I am sure I am going to need to add more a few times and am confused as how to do this and where is the best spot.
Because of the openness of the pattern, I would start at the bottom of any base stitch like this… You wrap, wrap, wrap the yarn and go into the proper base stitch, and pull up a loop, then I would bring in the new yarn at that point and draw it through the first 2 loops and go on with that, to finish the DT. Both the last yarn and the first yarn will be close to a place where it can be woven in, and it will give maximum strength to the add-on.
I hope this helps!
Yes this helps. I could not wrap my head around where to combine. Thank you so much!
This Helped so much Thank You!
Pattern was very confusing, your video is great explained much more clearly. Now that I saw video will try reading pattern again to see if it makes sense.
I think I deviated on the pattern to explain it easier… I am willing to bed it doesn’t align.
Do not follow the written pattern as row 9 of the written instructions is wrong. When u get to row 9 watch and follow Mikey’s video only. Once u get the pattern down, continue until u get to and finish row 25 then u can go back to the written pattern for the top border and handles. Just a heads up! =)
Thanks for sharing that one. I could not figure out why Mikey’s video instructions is so different on Row 9 in the RH pattern. Whew!
Can someone confirm that this handle is not centered around the bag? I thought I screwed the whole thing up because I was expecting the rows between the handle to match up, but it seems like it is askew. Can someone confirm this????
If I recall, there were 9 stars between one side and 10 between the other.
The number of ‘spaces’ (5 ch +DT) around the rim should equal 32. There are 2 areas of 6 ‘spaces’ under the handles. There are 2 ‘spaces’ of crochet from the attachment of the handle to the next 60 ch handle. Both are 10 ‘spaces’ long. The first explains what to do, then it says repeat 9 times. the 1st plus 9 = 10. So, 6+6 =12 + 10 + 10 = 32.
That first explanation is what is messing you up.
Then I really screwed up both times. I have 29 “spaces” around after I finish row 9. Not sure how many I am supposed to have, but you say 32. I have done it 2x and still come out with 29. I have gone back over and each “bunch” has 2 skipped stitches in between. I don’t know where the missing stitches are. I have done the 8 beginning rows, with proper increase (each 2x is in a 2x from the previous row) so the stitches seem to even out. Any other thoughts as to how I am so off????
That is a good question since I don’t have a picture to work with. The eighth row has 96 stitches, (8×12) working every third stitch on row 9, gives you 1/3rd that stitch spaces (the parallel bars) or 32 stitch spaces. Since you work the same gathers all the way up, you would end up at the top with the same number… 32. You could have missed a level somewhere a couple of times and not made the full stitch bridge, (I did that once and had to tear out two rows when I caught it, Watching a movie at the same time. Drat!) Or you could have made the miss at the bottom. Count the parallel spaces on the very first row. If they are right, then go up three rows and count again. Keep doing that until you find the problem row(s).That way you will find the culprit that is causing you grief. Good luck. I feel for you. This is a lot more work than it looks like in the first place. I am sorry this miss count is adding to it.
Hola!
Me encanto desde que vi esta bolsa. Voy en la 12° vuelta, me volví loca en la 10°. Pero con el video me pude guiar mucho mejor.
Gracias Mikey :3
Mikey, when you say that you can use any yarn of our choice for the bag, does it have to be less than 5ply? Or can it be a thicker yarn?
Also, I didn’t get the rule about sizing. Does my bag have to be the same size as in the pattern? I’m asking because I have this nice yarn in navy blue but it is 10ply, so obviously my bag will become huge!
The pattern size will change if you substitute the yarn… This is normal… so as long as you do the right stitches, that’s what matters to us more.
I’m using some very old yarn I have and it’s labeled sport but in todays’ standards it’s more like a worsted. I figured it’ll work as a beach bag! You won’t be the only one.
I can use any type of yarn? My JoAnn’s does not have the yarn yet and I need to make 2 for two of my girls scout leaders for their leadership advancement. I hope I can do it without the video. Will have no internet connection til August 2.
No kidding! I tried with an H hook and 4 ply and ended up with a bag that was way to big to take to the store, and way used over 7 ozs of yarn. I am now trying some cotton (also 4 weight), but with an E hook and it is coming out shopping size. So if you want a laundry bag instead of a shopping bag….. go for it. Just be aware that it will take a LOT more yarn that the pattern calls for! (The ozs called for are for 2 weight yarn.)
Love, love this pattern. I will admit, row 9 was a bit tough. But row 10 is a lot easier. I did not even look at the pattern, just followed the video. Admittedly a lot of pausing, rewinding (and a bunch of undoing of incorrect stitches!) but I was able to get past and on to 10. This is my 3rd challenge (though I am still working on the May blanket!) and I love challenging myself to do something I would never have tried by looking at just the pattern. Mikey… you are a crocheter’s hero!!!
i’ll admit, I had a few choice words to say to row 9, but after that it was smooth sailing! this is my very 1st challenge, and I was soo scared to try the stitch. after watching, and pausing frequently, the video I caught on and just took off with it! decided to use worsted weight since that was all I had, and my sister claimed it for her new beach bag. Lol! she calls it her awesome rainbow bag of awesomeness. Lol!
That is awesome. Congrats. I have found these challenges very fun, as Mikey does such a great job stepping you through. I wish there was more on the handles (as I messed those up) but it is fun to tackle something I never would have even tried!!!
After trying row 9 per the pattern, all I can say is thank goodness for Mikey and thank goodness for the invention of the internet and video! The least of the problem was the dtr that part was easy. OMG ………. could not have done it without you!! Thank you again!
I could not agree more. I concentrated so hard on row 9 & 10 – following it word for word and it was still so wrong. The video was a godsend – I really would’ve just given up if it hadn’t been for Mikey!!
Thank you!!
OMG… I did it! I was soooo confused. The pattern is not the same as the video at all and it had me crazy BUT… I just ignored the pattern and learned from the video and omg… I never ever thought I could get this but I not only can follow the stitch but I really understand it. Mikey… I would never have learned this without you as the pattern was so confusing to me after the circle. I am amazed… I can actually do this now!!! I can’t wait to finish it lol. For those having problems, just follow the video and don’t compare with the pattern; you will end of getting it 🙂 THANK YOU SO MUCH Mikey!!!!
I consider myself an experienced crocheter, Yet……… I totally agree this written pattern was not the same at all as to Mikey’s video, I also put the written one aside and followed this video. Thank you Mikey so much for creating the video ! I suggest the written directions should be re-edited or tossed out lol
The stitch everyone is having a problem with is actually a double treble crochet (dtr). I used the stitch in a shawl pattern recently. It’s just badly written and that’s why everyones’ heading is spinning from trying to read it. If you sub a dtr for all the yo’s and pull throughs it would make more sense.
I just started row 9 per the pattern and will check with the tutorial to see if it’s correct. As they say a picture is worth a thousand words. In this case it may be more.
I have tried 3 stores in search of this luster sheen yarn. Does anyone have a suggestion of where I could find it?
Red Heart Yarn is having a 15% off and $2.99 shipping special right now. They have some. Not in all colors but they also have colors in “baby” sheen which is the same thing.
http://www.shopredheart.com/
I ordered it from: http://www.knitting-warehouse.com/. It’s a little cheaper, but I don’t remember how much shipping was. (This is my “go to” site for yarn ordering, they have great prices.)
Good luck!
Oh, Mikey! I am LOVING THIS PROJECT!!!!
Finding Red Heart yarn in Australia is near to impossible, so I am using a cotton blend yarn in rainbow colours. It’s looking great, but the best bit is it is a functional item that is pushing me to learn some new stitches and techniques.
Thanks so much for the easy to follow tutorial (as always), and the opportunity to crochet along on such a fab project with a bunch of other hookers worldwide.
LOVE YOU GUYS!!!!!
Alexandra Big W has started carrying some red heart yarns
On the minimum size requirements it states base and diameter must be the same size. If I use a size 3 cotton it will measure smaller than pattern. This wont qualify?
Same size meaning stitch counts wise… When changing your yarn, it will change the dimensions but you still need to follow the stitch.
Awesome! Thanks. I decided to double up the cotton thread 🙂
I am enjoying this project! My first challange was the heart scarf. I didn’t finish in time for the drawing, but the main thing for me is that I DID finish. For me, these challanges are a great learning tool. You explain things so well! I am excited to finish my bag! Thanks Mikey !!
Mikey could you tell me how many yards your skeins were I want to use some light weight mercerized cotton I have and want to make sure I have enough first.
The pattern has those details as it’s in the skein information. 😀
I’ve been trying to figure this out for over two hours now. I watched and tried to follow the video, I’m not sure what I’m doing wrong but aside from an almost perfect circle for the bottom, I’m giving up for today. I hope someone can explain this to those of us having problems. 🙂
Barb
I am confused…the written instructions are not the same as the video on round 9
the pattern says: ch5, yo 3 times, insert hook in same st, pull up a loop, [yo, pull through 2 loops on hook] 3 times, SKIP 2 sts, yo 3 times, insert hook in next st, yo, pull up a loop, [yo pull through 2 loops on hook] 3 times, yo 3 times, insert hook in SAME st, yo, pull up a loo, [ yo, pull through 2 loops on hook] 3 times, yo, pull trough all loops remaining on hook….
but in the video you dont skip 2 sts until the end, where is supposed to be in the same st
I’m confused on the same. I was having problems just reading the pattern and wasn’t sure if I was doing it right so I watched the video which just confused me more. Some clarification on the differences between the pattern and the video would be greatly appreciated.
I noticed that, too. There also isn’t the extra ch after drawing through all six loops on R10. There are things about the written pattern that are misleading…especially the use of the term “next stitch” on R10… In the 20 years I’ve crocheted, next stitch is the next unworked stitch. On this, the “next stitch” after the ch 5, etc in the top of the last cluster, you don’t truly go to the next stitch…in order for your bag to look like the bag in the pattern, you go into the last stitch you worked in from the previous row. I love the finished product…not a fan of the way the pattern is written, though…
Once you pull through all 6… you immediately grab the yarn to through which is your chain that it’s asking for.. sometimes on these types of stitches I say pull through all six and then seal the deal with a chain. Hopeflly that helps.
I do the same in similar clustered/grouped stitches in my own designs if there aren’t stitches following it to do the job. With the ch 5 already existing in the pattern, there really isn’t a need here. It really wasn’t about saying you are doing something “wrong”, more as to mean there is a lot contradicting between the written pattern, the photo in the pattern and the video…. They just aren’t all on the same page where R9-10 are concerned.
I agree… I’m the same way.
I noticed the same thing, I went to the video once I was confused about R10 and next stitch. My first bag row has the V’s upside down (following the pattern, which I redid twice!) and the video has them opening up. I may just continue and see if it works out.. I am confused more after watching the video!
Yes, Lorraine, same here.
Mikey starts with one angled side going up then he makes the crossbar, then he makes the next angled side going down. [Repeats]
The pattern, however, (row 9) starts with one angled side going down, then the next angled side going up, then you make the crossbar [Repeats].
I’m with you in the not matching department. I had part of R9 done but thought it looked funny so I watched the video and it’s showing R10 as R9.
What the pattern is doing, is starting with an inverted V. Like walking legs, at the end, you would do the cross stitches and connect to the top of the first inverted v. Mikey, went from a ‘leg’ to a cross section, to the next leg that would share the same hole. In other words, a downward pointing triangle. His row ends with connecting a cross section and a ‘backward pointing leg’ to the point on his triangle. I personally prefer starting with the inverted ‘v’. That is how i start my star gather stitch and it is more natural for me. That is what is causing the confusion between the pattern and the video.
THank you for your constructive feedback.
When I click on the arrow to watch the video it won’t open
Just to make sure I’m understanding the minimum sizing requirement for entry information, instead of working the full 25 rows of repeats, you will accept bags that are worked to at least 18 rows of the bag pattern (the first 8 rows being the base of the bag), before moving on to the band/handle section?
Yes… that’s right. 10 Rows minimum for the cross stitch area affect.
I simply love how you are teaching …. fantastic.. gonna give it a go… even if i am a beginner.
I agree… Mikey your tutorials are always easy to to follow and I adore your funny bit of humour that creep in… Keep up the fab work!
The latest Crochet Crowd Newsletter said that we would need 3 balls of the luster yarn, but the pattern itself says we’d only need one. Which is correct? I have 3 balls on order, my husband won’t be happy if I ordered 3x what I need. (He claims I have too much yarn, and too many things on my “to do” list, I tell him you can never have enough!) 😉
I used 2 balls with almost needing a 3rd. I think the packaging has changed on the ball of yarn sizes.
Gotcha, thanks for clarifying! I hate that they keep changing the skein sizes, so when people reference a “skein”, they should put the “ounces” required as well. (Not you specifically, it’s just something that bugs me with my Grandmother’s patterns and recipes. One “skein” or “bag of whatever” doesn’t amount to the same quantity as it did in the 50’s.)
Sorry for the rant, I am truly looking forward to the arrival of my yarn so I can start! I love your challenges! Missed the Mystery Challenge due to too much on my plate, but I should be able to sneak this one in. 😉 Thank you again!
Mikey could you tell me how many yards your skeins were I want to use some light weight mercerized cotton I have and want to make sure I have enough first.
I made this last year from the Red Heart pattern and it was fun and my granddaughter loved it!! Too bad this contest wasn’t last year.
Thank you for such clear and concise instructions. I have been crocheting for over 50 yrs and not only learned something new, but also able to work a stitch that I would have given up on if I only had written instructions. Also pick up some tips that I never knew…used to just wing it. Only one problem….have neglected ALL of my other hobbies since I found your site!!